Yamaha NS-P270 Owner's Manual
Home cinema 5.1ch speaker package; home cinema 6.1ch speaker package;
Hide thumbs
Also See for NS-P270:
- Specification (2 pages) ,
- Owner's manual (13 pages) ,
- Service manual (16 pages)

Related Manuals for Yamaha NS-P270


Summary of Contents for Yamaha NS-P270
- Page 1 NS-P270/ NS-P276 (NS-P270 / NS-P276: NX-E270 + NX-C270 + SW-P270) OWNER’S MANUAL...
-
Page 2: Important Safety Instructions
IMPORTANT SAFETY INSTRUCTIONS CAUTION: TO REDUCE THE RISK OF ELECTRIC SHOCK, DO NOT REMOVE COVER (OR BACK). NO USER-SERVICEABLE PARTS INSIDE. REFER SERVICING TO QUALIFIED SERVICE PERSONNEL. • Explanation of graphic symbols: The lightning flash with arrowhead symbol within an equilateral triangle is intended to alert you to the presence of uninsulated “dangerous voltage”... - Page 3 YAMAHA Electronics Corp., U.S.A.; 6660 Orangethorpe Ave; Buena Park, CA 90620. The above statements apply ONLY to those products distributed by YAMAHA Corporation of America or its subsidiaries. Special Instructions for U.K. Model IMPORTANT: THE WIRES IN MAINS LEAD ARE COLOURED IN...
-
Page 4: Precautions
7 Placing the speakers on the same shelf or rack as the turntable can result in feedback. 8 Secure placement or installation is the owner’s responsibility. YAMAHA is not liable for accidents caused by improper placement or installation of speakers. 9 Any time you note distortion, reduce the volume control on your amplifier to lower setting. -
Page 5: Table Of Contents
Pre-adjusting the subwoofer volume ......... . 8 Advanced YAMAHA Active Servo Technology (on the SW-P270)..9 Troubleshooting . -
Page 6: Introduction
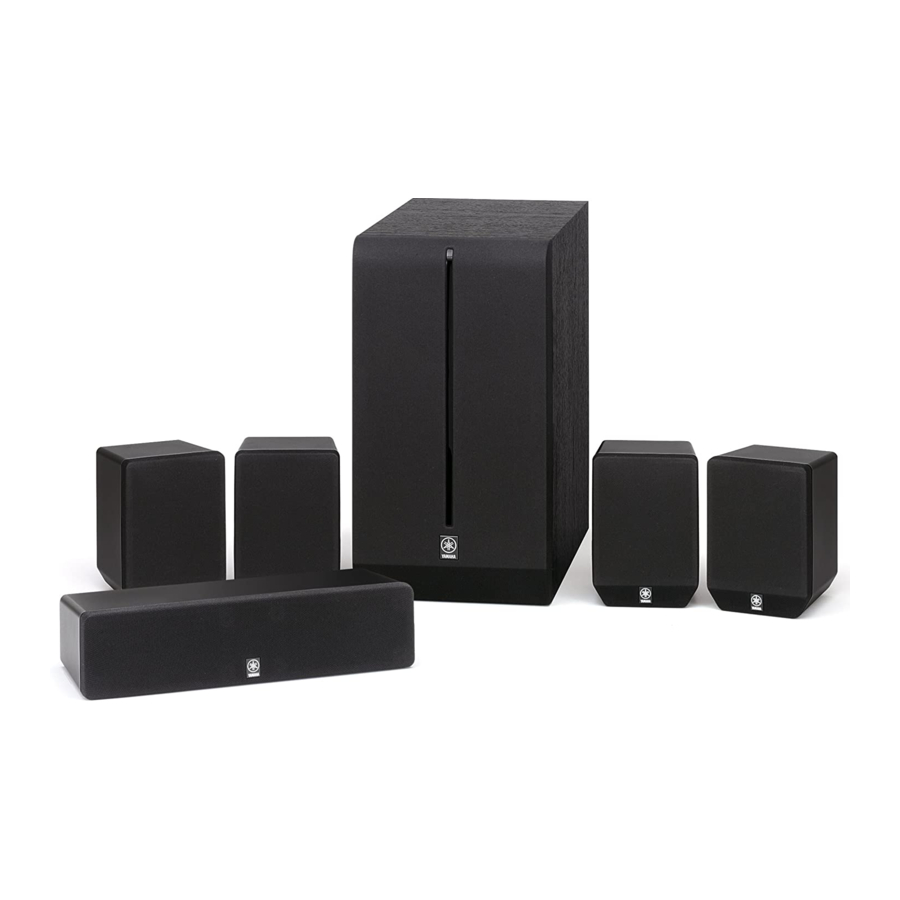
Introduction Thank you for choosing a YAMAHA NS-P270 or NS-P276 Home Cinema 5.1/6.1 Channel Speaker System. Each of these systems includes the following speakers: • NX-E270 The NX-E270 are full-range acoustic-suspension speakers. Each system includes two (2) front and two (2) surround speakers. -
Page 7: Setting Up The Speakers
Setting up the speakers Before you connect the speakers, place each speaker in its respective location. Speaker positioning is very important as it affects the overall sound quality of the system. Place the speakers in locations that will optimize the sound quality at your listening position. -
Page 8: Positioning The Center Speaker (Nx-C270)
Positioning the center speaker (NX-C270) Place the center speaker precisely between the front speakers, facing directly forward. You can place the center speaker on top of a TV (if the top of the TV is flat), on the floor beneath the TV, or in an entertainment center. -
Page 9: Mounting The Front And Surround Speakers
Mounting the front and surround speakers You can place the front and surround speakers (and surround back speaker in an NS-P276 system) on a shelf or rack, set them on the floor, or mount them on a wall or speaker stand. To mount the speakers on a wall: Affix screws to a firm wall or wall support as shown below. -
Page 10: Connections
Connections Caution: Plug the power cables for the subwoofer and other audio/video components into an AC outlet only after you complete all other connections. Basic connection example Right Note: The rear panel of various amplifiers may differ in appearance. Amplifier Subwoofer To AC outlet Front speakers... -
Page 11: Connecting Speaker Cables
(marked R) terminals. • Connect the subwoofer to the line output (pin jack) terminal(s) on the amplifier. – To connect to a YAMAHA DSP amplifier (or AV receiver), connect the SUBWOOFER (or LOW PASS, etc.) terminal on the rear of the DSP amplifier (or AV receiver) to the INPUT terminal... -
Page 12: Using The Subwoofer (Sw-P270)
Using the subwoofer (SW-P270) Rear panel VOLUME INPUT POWER Power indicator Lights up in GREEN when the POWER switch (4) is turned ON; turns off when the POWER switch is turned OFF. VOLUME control Adjusts the volume level. Turn the control clockwise to increase the volume, and counterclockwise to decrease the volume. -
Page 13: Advanced Yamaha Active Servo Technology (On The Sw-P270)
Advanced YAMAHA Active Servo Technology (on the SW-P270) The theory behind YAMAHA Active Servo Technology is based on two factors: the Helmholtz resonator and negative-impedance drive. Active Servo Processing speakers reproduce the bass frequencies through an “air woofer,” which is a port or opening in the speaker’s cabinet. -
Page 14: Troubleshooting
Refer to the chart below if the unit does not function properly. If the problem you are experiencing is not listed, or if the instructions fail to help you resolve the problem, disconnect the power cord and contact your authorized YAMAHA dealer or service center. Problem No sound. -
Page 15: Specifications
SW-P270 subwoofer combined with NX-E270 speakers. VOLUME 500 Hz SW-P270 Type ... Advanced YAMAHA Active Servo Technology Driver ...16 cm (6-5/16") cone woofer Output Power... 50 W (100 Hz, 5 Dynamic Power ... 100 W, 5 cone speaker x 2 Input Impedance ... - Page 16 YAMAHA ELECTRONICS (UK) LTD. YAMAHA HOUSE, 200 RICKMANSWORTH ROAD WATFORD, HERTS WD18 7GQ, ENGLAND YAMAHA SCANDINAVIA A.B. J A WETTERGRENS GATA 1, BOX 30053, 400 43 VÄSTRA FRÖLUNDA, SWEDEN YAMAHA MUSIC AUSTRALIA PTY, LTD. 17-33 MARKET ST., SOUTH MELBOURNE, 3205 VIC., AUSTRALIA...