Table of Contents
Advertisement
Available languages
Available languages
Quick Links
IB521002EN
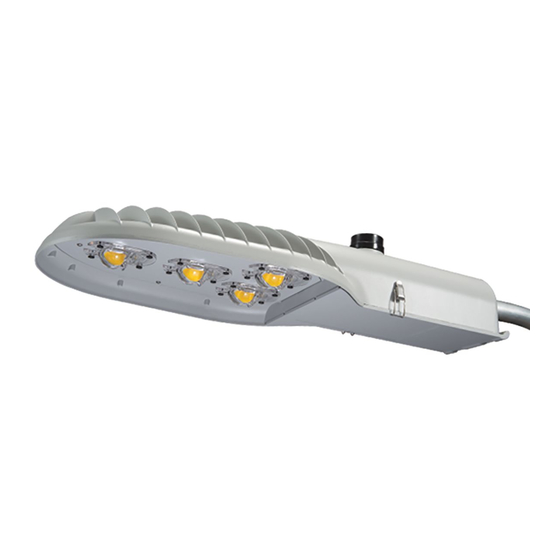
Installation Instructions – Verdeon/VRDN
Instructions d'installation – Verdeon/VRDN
Instrucciones de instalación – Verdeon/VRDN
WARNING
Make certain power is OFF before starting installation
or attempting any maintenance.
WARNING
Risk of fire/electric shock. If not qualified, consult an
electrician.
WARNING
Risk of Electric Shock – Disconnect power at fuse or
circuit breaker before installing or servicing.
WARNING
Risk of Personal Injury – Fixture may become damaged
and/or unstable if not installed properly.
Do not mount luminaire within 6" of a
●
●
combustible surface.
Do not handle luminaire by the glass. Do not
●
●
touch LEDs.
IMPORTANT: Read carefully before installing fixture. Retain for future reference.
GENERAL: Upon receipt of the fixture, thoroughly inspect for any freight damage which should be brought to the
attention of the delivery carrier. Compare the catalog description listed on the packing slip with the fixture label on the
housing to assure you have received the correct material.
SAFETY: This fixture must be wired in accordance with the National Electrical Code and applicable local codes and
ordinances. Proper grounding is required to insure personal safety. Carefully observe grounding procedure under
installation section.
APPLICATIONS: This lighting fixture is designed for outdoor lighting services, and should not be used in area of limited
ventilation or inside high ambient temperature enclosures. It must be stored in a dry location prior to installation. Do not
expose lighting fixture to rain, dust or other environmental conditions prior to installation and insertion of photocontrol
or shorting cap (if so equipped). Do not install the fixture near combustible materials or locate next to airflow
blocking surfaces within 6 inches. Best results will be obtained if installed and maintained according to the following
recommendations.
WARNING
Risk of Burn – Disconnect power and allow fixture to
cool before servicing.
These instructions do not claim to cover all
N
ote:
details or variations in the equipment, procedure,
or process described, nor to provide directions
for meeting every possible contingency during
installation, operation or maintenance. When
additional information is desired to satisfy a
problem not covered sufficiently for user's purpose,
please contact your nearest representative.
N
ote:
This lighting fixture has been shipped complete
with one of several mounting options. Please follow
the installation instructions specific to the catalog
part that you ordered.
N
ote:
Care must be taken not to set lighting fixture down
on optical lenses or lift the fixture in the lens area.
N
ote:
Specifications and dimensions subject to change
without notice.
Brand Logo
reversed out of
black
INS #
INS #
Advertisement
Table of Contents

Related Manuals for Eaton Verdeon


Summary of Contents for Eaton Verdeon
- Page 1 IB521002EN INS # INS # Installation Instructions – Verdeon/VRDN Instructions d’installation – Verdeon/VRDN Instrucciones de instalación – Verdeon/VRDN WARNING WARNING Make certain power is OFF before starting installation Risk of Burn – Disconnect power and allow fixture to or attempting any maintenance.
-
Page 2: Installation
Installation Instructions - Verdeon/VRDN INSTALLATION Tools Required 9/16” socket or wrench, screwdriver #2 Phillips and Flat, electrical wiring tools as needed. Installation Bird Guard A splash guard is provided pre-cut to accommodate 1-5/8” diameter mounting arms. When using larger diameter mounting arms, remove the punch out section of the splash guard (Figure 1). - Page 3 Installation Instructions - Verdeon/VRDN Lift the housing into place and position end of mounting arm onto leveling steps so that housing is level. Care must be taken so arm does not inadvertently strike Install Direction internal components. (Figure 3. & Figure 4.) Using a 9/16”...
- Page 4 Installation Instructions - Verdeon/VRDN Arm Installation (Optional) Backup Plate Threaded Rods Cover Plate Mast Arm: Square Pole (Figure 7.) and Round Pole (Figure 8.) Insert nut plate into pole and align insert holes with the mounting holes in the pole.
-
Page 5: Maintenance
Installation Instructions - Verdeon/VRDN Photocontrol (If Equipped) Using a flat blade screw driver, loosen the two flathead screws to allow rotation of the receptacle. Adjustment Slot (Figure 10. & Figure 11.) for North Insert screwdriver into center slot and rotate receptacle until indicator arrow points in desired direction. - Page 6 Instructions d’installation – Verdeon/VRDN AVERTISSEMENT AVERTISSEMENT Assurez-vous que l'alimentation électrique est HORS Risque de brûlure - Débranchez la source d'alimentation TENSION avant de commencer l'installation ou de et laissez refroidir le luminaire avant de procéder à son procéder à l'entretien.
-
Page 7: Outils Requis
Instructions d’installation – Verdeon/VRDN INSTALLATION Outils requis Clé ou douille de 14 mm (9/16 po), tournevis plat ou Phillips n° 2 et outils pour câblage électrique au besoin. Installation du dispositif de protection contre les oiseaux Un dispositif de protection contre les éclaboussements est fourni pré-coupé... - Page 8 Instructions d’installation – Verdeon/VRDN Avec la douille de 14 mm (9/16 po), desserrez suffisamment les quatre boulons de montage de la bride de serrage pour permettre le glissement du bras Direction de l'installation de montage (non fourni) sur les échelons de mise à...
- Page 9 Instructions d’installation – Verdeon/VRDN Assurez-vous que le câblage est sécuritaire et Plaque rebranchez les raccords rapides. Bras Tiges filetées d'appui Replacez la porte sur la charnière si elle a été enlevée Plaque d'adaptation et basculez la porte du boîtier à la position fermée, verrouillez-la et resserrez les vis de 19 à...
-
Page 10: Entretien
Instructions d’installation – Verdeon/VRDN Photocontrôle (si équipé) Fente Avec un tournevis à tête plate, dévissez les deux d'ajustement vis à tête plate pour permettre la rotation du réceptacle. pour le nord (Figure 10. et Figure 11.) Insérez un tournevis dans la fente de centre et tournez le réceptacle jusqu'à... - Page 11 Instrucciones de instalación – Verdeon/VRDN ADVERTENCIA ADVERTENCIA Asegúrese de que el suministro eléctrico esté Riesgo de quemaduras: desconecte el suministro DESCONECTADO antes de iniciar la instalación o de eléctrico y deje que la luminaria se enfríe antes de intentar hacer cualquier reparación.
-
Page 12: Instalación
Instrucciones de instalación – Verdeon/VRDN INSTALACIÓN Herramientas necesarias Llave de tubo o llave inglesa de 9/16 in, destornillador Phillips y plano nro. 2, herramientas de cableado eléctrico, según sea necesario. Instalación del protector contra pájaros Se incluye un protector de salpicaduras precortado para acomodar los brazos de montaje de 1-5/8 in de diámetro. - Page 13 Instrucciones de instalación – Verdeon/VRDN Con una llave de tubo de 9/16 in, afloje los cuatro pernos de montaje de la abrazadera del tubo lo suficiente como para permitir que el brazo de montaje Dirección de instalación (no incluido) se deslice de forma nivelada. (Figura 3.) Eleve la carcasa a su posición y coloque el extremo...
- Page 14 Instrucciones de instalación – Verdeon/VRDN ota: Las terminales están numeradas en la entrada de Placa de Placa de cables del bloque de terminales. Vea el diagrama de respaldo Varillas roscadas cubierta cableado para más detalles sobre el cableado. Asegúrese de que todo el cableado esté seguro y Brazo vuelva a conectar los desconectores rápidos.
-
Page 15: Mantenimiento
Instrucciones de instalación – Verdeon/VRDN Fotocontrol (si lo posee) Ranura de Con un destornillador de paleta plana, afloje los dos ajuste tornillos de cabeza plana, para permitir la rotación del para el Norte receptáculo. (Figura 10. y Figura 11.) Inserte el destornillador en la ranura central y gire el receptáculo hasta que la flecha apunte hacia la... - Page 16 Warranties and Limitation of Liability Please refer to www.eaton.com/LightingWarrantyTerms for our terms and conditions. Garanties et limitation de responsabilité Veuillez consulter le site www.eaton.com/LightingWarrantyTerms pour obtenir les conditions générales. Garantías y Limitación de Responsabilidad Visite www.eaton.com/LightingWarrantyTerms para conocer nuestros términos y condiciones.