Viessmann EM-EA1 extension Installation And Service Instructions Manual
Dio electronics module, function extension
Hide thumbs
Also See for EM-EA1 extension:

Related Manuals for Viessmann EM-EA1 extension


Summary of Contents for Viessmann EM-EA1 extension
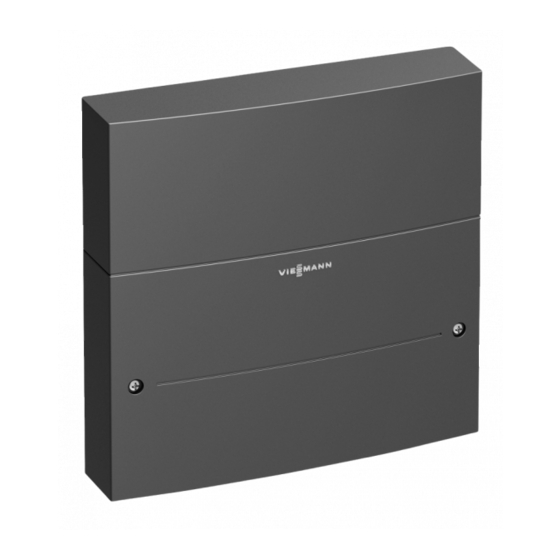
- Page 1 VIESMANN Installation and service instructions for contractors EM-EA1 extension DIO electronics module Function extension EM-EA1 extension Please keep safe. 6131087 GB 6/2019...
- Page 2 Never touch hot surfaces on the boiler, burner, lidate our warranty. ■ flue system or pipework. For replacements, use only original spare parts supplied or approved by Viessmann. Please note Electronic assemblies can be damaged by elec- trostatic discharge. Prior to commencing work, touch earthed objects such as heating or water pipes to dis- charge static loads.
- Page 3 Safety instructions Safety instructions (cont.) Safety instructions for operating the system If you smell gas Flue systems and combustion air Danger Ensure that flue systems are clear and cannot be Escaping gas can lead to explosions which may sealed, for instance due to accumulation of conden- result in serious injury.
-
Page 4: Table Of Contents
Index Index Information Disposal of packaging ................Symbols ....................Intended use ..................Product information ................System examples ................■ Spare parts lists .................. ■ Installation sequence Wall mounting ..................Overview of electrical connections ............Electrical connections ................Connecting external functions ............... Connecting external default set flow temperature: 0 - 10 V IN ... - Page 5 Information Disposal of packaging Please dispose of packaging waste in line with statu- tory regulations. Symbols Symbol Meaning Reference to other document containing further information Step in a diagram: The numbers correspond to the order in which the steps are carried out. Warning of material losses and environ- mental pollution Live electrical area...
- Page 6 (DIO electronics module). The functions that can be connected depend on the settings made at the heat generator. System examples Available system examples: See www.viessmann- schemes.com. Spare parts lists Information about spare parts can be found on the...
-
Page 7: Overview Of Electrical Connections
Installation sequence Wall mounting Fig. 1 Overview of electrical connections fÖ 1 2 3 4 5 6 Fig. 2 Digital input 1 230 V relay output, 230 V input Digital input 2 Power supply fÖ Digital input 3 Power supply for additional accessories fÖ... -
Page 8: Electrical Connections
Installation sequence Overview of electrical connections (cont.) Function Page Connections: PWM1 0 - 10 V 43-1 43-L External functions External default set flow temperature ■ External default output ■ Operating mode changeover ■ External demand ■ External blocking ■ Fault message input and fault mes- sage output Connection without system blocking ■... -
Page 9: Connecting An External Default Output: 0 - 10 V In
Installation sequence Connecting external functions (cont.) fÖ Fig. 3 Enable signal Junction box When making the connection, ensure correct polarity The 0 to 10 V hook-up generates the following set flow of the DC control voltage 0 - 10 V. temperatures: <... -
Page 10: Connecting The Operating Mode Changeover: Di1 To Di3
Installation sequence Connecting external functions (cont.) Connecting the operating mode changeover: DI1 to DI3 Continuous operation or room temperature- dependent operation DI1 DI2 DI3 As soon as the contact closes, the following demands 1 2 3 4 5 6 become active: ■... -
Page 11: Connecting External Blocking: Fd
Installation sequence Connecting external functions (cont.) Connecting external blocking: If 230 V voltage is present at digital input 43-1, the heat generator is blocked. The message I.57 is shown. fÖ Fig. 7 Signal for external demand or external blocking Junction box Connecting the fault message input and fault message output Connection without system blocking via 230 V fault message input: fÖ... -
Page 12: Connection With System Blocking Via 230 V Fault Message Input
Installation sequence Connecting the fault message input and fault… (cont.) Connection with system blocking via 230 V fault message input: fÖ Fig. 9 Fault message facility Junction box Fault message input 43-1 and conductor L of the The fault message is active if 230 V voltage is present ■... -
Page 13: Connecting Only Message Facility: Hh
Installation sequence Connecting the fault message input and fault… (cont.) External contacts at DI1 must be potential-free. The fault messaging is active if the digital fault mes- ■ When making the connection, adhere to the require- sage input DI1 is closed. The heat generator is ments of protection class II. -
Page 14: Connecting The Plusbus To The Heat Generator
Installation sequence Connecting the external extractor interlock: (cont.) The floating contact switches from "Ö" to "S" as soon as the burner control unit starts the burner. The extrac- tor is switched off. Connecting the PlusBus to the heat generator Note If making the connection to the heat generator with an external plug for the bus connection, disconnect plug and connect the wires directly. - Page 15 Installation sequence Power supply (cont.) Danger Isolators for non-earthed conductors Incorrect electrical installations can lead to seri- ■ The mains isolator (if installed) must simultaneously ous injury from electrical current and result in isolate all non-earthed conductors from the mains appliance damage.
- Page 16 Installation sequence Power supply (cont.) Connect the power supply in accordance with the dia- gram. If the power supply to the appliance is connected with a flexible cable, ensure that the live conductors are pulled taut before the earth conductor in the event of strain relief failure.
-
Page 17: Rotary Switch S1 For Subscriber Number Addressing
Rotary switch S1 for subscriber number addressing Set rotary switch S1 to a consecutive numbers as shown in the example below: ■ 1st EM-EA1 extension: Rotary switch to 1 ■ 2nd EM-EA1 extension: Rotary switch to 2 ■ 3rd EM-EA1 extension: Rotary switch to 3... - Page 18 Connection and wiring diagram Connection and wiring diagram Fig. 18 Digital input 1 Digital input 2 Digital input 3 0 - 10 V IN Input 0 to 10 V 0 - 10 V OUT Output 0 to 10 V Fuse 2 A (slow) PWM1 Control voltage output Rotary switch...
- Page 19 Specification Specification Rated voltage 230 V∼ Rated frequency 50 Hz Rated current Power consumption – electronics 2.8 W Power consumption 12 mA Permissible ambient temperature Operation 0 to +40 °C ■ Storage and transport 20 to +60 °C ■ – Output for rated breaking capacity (floating) 1 A, 230 V~...
-
Page 20: Final Decommissioning And Disposal
Disposal Final decommissioning and disposal Viessmann products can be recycled. Components For decommissioning the system, isolate the system and substances from the system are not part of ordi- from the power supply and allow components to cool nary household waste. -
Page 21: Declaration Of Conformity
Declaration of Conformity Using the serial number, the full Declaration of Con- formity can be found on the following website: We, Viessmann Werke GmbH & Co. KG, D-35107 www.viessmann.co.uk/eu-conformity Allendorf, declare as sole responsible body that the named product complies with the European directives and supplementary national requirements in terms of its design and operational characteristics. - Page 24 Viessmann Werke GmbH & Co. KG Viessmann Limited D-35107 Allendorf Hortonwood 30, Telford Telephone: +49 6452 70-0 Shropshire, TF1 7YP, GB Fax: +49 6452 70-2780 Telephone: +44 1952 675000 www.viessmann.com Fax: +44 1952 675040 E-mail: info-uk@viessmann.com...