Table of Contents
Advertisement
Quick Links
Advertisement
Table of Contents

Related Manuals for Bosch DDW88MM65


Summary of Contents for Bosch DDW88MM65
- Page 1 Extractor hood DDW88MM65 DDW88MM66 [en] User manual and installation instructions...
-
Page 2: Table Of Contents
en Safety 1.2 Intended use Table of contents Read the information on intended use to en- sure that you use the appliance correctly and safely. USER MANUAL This appliance is designed only to be built Safety .............. 2 into kitchen units. Read the special installation instructions. - Page 3 Safety en other technical means. An incoming/ex- WARNING ‒ Risk of suffocation! haust air wall box alone does not ensure Children may put packaging material over compliance with the limit. their heads or wrap themselves up in it and ▶ In any case, consult your responsible chim- suffocate.
-
Page 4: Avoiding Material Damage
en Avoiding material damage ▶ Do not look directly into the switched-on ▶ If the power cord of this appliance is dam- LED lights for longer than 100 seconds. aged, it must be replaced by trained spe- cialist staff. If the appliance is operated by another person via the Home Connect app during cleaning, An ingress of moisture can cause an electric this increases the risk of injury. -
Page 5: Environmental Protection And Saving Energy
Environmental protection and saving energy en 3 Environmental protection and saving energy Help protect the environment by using your appliance If you use the Guided Air function, the specified energy in a way that conserves resources and by disposing of values and consumption values may differ. reusable materials properly. -
Page 6: Familiarising Yourself With Your Appliance
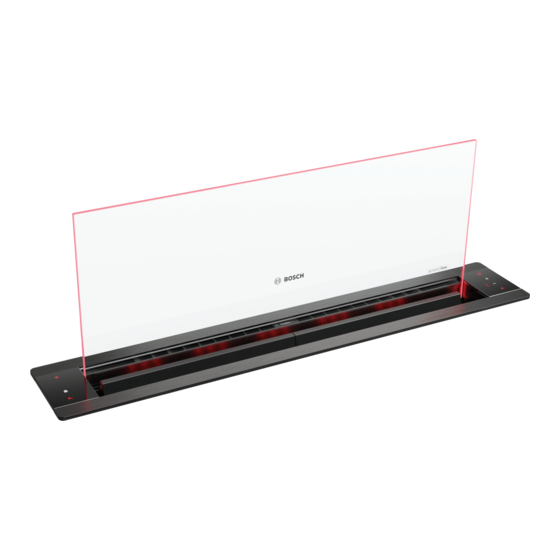
en Familiarising yourself with your appliance 5 Familiarising yourself with your appliance Familiarise yourself with the parts of your appliance. Fan setting 1 Fan setting 2 5.1 Controls Fan setting 3 The controls are used to configure all functions of your appliance and to obtain information about the operat- Intensive mode 1 ing status. - Page 7 Basic operation en 7.4 Switching on intensive mode 7.10 Sensor control If particularly strong odours or vapours develop, you In automatic mode, a sensor in the appliance detects can use intensive mode. the intensity of the cooking and roasting fumes. De- pending on the setting of the sensor sensitivity, the op- Press repeatedly until LED 4 lights up in the LED timum fan setting is automatically switched on.
-
Page 8: Hob-Based Hood Control
en Hob-based hood control 7.14 Switching on Ambient Light 7.15 Switching on Guided Air You can switch on the Ambient Light independently of With the Guided Air function, the cooking vapour is the appliance's ventilation system. routed in such a way that it can be optimally collected from the appliance and removed. - Page 9 ▶ 9.5 Declaration of Conformity Home Connect by pressing and holding and approx. three seconds. Robert Bosch Hausgeräte GmbH hereby declares that the appliance with Home Connect functionality meets 9.3 Software update the essential requirements and other relevant provi- sions of the Directive 2014/53/EU.
-
Page 10: Cleaning And Servicing
en Cleaning and servicing 10 Cleaning and servicing To keep your appliance working efficiently for a long Clean aluminium using a soft cloth and glass ‒ time, it is important to clean and maintain it carefully. cleaner. Clean plastic using a soft cloth and glass ‒... - Page 11 Cleaning and servicing en 10.5 Cleaning the drip tray 10.7 Cleaning grease filters manually When cooking or cleaning the appliance, liquid may The grease filters filter the grease from the cooking va- get into the appliance. The drip trays are used to col- pour.
-
Page 12: Troubleshooting
en Troubleshooting To avoid causing damage, do not bend the grease 10.10 Fitting the grease filters filters. Press . Insert the grease filter cartridges. a The glass panel moves up to halfway upwards and grease filter cassettes are transported upwards. Remove the grease filter cassettes. Press ... -
Page 13: Customer Service
Customer Service en Fault Cause & Troubleshooting The button illumination does not The control unit is faulty. work. Call the after-sales service. ▶ → "Customer Service", Page 13 The lighting does not work. Different causes are possible. Call the after-sales service. ▶ → "Customer Service", Page 13 Defective LED lights may be replaced by the manufacturer, their customer ▶... -
Page 14: Disposal
en Disposal 14 Disposal Find out here how to dispose of old appliances cor- This appliance is labelled in accord- rectly. ance with European Directive 2012/19/EU concerning used elec- 14.1 Disposing of old appliance trical and electronic appliances (waste electrical and electronic equip- Valuable raw materials can be reused by recycling. - Page 15 Installation instructions en room in which they are installed and dis- ▶ The specified safety clearances must be charge the exhaust gases into the open complied with in order to prevent a build-up through an exhaust gas system (e.g. a chim- of heat.
- Page 16 en Installation instructions ▶ Only use genuine spare parts when repair- ¡ This appliance complies with the EC interference suppression regulations. ing the appliance. ¡ The appliance corresponds to protection class 1. ▶ If the power cord of this appliance is dam- You should therefore only use the appliance with a aged, it must be replaced by trained spe- protective earth connection.
- Page 17 Installation instructions en ¡ The width of the extractor hood must correspond at Place the appliance on a soft surface and remove least with the width of the hob. the transport lock. ¡ To optimally detect the cooking vapours, install the appliance behind the hob.
- Page 18 en Installation instructions Pull the cable connection into the strain relief Slide the fan box into the guide, connect the pipe- remove the transport lock . work and screw the fan box tightly back in place. Note: To ensure that the appliance is not yet fully in- Support the appliance from below and remove the serted into the cut-out, place a slat below the short slats.
- Page 19 Installation instructions en Align the appliance to the hob and tension it Plug the cables into the fan box. against the worktop . Insert the glass panel as far as it will go into the Insert the drip tray and snap it into place. guides.
- Page 20 Expert advice for your Bosch home appliances, help with problems or a repair from Bosch experts. Find out everything about the many ways Bosch can support you: www.bosch-home.com/service Contact data of all countries are listed in the attached service directory.