Riello RTQ 3S Series Installation, Operation, Maintenance And System Management Manual
Steel boilers
Hide thumbs
Also See for RTQ 3S Series:

Related Manuals for Riello RTQ 3S Series


Summary of Contents for Riello RTQ 3S Series
- Page 1 S T E E L B O I L E R S RTQ 3S INSTALLATION, OPERATION, MAINTENANCE AND SYSTEM MANAGEMENT MANUAL...
- Page 2 CONFORMITY RTQ 3S r boilers conform to the Efficiency Directive 92/42/CEE When used in conjunction with a CE marked jet burner, they also satisfy the requirements of the Gas Appliances Directive 2009/142/EC (until 20 April 2018 ) and Regulation (EU) 2016/426 (from 21 April 2018) and applicable sections of the Electromagnetic Compatibility Directive 2014/30/UE and Low Voltage Directive 2014/35/UE.
- Page 3 This instruction manual contains important instructions and precautions that must be observed to ensure the trouble-free installation and efficient functioning of your RTQ 3S r boiler. Please accept our renewed thanks for your purchase. Riello S.p.A.
-
Page 4: Table Of Contents
CONTENTS GENERAL Precautions General safety information Product description Control panels Recommended burners Product identification Technical data SYSTEM MANAGER Start up Temporary shutdown Preparing for extended periods of disuse Cleaning Maintenance Useful information INSTALLER Unpacking the product Overall dimensions and weights Handling Installation in older systems and systems requiring modernisation... -
Page 5: General
GENERAL SAFETY INFORMATION Periodically check that operating pressure in the The boiler is delivered in separate crates. Check water circuit is over 1 bar but below the maximum that it is complete, undamaged and as ordered as limit specified for the boiler. If this is not the case, soon as you receive it. -
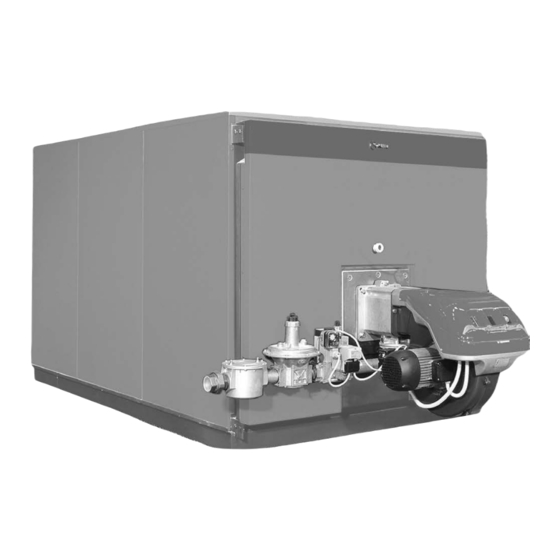
Page 6: Product Description
PRODUCT DESCRIPTION Stainless steel turbulators inside the flue gas pipes RTQ 3S r steel boilers are high efficiency boilers establish an ideal pressure inside the combustion with horizontal, flame reversal combustion chambers chamber and an ideal flue gas temperature. Evenly and concentrically arranged flue gas pipes. -
Page 7: Control Panels
CONTROL PANELS The r control panels that can be used with r RTQ 3S steel boilers are listed below. These control panels cater for all the needs of the heating system and of all the devices installed in it. Respect the indications of the table rigorously to ensure trouble-free operation and maximum reliability of your boiler over time. -
Page 8: Recommended Burners
RECOMMENDED BURNERS RTQ 3S The burners recommended to obtain the best possible performance from r boilers are: BURNER RTQ 3S ACCESSORIES KIT MODEL CODE 2700 3000 3500 4000 BURNER PLATE RS 300/M 20071010 • • 20076596 RS 300/E on demand •... - Page 9 BURNER RTQ 3S ACCESSORIES KIT MODEL CODE 2700 3000 3500 4000 BURNER PLATE RL 300/B MZ 3478410 • • 20076596 RL 300/B MZ 3478400 • Standard RL 400/B MZ 3478512 • 20076596 PRESS 300 T/N ECO t.l. 3439022 • • Standard The couplings were obtained with the operating point at 3% O2.
- Page 10 IMPORTANT NOTES FOR BURNER INSTALLATION L < S Before fixing the burner to the boiler, make sure that: - The door opens the right way (see the relevant sections for details on how to reverse the door). - The length (L) of the burner fixing bolts is less than (S), i.e.
-
Page 11: Product Identification
PRODUCT IDENTIFICATION The boilers are identified by two plates: Serial number plate This is located on the boiler body and specifies the serial number, model, and furnace power. Data plate 2 3 2 7 0 0 0 0 5 8 1 WEEK OF This lists the technical specifications and MANUFACTURE... -
Page 12: Technical Data
TECHNICAL DATA RTQ 3S DESCRIPTION 2700 3000 3500 4000 Fuel OIL/GAS 2401 2701 3001 3501 Rated heat input 2700 3000 3500 4000 2310 2598 2887 3368 Rated useful heat output Pn 2576 2862 3339 3816 Useful efficiency at minimum Pn 96,2 96,2 96,2... -
Page 13: System Manager
START UP RTQ 3S Have r’s Technical Assistance Service start up your boiler for the first time. Once this has been done, the boiler can be left to function automatically. Under certain circumstances, such as after long periods of disuse, the service engineer responsible for the boiler may need to re-start it without involving the Technical Assistance Service. -
Page 14: Temporary Shutdown
The burner should now ignite and remain in operation If a “LOCKOUT SHUTDOWN” occurs, wait about 30 until the set temperature is reached. seconds before resetting the burner. The burner will then switch off and on automatically to maintain the set temperature without further operator To reset the burner, press the red button light on the action. -
Page 15: Preparing For Extended Periods Of Disuse
PREPARING FOR EXTENDED PERIODS OF DISUSE If the boiler is not going to be used for an extended period of time, perform the following operations: - Turn the control panel power switch OFF and make sure that the green power indicator goes out - Turn the mains power switch OFF - Close the fuel cock and heating circuit water cock - Drain the central heating circuit if there is any risk of... -
Page 16: Maintenance
MAINTENANCE Please remember that THE PERSON RESPONSIBLE r’s Technical Assistance Service is qualified to FOR SYSTEM MANAGEMENT MUST ENSURE THAT satisfy these legal requirements and can also provide PROFESSIONALLY QUALIFIED HEATING ENGINEERS useful information on MAINTENANCE PROGRAMMES UNDERTAKE PERIODIC MAINTENANCE designed to guarantee: COMBUSTION EFFICIENCY MEASUREMENTS. -
Page 17: Unpacking The Product
UNPACKING THE PRODUCT RTQ 3S r steel boilers come in 3 separate crates: BOILER BODY CRATE to which is attached the documentation envelope (A) containing: - Instruction manual - Data label (to be applied to the casing on completion of the installation) - Water test certificate - Bar code labels - Spare parts catalogue... -
Page 18: Overall Dimensions And Weights
OVERALL DIMENSIONS AND WEIGHTS RTQ 3S DESCRIPTION 2700 3000 3500 4000 A - Width 1865 1935 2040 2070 A1 -Base width 1815 1885 1990 2020 B - Depth 3490 3600 3934 4184 B1 -Base depth 2940 3040 3310 3560 C - Height 1995 2055 2140... -
Page 19: Installation In Older Systems And Systems Requiring Modernisation
PLACE OF INSTALLATION RTQ 3S r steel boilers must be installed in a If the specific weight of the gas supply to the burner dedicated boiler room, with adequately sized vents, in is greater than the specific weight of air, install all compliance with applicable laws and standards. -
Page 20: Water Connections
WATER CONNECTIONS RTQ 3S r boilers are designed and made for use Allow for the dimensions of the control panel that in central heating installations, but can also be used for needs to be installed on top of the boiler. domestic hot water production if connected to a suitable storage cylinder. -
Page 21: Anti-Condensate Pump
Schematic diagram - central heating and domestic hot water production HOT WATER SYSTEM SYSTEM OUTLETS DELIVERY RETURN 1 - Boiler 2 - Central heating manifolds 3 - Disconnect valves 4 - System pumps 5 - Non-return valves 6 - Automatic vent valve 7 - Boiler safety valve 8 - Boiler drain cock 17 5... -
Page 22: Combustion Gas Exhaust
COMBUSTION GAS EXHAUST The flue gas exhaust and its connection to the stack must be made in compliance with applicable laws and standards, using heat resistant, condensate resistant and stress resistant rigid pipe and sealed joints. Ø Typical installation schematic RTQ 3S DIMENSION (mm) -
Page 23: Changing The Direction Of Door Opening
CHANGING THE DIRECTION OF DOOR OPENING The boiler door hinges are factory fitted on the right of the door. If opting to open the door from right to left, rotating on the hinges placed on the left, perform these operations: - Make sure that the main door fixing bolts (1) are securely tightened. - Page 24 - Fit the top door stop bracket (3) to the opposite side - Completely unscrew the main fixing bolts (1) and of the door and fix it in place with the safety bolts (2). open the door. (These bolts are captive in the door and cannot be removed.) - Fit the bottom door stop bracket (5) to the opposite - Remove the spare hinge assembly ‘B’...
-
Page 25: Earth Connection
EARTH CONNECTION A terminal is provided on the front boiler head to connect the boiler body to an efficient earth system. Another hole (*) in the left side of the boiler head can also be used to earth the appliance. If you wish Proceed as follows. -
Page 26: Fitting The Casing Panels
FITTING THE CASING PANELS - engage the bottoms of the rear side (1) and front side - route the electrical cables and insert the sensors in their panels (2) in the bottom rails (3), then hook their top lips sockets; over the top rails (4) running between the front and rear - fit the cable grommets provided into their seats in the heads;... - Page 27 - engage the bottoms of the rear side (1) and front side - route the electrical cables and insert the sensors in their panels (2) in the bottom rails (3), then hook their top lips sockets; over the top rails (4) running between the front and rear - fit the cable grommets provided into their seats in the heads;...
- Page 28 - Engage the bottom of the side panels (1), central - route the electrical cables and insert the bulbs/sensors panel (2) and fornt panel (3) in the bottom rails (4) and in their sockets; engage the top lip of the side panels in the slots (5) in - fit the cable grommets provided into their seats in the the front and rear heads;...
- Page 29 - Engage the bottom of the side panels (1), central - route the electrical cables and insert the bulbs/sensors panel (2) and fornt panel (3) in the bottom rails (4) and in their sockets; engage the top lip of the side panels in the slots (5) in - fit the cable grommets provided into their seats in the the front and rear heads;...
-
Page 30: Technical Assistance Service
PREPARING FOR INITIAL START-UP It is essential to perform the following checks before RTQ 3S starting up or testing the functioning of your r boiler. In particular, check that: - The protective cardboard sheet (1) has been removed from the ceramic fibre - The turbulators (2) are correctly positioned (vertical posi- tion) inside the heat exchange tubes and the clips (3) are resting against the wall (4) of the heat exchanger... -
Page 31: Initial Start-Up
INITIAL START-UP Once you have completed all the preparatory steps, proceed as follows to start up the boiler for the first time: - If the system is equipped with a temperature controller or timer thermostat, make sure that it is switched on - Adjust the timer thermostat/s or temperature controller to the desired temperature (~20°C) - Turn the system’s main power switch ON... -
Page 32: Checks During And After Initial Start-Up
CHECKS DURING AND AFTER INITIAL START-UP Once the boiler has started up, make sure that it shuts down and re-starts properly when the following actions are taken: - The boiler thermostat setting is changed - Power to the control panel is switched off and on again - The room thermostat or timer thermostat is adjusted. -
Page 33: Maintenance
MAINTENANCE Regular maintenance is a legal requirement. It is also Have your boiler serviced either by r's Technical essential for the safety, efficiency and durability of the Assistance Service or by a qualified heating engineer. boiler. Proper maintenance keeps consumption and emissions down, and ensures that the boiler continues to Analyse the combustion fumes before commencing any operate reliably over time. -
Page 34: Cleaning The Boiler
CLEANING THE BOILER Clean the boiler and remove any carbon deposits from the surfaces of the heat exchanger at least once a year. This not only extends the boiler’s working life, but also keeps it efficient in terms of heat output and consumption. Proceed as follows to clean the boiler: Check at regular intervals that the condensate drain (6) - Open the front door (1) and pull out the turbulators (2) -
Page 35: Troubleshooting
TROUBLESHOOTING FAULT CAUSE CORRECTIVE ACTION The boiler becomes dirty Burner badly adjusted Check the adj. of the burner very quickly (perform flue gas analysis) Blockage in stack Clean the flue gas pipes and stack Burner air intake dirty Clean the burner air intake The boiler does not reach Boiler dirty Clean the flue gas pipes... - Page 36 RIELLO S.p.A. Via Ing. Pilade Riello, 7 37045 - Legnago (VR) www.riello.com The manufacturer strives to continuously improve all products. Appearance, dimensions, technical specifi cations, standard equipment and accessories are therefore liable to modifi cation without notice.