Table of Contents
Advertisement
Advertisement
Table of Contents

Related Manuals for Dish TV SmartVU+


Summary of Contents for Dish TV SmartVU+
- Page 1 QUICK START GUIDE www.dishtv.co.nz...
- Page 2 Notes...
-
Page 3: Table Of Contents
Contents Contents..........................What’s in the Box?......................Product Overview......................Front/Back View........................Remote Control........................Getting Connected......................First Time Installation..................... Connecting the Bluetooth Remote................... Why Connect to the Internet?.................... Select Tuning Type......................Home Hub Menu......................Mini Guide & TV Guide...................... Freeview On Demand...................... Android TV Apps...................... -
Page 4: What's In The Box
What’s in the Box? Please check you have all of the following in your box: SmartVU+ (A7070) Bluetooth Remote HDMI Cable Power Supply Items missing? Please contact the retailer or store you purchased this from. -
Page 5: Product Overview
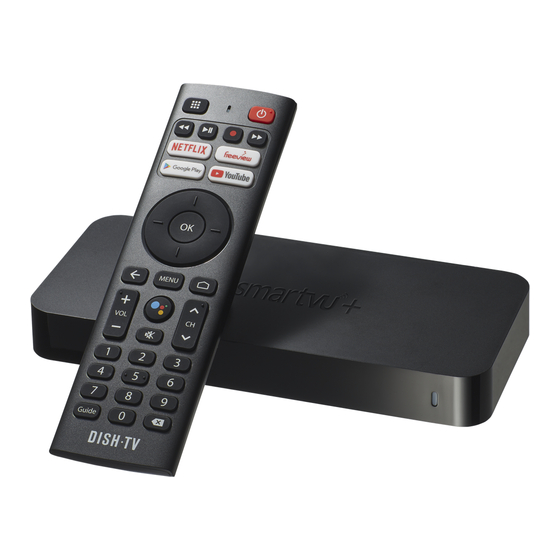
Your SmartVU+ (A7070) Front Panel 1. LED STATUS RED: Standby. BLUE: Power On. Back Panel RF IN LNB IN HDMI TF CARD 12V 1.5A 1. RF IN 5. TF CARD Connect to UHF Aerial cable. Storage, etc. 2. LNB IN 6. -
Page 6: Remote Control
Bluetooth Remote This Remote requires 2x AAA Batteries to operate. I nsert the batteries, ensuring they correctly align with the polarity (+/-) markings found inside the battery compartment. - Page 7 Bluetooth Remote BUTTONS DESCRIPTION Apps Power On/Off Play/Pause, Fast Forward, Rewind Start Netflix Start Freeview Open the Play Store Start YouTube Navigation Arrows OK/Confirm Selection Back/Return Home Hub Menu Android TV Home Volume Up/Down Google Assistant Mute Channel Up/Down Numeric Keys Freeview TV Guide Delete Google, Google Play, YouTube, Android TV, Chromecast and other related marks and logos are trademarks of Google LLC.
-
Page 8: Getting Connected
Getting Connected RF IN LNB IN HDMI TF CARD 12V 1.5A 1. Connect the UHF Aerial or Satellite cable from your wall port to the SmartVU+. 2. Connect the HDMI cable from the SmartVU+ to an HDMI port on your TV. 3. -
Page 9: First Time Installation
Connecting the Bluetooth Remote When prompted on-screen, please stand about 20cm away from the SmartVU+, to connect the Bluetooth Remote. 20cm 1. Press and hold the buttons together. 2. When in pairing mode the LED indicator on the Remote will start flashing. 3. -
Page 10: Why Connect To The Internet
Why connect to the Internet? To ensure you are getting the most out of your SmartVU+, please connect the SmartVU+ to the Internet. This is critical to the correct operation of your SmartVU+. Once connected to the Internet, the SmartVU+ will receive automatic software updates and the following benefits, to ensure you are getting the best Freeview experience! •... -
Page 11: Select Tuning Type
Select Tuning Type Your SmartVU+ works with both a UHF Aerial OR Satellite Dish. During the initial setup you will be prompted to tune in your SmartVU+ Installation Select Tuning Type Satellite UHF Aerial Internet only Down Next Select Use the ▲ UP or ▼ DOWN navigation arrows on the Bluetooth Remote, to select one of the following: •... -
Page 12: Home Hub Menu
Home Hub Menu The Home Hub brings everything together in one place. While watching Live TV, press the MENU button to open the Home Hub Menu. Live TV: Access Freeview Live TV channels. TV Guide: Browse what’s on across the next eight days. On Demand: Access content from TVNZ, ThreeNow and Māori TV. -
Page 13: Mini Guide & Tv Guide
Mini Guide & TV Guide Mini Guide While watching Live TV, press the OK button to open the Mini Guide, displaying what’s on now and coming up next. Use the Mini Guide to quickly browse through channels, or go directly to a channel. Press ◄... -
Page 14: Freeview On Demand
Freeview On Demand Select On Demand on the Home Hub, or press the ◄ LEFT arrow on the Mini Guide to access Freeview On Demand. When you first open Freeview On Demand, you will receive a tutorial to help. This will provide you with the tools required to get the most from Freeview On Demand. -
Page 15: Audio & Subtitles
Audio & Subtitles Broadcasters work with organisations such as Able NZ to make the content you find on Freeview as accessible as possible for all. This means they provide Audio Descriptions as well as Subtitles for selected Movies and TV shows. Audio Description Audio Descriptions are helpful for those who are visually impaired, narrating the selected Movie/TV show with what’s happening on screen in between spoken dialogue. -
Page 16: Settings
Settings Log In • Log In to On Demand. To watch On Demand, you’ll need to a Freeview On Demand account. It’s free to sign up and you only need to do it once. So you can get started watching the latest free TV Shows and Movies, any time. -
Page 17: Advanced Settings
Advanced Settings Press the MENU button to open the Home Hub Menu, then go to: Settings → Advanced Settings. ADMIN • Change Password. To adjust settings, you are often required to enter the PIN (Password). Here you can change the Default PIN (000000). VIDEO •... -
Page 18: Troubleshooting
4. See Page 08 on Connecting the Bluetooth Remote. TIP: Before contacting Dish TV for any issues, go to Menu → Settings → Help, or try turning off the SmartVU+ for 30 seconds. If the issue persists, contact Dish TV. - Page 19 Troubleshooting Tips How to Reset the SmartVU+ Solution 1: Perform a Power Reset. 1. Unplug the SmartVU+ power supply from the wall socket and wait one minute. 2. Reconnect the power supply. Solution 2: Perform a Factory Data Reset. 1. Press the Google Home button to access the Android TV Home screen.
- Page 20 Troubleshooting Tips The SmartVU+ is powered on, but there’s no Video/Audio on TV. Solution 1: Ensure the HDMI/AV cable used is firmly connected to both the SmartVU+ and TV. Solution 2: Ensure you selected the correct Input/Source on the TV. Solution 3: Try replacing the HDMI/AV cable used.
-
Page 21: Placement Tips
Placement Tips With long extended periods of use, the SmartVU+ will operate at temperature. This does not affect the operation or overall performance of the SmartVU+. So to help ensure the SmartVU+ operates as smooth as possible and to avoid damaging the SmartVU+, there are several instructions outlined below. -
Page 22: Contact Us
We try our best to get the issues sorted either over the phone or via email. OFFICE HOURS are between 8:00am and 5:00pm NZST, Monday to Friday, excluding Public Holidays. Phone 0800 DISH TV (347 488) or 07 929 4123 07 929 4122 Email support@dishtv.co.nz Website www.dishtv.co.nz... -
Page 23: Warranty Information
• All warranty claims will require you to return the product to our address. • The obligations of Dish TV are limited to the repair of defective parts. Costs and risks of transport to the retailer as well as removal and installation of the product, and any other costs directly or indirectly related to its repair, are not covered by warranty. - Page 24 Version 1.3 JUNE 2020 www.dishtv.co.nz...