Table of Contents
Advertisement
Advertisement
Chapters
Table of Contents

Related Manuals for Dish TV satBox S8200


Summary of Contents for Dish TV satBox S8200
- Page 1 User Guide S8200 Works only with a Satellite Dish...
- Page 3 Welcome Thank you for choosing this Dish TV Freeview Satellite Digital Set Top Box. You will be able to receive all Freeview Satellite digital TV and radio channels as well as MyFreeviewPlus® bringing the most popular shows from On Demand and Live TV together all free from subscriptions.
-
Page 4: Table Of Contents
Watch Recorded Programmes..............Web Remote..................... Apps........................TVNZ On Demand................... Audio Descriptions.................... Subtitles......................Device Streaming................... Dish TV Smartphone App................Electronic Programme Guide (EPG)..............Recording........................ Recording via the Freeview EPG..............Pause and Rewind live TV (Time Shifting)............Instant Record....................View Recorded Shows.................. - Page 5 Frequently Asked Questions................52 Placing your Unit....................Technical Specifications..................Quick Troubleshooting................... Support Information....................Warranty Information....................the next generation...
-
Page 6: About Your Set Top Box
About Your Set Top Box Features • MyFreeviewPlus • Built-in WiFi • Built in 1 TB Hard Drive (approx. 500 hours recording) • Apps for online streaming entertainment. • Pause, Rewind & Record Live TV • Series Linking (record an entire season) •... -
Page 7: Product Overview
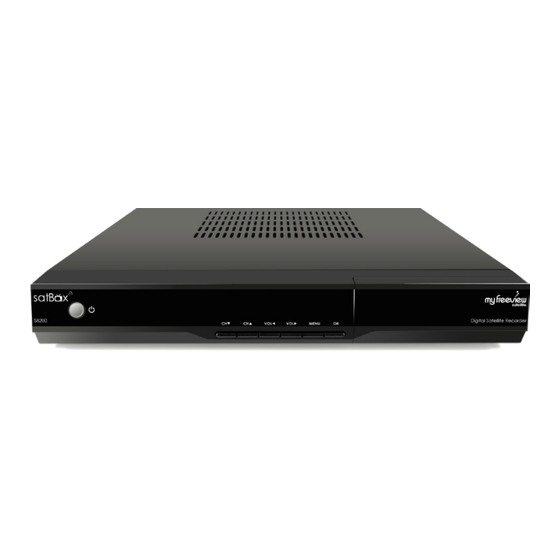
Product Overview Front View Signal/Power/Standby Indicator Standby Button Orange: Signal Lock Switches on/off the receiver Green: Power LED Display Red: Standby Displays channel number, menu. Menu buttons Access Menu, volume, channel. Back View LNB IN (Loop In) HDMI Output Coaxial Input for loop cable LNB IN (FROM DISH) Digital Audio output. -
Page 8: Remote Control
Remote Control Power Mute TV/ Radio Subtitle Favorite Audio Numeric Info Record Book List Colour Keys Menu Exit OK/Select Navigation Keys Library List Back (Return) Portal Volume Channel Navigation EPG / Guide Rewind Play/Pause Stop Forward Forward Skip Record Media (USB) Backward Skip Bookmark Settings... -
Page 9: Connecting Up
Connecting Up Connecting to the Satellite Dish Connect the cable from your satellite dish to the SAT IN socket in the back of your receiver. The supplied loop cable allows you to use the 2nd tuner to record more than one show at a time, Connecting to your TV HD Ready TV Connecting using a HDMI Cable... -
Page 10: Getting Started
Getting Started Step Install batteries in the remote control Open the battery cover of the remote control and put two AAA size batteries so the ‘+’ and ‘-’ marks on the batteries match the ‘+’ and ‘-’ marks inside the remote control. - Page 11 Installation Setup Choose your Internet connection type by selecting either Wireless (if you have a wireless router) or Wired (if you have a Ethernet cable connected) If you have no access to the Internet, simply press the green button to skip and begin scanning for Freeview channels.
-
Page 12: Main Features
Main Features Your receiver comes packed full of great features which you can use right away, this section will tell you the basic functions of the receiver so that you can get used to it. Changing the channel Use your remote to quickly change the channel, you can use either the numeric pad on the top half of the remote or you can use the + CH -... -
Page 13: Quick Selection
Quick Select This will allow you to select other channels or view its schedule while allowing you to view the current channel. Press OK on your remote. Use the ▼▲ keys to select a channel. Press OK to view that channel. Quick Select - Guide You can also view a 7 Day schedule of any channel without interrupting the... -
Page 14: Tv / Radio Mode
TV / Radio Mode You can access either TV or Radio channels by simply pressing the button. Radio Channels are audio only and to preserve the screen from image burning, a blank screen will appear while audio is being played. You can still access the Menu and Info options on your remote and this will wake the screen up. -
Page 15: Web Remote
*Apps may be added or removed at any time, all decisions about apps are made by the broadcaster themselves and not by Dish TV TVNZ On Demand In the apps portal you can access TVNZ... -
Page 16: Audio Descriptions
Audio Descriptions Audio Descriptions are helpful for those who are visually impaired, Audio Descriptions narrate the programme so that you can understand what is happening in a scene. Audio Descriptions are only available on TV One and TV2 and with selected programmes only with the icon in the Freeview EPG. -
Page 17: Device Streaming
Device Streaming Stream the current live channel from the S8200 to any HTSP media playback device on your local network. Handy if you want another feed in another room. Plus it works on any device that has the suitable HTSP streaming app such as VLC, Kodi, VLC for iPad etc... -
Page 18: Dish Tv Smartphone App
Dish TV App A great companion to the satBox is the official satbox/aerialbox app on your Android or iOS device. View the latest listings on each channel, control the unit with the app remote, stream the current channel to a media sharing app. -
Page 19: Electronic Programme Guide (Epg)
Freeview EPG The Freeview EPG allows you to view detailed programme information on your favorite channels for up to 8 Days. You can also view what’s on now/next and switch to another channel. Launching the Freeview EPG Press the EPG (Guide) Wait for the guide to load. - Page 20 Record the shows you love with MyFreeview The satBox S8200 comes with a 1TB built-in Hard Drive allowing you to record just over 500 hours of shows. You can record series and one off episodes from a press of a button. And don’t forget the OnDemand apps are there in case you forget to...
-
Page 21: Pause And Rewind Live Tv (Time Shifting)
Pause and Rewind live TV (Time shifting) With the aerialBox S8200 you can pause live TV and rewind back to a point that you missed, so the schedule suits you. Make sure that you have the correct Time shifting options set in the Main Menu you can find out more about this on Page 35. -
Page 22: Instant Record
Instant Record If you would like to make a one off recording on the current programme you can use instant record to record to the end of the show. Press the REC button at any time you would to record the rest of the programme on the current live channel. -
Page 23: View Recorded Shows
View your Recorded Shows Library Find all your collections of recorded shows and imported files in the media library. Simply press the LIB (Library) button on your remote. Series / Episode View Press the Blue button to sort the recordings to series or episode view. Series View allows you to group the series together instead of individual episodes, simply select a series to open... -
Page 24: Editing Recordings
Editing Recordings You can edit out certain parts of a program which is handy if you want to create seamless viewing. Once you have selected your program and accessed the Recording Edit from the options menu the program will play in its real-time. - Page 25 A better way to TV! With FreeviewPlus™ The smartest way to enjoy TV bringing the most popular shows from On Demand and Live TV together. • Switch easily between Live TV & On Demand • 8-days forward & 8-days catch up TV Guide •...
-
Page 26: Freeviewplus
Mini Guide The mini guide enables you to browse through listings for the next 8 days while watching the current channel uninterrupted. To open the mini guide press the red button at any time when watching any channel on Freeview. View Featured, Full Guide... - Page 27 Full Guide The full guide enables you browse through more channel listings for the next 8 days, to view the full guide, open up the Mini Guide by pressing the Red button, press the Red button again to highlight the left side options and select the two “Expand”...
- Page 28 Set a Reminder Press OK on a show within the FreeviewPlus™ guide that you would like to set a reminder. Highlight and select then confirm when you will be notified before the show starts, the max is 5 minutes. An icon in the guide will appear to let you know it’s set.
- Page 29 Catchup Guide With FreeviewPlus you can go back 8 days on the guide and catchup on missed content. Meaning if you forgot something last week, you will be able to catch up via the On Demand apps (Currently Available on TV One, TV2, TV3, FOUR, Maori TV and Te Reo).
- Page 30 Featured, TV, Movies FreeviewPlus also delivers a range of content which you can quickly access and discover throughout the FreeviewPlus channels. To launch simply open up the Mini or Full Guides, press the Red button to navigate to the Menu, then select the Hamburger Icon ( 3 bars) to open up the Features, TV, Movies and On- demand List.
-
Page 31: Main Menu
Main Menu To access the S8200 Main Menu, simply press the Menu button on your remote, the menu has been designed so you can still see what’s happening on screen. Use the ◀ ▶ keys to choose a Menu category then ▼▲ to select a sub menu item...................... -
Page 32: Settings
Settings OSD (On Screen Display Change the way the on screen menus appear which includes the theme and banner position. Info Banner Timeout Adjust how long you want the banner to appear on screen before it’s hidden, you can set it up to 15 secs or leave it Theme Selection Choose the color of the theme to either Green or Fuschia. -
Page 33: Video
Settings Video Adjust the video settings of the receiver to your preference. Resolution Change the resolution of the video output to your TV, adjust these if you experience any issues with the screen, you can set up to 1080p 60Hz. Aspect Ratio Aspect Ratios Change how the screen fits depending... -
Page 34: Admin
Settings Admin To access the Admin panel, enter in your 4 digit PIN code. Auto Shutdown Set a countdown timer to tell the S8200 when to shut down, specify a time in which you would like this to happen, or leave it off. -
Page 35: Application
Settings PVR Settings Application Start Offset Live Streaming Change the time before the scheduled Stream the current live channel on the recording starts to ensure the start of S8200 to any HTML streaming device the show is recorded. on your local network such as an iPad with VLC, Kodi, VLC PC and Mac. -
Page 36: Installation
Installation Satellite Scan Satellite Scan allows you to make some changes to the current satellite configuration such as adding, scanning, editing satellites. Viewing Transponders and adding or removing them as well as adjusting the LNB set up. Scanning the Satellite If you need to re-tune your satBox, use this option, this will restore the channels you have lost using the carriers already... - Page 37 Installation LNB Setup You can adjust a few settings on the LNB to ensure you have configured your satellite setup correctly. • LNB Type Specify the type of LNB you are using to receive the selected satellite, use the left and right keys to toggle through the LNB Types and Frequency.
-
Page 38: Blind Scan
Installation Blind Scan Blind Scan allows you to tune in all available frequencies on the selected satellite, this is the most easiest way of scanning for other channels you don't have the carrier details for. Select your satellite you would like to scan for. -
Page 39: Factory Reset
Installation Factory Reset In the unlikely event that the unit has A Factory Reset will wipe away all issues or you are having a hard time settings except recorded shows trying to use the S8200 unit, then a on the Hard Drive. Factory Reset should be able to correct any issues. -
Page 40: Network Setup
Installation Network Setup Connecting to the Internet allows you to use a range of features such as FreeviewPlus, DLNA Media Sharing, Live streaming, Apps and automatic software upgrades. You can connect using two methods, via an Ethernet cable (Wired Connection) or through the built-in WiFi for a wireless internet connection. -
Page 41: Imanual
Installation A successful connection will have a tick within your network name to indicate that you can now use the internet. If you wish to change IP, DNS settings press the Blue button. iManual An updated version of the manual is available on the S8200 unit, the IManual is easy to navigate and is updated often. -
Page 42: Software Upgrade
Software Upgrade Manual Update Check for the latest updates manually either over the Air (Freeview Broadcast), Internet or a USB drive. Update over the Network Toggle so that NETWORK is selected as the update method. Enter in your 4 digit PIN. Please wait for the update to be downloaded to the device then installed, this may take up to 5... -
Page 43: Schedule Update
Schedule Update Let the S8200 do all the upgrading for you. You can change how the unit checks and installs new updates. You can: • Enable Auto Software Updates. This will allow thew unit to check for updates at a specified time. Please do not turn off the •... -
Page 44: Media Manager
Media Manager Play media files from a USB device such as a Portable Hardrive. You will be able to play Video, Music and Photos. Go to Menu > Media Manager > USB and then plug in your USB device into one of the ports on the unit. -
Page 45: Media Sharing
Media Sharing (DLNA) You can search and play media files using devices on your local network such as computers and media servers. Just make sure that your sharing device has the correct share settings. • Retrieve Files from the aerialBox: Go to Menu >... -
Page 46: Media Info
The format will also allow files to be recorded onto the external device and can work across aerialBox S8200 and satBox S8200 units. You can wipe the built in 1TB hard-drive as well if the S8200 is going to a new owner or if you would like to bulk delete all shows and start new. -
Page 47: Library
Library Find all your collections of recorded shows and imported files in the media library. Simply press the LIB (Library) button on your remote. Series / Epsiode View Press the Blue button to sort the recordings to series or episode view. Series View allows you to group the series together instead of individual episodes, simply select a series to open... -
Page 48: Schedule
Schedule View all upcoming bookings that the S8200 unit will record. You can see what type of recording will be set such as Series or Single Links. To delete a booked show, press the RED button and confirm the deletion. To select multiple bookings, press the GREEN button to mark then press the RED Button to delete. -
Page 49: File Transfer
File Transfer Transfer files to a USB hard drive or import files into the Library. This is useful if you are wanting to wipe the S8200 to start from fresh or move files to another S8200 or T2200 unit. The USB hard drive will need to be a FAT32. -
Page 50: Channel Organiser
Channel Organiser Personalise your channels to your preference, you can move, delete, favorite, lock and skip channels. Please be aware that some options will only work if LCN is turned off from Settings, see page 34 on how to do this. •... - Page 51 • Favorites Set channels as specific favorite based on their genre, the Favourites can group channels together so you can have lists. Select a channel you would like to set a favorite to, then press 5. A pop up box will appear which will let you choose what genre the channel belongs to, simply press the OK button to confirm the favorite.
-
Page 52: Frequently Asked Questions
Q. I am recording something but a group of channels are unavailable to watch? A. A Freeview signal is transmitted on different frequencies. The Dish TV S8200 comes with a dual tuner which allows you to record two channels on different frequency and watch another channel or play a recorded show. -
Page 53: Placing Your Unit
Where should I place my unit? Over long periods of use, the aerialBox S8200 will be warm, to keep the unit running as smooth as possible and to avoid damaging the unit from heat we recommend you take in the following: •... -
Page 54: Technical Specifications
Technical Specifications Item Specification Tuner Frequency Range 174MHz to 858MHz Signal Input Level -90 ~ -20dBm IF Bandwidth 7, 8 MHz Interface HDMI Output RCA Composite (CVBS) video/audio output S/PDIF audio via RCA Coaxial RJ-45 Ethernet 10/100Mbps 2x USB 2.0 Connectors 1x front 1x rear IR extension socket 12v DC jack input 5.5mm x 2.1mm Wi-Fi 802.11N... -
Page 55: Quick Troubleshooting
Quick Troubleshooting Problem Possible Causes What to do Main Lead unplugged/ Check that the adapt- Power Indicator on switched off er is plugged in and front panel not lit. switched on. Your TV isn’t able to display the Check to see if your TV is set current output format to the current source. -
Page 56: Support Information
Geekzone Forums geekzone.co.nz Office Hours are 9:00am - 5pm NZST, Mon - Fri. * Geekzone and Freeview Forum free registration required, please be a descriptive as possible when posting and make sure you include Dish TV in the post title. -
Page 57: Warranty Information
Warranty Information Please keep your receipt as proof of purchase. This product is warranted for any defect in materials or workmanship for one year after the original date of purchase. This product is for normal domestic use only. This warranty does not cover damage from misuse or neglect, accidental damage, vermin infestation, excessive voltages such as lightening or power surges or any modification that affects the reliability of the product. - Page 59 0800 DISH TV support@dishtv.co.nz the next generation Version 4.5 April 13, 2016 10:18 AM...