Table of Contents
Advertisement
Available languages
Available languages
Quick Links
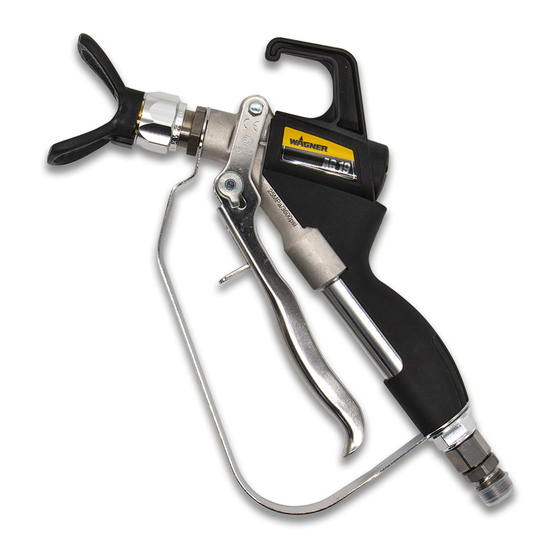
AG-19
NL
D
GB
F
I
HIGH-CAPACITY SPRAY GUN
E
DK
S
P
Owner's Manual
Betriebsanleitung • Deutsch ....................................... S. 2
Operating manual • English ......................................p. 16
Mode d'emploi • Français ..........................................p. 31
Gebruikshandleiding • Nederlands ..........................b. 47
Istruzioni per l'uso • Italiano .....................................p. 62
Manual de instrucciones • Español ...........................p. 76
Driftsvejledning • Dansk ........................................... s. 90
Bruksanvisning • Svenska ....................................... s. 104
Manual de instruções • Português .........................p. 118
wagner-group.com
Advertisement
Table of Contents

Related Manuals for WAGNER AG-19


Summary of Contents for WAGNER AG-19
- Page 1 AG-19 HIGH-CAPACITY SPRAY GUN Owner’s Manual Betriebsanleitung • Deutsch ........S. 2 Operating manual • English ........p. 16 Mode d’emploi • Français ..........p. 31 Gebruikshandleiding • Nederlands ......b. 47 Istruzioni per l‘uso • Italiano ........p. 62 Manual de instrucciones • Español ......p. 76 Driftsvejledning •...
- Page 2 Sicherheitshinweise Sicherheit ist oberstes Gebot! Es müssen alle lokalen und nationalen Vorschriften zur Entlüftung, zum Brandschutz und zum Arbeitsschutz eingehalten werden. GEFAHR: Verletzung durch Flüssigkeiten unter Druck Der durch dieses Gerät erzeugte Hochdruckflüssigkeitsstrahl kann Haut und Bindegewebe durchdringen und schwere Verletzungen verursachen, die sogar zur Amputation führen können.
- Page 3 Abzugbügel verwenden. • Das gesamte Zubehör muss mindestens für den maximalen Betriebsdruck des Airless-Spritzgeräts zugelassen sein. Dies betrifft Spritzdüsen, Verlängerungen und den Schlauch. GEFAHR: Explosionsgefahr aufgrund inkompatibler Materialien Inkompatible Materialien können schwere Personen- und Sachschäden verursachen. Keine Materialien verarbeiten, die Chlor oder Hypochlorid enthalten. •...
- Page 4 8. Bei Betätigung des Abzugs zieht die Airless Pistole zur Seite. Diese Kraftwirkung der Airless Pistole ist besonders stark, wenn die Düse entfernt wurde und bei der Hochdruckpumpe hoher Druck eingestellt wurde. Bei der Reinigung mit abgeschraubter Düse daher das Druckregelventil auf den niedrigsten Druck einstellen.
-
Page 5: Technische Daten
Gefahr Quelle/Ursache Auswirkung Vorbeugende Kann Maßnahmen auftreten während: Explosion Statische Schwere Nur in gut durch- Betrieb oder Feuer Elektrizität oder Verletzung lüfteten Bereichen Funken verwenden Erden Sie die Airless Pistole Gefährliche Gefährliche Schwere Nur in gut Betrieb Dämpfe Dämpfe aus den Verletzung durchlüfteten Spritzmaterialien... - Page 6 (Spritzpistole sprüht nicht) sprüht) Pistolenfilter In der AG-19 ist kein Pistolenfilter vormontiert. Abhängig vom zu verarbeitenden Material ist es empfehlenswert, einen der Düse entsprechenden Pistolenfilter zu verwenden. Achtung: Bei der Verarbeitung von Spritzspachtel und ähnlichen Materialien keinen Pistolenfilter verwenden, da der Filter ansonsten verstopft.
- Page 7 7. Die Griffdichtung (8) mit der flachen Seite zum Pistolenkopf einschieben. 8. Filtergehäuse (6) wieder in Pistole einsetzen und festschrauben. 9. Einen original Hochdruckschlauch von Wagner am Materialeingang der Airless Pistole anschließen. Den Schlauch mit zwei Schraubenschlüsseln (einem an der Airless Pistole und einem am Schlauch) festziehen.
-
Page 8: Betrieb
Betrieb 1. Den Pfeil auf der Düse in Spritzrichtung drehen. 2. Das Airless-Gerät in Betrieb nehmen (siehe Bedienungsanleitung des Airless-Gerätes). 3. Spritzdruck am Spritzgerät so einstellen, dass der Farbstrahl beim Austritt an der Düse komplett zerstäubt wird. Immer den geringst möglichen Spritzdruck verwenden, mit dem noch ein gutes Spritzbild erreicht wird. - Page 9 2. Die Düse aus dem Schlitz des Düsenschutzes entfernen. 3. Die neue Düse in den Schlitz am Düsenschutz einsetzen. Der Pfeil an der Düse muss nach vorn in Sprührichtung zeigen. Dichtung und Düsendichtung entfernen 1. Düse und Düsenschutz von der Airless Pistole abbauen. 2.
-
Page 10: Wartung
Wartung Vor der Durchführung von Wartungsarbeiten alle Sicherheitshinweise entsprechend dem Abschnitt „Sicherheitshinweise“ in diesem Handbuch beachten. Die Teilenummern finden Sie in der Ersatzteilliste dieses Handbuchs. Dichtung ersetzen bzw. instand halten Tritt an der Airless Pistole Material aus, obwohl der Abzug nicht gezogen ist, sind die Nadel oder der Nadelsitz verschlissen, beschädigt oder verschmutzt und müssen gereinigt oder ersetzt werden. - Page 11 1. Abdeckschraube (1) mit einem Schraubendreher abschrauben, Druckfeder (2) entfernen. 2. Mit Steckschlüssel 10 mm (3) Druckplatte eine Viertelumdrehung nach rechts drehen. 3. Druckfeder (2) einsetzen, Abdeckschraube (1) bis auf Anschlag schrauben. Bringt das keine Abhilfe, bitte an eine WAGNER Servicestelle wenden. AG 19...
- Page 12 Filter austauschen und ausbauen 1. Verschraubung (1) mit Schraubenschlüssel lösen und Filtergehäuse (2) und Filter (3) aus Pistole ziehen. 2. Den alten Filter aus dem Filtergehäuse entfernen. 3. Den neuen Filter mit dem schmalen Ende nach oben in das Filtergehäuse einsetzen. 4.
- Page 13 Fällen kann von den zuständigen Behörden (Berufsgenossenschaft und Gewerbeaufsichtsamt) der Gebrauch des gesamten Gerätes untersagt werden. Mit Original WAGNER Zubehör und Ersatzteilen haben Sie die Gewähr, dass alle Sicherheitsvorschriften erfüllt sind. 3+2 Jahre Garantie Professional Finishing Wagner Profi-Garantie (Stand 01.02.2009)
- Page 14 Überlastung oder mangelnde Wartung oder Pflege bzw. Reinigung zurückzuführen sind. - bei Fehlern am Gerät, die durch Verwendung von Zubehör-, Ergänzungs- oder Ersatzteilen verursacht wurden, die keine Wagner- Originalteile sind. - bei Produkten, an denen Veränderungen oder Ergänzungen vorgenommen wurden.
-
Page 15: Eu-Konformitätserklärung
Für diese Garantie gilt deutsches Recht. Die Vertragssprache ist deutsch. Im Fall, dass die Bedeutung des deutschen und eines ausländischen Textes dieser Garantie voneinander abweichen, ist die Bedeutung des deutschen Textes vorrangig. J. Wagner GmbH Division Professional Finishing Otto Lilienthal Strasse 18 88677 Markdorf Bundesrepublik Deutschland EU Konformitätserklärung... -
Page 16: Safety Precautions
Safety Precautions Be safety-conscious! All local and national regulations governing ventilation, fire prevention, and operation must be observed. HAZARD: Injection injury A high pressure stream produced by this equipment can pierce the skin and underlying tissues, leading to serious injury and possible amputation. See a physician immediately. DO NOT TREAT AN INJECTION INJURY AS A SIMPLE CUT! Injection can lead to amputation. - Page 17 • Do not use halogenated hydrocarbon solvents such as bleach, mildewcide, methylene chloride and 1,1,1 - trichloroethane. They are not compatible with aluminum. • Contact your coating material supplier about the compatibility of material with aluminum. HAZARD: General This product can cause severe injury or property damage. 1.
-
Page 18: Residual Risks
EXPLOSION PROTECTION IDENTIFICATION X marking: The spray gun corresponds with Ex II 2G X and is, in accordance with Directive 2014/34 EU, suitable for use in explosion-hazardous areas—as of type Zone 1. Under certain circumstances, the unit itself may cause the Zone 1 condition to be in effect. -
Page 19: Technical Data
Technical Data Max. operating pressure 25 MPa (250 bar) 53 MPa (530 bar) Material inlet thread size 3/8” NPS 1/4” NPS Diffuser thread size 7/8” NPS (G thread) 11/16” NPS (F thread) Wetted parts material High-grade steel, aluminum, PTFE, hard metal Operating temperature range 5ºC to 40ºC Maximum material... - Page 20 Gun filter The AG-19 does not include a pre-mounted gun filter. Depending on the type of material being processed, we recommend using the appropriate gun filter. Attention: When processing spray filler and similar materials, do not use a gun filter as the filter can otherwise become blocked.
- Page 21 8. Insert the filter compartment (6) back into the gun and screw it securely into place. 9. Connect a Wagner original high-pressure hose to the material inlet on the airless gun. Using two wrenches (one on the gun and one on the hose), tighten securely.
-
Page 22: Operation
Operation Make sure the arrow on the tip handle is pointing in the forward direction for spraying. 2. Start the sprayer. Refer to the instructions in the sprayer’s Owner’s Manual. 3. Adjust the fluid pressure on the sprayer until the spray is completely atomized. - Page 23 3. Insert the new tip into the slot on the tip guard. The arrow on the tip handle should be pointing in the forward direction for spraying. Removing the Seal and Tip seal 1. Remove the tip and tip guard from the spray gun. 2.
-
Page 24: Maintenance
Maintenance Follow all safety precautions as described in the Safety Precautions section of this manual before proceeding. Refer to the Spare Parts List section in this manual for part identification. Replacing/Servicing the Seal Assembly If any material leaks from the spray gun when the trigger is not activated, then either the needle or the needle seat could be worn, damaged or dirty and need to be cleaned or replaced. - Page 25 2. Use box spanner 10 mm (4) to turn the pressure plate a quarter turn to the right. 3. Replace the spring (2) and tighten the cap (1) as far as the stop. If the problem persists, please consult your WAGNER service center. AG 19...
- Page 26 Replacing/Removing the Filter 1. Loosen the fitting (1) with a wrench and pull the filter compartment (2) and filter (3) out of the gun. 2. Take the old filter out of the filter compartment. 3. Insert the new filter, with the narrow end facing upwards, into the filter compartment.
- Page 27 (employer´s liability insurance association and factory inspectorate division). Only the usage of original WAGNER accessories and spare parts guarantees that all safety regulations are observed. 3+2 years guarantee for professional finishing Wagner professional guarantee (Status 01.02.2009)
- Page 28 - for errors in the device that have been caused by using accessory parts, additional components or spare parts that are not original Wagner parts. - for products to which modifications or additions have been carried out.
-
Page 29: Eu Declaration Of Conformity
In the event that the meaning of the German and a foreign text of this guarantee deviate from one another, the meaning of the German text has priority. J. Wagner GmbH Division Professional Finishing Otto Lilienthal Strasse 18 88677 Markdorf... - Page 30 Ersatzteiliste Pos. Art. Nr. Bezeichnung Pos. Art. Nr. Bezeichnung 0335301 Abdeckschraube (250 bar) Düsenhalter 2339659 Abdeckschraube (530 bar) 0289391 250 bar, F-Gewinde 0289390 250 bar, G-Gewinde 2343936 Typenschild (rechts) 0289396 530 bar, F-Gewinde 2332588 Griffschale 0289395 530 bar, G-Gewinde 2343935 Typenschild (links) 2332605 Schutzbügel 2344878 Druckfeder (250 bar)
- Page 31 Spare parts list Liste de pièces de rechange Item Part # Description N° Référence Désignation 0335301 Cap (250 bar) 0335301 Vis d’obturation (250 bar) 2339659 Cap (530 bar) 2339659 Vis d’obturation (530 bar) 2343936 Label (right) 2343936 Plaque ( à droite) 2332588 Handle recess 2332588 Poignée...
- Page 32 Helgeshøj Allé 28 Netherlands 2630 Taastrup, Denmark Tel. +31/ 30/241 41 55 Tel. +45 43 27 18 18 Telefax +31/ 30/241 17 87 Telefax +45 43 43 05 28 info@wagner-wsb.nl wagner@wagner-group.dk www.wagner-group.com Part. No. 2347392 D 12/2017_RS © Copyright by J.Wagner GmbH...