Table of Contents
Advertisement
Swapping GSA80 Roll & GSA80 Yaw Servo on Citation CJ3+
Caution: Before starting the software or configuration loading process, certain
items may be required to be recorded first, to prevent loss of
information or settings. See Section 1 for details.
Caution: Make certain that all SD cards are available before starting. These are
usually located in a blue pouch onboard the aircraft (usually in AFM).
Caution: Follow all steps in a given section for specific loadings. Failure to do so
will result in probable rework.
Caution: Ensure that power is available through a GPU so that power is not
interrupted during the loading process.
Note:
This document is to supplement, not replace, the Cessna Citation CJ3+
MM, and Garmin G3000 LMM.
Note:
Reference latest revision of the Garmin G3000 LMM 190-01785-00.
Section 1
Section 2
Section 3
Section 4
Section 5
Version 1.0
REFERENCE ONLY
Garmin G3000 Software Version 10
Table of Contents
REFERENCE ONLY
1
Advertisement
Table of Contents

Related Manuals for Garmin G3000


Summary of Contents for Garmin G3000
- Page 1 Note: This document is to supplement, not replace, the Cessna Citation CJ3+ MM, and Garmin G3000 LMM. Note: Reference latest revision of the Garmin G3000 LMM 190-01785-00. Table of Contents Introduction G3000 System Familiarization Section 1...
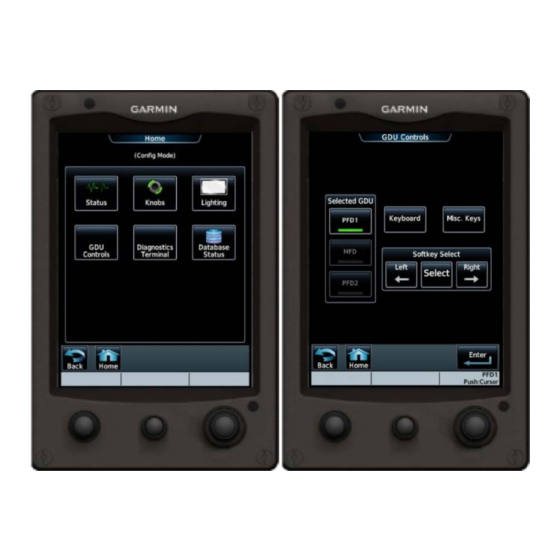
- Page 2 REFERENCE ONLY Introduction G3000 System Familiarization When in configuration mode, select GDU controls on left side of GTC 1. Ensure that PFD 1 is selected on the screen. The dual concentric knobs on the lower right bezel will be utilized, and throughout this document will be referred to as the FMS small and large knob.
- Page 3 REFERENCE ONLY Section 1 Determining Options Installed Determine Options Installed Note: This is with the G3000 powered up in normal mode. • Synthetic Vision o On the PFD, select PFD Settings, then select Attitude Overlays. If Synthetic Terrain button is displayed, mark YES.
- Page 4 REFERENCE ONLY • CPDLC o Mark YES if the CPDLC button is available on the home screen of either GTC. • Single GSR56 (Iridium Phone) o On either GTC 570, select the SERVICES / TELEPHONE button, then select Telephone. Mark YES if a single Iridium transceiver is displayed on the left side. •...
- Page 5 REFERENCE ONLY • GDL69 (XM Receiver) o From the Home screen of either GTC 570, touch the Weather button. Then touch Weather Selection. If Sirius XM Settings is displayed, mark YES. • GSR56 Weather o From the Home screen of either GTC 570, touch the Weather button. Then touch Weather Selection.
- Page 6 REFERENCE ONLY • Ground Clutter Suppression (Stand Alone Option Without Doppler & Turbulence) o From the Home screen of either GTC 570, select the Weather button. Select Weather Selection button. Select the WEATHER RADAR SETTINGS button & the GND Clutter Suppression button will be visible, without the Turbulence Detection button.
- Page 7 REFERENCE ONLY • Becker ADF o If ADF is seen on the AUDIO & RADIO screen of either GTC 570, mark YES. • GDR66 (VHF Datalink (Datalink/COMM 3)) o If GDR or Datalink are seen on the AUDIO & RADIO screen of either GTC 570, mark YES.
- Page 8 REFERENCE ONLY • TAWS Class A o From the Home screen of either GTC 570, select the TAWS button. Then select TAWS Selection button. If there are 6 buttons displayed on the page, then TAWS A is loaded, and mark YES. Otherwise TAWS B is loaded as default. Note: First image is TAWS B, and second image is TAWS A.
- Page 9 REFERENCE ONLY 4) Press and hold the right knob on the left GTC and push the L Touch Control circuit breaker in. Let go when you see initializing. 5) Press and hold the right knob on the right GTC and push the R Touch Control circuit breaker in.
- Page 10 Determine Options Installed (Options That Can Only Be Seen In Configuration Mode) Note: This is with the G3000 still powered up in configuration mode. • ACARS Service Provider (Only if ACARS was determined to be an option per page 3) o Rotate small FMS knob until on AIRCRAFT CONFIGURATION page.
- Page 11 REFERENCE ONLY 100-400 FT VCO Not On 100-400 FT VCO On Only 400 FT shown, but would indicate that 100-400 are turned on. REFERENCE ONLY Version 1.0...
- Page 12 REFERENCE ONLY • SurfaceWatch Voice Callouts (Only if SurfaceWatch option is installed) o The system should still be in configuration mode. o Push the FMS knob to deactivate the cursor. o Rotate the small FMS knob to the right until on SurfaceWatch Configuration. o If the following are shown, then the SurfaceWatch Voice Callouts are turned on: ...
- Page 13 REFERENCE ONLY Section 2 Software and Configuration Loading This section will provide the steps necessary to target load the software and configuration into GSA 80 Roll & GSA 80 Yaw Servos after swapping. • GSA 80 (Roll & Yaw Servos) 1) Activate the cursor by pushing down on the FMS knob.
- Page 14 REFERENCE ONLY Section 3 Final Verification / Return to Service • Review the options that were determined to be installed per section 1. • Compare that to the tables in Section 4. o Write the Expected FLEET ID in the table below. •...
- Page 15 REFERENCE ONLY Section 4 FLEET ID / CRC Numbers This section will provide details on determining the correct FLEET ID or CRC number for a particular CJ3+ aircraft based on the installed options. Through the rest of this section the number will be referred to as a CRC number for simplification.
- Page 16 REFERENCE ONLY Option FLEET ID Option FLEET ID Option FLEET ID C6A09372 BCDEF 7C9CB227 41B1C39D ACDKN 5AF828AA BCDEFG BC3760C4 CFRST 7FD19674 ACDKNR 9C9A9F9B BCDEFGH A55A1F09 DCEAC553 ACDN 3FD9E5E7 BCDEFGHJ DEE5E40A 48F7F5FD ACDNR F9BB52D6 BCDEFGHJK BBC42947 D5ACF333 ACEF 5ABB01CD BCDEFGHJKM C12CEDC0 EFNPR 07B9B83A ACEFK...
- Page 17 REFERENCE ONLY Section 5 Troubleshooting This section will provide corrective actions for issues seen after the software is loaded. • Fail Message During Software & Configuration Loading o If a fail message occurs: Acknowledge the pop-up window by pressing the Enter key. ...