Table of Contents
Advertisement
Quick Links
Advertisement
Table of Contents

Related Manuals for KODA RAPID

Summary of Contents for KODA RAPID
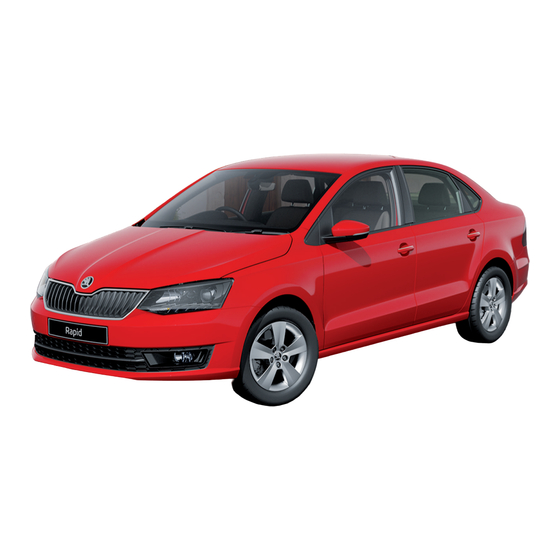
- Page 1 OWNER'S MANUAL ŠKODA RAPID...
- Page 2 Signature of the customer Does the vehicle have an extended warranty? Limitations of the ŠKODA extended warranty Years: miles: Affix the vehicle data sticker here Due to the requirements of the generally binding country-specific regulations, the date of first registration can be given instead of the date of the vehicle ...
- Page 3 This vehicle with the official registration number number (To be filled in by the vendor) belongs to: belongs to: Title, Name / Company: Title, Name / Company: Address: Address: Telephone: Telephone: ŠKODA Partner ŠKODA Partner Service consultant: Service consultant: Telephone: Telephone:...
-
Page 4: Table Of Contents
Luggage compartment door Reversing camera Table of Contents Window operation Cruise control system Materials defect liability and ŠKODA Lights and visibility General Maintenance Warranty for new cars Lights Care and maintenance On-board literature Interior lighting Service work, adjustments and technical... - Page 5 Technical data Technical data Basic vehicle data Vehicle-specific details per engine type Index Table of Contents...
-
Page 6: Materials Defect Liability And Škoda Warranty For New Cars
Some parts with which ŠKODA vehicles are equipped, such as tyres, batteries, cars etc., are not produced by ŠKODA Auto India Private Limited, but are provided by other suppliers. These parts are excluded from the ŠKODA warranty, but Warranty period the vehicle purchaser can make a warranty claim with the respective manufac- By means of the ŠKODA partner, ŠKODA Auto India Private Limited provides a... - Page 7 ▶ of non-original parts or accessories that have an effect on the specifications This warranty does not apply to repairs of ŠKODA vehicles in which the odom- of the vehicle performance compared to the specifications of the vehicle eter has been tampered with or where the actual mileage cannot be read di- manufacturer (unwarranted changes are excluded from the warranty).
- Page 8 The customer must present an invoice to the seller in order to claim the spare ▶ 6 years against the corrosion of the bodywork parts warranty for these parts. This type of damage will be repaired by any authorized ŠKODA dealer free of charge. The warranty does not relate to: ▶...
-
Page 9: On-Board Literature
ŠKODA AUTO pursues a policy of ongoing product and model development with all vehicles. Changes in terms of supply scope are possible at any time with regard to design, equipment and technology. -
Page 10: Notes
“ŠKODA Service Partner” - A workshop that has been contractually author- ised by ŠKODA AUTO or its sales partner to service ŠKODA vehicles and to sell ŠKODA Genuine Parts. “ŠKODA Partner” - A company that has been authorised by ŠKODA AUTO or its sales partner to sell new ŠKODA vehicles and, when applicable, to... -
Page 11: Safety Passive Safety
Driving safety Safety Passive Safety In the interests of traffic safety, the following information must be observed. ▶ Do not become distracted from concentrating on the traffic situation, (e.g. by your passengers or mobile phone calls, etc.). General information ▶ Never drive when your driving ability is impaired, (e.g. - Page 12 Adjust the headrest so that the top edge of the headrest is at the same WARNING level as the upper part of your head (not for seats with integrated headr- The front seats and head restraints must be adjusted to match the body ■...
- Page 13 WARNING Correct seating position for the passengers in the rear seats Never adjust the steering wheel when the vehicle is moving, only do so ■ Read and observe on page 10 first. when the vehicle is stationary! The safety lever must always be locked so that the steering wheel cannot ■...
-
Page 14: Seat Belts
WARNING (Continued) Seat belts Many layers of clothing and loose clothing (e. g. a winter coat over a jack- ■ et) do not allow you to be correctly seated and impairs proper operation of Using seat belts the seat belts. ... - Page 15 WARNING Always ensure that the webbing of the seat belts is properly routed. Seat ■ belts which are not correctly adjusted can themselves cause injuries even in minor accidents. A seat belt which is hanging too loose can result in injuries as your body is ■...
-
Page 16: Inertia Reels And Belt Tensioners
› Guide the belt back by hand so that the seat belt does not twist and the When pulling slowly on the seat belt, the belt can move freely. When pulling webbing rolls up fully. sharply on the seat belt, the movement is locked by the inertia reel. The belts also lock when full braking, when the car accelerates, when driving downhill WARNING and when cornering. -
Page 17: Airbag System
Front airbags - the forward thrust of the driver and of the front passenger is Airbag system cushioned when they make contact with the fully inflated airbag, and the risk of injury to head and chest is thus reduced. Description of the airbag system The front airbags can be identified by the lettering ... - Page 18 When is the airbag not deployed? Fig. 10 In the event of minor frontal and side collisions, rear-end collisions, the airbag Gas-filled driver side airbag is not deployed, or if the vehicle overturns or rolls over. Safety instructions Fig. 11 Safe distance from the steering wheel and dashboard The airbag system is only functional when the ignition is switched on.
-
Page 19: Airbag Deactivation
Airbag deactivation side. Deactivating airbags WARNING We recommend that you ask a ŠKODA service partner to deactivate any other Information about the side airbags airbags. There must not be any objects in the deployment area of the side airbags, ■... -
Page 20: Transporting Children Safely
We recommend that you use child seats from ŠKODA Original Accessories. Child seats complying with the ECE-R 44 Economic Commission for Europe These child seats were developed and also tested for use in ŠKODA vehicles. standard must be used. They meet the ECE-R 44 standard. - Page 21 The following instructions must be followed when using a child seat on the Use of child safety seats which are secured with a safety belt front passenger seat. Never use a rear-facing child seat on the front passenger seat if the passenger ▶...
- Page 22 Fig. 13 Cockpit Usage...
-
Page 23: Usage
Bonnet release lever Usage Button to unlock the boot lid Central locking button Cockpit Overview Electric windows Door opening lever Electric exterior mirror adjustment Light switch Air outlet vents Operating lever (depending on equipment): ▶ Windscreen wipers and washers ▶ Information system Multifunction steering wheel with horn / with driver's front air- bag (depending on equipment fitted) -
Page 24: Instruments And Indicator Lights
Notice Instruments and Indicator Lights If appears in the display, then the system indicates that the ignition is switched on. Instrument cluster Introduction Rev counter The tachometer » fig. 14 on page 22 shows the actual engine speed per mi- nute. -
Page 25: Warning Lights
WARNING Cruise control » page 26 For the vehicle systems to function correctly, and thus for safe driving, Brake pedal (automatic gearbox) » page 26 there must be sufficient fuel in the tank. Never drain the fuel tank com- High beam »... - Page 26 Park the vehicle, stop driving! Seek help from a specialist garage. ▶ Engine oil WARNING Read and observe on page 23 first. A fault to the braking system can increase the vehicle’s braking distance - Low oil pressure There is a risk of an accident! illuminates/flashes.
- Page 27 If the coolant level is within the specified range and the warning light lights The vehicle will only be braked by the normal brake system without the ABS. up again, there may be a malfunction of the cooling fan. You can drive on, exercising appropriate caution.
- Page 28 Traction control (TCS) disabled Airbag system Read and observe on page 23 first. Read and observe on page 23 first. illuminates - the TCS system is deactivated » page 61, Stability Control lights up – there is a fault in the airbag system. ...
-
Page 29: Information System
Display of a low temperature Information system Read and observe on page 23 first. Driver information system illuminates - the outside temperature is below +4 °C. Display in the instrument cluster WARNING Depending on the vehicle's equipment, the information system provides the Even at temperatures around +4 °C, black ice may still be on the road sur- following information via the instrument cluster display. - Page 30 Reset the counter for distance driven (Trip) WARNING › Select the counter for distance driven (Trip). The driver is always responsible for selecting the correct gear in different › Press and hold the button. driving situations (e.g. when overtaking). Setting the clock Notice Produced when the clutch pedal is not recommended gear indicator.
-
Page 31: Driving Data (Multifunction Display)
Average fuel consumption - is calculated continuously since the last clearing Driving data (Multifunction display) of the memory. After erasing the memory, no data will appear for the first 300 m driven. Introduction Range - Drive distance in km which can be covered with the existing tank ca- The driving data is displayed in the multifunction display when is ignition is pacity and with the same driving style. - Page 32 Disabling set speed limit Reset memory » page › Select and confirm the menu item (warning when speed limit is exceeded). The following driving data is stored in memory banks. › By confirming the speed stored in the memory, the speed limit is reset. ▶...
-
Page 33: Unlocking And Opening
Unlocking/locking with the key in the lock cylinder Unlocking and opening Unlocking and locking Fig. 20 Right side of the vehicle: Turn- Introduction ing the key for unlocking and locking the vehicle The vehicle is equipped with a central locking system which makes it possible to unlock / lock all the doors, the fuel filler flap and boot lid simultaneously. - Page 34 Opening the boot lid WARNING By pressing down on the button the lid is unlocked and unlatched (partly Doors locked from the inside make it difficult for rescuers to get into the opened). vehicle in an emergency – risk to life! If the lid is unlocked using the ...
-
Page 35: Anti-Theft Alarm System
Low voltage of the key battery Child safety lock If the voltage of the key battery is too low, a message appears in the display of the instrument cluster referring to the need to replace the battery. Replace the battery »... -
Page 36: Luggage Compartment Door
Interior monitor and towing protection Luggage compartment door Fig. 25 Button for interior monitor and towing protection Read and observe on page 33 first. Fig. 26 Opening/closing luggage compartment lid The interior monitor detects movements inside the locked vehicle and then ›... -
Page 37: Window Operation
Power window buttons » fig. 27 Window operation Front door, left Introduction Front door, right Rear door, left WARNING Rear door, right Always close the window carefully and in a controlled manner. Otherwise Deactivate/activate the buttons in the rear doors (the deactivation may be these could cause severe crushing injuries. -
Page 38: Lights And Visibility
If you attempt to close the window again within 10 seconds of the window be- Lights and visibility ing moved down for the second time, even though the obstacle was not yet been removed, the closing process is only stopped. During this time, it is not Lights possible to automatically close the window. - Page 39 Deactivate bulbs for daytime running lights function (vehicles with halogen WARNING headlights) Always adjust the headlight beam to meet the following conditions - other- › Switch off the ignition and remove the fuse for the daytime running lights wise there is a risk of an accident. »...
- Page 40 If during comfort signalling the operating lever is pressed in the opposite di- CAUTION rection, the indicating will stop. Poorer visibility is evaluated by a sensor mounted below the windscreen in the holder of the rear-view mirror. Do not cover the sensor - the system function WARNING may be disrupted.
-
Page 41: Interior Lighting
› Switch off the ignition and lock the vehicle. Interior lighting After pulling out the ignition key and opening the driver's door, an audible Introduction warning sounds. After a few seconds or after closing the driver's door, the au- dible warning is turned off. -
Page 42: Visibility
Read and observe on page 40 first. Rear interior lights The heating is used to quickly defrost or ventilate the rear window. Fig. 34 The heating only works when the engine is running. Interior lights at the rear Button for heating »... -
Page 43: Windscreen Wipers And Washers
Read and observe on page 41 first. Windscreen wipers and washers The lever can be moved to the following positions » fig. 37 Introduction Wipers and washers off Depending on equipment fitted: The windshield wipers and the windshield washer system only operate if the Intermittent wiping ▶... - Page 44 Interior mirror dimming Exterior mirrors Fig. 39 Exterior mirror operation Read and observe on page 41 first. Fig. 38 Interior rear-view mirror: with manual dimming/auto-darkening The knob can be moved (depending on vehicle equipment) to the following Read and observe on page 41 first.
-
Page 45: Seats And Head Restraints
Setting the armrest height Seats and head restraints Front seats Fig. 41 Lifting the armrest Introduction WARNING Only adjust the driver's seat when the vehicle is stationary – otherwise ■ there is a risk of accident! Caution when adjusting the seat! You may suffer injuries or bruises as a ■... -
Page 46: Headrests
› To insert the headrest, push the headrest into the seat backrest in the direc- Headrests tion of arrow until the locking button clicks into place. Setting the height Fig. 43 Setting the height of the front headrests Only the front headrests are height-adjustable. ›... -
Page 47: Transporting And Practical Equipment
WARNING Transporting and practical equipment Do not exceed the permissible axle loads and permissible gross weight of ■ the vehicle – There is a risk of an accident! Transporting loads and practical equipment An unsecured or improperly attached load could slip through the vehicle ■... - Page 48 Storage compartment on the passenger side Storage compartment in the front arm rest Fig. 47 Opening the storage compart- ment Read and observe on page 45 first. Fig. 46 Opening storage compartment / closing storage compartment and opening air supply ›...
- Page 49 Storage compartment in the centre console Fig. 51 Rear cup holder Read and observe on page 45 first. Opening/closing the front cup holders Fig. 49 Storage compartment: front/in the centre › Open the holder in the direction of the arrow »...
- Page 50 CAUTION 12-volt socket When using the 12 volt power outlets the following notes are to be observed. The sockets can only be used for the connection of approved electrical ac- ■ Fig. 52 cessories with a total power consumption of up to 120 watts, otherwise the Cover of the 12-volt power out- electrical system of the vehicle may be damaged.
-
Page 51: Heating And Ventilation
Storage pockets on the rear sides of the front seats Heating and ventilation Manual air conditioning system, Climatronic Fig. 54 Map pockets Introduction The heater heats and ventilates the vehicle interior. The air conditioning sys- tem also cools and dehumidifies the vehicle interior. The heating effect is dependent upon the coolant temperature, thus full heat output only occurs when the engine has reached its operating temperature. - Page 52 Switch recirculated air mode on/off » page 51 Notice Switch the cooling system on/off The air inlet in front of the windscreen must be free of e.g. ice, snow or ■ leaves to ensure that the heating and cooling system operates properly. Information on the cooling system After switching on the cooling Condensation from the evaporator of the air ■...
- Page 53 Setting the temperature (the set temperature is displayed) Climatronic - automatic operation Reduce the temperature/ Increase the temperature ▶ Read and observe on page 49 first. Interior temperature sensor Switching automatic mode on The automatic mode is used in order to maintain a constant temperature and Switching the airflow to the windscreen on and off ...
- Page 54 Depending on the setting for air distribution, the air will flow from the follow- Air outlet vents ing air vents. Set the direction of the air Air vents » fig. 57 » fig. 58 outlet 1, 2, 4 1, 2, 4, 5, 7 ...
-
Page 55: Communication And Multimedia
Radio menu Communication and Multimedia But- Phone operation via the multifunction steering wheel ton / dial Action Function » fig. 6 Fig. 59 Buttons/dial on the multifunc- tion steering wheel Press Switch sound off/on Hold Switch device on/off Turn Volume setting Press Skip to next stored channel Hold... -
Page 56: Driving
Electronic immobiliser and steering lock Driving Read and observe on page 54 first. Starting-off and Driving The electronic immobilizer (hereafter referred to as immobilizer) makes theft Starting and stopping the engine or unauthorised use of your vehicle more difficult. ... -
Page 57: Brakes And Parking
Do not switch the engine off immediately at the end of your journey if the en- Ignition on / off gine has been working at high revs over a prolonged period, but leave it to run at an idling speed for about 1 minute. This prevents any possible accumulation Fig. - Page 58 If the brake fluid level is too low, it can cause faults in the braking system; Read and observe on page 56 first. the warning light will light up in the instrument cluster » page Braking The handbrake secures the vehicle against unwanted movement when stop- system.
-
Page 59: Manual Gear Changing And Pedals
Manual gear changing and pedals The operation of the pedals must not be hindered under any circumstances! Only a floor mat (ex-factory or from the ŠKODA Original Accessories range) Manual gear changing which can be secured to the attachment points should be used in the driver's footwell. - Page 60 Neutral (idle position) - power transmission to the drive wheels is inter- WARNING (Continued) rupted. If the vehicle stalls, with engine running, in the D, S, R or Tiptronic mode, ■ Forward mode / sport programme - the gear change takes place in the the vehicle must be prevented from rolling away by means of the brake position S at higher engine speeds than in mode D pedal or the parking brake.
-
Page 61: Running In And Economical Driving
› Push the selector lever to the left out of position D. The current gear is main- Rapid acceleration ( e.g. on slippery roads) can lead to a loss of control over tained. the vehicle – There is a risk of an accident! Changing gear ›... -
Page 62: Avoiding Damage To Your Vehicle
Tips on economical driving Driving through water Fuel consumption depends on the driving style, road and weather conditions, Fig. 67 and similar such factors. Maximum permissible water lev- For an economical driving style, the following instructions must be observed. el when driving through water ▶... -
Page 63: Assist Systems
If there is a TCS intervention, the warning light flashes in the instrument Assist systems cluster. General information Anti-lock braking system (ABS) WARNING Read and observe on page 61 first. The assistance systems only serve to support the driver and do not re- ■... -
Page 64: Parking Assistance (Parkpilot)
During a TCS intervention, the indicator light flashes in the instrument clus- Hill Start Assist ter. Read and observe on page 61 first. › To deactivate/activate the system, press the button» fig. When driving on slopes, Hill Start Assist (hereinafter referred to simply as the The warning light lights up in the instrument cluster when the TCR is deacti- ... -
Page 65: Reversing Camera
CAUTION Activation/deactivation Keep the system sensors » fig. 69 on page 63 clean, snow- and ice-free and ■ Read and observe on page 62 first. do not cover with any objects of any kind, otherwise the system functioning may be impaired. The system is activated by engaging reverse gear. - Page 66 Operation Guidelines and function surfaces Fig. 71 Infotainment screen: Guidelines and function surfaces Read and observe on page 63 first. Fig. 70 Installation location of the camera / scanned area behind the ve- hicle Orientation lines are shown along with the monitored area behind the vehicle on the screen.
-
Page 67: Cruise Control System
Cruise control system Operation description Introduction Fig. 72 Cruise control system controls The Cruise Control System (CCS) maintains a set speed without having to ac- tuate the accelerator pedal. The state where the CCS maintains the speed is referred to hereinafter as the control. WARNING Please take note of the general points relating to the use of assistance sys- tems... - Page 68 Notice During control, speed can be increased by pressing the accelerator pedal. Re- leasing the accelerator pedal will cause the speed to drop again to the set speed. Driving...
-
Page 69: General Maintenance
- there is a risk of accident and, potentially, increased wear on ŠKODA AUTO is able to warrant the safety, suitability, and long life of these parts! products. -
Page 70: Service Intervals
ŠKODA Service Partners are liable for any defects of ŠKODA Genuine Acces- WARNING sories for a period of 2 years after installation or delivery in accordance with No changes may be made to airbag system components, the front bump- ■... - Page 71 The service interval specified by the manufacturer can be found on the vehicle data carrier » fig. 73 or ask a ŠKODA partner. The vehicle data sticker is affixed in the Owner's Manual and under the floor covering in the luggage compart- Depending on which comes first.
-
Page 72: Cleaning And Care
This particularly applies to instruc- tions regarding the pressure and spraying distance from the vehicle surface. Notice We recommend that the vehicle is cleaned and maintained at a ŠKODA service WARNING partner. When washing your vehicle in the winter: Water and ice in the braking ■... - Page 73 CAUTION Vehicle compo- Circumstances Remedy nents Washing the vehicle with high-pressure cleaners Films should not be washed with any high-pressure cleaners -There is a risk ■ Door lock cylin- De-icing fluid specifically for that pur- Snow/ice of damage. ders pose Do not aim the water jet directly at the lock cylinders or the door or opening ■...
- Page 74 Care (natural leather protecting fluid / use a care ■ Fabric ted from this is equipment from the ŠKODA Original accessories. It ensures leather) cream with light blocker and impregna- tion after each cleaning that the seals and window guides’ protective lacquer layer is not attacked.
-
Page 75: Inspecting And Replenishing
Windows ■ ■ the intended weather conditions, please contact a ŠKODA partner. They will Do not attach any stickers to the filaments or glass antenna – risk of dam- ■ tell you whether the fuel specified by the manufacturer is offered in that coun- age. - Page 76 Petrol Refuelling Unleaded petrol Read and observe on page 73 first. The correct fuel for your vehicle is specified on the inside of the fuel filler flap» fig. 74 on page 74. The vehicle can only operate with unleaded petrol that meets standard EN 228, and contains maximum 10% bioethanol (E10).
-
Page 77: Engine Compartment
For vehicles with manual transmission the lever into the neutral position. ■ On vehicles with automatic transmission place the selector lever in the P Fluids with the proper specifications can be purchased from the ŠKODA ■ position. Original Accessories or from the ŠKODA Genuine Parts ranges. - Page 78 Close the bonnet Opening and closing the bonnet › Lift the bonnet. › Unhook the bonnet support and press into the holder designed to hold it. › Drop down the bonnet lid from a height of about 20 cm applying light pres- sure until it clicks safely into place.
-
Page 79: Engine Oil
The engine has been filled ex-factory with a high-grade oil that can be used throughout the year (except in extreme climate zones). We recommend that the oil changes are carried out by a ŠKODA Service Part- ner. The engine oil should be changed at specified service intervals »... -
Page 80: Coolant
Notice Check and refill If the engine oil level is too low, a warning light lights up in the instrument clus- » page Engine oil. Nevertheless, we recommend checking Fig. 79 the oil level on a regular basis using the dipstick. Dipstick variants Coolant ... -
Page 81: Brake Fluid
If it is not possible to add coolant, stop driving! Switch off the engine and ■ Checking and refilling seek assistance from a specialist garage. A coolant additive which does not correspond to the correct specification ■ Fig. 80 can reduce the anti-corrosion effect of the cooling system - There is a risk of Coolant expansion reservoir damage to the cooling system and the engine. -
Page 82: Vehicle Battery
WARNING Symbol Importance The following instructions must be followed at all times when working on ■ When charging the vehicle battery, a highly explosive gas mixture the engine compartment » page is produced. If the fluid level drops significantly within a short time or if it drops below ■... - Page 83 Refer to the instructions of the charger manufacturer. Checking the condition Charging › Fig. 82 Reconnect the charger terminals to the corresponding battery terminals ( Vehicle battery: Electrolyte level to . to ) . › Plug the mains cable of the charger into the power socket and switch on the indicator device.
-
Page 84: Wheels
Rims and wheel bolts are matched to each other in terms of design. We rec- of the vehicle is guaranteed. ommend that you use rims and wheel bolts from ŠKODA Original Accessories. Wheels and tyres should always be stored in a cool, dry and dark place. The tyres themselves should be stored vertically. - Page 85 ■ into contact, then we recommend that you check this in a specialist workshop. In the event of very rapid pressure loss (e.g. in the event of tyre damage) ■ Do not use rims with ground or polished surfaces in winter conditions - there ■...
- Page 86 Incorrect wheel balancing (you should have the wheels balanced after chang- A warning label is always placed on the rim of the temporary spare wheel. ▶ ing/repair tyres or if the steering “is drifting”). Please note the following if you intend to use the temporary spare wheel. ▶...
-
Page 87: Operating In Winter Conditions
Speed symbol - indicates the maximum permissible speed for a vehicle fit- ted with tyres in a given category Speed symbol Maximum speed (in km/h) WARNING Never exceed the maximum permissible load bearing capacity and speed for the tyres fitted – There is a risk of an accident. Operating in winter conditions “Winter”tyres (indicated by an M+S or a mountain peak/snowflake symbol ) to improve the performance of the vehicle in winter conditions. -
Page 88: Do-It-Yourself
Top section for the anti-theft wheel bolts The following information is valid for the first aid kit and warning triangle from Towing eye the ŠKODA Original accessories. Clamps for removing the wheel trims The first aid kit can be stored in storage compartment... -
Page 89: Changing A Wheel
WARNING Changing a wheel Undo the wheel bolts just a little (about one turn), provided the vehicle ■ Preliminary work has not yet been jacked up. Otherwise the wheel could come loose and fall off –There is a risk of injury. For safety's sake, the following instructions must be observed before Under no circumstances must the bolts be greased or oiled - There is a ■... - Page 90 The position of the anti-theft wheel bolt is indicated by means of a symbol on the back of the wheel trim supplied ex-factory or from the ŠKODA Original Accessories. If using the anti-theft wheel bolt it should be fitted at this point »...
- Page 91 For wheel trims supplied ex-factory or from ŠKODA Original Accessories, the Raising the vehicle anti-theft wheel bolt should be installed in the position marked on the back of the wheel trim» page Fig. 91 Jacking points for the jack Notice The attachment and the anti-theft wheel bolts are provided with a code num- ber.
-
Page 92: Jump-Starting
WARNING Jump-starting using the battery from another vehicle The following instructions must be observed, otherwise there is risk of in- jury. Ensure the vehicle cannot unexpectedly roll away. ■ Always ensure the base plate of the lifting jack cannot slip. ■... -
Page 93: Towing The Vehicle
Conditions for towing. Notice Cars with automatic gearboxes must not be towed with the rear wheels We recommend that you use a tow rope from ŠKODA Original Accessories. raised - there is a risk of gearbox damage! If the gearbox has no oil, your vehicle must be towed with the front axle ... -
Page 94: Remote - Change Battery
Front towing eye Towing eye rear Fig. 96 Rear towing eye The rear towing eye is located below the bumper on the right. Fig. 95 Remove cap / install towing eye Remote - change battery Cover cap removal/fitting › To remove, press down on the cap in the direction of arrow and remove it in the direction of arrow »... -
Page 95: Emergency Unlocking / Unlocking Of Doors
■ If a key has an affixed decorative cover, this will be destroyed when the bat- ■ tery is replaced. A replacement cover can be purchased from a ŠKODA Part- ner. Emergency unlocking / unlocking of doors Fig. 99 Remove / release the selector lever Locking the door without locking cylinders ›... -
Page 96: Fuses And Light Bulbs
Attaching the wiper blade Fuses and light bulbs › Slide the windscreen wiper blade in the opposite direction to arrow until it locks into place. Check that the wiper blade is correctly attached. Fuses › Fold the wiper arm back to the windscreen. ... - Page 97 Read and observe on page 94 first. Fuses in the dashboard Power consumer Not used Lever under the steering wheel, windscreen washer system Engine control system, fuel pump Multifunction steering wheel Not used Not used Button lighting, license plate light Not used Fig.
- Page 98 Power consumer Power consumer Engine components Low beam – left side Engine components Dayt. r. light Engine components Fuses in the engine compartment Engine components Clutch pedal switch, brake pedal switch, radiator fan Fig. 104 Main beam Remove the fuse box cover Not used Radio / Infotainment Not used...
-
Page 99: Bulbs
WARNING Fuse arrangement in the engine compartment Always read and observe the warnings before completing any work in the ■ engine compartment » page 75, Engine compartment. Fig. 105 Accidents can be caused if the road in front of the vehicle is not suffi- ■... - Page 100 Read and observe on page 97 first. Bulb arrangement in the front headlights › Remove the protective cap » fig. 106 on page 98. › Press the connector latch and remove the plug connector by jiggling in the direction of arrow »...
- Page 101 Read and observe on page 97 first. Replacing the bulb for the side light (Halogen headlights) › Turn the pedestal with the light bulb in the direction of arrow and pull out in the direction of arrow » fig. 110.
- Page 102 Read and observe on page 97 first. Replacing the bulb for the main beam (Halogen headlights) › Remove the protective cap » fig. 106 on page 98. › Remove the pedestal with the bulb by jiggling it out in the direction of arrow »...
- Page 103 › Using a screwdriver, Unlock the fuse in the direction of arrow Install › › Remove the headlight in the direction of arrow Insert the connector into the lamp and lock it securely. › Insert the light into the opening in the body. Replacing the light bulb ›...
- Page 104 The lamp holder must engage firmly. Do-it-yourself...
-
Page 105: Technical Data
The vehicle identification number - VIN (vehicle body number) is stamped into The data on fuel consumption and CO emissions are given in the ŠKODA the engine compartment on the right hand suspension strut dome. This num- websites or the sales and technical vehicle documentation. - Page 106 Dimensions Fig. 117 Vehicle dimensions Vehicle dimensions operating weight without driver (in mm) » fig. 117 Specification Value Height 1467 Front track 1457 Width including exterior mirror 1927 Rear track 1500 Width 1699 Clearance Wheel base 2553 Length 4413 Technical data...
- Page 107 Overhang angle Fig. 118 Overhang angle Angle » fig. 118 Front overhang angle Rear overhang angle The overhang angle values indicate the maximum incline of a slope, up which the vehicle can drive at a slow speed without the bumper or underbody mak- ing contact with the slope.
-
Page 108: Vehicle-Specific Details Per Engine Type
Vehicle-specific details per engine type Introduction The specified values have been determined in accordance with rules and under conditions set out by legal or technical requirements for determining operational and technical data for motor vehicles. 1.0 l/81 kW TSI engine Output (kW at rpm) 81/5000-5500 Highest torque (Nm at rpm) -
Page 109: Index
Armrest Brakes Index Front Brake booster Rear Brake fluid Braking and stabilisation systems Assist systems Handbrake Automatic drive Operation Information on braking Selector lever Warning light Warning lights Automatic driving light control Accessories Brake system Automatic gearbox Adjusting Braking Gear selector release Steering wheel Running in Kickdown... - Page 110 Checking Electric windows Battery condition Buttons on the driver door DAY LIGHT Coolant Electronic Differential Lock (EDL) See Daytime running lights Children and safety Electronic immobiliser Daytime running lights Child safety lock Emergency Deactivation Child seat Hazard warning light system Airbag Classification Jump-starting...
- Page 111 Warning light handbrake warning light Change battery Operation Ignition on / off Handbrake Warning light Locking Hazard warning light system Unlocking Headrests Films Heating First aid kit Lever Air distribution control Flashing Cruise control Exterior mirrors Fog lights/rear fog light Turn signal/main beam Rear window Footmats...
- Page 112 Locking the steering lock Oil changing Practical equipment Engine oil Clothes hook Luggage compartment door Cup holders On-board computer Luggage Storage See multifunction display Practical features 12-volt socket in the interior Open door Pockets warning light Main beam Operating weight Warning light Original accessories Manual air conditioning...
- Page 113 Running in Service intervals 68, 69 Sun visors Brake pads Service Plan Switch Engine Vehicle battery Setting Tyres Exterior mirrors Switching the lights on and off Headrests Switch off Seat belt height Alarm Seats Safety Switch off the ignition Airbag Setting the Switch on ignition Child safety...
- Page 114 Tyres Vehicle washing Windscreen washer system damage Exterior Windscreen washer system Explanation of the label Interior Windscreen wipers and washers Vehicle width Add fluid Tyre pressure Operate Wear indicator Vehicle identification number Winter operation Tyre size Vehicle battery Visibility Winter tires Visors Winter tires See Sun visors...
- Page 115 Index...
- Page 116 Index...
- Page 117 Index...
- Page 118 Reprinting, reproduction or translation, either in whole or in part, is not permit- Subject to change. ted without the written consent of ŠKODA. Issued by: ŠKODA AUTO a.s. ŠKODA expressly reserves all rights relating to copyright laws. © ŠKODA AUTO a.s. 2020...
- Page 120 Návod k obsluze Rapid anglicky – Indie/Nepál 02.2020 5J5012791AM 5J5012791AM...