LG ARNU07GL1G2 Installation Manual
Hide thumbs
Also See for ARNU07GL1G2:
- Installation manual (23 pages) ,
- Service manual (138 pages) ,
- Service manual (95 pages)
Table of Contents
Advertisement
Quick Links
INSTALLATION MANUAL
AIR
CONDITIONER
Please read this installation manual completely before installing the product.
Installation work must be performed in accordance with the national wiring
standards by authorized personnel only.
Please retain this installation manual for future reference after reading it
thoroughly.
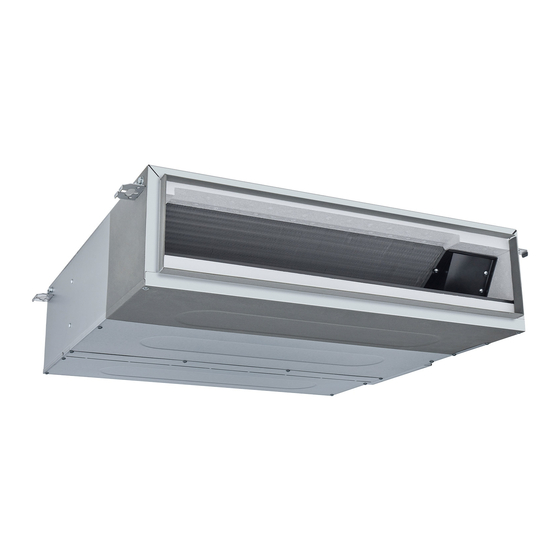
Ceiling Concealed Duct - Low Static
Original instruction
ARNU07GL1G2 ARNU09GL1G2 ARNU12GL2G2
ARNU15GL2G2 ARNU18GL2G2 ARNU24GL3G2
P/NO : MFL69446304
I.15.LG29.00502.0116
www.lg.com
Advertisement
Table of Contents

Related Manuals for LG ARNU07GL1G2


Summary of Contents for LG ARNU07GL1G2
- Page 1 Installation work must be performed in accordance with the national wiring standards by authorized personnel only. Please retain this installation manual for future reference after reading it thoroughly. Ceiling Concealed Duct - Low Static Original instruction ARNU07GL1G2 ARNU09GL1G2 ARNU12GL2G2 ARNU15GL2G2 ARNU18GL2G2 ARNU24GL3G2 www.lg.com I.15.LG29.00502.0116 P/NO : MFL69446304...
-
Page 2: Table Of Contents
Ceiling Concealed Duct - Low Static Type Indoor Unit Installation Manual TABLE OF CONTENTS Installation Requirements Required Parts Required Tools Features........3 Safety Precautions....4 o Level gauge Installation.......7 o Four type "A" screws o Screw driver o Connecting cable o Electric drill o Hole core drill Selection the best location..7 o Pipes: Gas side... -
Page 3: Features
Feature Features Air outlet vents Air filters Air intake vents Control box Wired Remote Controller Installation Tool Washer for Clamp Insulation for Name Drain hose Clamp metal (Other) hanging bracket (Tie Wrap) fitting Quantity 1 EA 2 EA 8 EA 4 EA 1 SET •... -
Page 4: Safety Precautions
Safety Precautions Safety Precautions To prevent injury to the user or other people and property damage, the following instructions must be followed. n Incorrect operation due to ignoring instruction will cause harm or damage. The seriousness is classi- fied by the following indications. WARNING This symbol indicates the possibility of death or serious injury. - Page 5 Safety Precautions Do not turn on the breaker or power under condi- Use a vacuum pump or Inert (nitrogen) gas when tion that front panel, cabinet, top cover, control doing leakage test or air purge. Do not compress box cover are removed or opened. air or Oxygen and Do not use Flammable gases.
- Page 6 Safety Precautions CAUTION n Installation Always check for gas (refrigerant) leakage Install the drain hose to ensure that Keep level even when installing after installation or repair of product. water is drained away properly. the product. • Low refrigerant levels may cause •...
-
Page 7: Installation
Installation Installation Selection of the best location Indoor unit Top view Inspection hole (Unit: mm) Control box Install the air conditioner in the location that satisfies the fol- (600 x 600) lowing conditions. • The place shall easily bear a load exceeding four times the indoor unit’s weight. -
Page 8: Ceiling Opening Dimension And Hanging Bolt Location
Installation Ceiling dimension and hanging bolt location Installation of Unit Install the unit above the ceiling correctly. POSITION OF SUSPENSION BOLT • Apply a joint-canvas between the unit and duct to absorb unnecessary vibration. • Apply a filter Accessory at air return hole. (Unit:mm) Dimension Capacity(kBtu/h) -
Page 9: Indoor Unit Installation
Installation Indoor Unit Installation • Select and mark the position for fixing bolts. • Insert the set anchor and washer onto the sus- • Drill the hole for set anchor on the face of ceil- pension bolts for locking the suspension bolts ing. -
Page 10: Checking The Drainage
Installation INSULATION, OTHERS Insulate the joint and tubes completely. THERMAL INSULATION All thermal insulation must comply with local requirement. INDOOR UNIT Union for gas pipe Thermal insulator for refrigerant pipe (Local supply) Thermal insulator for Refrigerant pipe and thermal piping(Local supply) insulator(Local supply) Hose clip for thermal insulator (Local supply) -
Page 11: Drain Piping
Installation CAUTION 1. Install declination of the indoor unit is very important for the drain of the duct type air conditioner. 2. Minimum thickness of the insulation for the connecting pipe shall be 19mm. Front of view • The unit must be horizontal or declined to the drain hose connected when finished installation. -
Page 12: Dip Switch Setting
Installation CAUTION : The supplied flexible drain Hanger hose should not be curved, neither distance Hanger Bracket Max 300mm 1~15m 1/50~1/100 slope screwed. The curved or screwed hose Metal may cause a leakage of water. clamp Flexible drain hose Insulation HAND OVER Teach the customer the operation and maintenance procedures, using the operation manual. -
Page 13: Group Control Setting
Installation Group Control Setting 1. Group Control 1 n Wired remote controller 1 + Standard Indoor Units LGAP Network System Signal Master Slave Slave Slave 12 V Only connect serial signal and GND lines Display Error Message between indoor units. Master n DIP Switch in PCB (Cassette and Duct Type indoor units) ¿... - Page 14 Installation 5. In case of any error occurs al indoor unit, display on the wired remote controller. Exception of the error indoor unit, an individual indoor unit control possibility. 6. In case of Group Control, it is possible to use following functions. - Selection of operation options (operation/stop/mode/set temperature) - Control of flow rate (High/Middle/low) - It is not possible at some functions.
- Page 15 Installation 3. Group Control 3 n Mixture connection with indoor units and Fresh Air Intake Unit LGAP Network System Master Signal Slave Master Slave Master 12 V Display Error Message Display Error Message Master Master h In case of connecting with standard indoor unit and Fresh Intake Unit, separate Fresh Air Intake Unit with standard units.
- Page 16 Installation 4. 2 Remote Control n Wired remote controller 2 + Indoor unit 1 LGAP Network System Master Display Error Message Master Slave 1. It is possible to connect two wired remote controllers with one indoor unit. 2. Every types of indoor unit is possible to connect two remote controller. 3.
- Page 17 Installation 5. Accessories for group control setting It is possible to set group control by using below accessories. Indoor unit 2 EA +Wired remote controller Indoor unit 1 EA +Wired remote controller 2EA h PZCWRCG3 cable used for connection h PZCWRC2 cable used for connection S lave Mas te r PZC WRC 2...
- Page 18 How to Set E.S.P? How to Set E.S.P? (Unit : CMM) ARNU05GL1G2, ARNU07GL1G2, ARNU09GL1G2 Static Pressure(mmAq(Pa)) Setting Value 0 (0) 1 (10) 2 (20) 3 (29) 4 (39) 5 (49) 5.03 5.60 4.85 6.19 5.44 4.57 6.79 6.05 5.17 7.41 6.67...
- Page 19 PT.LG Electronics Indonesia Gandaria 8 Office Tower Lt. 29 & 31 ABCD Jl.Sultan Iskandar Muda, Kebayoran Lama Utara - Lama, Jakarta Selatan - DKI Jakarta Raya, Indonesia...