Table of Contents
Advertisement
Quick Links
Advertisement
Table of Contents

Related Manuals for IBM PureFlex System


Summary of Contents for IBM PureFlex System
- Page 1 PureFlex System Installing and configuring IBM PureFlex System GI11-9880-02...
- Page 3 PureFlex System Installing and configuring IBM PureFlex System GI11-9880-02...
- Page 4 Before using this information and the product it supports, read the information in “Safety notices” on page v and “Notices” on page 23 and read the information in the safety and environmental notices included with the system. This edition applies to the IBM PureFlex System and to all subsequent releases and modifications until otherwise indicated in new editions.
-
Page 5: Table Of Contents
. 24 Performing tasks associated with the 7953-94X rack . 4 Electronic emission notices . . 24 Removing the IBM Storwize V7000 shipping brackets 6 Class A Notices . . 24 Verifying that the IBM Storwize V7000 control Class B Notices . - Page 6 PureFlex System: Installing and configuring IBM PureFlex System...
-
Page 7: Safety Notices
You should also refer to the safety information documentation any time you do not clearly understand any safety information in the U.S. English publications. Replacement or additional copies of safety information documentation can be obtained by calling the IBM Hotline at 1-800-300-8751. - Page 8 Electrical voltage and current from power, telephone, and communication cables are hazardous. To avoid a shock hazard: v Connect power to this unit only with the IBM provided power cord. Do not use the IBM provided power cord for any other product.
- Page 9 Observe the following precautions when working on or around your IT rack system: v Heavy equipment–personal injury or equipment damage might result if mishandled. v Always lower the leveling pads on the rack cabinet. v Always install stabilizer brackets on the rack cabinet. v To avoid hazardous conditions due to uneven mechanical loading, always install the heaviest devices in the bottom of the rack cabinet.
- Page 10 Pack the rack cabinet in the original packaging material, or equivalent. Also lower the leveling pads to raise the casters off of the pallet and bolt the rack cabinet to the pallet. (R002) (L001) (L002) viii PureFlex System: Installing and configuring IBM PureFlex System...
- Page 11 (L003) All lasers are certified in the U.S. to conform to the requirements of DHHS 21 CFR Subchapter J for class 1 laser products. Outside the U.S., they are certified to be in compliance with IEC 60825 as a class 1 laser product.
- Page 12 Exchange only with the IBM-approved part. Recycle or discard the battery as instructed by local regulations. In the United States, IBM has a process for the collection of this battery. For information, call 1-800-426-4333. Have the IBM part number for the battery unit available when you call. (C003)
-
Page 13: Installing And Configuring The System
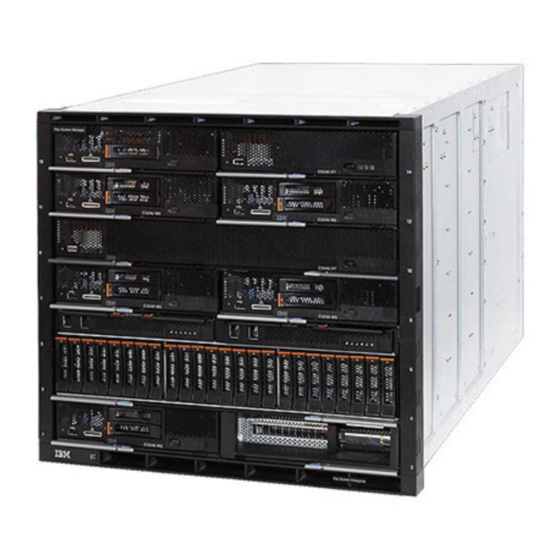
Figure 1. Front and rear views of chassis-only Express configuration 4a Note: If you ordered a single IBM PureFlex System chassis (no rack), ensure that you record the locations of each of the chassis components before you remove them. Use the label template that was shipped with the chassis to perform this task. - Page 14 Does not include FC EFPT Connect to Customer Management Network For more information, see Setting up your IBM Flex System Enterprise Chassis. If cables are taped to the top of the chassis, you must plug these cables into the appropriate ports (identified with labels on each end of cable) after you have installed the chassis in the rack and re-installed all the components in their specific bays.
-
Page 15: Scenario: Installing The Ibm Pureflex System
Scenario: Installing the IBM PureFlex System After you order an IBM PureFlex System, multiple groups ship, install, and configure your system. The following figure shows the flow of events in a typical installation of the IBM PureFlex System. User task... -
Page 16: Performing Tasks Associated With The 7953-94X Rack
11. You contact an IBM Services Team representative to request that they go ahead with the next step. 12. You meet with an IBM Services Team representative to complete the system configuration. - Page 17 Figure 3. Removing the outriggers 2. Position the rack where you want it to be installed. 3. Use the open-end wrench that comes with the hardware kit to lower each of the four leveling pads just enough so that they touch the floor. The rack casters support the weight of the rack cabinet. The pads prevent the rack from rolling.
-
Page 18: Removing The Ibm Storwize V7000 Shipping Brackets
Figure 4. Installing the recirculation plate and front stabilizer bracket Figure 5. Installing the air baffle and front stabilizer bracket using the IBM PureFlex Rack Door Kit d. Tighten the screws until the stabilizer bracket is flush against the recirculation prevention plate. - Page 19 Procedure 1. Clip and remove the cable ties (A) that secure the power supplies and control canisters to the shipping bracket. Note: Ensure that you do not clip any cables. Figure 6. Cable ties 2. Remove the two screws (B) that attach the bracket to the rack. See Figure 7 on page 8. 3.
- Page 20 5. Grasp the shipping bracket and remove it from the rack. 6. Reseat the IBM Storwize V7000 control canisters. a. Press the latches (A) on the unseated IBM Storwize V7000 control canister to access the control canister handle. PureFlex System: Installing and configuring IBM PureFlex System...
- Page 21 Figure 8. Pressing the latches to access the control canister handle. b. Push the canister into the enclosure (B). Figure 9. Push the canister into the enclosure. Installing and configuring the system...
- Page 22 Figure 10. Snap the latches back into place. 7. Reseat the IBM Storwize V7000 power supplies. a. Press the latches (A) on the unseated IBM Storwize V7000 power supply to access the power supply handle. PureFlex System: Installing and configuring IBM PureFlex System...
- Page 23 Figure 11. Pressing the latches to access the power supply handle. b. Push the power supply into the enclosure (B). Figure 12. Push the power supply into the enclosure. c. Snap the enclosure latches (C) back into place. Installing and configuring the system...
-
Page 24: Verifying That The Ibm Storwize V7000 Control Enclosure Is Cabled Between Racks
V7000 expansion enclosure in rack 2. Procedure If you have a second rack, and if the second rack has an IBM Storwize V7000 expansion enclosure, make sure the rack-to-rack SAS cables are connected between the IBM Storwize V7000 control enclosure in the system rack to the IBM Storwize V7000 expansion enclosure in the expansion rack as shown in figure Figure 14 on page 13. -
Page 25: Connecting Power Cords
Figure 14. Cabling between racks Connecting power cords You must connect the power cords to the power source before configuring the system. Installing and configuring the system... - Page 26 About this task After you perform this task, do not press the power button on the IBM Flex System Manager (FSM). The FSM power button is shown below. Procedure Do the following to connect power cords: 1. Plug the system power cord and the power cords for any other attached devices into the alternating current (AC) power source.
-
Page 27: Performing A Verification Check
The green power status indicator on the front panel flashes to indicate that the system is in standby Figure 15. Do not press the power button on the IBM Flex System Manager (FSM) mode and is ready to be powered on. - Page 28 Do you have only one chassis? 1. If you have one chassis, install the IBM BNT SFP (RJ45) transceiver (B in Figure 16 on page 17). This SFP transceiver is included in the ship group. Install the transceiver in I/O module slot 1, port 6.
- Page 29 6. Accept any security exceptions to continue. 7. In the IBM Chassis Management Module sign-in window, type the user name and password. The user name is USERID and the password is PASSW0RD. Installing and configuring the system...
- Page 30 8. Click Log In. Create a new password. The new password is Passw0rd. 9. Cancel out of the Initial Setup Wizard. 10. Click System Status. 11. Hover over each component to ensure that it is functioning properly. PureFlex System: Installing and configuring IBM PureFlex System...
- Page 31 14. If you have a single IBM Storwize V7000 chassis with no top of rack switch, connect it directly to port 1 on the upper controller. 15. Verify that your IBM Storwize V7000 storage is functioning. Open a different browser window, and type https://192.168.93.213/service.
- Page 32 Note: If you identify a component that is in the Error state, contact your service provider. 18. If you have a second IBM Storwize V7000 type 192.168.93.217/service in a different browser window. Complete steps 16 on page 19 and 17 for this second IBM Storwize V7000.
-
Page 33: Completing The Installation
Learn more about the tasks you must perform to complete the system installation. When you have finished installing your PureFlex system, save the configuration. You might want to do the following after the IBM Service Team representative leaves your site: v Change passwords... - Page 34 PureFlex System: Installing and configuring IBM PureFlex System...
-
Page 35: Notices
All statements regarding the manufacturer's future direction or intent are subject to change or withdrawal without notice, and represent goals and objectives only. The manufacturer's prices shown are the manufacturer's suggested retail prices, are current and are subject to change without notice. Dealer prices may vary. © Copyright IBM Corp. 2012, 2013... -
Page 36: Trademarks
IBM, the IBM logo, and ibm.com are trademarks or registered trademarks of International Business Machines Corp., registered in many jurisdictions worldwide. Other product and service names might be trademarks of IBM or other companies. A current list of IBM trademarks is available on the web at Copyright and trademark information at www.ibm.com/legal/copytrade.shtml. - Page 37 Properly shielded and grounded cables and connectors must be used in order to meet FCC emission limits. IBM is not responsible for any radio or television interference caused by using other than recommended cables and connectors or by unauthorized changes or modifications to this equipment.
- Page 38 Warning: This is a Class A product. In a domestic environment this product may cause radio interference in which case the user will be required to take adequate measures. IBM Taiwan Contact Information: PureFlex System: Installing and configuring IBM PureFlex System...
- Page 39 Um dieses sicherzustellen, sind die Geräte wie in den Handbüchern beschrieben zu installieren und zu betreiben. Des Weiteren dürfen auch nur von der IBM empfohlene Kabel angeschlossen werden. IBM übernimmt keine Verantwortung für die Einhaltung der Schutzanforderungen, wenn das Produkt ohne Zustimmung von IBM verändert bzw.
-
Page 40: Class B Notices
Consult an IBM-authorized dealer or service representative for help. Properly shielded and grounded cables and connectors must be used in order to meet FCC emission limits. Proper cables and connectors are available from IBM-authorized dealers. IBM is not responsible for PureFlex System: Installing and configuring IBM PureFlex System... - Page 41 This product is in conformity with the protection requirements of EU Council Directive 2004/108/EC on the approximation of the laws of the Member States relating to electromagnetic compatibility. IBM cannot accept responsibility for any failure to satisfy the protection requirements resulting from a non-recommended modification of the product, including the fitting of non-IBM option cards.
- Page 42 Um dieses sicherzustellen, sind die Geräte wie in den Handbüchern beschrieben zu installieren und zu betreiben. Des Weiteren dürfen auch nur von der IBM empfohlene Kabel angeschlossen werden. IBM übernimmt keine Verantwortung für die Einhaltung der Schutzanforderungen, wenn das Produkt ohne Zustimmung von IBM verändert bzw.
-
Page 43: Terms And Conditions
Permissions for the use of these publications are granted subject to the following terms and conditions. Applicability: These terms and conditions are in addition to any terms of use for the IBM website. Personal Use: You may reproduce these publications for your personal, noncommercial use provided that all proprietary notices are preserved. - Page 44 PureFlex System: Installing and configuring IBM PureFlex System...
- Page 46 Part Number: 00L5196 Printed in USA GI11-9880-02...