Table of Contents
Advertisement
Quick Links
NOTE: This User Instruction Manual contains important information, including
safety & installation points, which will enable you to get the most out of
your appliance. Please keep it in a safe place so that it is easily available
for future reference, for you or any person not familiar with the operation of
the appliance.
Wine Coolers
USER MANUAL
HWCB 15 UKBM
HWCB 30 UKBM
HWCB 60D UKBM
HWCB 60DD UKBM
HWCB 15 UKSSM
HWCB 30 UKSSM
HWCB 60D UKSSM
HWCB 60DD UKSSM
EN Ver.2/2019
Advertisement
Table of Contents

Related Manuals for Hoover HWCB 15 UKBM


Summary of Contents for Hoover HWCB 15 UKBM
- Page 1 Wine Coolers USER MANUAL HWCB 15 UKBM HWCB 30 UKBM HWCB 60D UKBM HWCB 60DD UKBM HWCB 15 UKSSM HWCB 30 UKSSM HWCB 60D UKSSM HWCB 60DD UKSSM NOTE: This User Instruction Manual contains important information, including safety & installation points, which will enable you to get the most out of your appliance.
-
Page 2: Table Of Contents
--CONTENTS-- SAFETY INFORMATION SCRAPPING OLD APPLIANCES Conformity Energy Saving Service DESCRIPTION OF APPLIANCE Product Features Control Panel Interior light The Wine Cooler shelves USING YOUR WINE COOLER Before Switching On During First Use Unlocking The Control Panel The Interior Light Setting The Temperature Range Setting The Temperature Changing Between Fahrenheit And Celsius... -
Page 3: Safety Information
Thank you for purchasing this product. , s r y l l manual in order to maximize its performance. Store all documentation for subsequent use or for other owners. This product is intended solely for household use or similar applications such as: --the kitchen area for personnel in shops, offices and other working environments --on farms, by clientele of hotels, motels and other environments of a... - Page 4 process. heaters, steam cleaners, candles, oil lamps and the like in order to speed up the defrosting phase. unless they are of the type recommended by the manufacturer. as ether, petrol, LPG, propane gas, aerosol spray cans, adhesives, pure alcohol, etc. These materials may cause an explosion. be stored, it is possible that it will deteriorate or an uncontrolled reaction may occur that can cause risks.
-
Page 5: Scrapping Old Appliances
SCRAPPING OLD APPLIANCES WEEE contains both polluting substances (which can cause negative in order to remove and dispose properly all pollutants, and recover and recycle all materials. Individuals can play an important role in ensuring that WEEE does not --WEEE should be handed over to the relevant collection points managed by the municipality or by registered companies. -
Page 6: Service
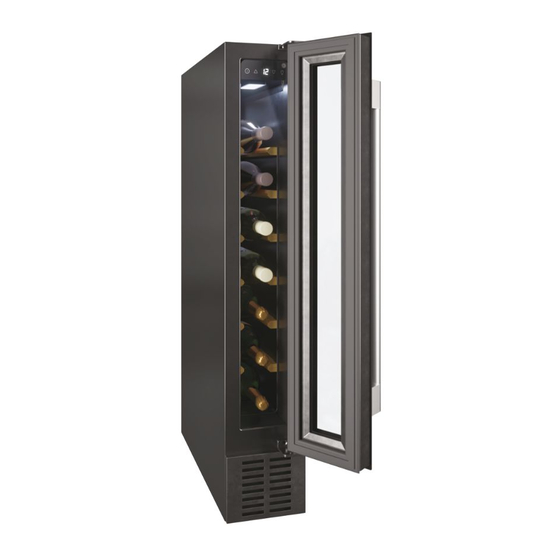
Service yourself, as this could cause injury or a more serious malfunction. If you require a service call then please contact the Customer Care Department DESCRIPTION OF APPLIANCE Product Features HWVB 15 UKBM, HWCB 15 UKSSM: Single Zone--6 Bottles A. Control Panel B. -
Page 7: Control Panel
E. Front Vent F. Adjustable Foot Control Panel Single Zone : HWCB 15 UKBM, HWCB 30 UKBM, HWCB 60DD UKBM, HWCB 15 UKSSM, HWCB 30 UKSSM, HWCB 60DD UKSSM A. Power B. Lighting C. Display Window D. Temp. Plus E. Temp.Minus F. -
Page 8: Interior Light
Dual Zone : HWCB 60D UKBM, HWCB 60D UKSSM Upper Zone Power Lighting Display Window ºC/ºF Lock Function Function Lower Zone Zone Select Switch Display Window Unlock Interior light Note: This LED light has a long life time. Once it is broken, it is mandatory to call aftersales center to get a new one. -
Page 9: Using Your Wine Cooler
USING YOUR WINE COOLER Before Switching On the information contained in the installation instructions. o After delivery, wait for eight hours before connecting the appliance to your mains supply. This will allow any refrigerant gasses that may have been disturbed during the transportation process to settle. o The outside of the appliance and the removable accessories contained within it, should be cleaned with a solution of liquid detergent and water. -
Page 10: Unlocking The Control Panel
Turning The Appliance On And Off HWCB 15 UKBM, HWCB 30 UKBM, HWCB 60D UKBM,HWCB 60DD UKBM HWCB 15 UKBM, HWCB 30 UKBM, HWCB 15 UKSSM, HWCB 30 UKSSM, HWCB 60D UKSSM,HWCB 60DD UKSSM HWCB 15 UKSSM, HWCB 30 UKSSM, HWCB 60D UKSSM,HWCB 60DD UKSSM o When the Wine Cooler is connected to the power outlet it will turn on automatically. -
Page 11: Setting The Temperature
2 - 10 °C (36ºF-50ºF) 12 - 22 °C (54ºF-72ºF) Setting The Temperature HWCB 15 UKBM, HWCB 30 UKBM, HWCB 60DD UKBM HWCB 15 UKSSM, HWCB 30 UKSSM, HWCB 60DD UKSSM o Use the temperature plus button and minus button to select the temperature you want the Wine Coolers to operate at. -
Page 12: Changing Between Fahrenheit And Celsius
10 seconds. Changing Between Fahrenheit And Celsius Fahrenheit. HWCB 15 UKBM, HWCB 30 UKBM, HWCB 60DD UKBM HWCB 15 UKSSM, HWCB 30 UKSSM, HWCB 60DD UKSSM o To alter what the temperature display is showing, press the Celsius and Fahrenheit switch. -
Page 13: Silent Mode
Silent Mode HWCB 15 UKBM, HWCB 30 UKBM,HWCB 60D UKBM, HWCB 15 UKSSM, HWCB 30 UKSSM, HWCB 60D UKSSM o The appliance is with Silent Mode, which will slow down the fans speed when the inside temperature reaches the temperature set. -
Page 14: Loading The Wine Cooler
As many bottles may differ in size and dimensions, the actual number of bottles you are able to store may vary. The maximum storage number is based on standard 0.75 litre Bordeaux style wine bottles. HWCB 15 UKBM HWCB 15 UKSSM 750ml Bordeau 305mm 76.20mm... -
Page 15: Storing Your Wines
HWCB 60D UKBM HWCB 60D UKSSM Upper Shelf Bottom Shelf 750ml Bordeau 76.20mm 305mm HWCB 60DD UKBM HWCB 60DD UKSSM Upper Shelf Bottom Shelf 750ml Bordeau Φ76.20mm 305mm Storing Your Wines The chart below indicates the ideal storage temperatures for different types of wine: Temperature Temperature... - Page 16 from being served slightly cooler than full-bodied reds. temperature inside of your Wine Cooler. Or leave it to warm slightly when you remove it from your Wine Cooler. o Temperature stability is the most important factor when it comes to storing wine.
-
Page 17: Wine Storage Problems
Wine Storage Problems Corking- a tiny percentage of bottled wine (about 1%) will suffer from this. The cork reacts with the wine and gives it a musty, unpleasant taste. It is the most common wine storage problem and is caused by harmless bacteria growing on the cork. -
Page 18: Cleaning And Maintenance
CLEANING AND MAINTENANCE WARNING: PLEASE ENSURE THAT YOUR APPLIANCE IS DISCONNECTED FROM Y O U R M A I N S S U P P L Y B E F O R E ATTEMPTING TO CLEAN IT. o Do not clean the appliance by pouring water onto it or spraying water over it. -
Page 19: Removing The Shelves For Cleaning
Before removing a Shelf from the appliance, it is necessary to remove all the bottles on the Shelf. HWCB 15 UKBM, HWCB 15 UKSSM,HWCB 30 UKBM,HWCB 30 UKSSM,HWCB 60D UKBM, HWCB 60D UKSSM,HWCB 60DD UKBM,HWCB 60DD UKSSM. o Move the shelf to the position where the notch of the wooden shelf is directly under the plastic stopper and lift the wooden shelf. -
Page 20: Carbon Filter Change
Carbon Filter Change A good ambient air quality is important for wine maturing. The Carbon Filter is very helpful to absorb odor and improve air quality.For the models with Carbon Filter, we suggest to replace it once a year.Pls.contact your dealer Removing the Carbon Filter: right to Remove it;... -
Page 21: Power Failure
Power Failure o If power is cut to the appliance, for a few hours it will be able to maintain the temperature inside the cabinet. Providing that the number of times that the door is opened is kept to a minimum. o If the power cut is for longer than a few hours, then you will need to store the contents in an alternate location to prevent them being affected by temperature rise. -
Page 22: Installation
INSTALLATION MPORTANT: Before installation and usage read all the instructions and the Wine Cooler. The manufacturer declines all responsibility in the event of the installer failing to observe all the accident prevention regulations in force, which are necessary for normal use and the regular operation of the electric system. -
Page 23: Positioning
Positioning o It is advisable that your appliance is only installed in a location where the ambient temperature of the room, corresponds with the climate appliance may not function correctly if the ambient temperature falls outside of the following ranges. Appropriate ambient temperature 10 - 32 °C (50ºF-90ºF) 16 - 32 °C (61ºF-90ºF) -
Page 24: Built-In Installation
Built-In Installation HWCB 15 UKBM • HWCB 15 UKSSM Height Adjustable: 880mm 825- Removable Front Grille HWCB 30 UKBM HWCB 30 UKSSM • Height Adjustable: 880mm 825- 835mm Removable Front Grille... - Page 25 HWCB 60D UKBM HWCB 60D UKSSM • Height Adjustable: 825- 880mm > 835mm Removable Front Grille HWCB 60DD UKBM HWCB 60DD UKSSM • Height Adjustable: 880mm 825- > 835mm Removable Front Grille * Due to there is a nut on the bottom of the leg which is there for fixing the leg firmly when you adjust to the max height of 880mm.
- Page 26 This cut out is required whether the vent is removed or not. HWCB 15 UKBM, HWCB 15 UKSSM 88mm 148mm HWCB 30 UKBM, HWCB 30 UKSSM A.
- Page 27 Adjusting the height and levelling off your wine cabinet HWCB 15 UKBM, HWCB 30 UKBM, HWCB 60D UKBM, HWCB 60DD UKBM HWCB 15 UKSSM, HWCB 30 UKSSM, HWCB 60D UKSSM, HWCB 60DD UKSSM o The appliance is equipped with adjustable feet, so that the height may o We recommend that two people carry out this procedure.
- Page 28 3. With the help of another individual, make sure the wine cooler is secure and tilt it backwards to gain full access to the area below the door. Make sure that the door is kept closed at all times during this process in order to avoid damage to the door and appliance.
- Page 29 8. Adjust the wine cooler feet so that you achieve the desired height for the cooler. If needed, re-attach the extendable plinth section with the four screws that were removed in step 2. Stand the wine cooler remove it. Allow the wine cooler to stand for 24 hours before plugging it in.
-
Page 30: Installing The Handle
Adjusting the plinth The plinth/grille for this appliance comes with an adjustable section. The process for adjusting the plinth trim is simple and is achieved by following the steps below. Perform these steps once the appliance is standing on all four feet and do not put weight on the plinth. 1. -
Page 31: Reversing The Door Of Your Wine Cooler
This appliance has the capability of the door opening from either the left or right hand side. the door, should be retained for later use. HWCB 15 UKBM, HWCB 30 UKBM, HWCB 60D UKBM, HWCB 15 UKSSM, HWCB 30 UKSSM,HWCB 60D UKSSM o Open the glass door and remove under the right bottom corner of the glass door. - Page 32 o Remove the right top hinge and right lower hinge. o Pull out the 6 Plastic Caps at the Right Top Hinge front left corner of the cabinet. And move them all to the right side. Right Lower Hinge Plastic Caps...
- Page 33 o Take the left top hinge and left lower hinge from the plastic bag that contained this manual then install them in the designated positions on the left side of the cabinet. Left Top Hinge Left Lower Hinge o Turn the glass door around 180° and reinstall it.
- Page 34 o Install the door to the left hinge side by tightening the Support Rod with the 2 screws. Pivot Hinge Screws IMPORTANT: Check that the door opens and shuts correctly, without fouling, After the door has been reversed, you should check the door seal of the Wine Coolers.
- Page 35 a) Use a warm damp cloth and manipulate the seal until it does adhere to the cabinet properly, all the way around the door. b) Use a hair dryer on its lowest heat setting and lightly heat the areas of the door seal that are not adhering correctly.
-
Page 36: Troubleshooting
TROUBLESHOOTING IMPORTANT: If your Wine Cooler appears not to be operating properly, checklist below. PROBLEM POSSIBLE CAUSE The Wine Cooler does not operate The Wine Cooler is not cold enough A large amount of contents has been added to the Wine The lighting does not work Too much vibration Check to assure no parts inside the cabinet or in the... - Page 37 DO NOT ATTEMPT TO REPAIR THE APPLIANCE YOURSELF. Please note that if an engineer is asked to attend whilst the product is under guarantee necessary repair. If your appliance is installed in such a way that an This includes situations where appliances have been tiled in, sealed in with sealant, have wooden obstructions placed in front of the appliance, like plinths.
-
Page 38: Technical Data
TECHNICAL DATA HOOVER Manufacturer 2 – Refrigeration-cellar, Cellar and Wine storage Product Category appliances HWCB 15 UKBM HWCB 30 UKBM HWCB 60D UKBM HWCB 60DD UKBM Model Number HWCB 15 UKSSM HWCB 30 UKSSM HWCB 60D UKSSM HWCB 60DD UKSSM...