Table of Contents
Advertisement
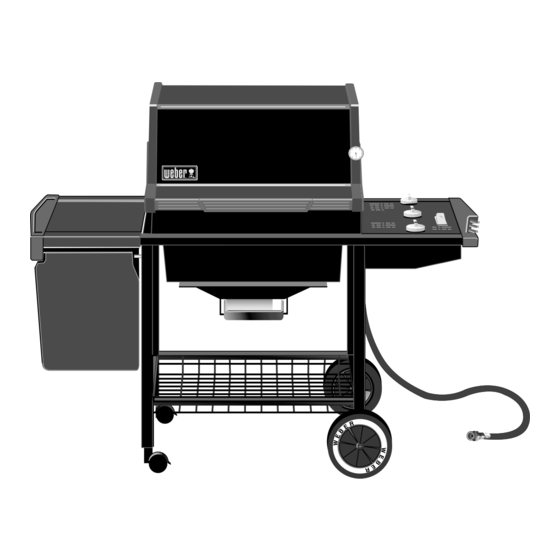
Owners Guide
DANGER
If you smell gas:
1. Shut off gas to the appliance.
2. Extinguish any open flames.
3. Open lid
4. If odor continues, keep away from the
appliance and immediately call your
gas supplier or your fire department.
Leaking gas may cause a fire or explosion
which can cause serious bodily injury or
death, or damage to property.
WARNING
Do not store or use gasoline or other
flammable liquids or vapors within 25 feet
(8m) of this appliance.
WARNING: Follow all leak-check
procedures carefully in this manual prior
to barbecue operation. Do this even if the
barbecue was dealer-assembled.
NOTICE TO INSTALLER: These
instructions must be left with the owner
and the owner should keep them for future
use.
THIS GAS APPLIANCE IS DESIGNED FOR
OUTDOOR USE ONLY.
WARNING: Do not try to light this
appliance without reading the "Lighting"
Instructions section of this manual
®
®
Y
OU MUST READ THIS
BEFORE OPERATING YOUR GAS GRILL
A005.f
B004.c
C002.c
D001.e
Natural Gas
O
G
WNERS
UIDE
55021 03/21/01
Advertisement
Table of Contents

Related Manuals for Weber Silver B


Summary of Contents for Weber Silver B
- Page 1 Owners Guide DANGER If you smell gas: 1. Shut off gas to the appliance. 2. Extinguish any open flames. 3. Open lid 4. If odor continues, keep away from the appliance and immediately call your gas supplier or your fire department. Leaking gas may cause a fire or explosion which can cause serious bodily injury or death, or damage to property.
-
Page 2: Warranty
Improper assembly may be dangerous. Please carefully follow the assembly instructions in this manual. After a period of storage, and/or nonuse, the Weber Gas Barbecue should be checked for gas leaks and burner obstructions before use. See instructions in this manual for correct procedures. - Page 3 If you are required to return defective parts, transportation charges must be prepaid. Weber will return parts to the purchaser, freight or postage prepaid. This Limited Warranty does not cover any failures or...
-
Page 4: Table Of Contents
Contents Danger & Warnings ... A-2 Warranty ... A-3 General Instructions ... A-5 Exploded View ... A-6 Parts List ... A-9 Assembly Instructions ... B-1 Installing Features ... C-1 Operating ... D-1 Lighting ... D-1 Manual Lighting ... D-2 Cooking ... D-3 Storage and/or Nouse ... -
Page 5: General Instructions
The closed lid and Flavorizer® Bars produce that “outdoor” flavor in the food. The Weber Gas Barbecue is portable so you can easily change its location in your yard or on your patio. Portability means you can take your Weber Gas Barbecue with you if you move. - Page 6 Genesis Silver-B NG 011901...
- Page 7 Hinge Pin Left Endcap Shroud Handle Warm-Up Basket Warming Rack Cooking Grates Flavorizer Bars Cooking Box 1/4-20 keps nut Slide Out Bottom Tray Catch pan holder Left Trim Piece Work Surface Left Frame Hinge Rod Swing-Up Work Surface Caster Frame 1/4-20 x 2 inch bolt Nylon Washers Frame Connectors...
- Page 8 ® of Weber-Stephen Products Co., 200 East Daniels Road, Palatine, IL, 60067-6266, U.S.A. This product is covered by one or more United States patents and patents in other nations globally. Printed in the U.S.A.
- Page 9 Screwdriver Phillips screwdriver Hammer 7/16 open-end or an adjustable wrench Pliers Block of wood Lid -1 Cooking Box - 1 Cooking grates - 2 Control panel - 1 Left Frame - 1 Right Frame -1 Wheel Frame - 1 Caster Frame - 1 Frame Connectors - 2 Left Trim Piece - 1 Right Trim Piece - 1...
- Page 10 Warming Rack - 1 Warm-Up Basket - 1 Flavorizer Bars - 5 Wrap-Around Trim Piece - 1 Bottom tray - 1 Catch Pan Holder - 1 Catch-Pan -1 Disposable Drip Pans - 2 Thermometer -1 Casters - 2 Wheels - 2 Hose - 1 Burner Control Knobs - 3 Hinge Pins (1/4 x 1 1/2 inch clevis pin) - 2...
- Page 11 * See Section D * General Maintenance Weber Spider Stopper™ Guards Your Weber Gas Barbecue, as well as any outdoor gas appliance, is a target for spiders and other insects. They can nest in the venturi section (Venturi(1), air shutter(2), venturi fin(3) ) of the burner tubes.
- Page 12 Replacing Main Burners 1) Your Weber Gas Barbecue must be OFF and cool. 2) Turn gas OFF at source. 3) To remove control panel: take off the burner control knobs.
-
Page 13: Assembly Instructions
Place one end of the axle rod on the block of wood (or other protected surface). Tap one hubcap onto the end of the axle rod. Slide one wheel onto the axle, WEBER name facing out. Next, slide the other end of the axle rod through the wheel frame. - Page 14 Continue frame assembly You will need: caster frame, wheel frame, four 1/2 inch bolts, four nylon washers and a 7/16 inch or adjustable wrench. Place the caster frame onto the tabs of the left frame, so that the swing table locking latch(1) is to the rear. Place the wheel frame onto the tabs of the right frame.
- Page 15 Insert casters You will need: frame assembly and two casters. Push the casters firmly into the inserts in the ends of the caster frame. Add Wrap-around Frame Panel You will need: wrap around frame panel and a wrench. Place wrap-around frame panel in place: 1) The cut-out tabs should fit between the washer and the frame, as shown.
- Page 16 Tighten by holding the bolt with pliers while you tighten the nut with a wrench. Your Weber Gas Grill Manifold assembly consisting of gas manifold, valves and gas burners has been factory assembled, pressure- and flame- tested. As a safety...
- Page 17 Install manifold brackets The manifold brackets(2) are already in place on the manifold between the valves. Place your hand underneath the manifold. Lift the manifold and cooking box slightly and hook the manifold bracket(2) onto the frame brace(1). Install igniter Note - The igniter wires are already attached to the Gas Catcher Ignition Chamber and the igniter.
- Page 18 Install Gas Supply General Specifications for Piping Note - Contact your local municipality for building codes regulating outdoor gas barbecue installations. In absence of Local Codes, you must confirm to the latest edition of ANSI Z223.1. WE RECOMMEND THAT THIS INSTALLATION BE DONE BY A PROFESSIONAL.
- Page 19 Check that all burner valves are off You will need: burner control knobs. Valves are shipped in the OFF position, but you should check to be sure that they are turned OFF. Put the knob on each valve. Check by pushing down and turning clockwise.
- Page 20 The burners have been flame-tested. As a safety precaution however, you should recheck all fittings for leaks before using your Weber Gas Barbecue. Shipping and handling may loosen or damage a gas fitting. WARNING: Perform these leak checks even if your barbecue was dealer or store assembled.
- Page 21 Install the slide out bottom tray You will need: the slide out bottom tray(1), catch pan holder(2), catch pan and one disposable drip pan. Hook the ends of the catch pan holder into the hole in the slide out bottom tray. The front of the catch pan holder must be on the same side as the finger grip(1) of the bottom tray.
- Page 22 Install Lid You will need: lid, two hair pin cotters(1) and two hinge pins(2). Place lid on top of the cooking box. Align the hinges at the rear of the barbecue. Insert hinge pins through the hinges from the outside. Insert hair pin cotters into the small holes in the hinge pins.
-
Page 23: Installing Features
Installing Features Install the right trim piece with tool holders You will need: Right trim piece with tool holders Push the Right trim piece into the frame as shown(1), making sure that the tabs on the underside of the trim piece are snapped into the slots in the frame.(2) Install the left end trim piece and swing-up work surface... - Page 24 4.) While holding swing-up work surface in position, insert the other end of the swing-up work surface rod into the left end trim piece. Push the trim piece into the frame. 5.) Add a washer to each bolt and insert it through the hole in the frame and the hole in the trim piece on both sides.
- Page 25 Installing the Warm-Up™ Basket You will need: Warm-Up Basket Insert one end of the Weber Warm-Up Basket into the hole at the right side of the inside of the lid, and the other end into the slot at the left side of the lid.
-
Page 26: Operating
WARNING: Check hose before each use of barbecue for nicks, cracking, abrasions or cuts. If the hose is found to be damaged in any way, do not use the barbecue. Replace using only Weber authorized replacement hose. Contact the Customer Service Representative in your region using the contact information sheet provided with your manual. -
Page 27: Manual Lighting
Manual Lighting DANGER Failure to open lid while igniting the barbecue’s burners, or not waiting 5 minutes to allow the gas to clear if the barbecue does not light, may result in an explosive flame-up which can cause serious bodily injury or death. 1) Open the lid. -
Page 28: Cooking
You can adjust the FRONT and BACK burners as desired. The control settings: High (H), Medium (M), Low (L), or Off (O) are described in your Weber cookbook. The cookbook uses these notations to describe the settings of the FRONT and BACK burners. -
Page 29: Annual Maintenance
The burners have been flame tested. As a safety precaution however, you should recheck all fittings for leaks before using your Weber Gas Barbecue. Shipping and handling may have loosened or damaged a gas fitting. WARNING: Perform these leak checks even if your barbecue was dealer- or store-assembled. -
Page 30: General Maintenance
General Maintenance Weber Spider /Insect screens Your Weber Gas Barbecue, as well as any outdoor gas appliance, is a target for spiders and other insects. They can nest in the venturi section Venturi(1). This blocks the normal gas flow, and can cause the gas to flow back out of the air shutter. -
Page 31: Replacing Main Burners
Replacing Main Burners 1) Your Weber Gas Barbecue must be OFF and cool. 2) Turn gas OFF at source. 3) To remove control panel: take off the burner control knobs. Remove the screws holding the control panel in place. Lift off the control panel. -
Page 32: Crossover Ignition System Operations
Crossover® Ignition System Operations If the Crossover Ignition System fails to ignite the Left burner, light the Left burner with a match. If the Left burner lights with a match, then check the Crossover Ignition System. Check that both the white(1) and black(2) ignition wires are attached properly. -
Page 33: Troubleshooting
THIS IS NOT A DEFECT. Cure Clean Weber Spider/Insect Screens. (See Section “Annual Maintenance”) Straighten fuel hose. If you can light the Front burner with a match, then check the Crossover Ignition System. -
Page 34: Contact Information
1440 Wauthier-Braine BELGIUM 32.2.367.1611 CANADA Onward Multi Corp, INC. 585 Kumpf Drive Waterloo, Ontario CANADA N2V 1K3 800-265-2150 DENMARK Weber Scandinavia A/S Boegildmindevej 23B P.O. Box 84 9400 Noerresundby DENMARK 45.99.36.30.10 FRANCE Le Creuset SA rue Olivier Deguise 02230 Fresnoy-le-Grand FRANCE 33.3.23.06.22.22... - Page 35 Kontaktinformation Informations concernant les contacts • Kontakt Information Kontaktinformasjon • Elenco dei nominativi da contattare SWEDEN Weber Scandinavia A/S Almungevagen 2 194 51 Upplands-Vasby SWEDEN 46.8.590.74.777 SWITZERLAND Koenig Apparate AG Eggbuhlstrasse 28 8052 Zurich SWITZERLAND 41.1.306.11.44 TURKEY Tropikal A/S Soganlik Yanliz Selvi Cad No. 33...
-
Page 36: Product Registration
If you choose, you can also receive information by mail about other relevant products from responsible organizations Please check the box at the end of this paragraph if you do not wish to learn more about Weber new and interesting opportunities from other companies. - Page 37 97049 STAPLE. benefits many one. question this Mail readers. just recipes, with filled newsletter free give we’ll grill! sizzle www.weber.com. register return, REGISTRATION !8020198408! MAIL STATES UNITED MAILED NECESSARY POSTAGE MAILING. BEFORE TAPE WITH SEAL FOLD realize still card check...