Table of Contents
Advertisement
Quick Links
Advertisement
Table of Contents

Related Manuals for VTech VT6221


Summary of Contents for VTech VT6221
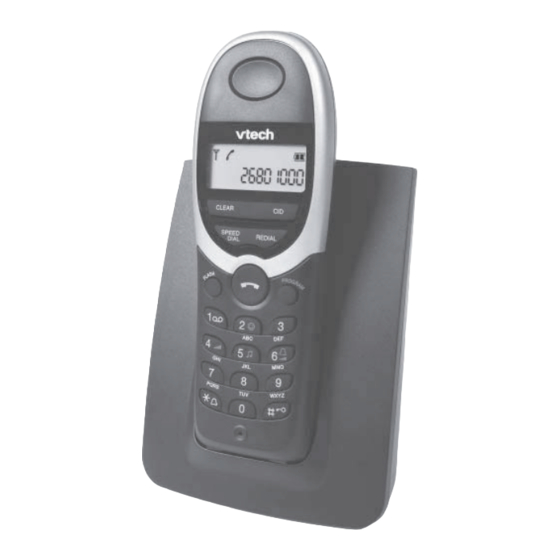
- Page 1 Digital Enhanced Cordless Telephone (DECT) User manual VT6221 www.vtech.com...
-
Page 2: Table Of Contents
Contents Setting up the telephone……………………………………………………………………3 Package contents …………………………………………………………………………3 Location ……………………………………………………………………………………3 Setting up the base station Connecting the telephone ...5 Removing the cords ...6 Putting the handset into operation ...7 Displays, keys, symbols ...10 Key lock on/off ...14 Paging ...14 Telephoning ...15 External calls ...15 Accepting a call ...16 Redial... - Page 3 Contents Telephone settings...20 Setting the ring tone volume ...20 Setting the ring tone melody ...20 ...21 Speed dialling Direct call (baby call) Flash time ...23 Restoring default settings ...23 Changing the PIN ...24 Key tone on/off ...24 Appendix ...25 Technical Data...25 ...22...
-
Page 4: Setting Up The Telephone
Setting up the telephone Package contents The package contains the following items: VT6221 1 Base station 1 Telephone line cord 1 AC power adapter 1 Handset 2 Dowels / 2 screws 2 Rechargeable batteries 1 English user manual and 1 Chinese user manual... -
Page 5: Setting Up The Base Station
Setting up the telephone Setting up the base station Do not expose the base station to direct sunlight. Protect the base station against moisture. Do not position the telephone in room exposed to condensation, corrosive steam or excessive dust. Condensation can occur in cellars, garages, conser vatories or sheds. -
Page 6: Connecting The Telephone
Before you can start using your telephone you must plug in the telephone connection cords and the mains cable. Safety note Use only the VTech power pack provided for the base station! Telephone connection cord The telephone connection cord has two different plugs. -
Page 7: Removing The Cords
Setting up the telephone Removing the cords First unplug the mains plug from the 220V socket and the plug from the telephone connection socket. -
Page 8: Putting The Handset Into Operation
Setting up the telephone Putting the handset into operation Your handset will be ready for operation (for making or accepting calls) only once the battery has been charged for the first time. Inserting the rechargeable batteries The bottom of the handset contains a battery compartment for housing two type AAA batteries (microcells). - Page 9 Setting up the telephone Charging the batteries The batteries are not yet charged when you first unpack the telephone. To charge the batteries, place the handset on the base station. The flashing battery symbol on the handset signals the charging pr ocedure. The batteries will take around 14 hours to charge up.
- Page 10 Setting up the telephone You can replace the handset in the base station after every call. Charging Note is electronically controlled to ensure optimal charging of batteries in diffe- rent charge states. A void removing the batteries from the handset for no good reason, since this af fects the optimum charging cycle.
-
Page 11: Displays, Keys, Symbols
Setting up the telephone Displays, keys, symbols Displays The display gives you information on the current status of your telephone. The «standby indicator» shown below shows you your handset is ready for use. The symbols in the upper row of the display have the following meaning: R Ó... - Page 12 Setting up the telephone Handset keys Open call list*, press key several times to scroll down. Previous called number(s), press to scroll through this redial list. REDIAL Performs different functions depending on the context. CLEAR Deletes the last character or number of an entry in the display. Press this key to return to standby mode.
- Page 13 Setting up the telephone In programming mode: Direct call on/off. Set handset volume. Set ring tone melody. Set ring tone volume. Handset: Display Delete/cancel key Speed-dial key Talk key Flash key Numerical keys Microphone * Only in networks that enable caller ID CLEAR SPEED REDIAL...
- Page 14 Setting up the telephone Base station keys Paging key PAGE Charging cradle for the handset...
-
Page 15: Key Lock On/Off
Setting up the telephone Key lock on/off . During incoming calls the key lock is deactivated for the duration of the call. Key lock on Hold down the hash key for about 2 seconds. The display shows the key symbol Key lock off Hold down the hash key for about 2 seconds. -
Page 16: Telephoning
Telephoning External calls Pr ess the Talk key. Enter the required telephone number. This number will then be dialled. To end this external call: Pr ess the Talk-key,or replace the hendset on the base station for auto-hang up. Note You may also make external calls by using predialling: enter the telephone number, use the key The telephone number will then be dialled. -
Page 17: Accepting A Call
Telephoning Accepting a call Calls are signalled acoustically as well as optically in the handset display. The callers number is displayed if you subscribed caller ID services from your net- work operator. The caller’s number is not displayed if the caller has withheld his number i.e. if he has suppressed transmission of his number, or if this is not technically possible. -
Page 18: Redial
Telephoning Redial The last 10 dialled numbers are saved under the redial key. Open the redial list. The last dialled number is displayed. Press this redial key REDIAL again to scroll through the list. Pr ess the CLEAR CLEAR Press the CLEAR CLEAR 2 seconds to delete the currently displayed entry from the list. -
Page 19: Dialling From The Call List
Telephoning Listen to messages in the network mailbox Hold down key 1 for about 2 seconds. The connection to your network mail- box is automatically established. Dialling from the call list If your network operator supports caller ID (CLIP), numbers (up to 18 digits) of unanswe- red calls ar e saved in the caller list. -
Page 20: Setting The Handset Volume
Telephoning Setting the handset volume The handset volume can be set and saved at any of three levels. PROGRAM Press the programming key. Press 4. The current volume setting is displayed (e.g. “2/3 ” is the middle volume 2 of 3). Use numerical keys 1 to 3 to set the preferred volume. -
Page 21: Telephone Settings
Telephone settings Setting the ring tone volume The ring tone volume can be set and saved at any of three levels. PROGRAM Press the programming key. Press 6. The current volume setting is displayed (e.g. “2/3 ” is the middle volume 2 of 3). -
Page 22: Speed Dialling
Telephone settings Speed dialling Your VT6221 can stor e 10 speed-dial numbers, each up to 18 digits. Selecting speed dialling Press the speed-dial key. SPEED DIAL The first entry is displayed. Scroll through the speed-dial list by pressing the speed-dial key as often as required or use numerical keys 1 to 9 to select an entry. -
Page 23: Direct Call (Baby Call)
Telephone settings Direct call (baby call) With direct call, you can program a number which can be directly dialled when any key (except the programming key) is pressed. Entering/editing the direct call number PROGRAM Press the programming key. Press 3. Enter your four-digit PIN. -
Page 24: Flash Time
Telephone settings Flash time The flash time has been set to 600 ms, which is most suitable to HKSAR telecommunications network setting. Though it is possible to change the flash time manually,it is not recommended as it may cause dysfunction of certain product features. -
Page 25: Changing The Pin
Telephone settings Changing the PIN The PIN is a four-digit password to protect the base station and handsets against unau- thorised access. The telephone is delivered with the system PIN set to «0000». PROGRAM Press the programming key. Press 1. Enter the old four-digit PIN (default setting “0000 ”). -
Page 26: Appendix
Appendix Technical Data Standard: DECT Number of channels: 120 duplex channels Frequencies: 1880 MHz bis 1900 MHz Range: up to 300 meters outdoors, up to 50 meters indoors Base station power supply: 220 V /50 Hz (power pack) Base station 220V AC adapter power supply Handsets operating time: standby / talk time... - Page 27 VTech Electronics (HK) Ltd. Rm 708, 7/F., Laford Centre, 838 Lai Chi Kok Road, Kowloon, Hong Kong. Tel: 852-2776 3223...