Table of Contents

Related Manuals for TP-Link TL-R480T


Summary of Contents for TP-Link TL-R480T
- Page 2 COPYRIGHT & TRADEMARKS Specifications are subject to change without notice. trademark of TP-LINK Technologies Co., Ltd. Other brands and product names are trademarks or registered trademarks of their respective holders. No part of the specifications may be reproduced in any form or by any means or used to make any derivative such as translation, transformation, or adaptation without permission from TP-LINK Technologies Co., Ltd.
-
Page 3: Table Of Contents
Package contents... 1 Chapter 1: About this Guide ... 2 1.1 Purposes ... 2 1.2 Conventions ... 2 1.3 Overview of this User Guide... 2 Chapter 2: Introduction ... 3 2.1 Overview of the Router... 3 2.2 Features ... 3 2.3 Panel Layout ... - Page 4 5.7.6 Advanced Security ... 35 5.8 Static Routing ... 37 5.9 DDNS ... 38 5.9.1 Oray.net DDNS ... 38 5.9.2 Comexe.cn DDNS ... 39 5.10 System Tools ... 40 5.10.1 Time ... 41 5.10.2 Firmware ... 41 5.10.3 Factory Defaults ... 42 5.10.4 Reboot...
-
Page 5: Package Contents
Mounting fittings for installing in a standard 19” rack Note: If any of the listed contents are damaged or missing, please contact the retailer from whom you purchased the TL-R480T Enterprise Broadband Router for assistance. Enterprise Broadband Router User Giude... -
Page 6: Chapter 1: About This Guide
1.1 Purposes This Guide tells you how to use the TL-R480T Enterprise Broadband Router. 1.2 Conventions The router mentioned in this guide stands for TL-R480T Enterprise Broadband Router. -
Page 7: Chapter 2: Introduction
The superior performance will bring you a full-new experience of a non-bottle-neck network. TL-R480T Enterprise Broadband Router makes plenty of applications become a reality. It can be used for constructing intranet FTP, WEB, and Mail server, etc, more inaccessibly. -
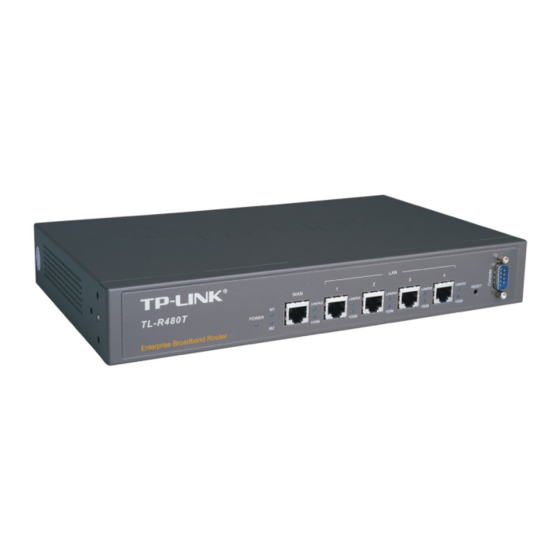
Page 8: Panel Layout
2.3 Panel Layout 2.3.1 The Front Panel The front panel of the TL-R480T consists of several LED indicators, which is designed to indicate connections. Viewed from left to right. Table 2-1 describes the LEDs on the front panel of the router. -
Page 9: The Rear Panel
WAN RJ45 port for connecting the router to a cable, DSL modem or Ethernet 2.3.2 The Rear Panel The rear panel of the TL-R480T only features a power receptacle, which is an AC power receptacle. Connect the female of the power cord head here, and the male head to the AC power outlet. -
Page 10: Chapter 3: Connecting The Router
TL-R480T Chapter 3: Connecting the Router 3.1 System Requirements Broadband Internet Access Service (DSL/Cable/Ethernet) One DSL/Cable modem that has an RJ45 connector (It’s not necessary if you connect the router to Ethernet) Each PC on the LAN needs a working Ethernet Adapter and an Ethernet cable with... - Page 11 Enterprise Broadband Router User Giude TL-R480T T L-R 48 0 T POWER Enterprise Broadband Router To WAN To LAN Switch/Hub XDSL Cable Ethernet ( 、 、 ) Figure 3-1 Hardware Installation of the TL-R480T Enterprise Broadband Router - 7 -...
-
Page 12: Chapter 4: Quick Installation Guide
TL-R480T Chapter 4: Quick Installation Guide After connecting the TL-R480T router into your network, you should configure it. This chapter describes how to configure the basic functions of your TL-R480T Enterprise Broadband Router. These procedures only take you a few minutes. You can access the Internet via the router immediately after it has been successfully configured. -
Page 13: Quick Installation Guide
After a moment, a login window will appear similar to that shown in Figure 4-4. Enter admin for the User Name and Password, both in lower case letters. Then click the OK button or press the Enter key. Enterprise Broadband Router User Giude ® Navigator) utility, the TL-R480T Figure 4-4 Login Windows - 9 -... - Page 14 Enterprise Broadband Router User Giude TL-R480T Note: If the above screen does not prompt, it means that your web-browser has been set to a proxy. Go to Tools menu>Internet Options>Connections>LAN Settings, in the screen that appears, cancel the Using Proxy checkbox, and click OK to finish it.
- Page 15 TL-R480T ISP. These fields are case sensitive. If you have difficulty with this process, please contact your ISP. If you choose " Dynamic IP", the router will automatically receive the IP parameters from your ISP without needing to enter any parameters.
-
Page 16: Chapter 5: Configuring The Router
TL-R480T Chapter 5: Configuring the Router This chapter describes each web page's key functions. 5.1 login After your successful login, you can configure and manage the router. There are nine main menus on the left of the web-based utility. Submenus will be available after you click one of the main menus. -
Page 17: Quick Setup
Enterprise Broadband Router User Giude TL-R480T Figure 5-1 Router Status 5.3 Quick Setup Please refer to Section 4.2: "Quick Installation Guide." 5.4 Network Figure 5-2 the Network menu There are six submenus under the Network menu (shown in figure 5-2): LAN, WAN, MAC Clone, Bandwidth Control, VLAN and Port Mirror. -
Page 18: Wan
TL-R480T MAC Address - The physical address of the router, as seen from the LAN. The value can't be changed. IP Address - Enter the IP address of your router in dotted-decimal notation (factory default: 192.168.1.1). Subnet Mask - An address code that determines the size of the network. Normally use 255.255.255.0 as the subnet mask. - Page 19 Enterprise Broadband Router User Giude TL-R480T Figure 5-4 WAN - Dynamic IP This page displays the WAN IP parameters assigned dynamically by your ISP, including IP address, Subnet Mask, Default Gateway, etc. Click the Renew button to renew the IP parameters from your ISP. Click the Release button to release the IP parameters.
- Page 20 TL-R480T Figure 5-4a WAN - 802.1X + Dynamic IP User Name - Enter the user name for 802.1x authentication provided by your ISP Password - Enter the password for 802.1x authentication provided by your ISP. Click the Login button to start 802.1x authentication.
- Page 21 TL-R480T If you are also given a user name and a password for 802.1x authentication, you should select 802.1x + Static IP for WAN Connection Type, a box will then appear requesting a user name and a password, shown in figure 5-5a: Figure 5-5a WAN - 802.1X + Static IP...
- Page 22 Enterprise Broadband Router User Giude TL-R480T Caution: Sometimes the connection cannot be disconnected although you specify a time to Max Idle Time. This is because there may still be active applications in the background, which may cause fee accounted by your ISP.
-
Page 23: Mac Clone
TL-R480T Service Name/AC Name - The service name and AC (Access Concentrator) name, this should not be done unless you are sure it is necessary for your ISP. ISP Specified IP Address - If you know that your ISP does not automatically transmit your IP address to the router during login, click “Use the IP Address... -
Page 24: Bandwidth Control
TL-R480T If you click the Save button, the router will prompt you to reboot. 5.4.4 Bandwidth Control You can control bandwidth of each LAN port on this page. This feature can be used for distributing flexibly Internet resource. Figure 5-9 Bandwidth Control LAN - LAN port number. -
Page 25: Dhcp
TL-R480T Mirroring Port - The port will collect packet from Mirrored Port(s). Mirrored Port(s) - Any packets through the Mirrored Port(s) will be copied and be forwarded to the Mirror Port. Note: 1) The Mirror port cannot be mirrored. 2) All in the Mirrored Port(s) means all LAN ports except for Mirror Port. -
Page 26: Dhcp Clients List
TL-R480T DHCP Server - Enable or Disable the DHCP server. If you disable the Server, you must have another DHCP server within your network or else you must manually configure the computer. Start IP Address - This field specifies the first of the addresses in the IP address pool. -
Page 27: Address Reservation
TL-R480T 5.5.3 Address Reservation When you specify a reserved IP address for a PC on the LAN, that PC will always receive the same IP address each time it accesses the DHCP server. Reserved IP addresses should be assigned to servers that require permanent IP settings. This page is used for address reservation (shown in figure 5-15). -
Page 28: Forwarding
TL-R480T Note: The function won't take effect until the router reboots. 5.6 Forwarding Figure 5-16 the Forwarding menu There are four submenus under the Forwarding menu (shown in figure 5-16): Virtual Servers, Port Triggering, DMZ and UPnP. Click any of them, and you will be able to configure the corresponding function. -
Page 29: Port Triggering
TL-R480T protocols supported by the router). Enable - The Enable checkbox to enable the virtual server entry. Common Service Port - Some common services already listed in the pull-down list. To setup a virtual server entry: Select the service you want to use from the Common Service Port list, select the ID you want to use, and click the Copy to button. - Page 30 TL-R480T NAT router. Port Triggering is used for some of these applications that can work with an NAT router. You can set up Port Triggering on this page shown in figure 5-18: Once configured, operation is as follows: A local host makes an outgoing connection using a destination port number defined in the Trigger Port field.
-
Page 31: Dmz
TL-R480T or All. Enter the range of port numbers used by the remote system when it responds to the PC's request. Select the protocol used for Incoming Ports Range from the pull-down list, either TCP, UDP, or All. Select the Enable checkbox to enable. -
Page 32: Upnp
TL-R480T To assign a computer or server to be a DMZ server: Click the Enable radio button Enter the local host IP address in the DMZ Host IP Address field Click the Save button. Note: After you set the DMZ host, the firewall related to the host will not work. -
Page 33: Security
TL-R480T Status - Either Enabled or Disabled, “Enabled” means that port is still active, • otherwise, the port is inactive. Click Refresh to update the Current UPnP Settings List. 5.7 Security Figure 5-21 the Security menu There are six submenus under the Security menu (shown in figure 5-21): Firewall, IP Address Filtering, Domain Filtering, MAC Filtering, Remote Management and Advanced Security. -
Page 34: Ip Address Filtering
TL-R480T Enable Firewall - The general firewall switch is on or off. Enable IP Address Filtering - Set IP Address Filtering is enabled or disabled. There are two default filtering rules of IP Address Filtering, either Allow or Reny passing through the router. - Page 35 TL-R480T Effective Time - Enter a range of time in HHMM format, which point to the range time for the entry to take effect. For example, 0803 - 1705, the entry will take effect from 08:03 to 17:05. LAN IP Address - Type a LAN IP address or a range of LAN IP addresses in the field, in dotted-decimal notation format.
-
Page 36: Domain Filtering
TL-R480T 5.7.3 Domain Filtering The Domain Filtering page (shown in figure 5-25) allows you to control access to certain websites on the Internet by specifying their domains or key words. Before adding a Domain Filtering entry, you must ensure that Enable Firewall and Enable Domain Filtering have been selected on the Firewall page. -
Page 37: Mac Filtering
TL-R480T To add additional entries, repeat steps 1-4. When finished, click the Return button to return to the Domain filtering page. To Modify or delete an existing entry: Find the desired entry in the table. Click Modify or Delete as desired on the Edit column. -
Page 38: Remote Management
TL-R480T filtering entry, click the Add New… button. The page " Add or Modify a MAC Address Filtering entry" will appear, shown in figure 5-28: Figure 5-28 Add or Modify a MAC Address Filtering entry To add or modify a MAC Address Filtering entry, follow these instructions: Enter the appropriate MAC address into the MAC Address field. -
Page 39: Advanced Security
TL-R480T Figure 5-29 Remote Management Web Management Port - Web browser access normally uses the standard HTTP service port 80. This router’s default remote management web port number is For greater security, you can change the remote management web interface to a custom port by entering that number in the box provided. - Page 40 Enterprise Broadband Router User Giude TL-R480T Figure 5-30 Advanced Security settings Packets Statistic interval (5 ~ 60) - The default value is 10. Select a value between 5 and 60 seconds in the pull-down list. The Packets Statistic interval value indicates the time section of the packets statistic. The result of the statistic used for analysis by SYN Flood, UDP Flood and ICMP-Flood.
-
Page 41: Static Routing
TL-R480T WAN port. The default is disabled. If enabled, the ping packet from the Internet cannot access the router. Forbid Ping Packet from LAN Port - Enable or Disable forbidding Ping Packet to access the router from the LAN port. The default value is disabled. If enabled, the ping packet from the LAN port cannot access the router. -
Page 42: Ddns
TL-R480T To add static routing entries: 1. Enter the following data: Destination IP Address - The Destination IP Address is the address of the network or host that you want to assign to a static route. Subnet Mask - The Subnet Mask determines which portion of an IP address is the network portion, and which portion is the host portion. -
Page 43: Comexe.cn Ddns
TL-R480T Figure 5-33 Oray.net DDNS Settings To set up for DDNS, follow these instructions: Type the User Name for your DDNS account. Type the Password for your DDNS account. Click the Login button to login the DDNS service. Connection Status - the status of the DDNS service connection is displayed here. -
Page 44: System Tools
TL-R480T Figure 5-34 Comexe.cn DDNS Settings To set up for DDNS, follow these instructions: Type the domain names your dynamic DNS service provider gave. Type the User Name for your DDNS account. Type the Password for your DDNS account. Click the Login button to login to the DDNS service. -
Page 45: Time
TL-R480T 5.10.1 Time You can set the time manually or get GMT from the Internet for the router on this page (shown in figure 5-36): Time Zone - Select your local time zone from this pull down list. Date - Enter your local date in MM/DD/YY into the right blanks. -
Page 46: Factory Defaults
TL-R480T New firmware versions are posted at the router is not experiencing difficulties, there is no need to download a more recent firmware version, unless the version has a new feature that you want to use. Note: When you upgrade the router's firmware, you may lose its configuration settings, so make sure you write down the router settings before you upgrade its firmware. -
Page 47: Password
TL-R480T Figure 5-39 Reboot the router Click the Reboot button to reboot the router. Some settings of the router will take effect only after rebooting, which include: • Change LAN IP Address. (System will reboot automatically) • MAC Clone (system will reboot automatically) •... -
Page 48: Log
TL-R480T 5.10.6 Log This page (shown in figure 5-41) allows you to query the Logs of the router. The router can keep logs of all traffic. You can query the logs to find what happened to the router. Click the Refresh button to refresh the logs. - Page 49 TL-R480T Statistics Table: The IP address displayed with statistics IP Address The total amount of packets received and transmitted by the router. Packets Total The total amount of bytes received and transmitted by the router. Bytes The total amount of packets received and transmitted in the last Packets Packets Statistic interval seconds.
-
Page 50: Appendix A: Faq
TL-R480T Appendix A: FAQ How do I configure the router to access Internet by ADSL users? First, configure the ADSL modem configured in RFC1483 bridge model. Connect the Ethernet cable from your ADSL modem to the WAN port on the router. - Page 51 TL-R480T Some ISPs require that you register the MAC address of your adapter, which is connected to your cable or DSL modem during installation. If your ISP requires MAC register, login to the router and click the "Network" menu link on the left of your browser, and then click "MAC Clone"...
- Page 52 TL-R480T “Enable” radio and type your IP address into the “DMZ Host IP Address” field, using 192.168.1.169 as an example, remember to click the "Save” button. I want to build a WEB Server on the LAN, what should I do?
-
Page 53: Appendix B: Configuring The Pcs
TL-R480T Appendix B: Configuring the PCs In this section, we’ll introduce how to install and configure the TCP/IP correctly in Windows 95/98. First make sure your Ethernet Adapter is working, refer to the adapter’s manual if needed. Install TCP/IP component On the Windows taskbar, click the Start button, point to Settings, and then click Control Panel. - Page 54 TL-R480T Figure B-3 Configuration tab Click on Properties. The following TCP/IP Properties window will display and the IP Address tab is open on this window by default. Now you have two ways to configure the TCP/IP protocol below: • Assigned by DHCP Sever...
- Page 55 TL-R480T Figure B-5 Gateway tab Choose Disable D NS on the DNS configuration following figure: Figure B-6 DNS Configuration tab • Setting IP address manually Select Specify an IP add figure. If the router's LAN IP address is 192.168.1.1, type IP address is 192.168.1.x (x is from 2 to 254), and subnet mask is 255.255.255.0.
- Page 56 Enterprise Broadband Router User Giude TL-R480T Figure B-7 IP Address tab Type the router’s LAN IP address (the default IP is 192.168.1.1) into the New gateway field on the Gateway tab, and click on the Add button, as shown in the figure:...
- Page 57 Enterprise Broadband Router User Giude TL-R480T Figure B-9 DNS Configuration tab Now, all the configurations are finished, it will take effect after reboot. - 53 -...
-
Page 58: Appendix C: Specifications
TL-R480T Appendix C: Specifications General Standards IEEE 802.3, 802.3u Protocols TCP/IP, PPPoE, DHCP, ICMP, NAT, SNTP Ports One 10/100M Auto-Negotiation WAN RJ45 port. Four 10/100M Auto-Negotiation LAN RJ45 ports supporting Auto MDI/MDIX Cabling Type 10BASE-T: UTP category 3, 4, 5 cable (maximum 100m) -
Page 59: Appendix D: Glossary
Enterprise Broadband Router User Giude TL-R480T Appendix D: Glossary DDNS (Dynamic Domain Name System) - The capability of assigning a fixed host and domain name to a dynamic Internet IP address. DHCP (Dynamic Host Configuration Protocol) - A protocol that automatically configure the TCP/IP parameters for the all the PCs that are connected to a DHCP server. -
Page 60: Appendix E: Contact Information
Enterprise Broadband Router User Giude TL-R480T Appendix E: Contact Information For help with the installation or operation of the TP-LINK TL-R480T Enterprise Broadband Router, please contact us. support@tp-link.com E-mail: http://www.tp-link.com Website: - 56 -...