Table of Contents
Advertisement
Quick Links
Advertisement
Table of Contents
Troubleshooting

Related Manuals for VIORE LCD19VX60PB1


Summary of Contents for VIORE LCD19VX60PB1
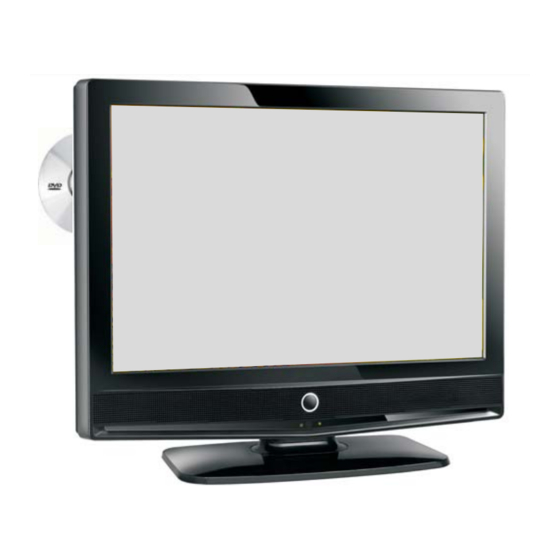
- Page 1 19” HD LCD Television with Built-in DVD Player LCD19VX60PB1...
-
Page 2: Table Of Contents
Safety and Warnings... 2 -4 Introduction...5 Installation... 6-9 emote Control... 10 OperatioN... 1 1-14 Caution and DVD side panel... Features... General steps of setup menu... Setup Items Introduction ... MP3 playback... DVD trouble shooting... Trouble Shooting...20 Contents... -
Page 3: Safety And Warnings
IMPORTANT SAFETY INSTRUCTION 1.Read these safety instructions. 2.Keep these safety instructions. 3.Heed all warnings. 4.Follow all safety instructions. 5.Do not use this apparatus near water. 6.Clean only with dry cloth. 7.Do not block any ventilation openings. Install in accordance with the manufacturers instructions. 8.Do not install near any heat sources such as radiators , stoves, or other apparatus (including amplifiers)that... - Page 4 High voltages are used in the operation of this television receiver. Do not remove the cabinet back from your set. Refer servicing to qualified service personnel. To prevent fire or electrical shock hazard, do not expose the television receiver to rain or moisture. Do not drop or push objects into the television cabinet slots or openings.
- Page 5 Thank you very much for purchasing this TV. To enjoy your product from the very beginning, read this manual carefully and keep it handy for easy reference. INSTALLATION Locate the TV in the room where light does not strike the screen directly Total darkness or a reflection on the picture screen can cause eyestrain.
-
Page 6: Introduction
Main features -Built-in progressive scan DVD player -Integrated ATSC TV tuner for HDTV broadcast reception -Integrated 3-in-1 Card Reader (SD, MS, MMC) and USB port for playing digital media files -1440 x 900 native resolution for HD performance -High brightness provides a vivid and brilliant picture deeper blacks and brighter whites with high contrast ratio -HDMI input for true digital connection... -
Page 7: Installation
Front panel 1: Remote control sensor. 2: Indicator LED: GREEN POWER ON. STANDBY. 3: Key board 4: Power: Press this button to turn the unit ON from STANDBY mode. Press it again to turn the set back to STANDBY. 5: DVD Disc loading Slot 6: 3-in-1 Card Slot (SD, MS, MMC) 7: USB Port... - Page 8 STEPS: Be sure both the TV and computer are set to Power off. 1.Connect VGA and audio cable. 2.Connect the power cord. 3.Power on the TV, switch to VGA mode. 4.Power on the VGA. This sequence is very important. AUDIO AUDIO AC-INPUT VGA INPUT...
- Page 9 INSTALLATION ANTENNA Note: Aerial connections:IEC(female). Input impendance:75 unbalanced.
-
Page 10: Installation
AV EQUIPMENT This TV provides one group of AV ,one group of S-Video,one group of YPbPr for convenient connection to VCR,DVD or other video equipment. Please refer to the owner s manual of the equipment to be connected as well. You can use the input terminals on TV set rear as follows. -
Page 11: Remote Control
POWER MUTE RECALL MENU SOURCE ENTER EXIT TV DISPLAY MTS/SAP ASPECT SLEEP CH LIST DVD/USB GOTO MENU SETUP RETURN DISPLAY AUDIO SUBTITLE Insert Batteries Into the Remote Control 1. Remove the battery cover. 2. Inserting the 2 AAA 1.5V batteries making sure the polarity (+ or -) of the batteries matches the polarity marks inside the unit. -
Page 12: Operation
1. PICTURE MENU The first item of the MENU is PICTURE MENU. You can adjust picture effect here, such as contrast, brightness, etc. Press to select, press to adjust, press MENU to exit. Audio Timer Setup Channel Picture V-CHIP Picture mode Standard Contrast Brightness... - Page 13 1). Advanced: In PC Mode is available. Press button to select Advanced ,Press button, the screen will display as follow: Picture Audio Timer Setup V-CHIP H-pos V-pos Clock Phase Auto Select Adjust Menu Exit (1).H-Pos:Adjust the horizontal position of the screen. (2).V-Pos:Adjust the vertical position of the screen.
- Page 14 switch: 5.2 V-CHIP When the Parental Control switch is ON, the below options can be adjusted. US: Press button, the screen will display as follow: Setup Picture Audio Timer V-CHIP Channel MPAA Select Adjust Menu Exit 1):TV: Press button, the screen will display as follow: Picture Audio...
- Page 15 2).Canada French: switch the French-rating control level: E, G,8ANS+,13 ANS+,16ANS+,18ANS+. Rating Description Exempt programming General :All ages and children, contains minimal direct violence, but may be integrated into the plot in a humorous or unrealistic manner . 8ans+ General but inadvisable for young children :May be viewed by a wide public audience, but could contain scenes disturbing to children under 8 who cannot distinguish between imaginary and real situations.
-
Page 16: Caution And Dvd Side Panel
DVD SIDE PANEL OPEN/CLOSE PLAY/PAUSE STOP PREV Disc label side NEXT Disc data side facing you In DVD mode, press DVD/USB button on the Remote control, insert a USB or a MP3 player with USB interface to play the MP3, JPEG and MP4 files. 3 in 1 Card Reader In DVD mode, press DVD/USB button on the Remote control, you can insert three kinds of card... -
Page 17: General Steps Of Setup Menu
MENU OPERATION Press the SETUP button on the remote control, the SETUP MENU will be displayed. After accessing the setup menu, press the direction buttons for up and down movement to select an item desired, and press RIGHT direction button to select the lower item. Then press the ENTER button to confirm. -
Page 18: Mp3 Playback
MP3/WMA/JPEG/MPEG4 PLAYBACK The MP3/WMA/MPEG4 disc has such a directory structure as shown picture above Press Direction key to choose the root directory and then press ENTER button to enter into the sub directory. Press to choose the desired Direction key track and then press ENTER PLAY... - Page 19 Function Buttons OPEN/CLOSE To open the disc tray, press OPEN/CLOSE; To close the disc tray, press OPEN/CLOSE again. SUBTITLE Press the button to choose different captions (Requires support from disc) GOTO For DVD discs, press the button to choose the desired title and chapter andsearch the desired title time and chapter time.For Super VCD,VCD,CD discs, press this button to search the...
-
Page 20: Dvd Trouble Shooting
DVD Trouble shooting If you have any questions, please consult the troubleshooting guide below: NO PICTURE OR SOUND Ensure the power button is on. Ensure the power outlet is operational. Ensure the power cord is not damaged. Ensure the power plug is connected firmly to the outlet. -
Page 21: Trouble Shooting
Trouble shooting Trouble phenomenon Symptom Picture Snow Ghost Interference Normal Picture No picture No colour Picture breaking up No colour The LCDTV panel is built with very high precision technology giving you fine picture details in vibrant color. Occasionally, a few non-active pixels may appear on the screen as a fixed point of red, green, blue, black or white. - Page 22 Viore,Inc. 7801 Hayvenhurst Avenue, Van Nuys,CA 91406 Printed in China...