Table of Contents
Advertisement
Advertisement
Table of Contents

Related Manuals for Honeywell IPGSM-4GC


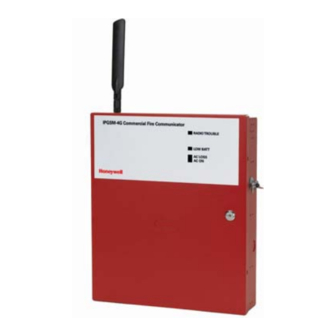
Summary of Contents for Honeywell IPGSM-4GC
- Page 1 800-12458 7/12 Rev. C...
-
Page 2: Table Of Contents
Dialer Capture Module Information ....................9 LED Display Information ....................... 9 PowerBoost1 Information ......................10 Communicator Information ......................11 RF Specifications ........................12 Central Station Messages ......................12 IPGSM-4GC Trouble Detection Information ..................13 IPGSM-4GC Specifications ......................13 Wiring Diagram ....................Inside of Back Cover... -
Page 3: General Information
Capture Module returns a handshake to the fire panel. The fire panel then sends the contact ID reports to the IPGSM-4GC, which in turn sends a kiss-off after the report is successfully received from the fire panel. Within the IPGSM-4GC, the Dialer Capture Module sends the contact ID reports over the ECP bus to the Communicator. -
Page 4: Step 1 - Setup The Customer Account
Search for the account using the Account Information or MAC ID. Under the “Actions” column, use the pulldown menu and choose Register. OR After the IPGSM-4GC is installed and programmed, you can register the communicator by clicking the Tamper ... -
Page 5: Step 4 - Mount And Wire
IPGSM-4GC Commercial Fire Communicator – Installation and Setup Guide Temporarily wire the battery's negative [–] terminal to TB1–4 on the communicator, then wire the battery's plus [+] terminal to TB1–2 on the communicator. Wait about one minute for the communicator to initialize. - Page 6 IPGSM-4GC Commercial Fire Communicator – Installation and Setup Guide 11. Verify the PowerBoost1 DIP switches are configured as shown below. PowerBoost1 2 3 4 (Switch handle = white) 2 3 4 12. Ensure the following: LED Display board is fully seated.
- Page 7 IPGSM-4GC Commercial Fire Communicator – Installation and Setup Guide ANTENNA 1451-UL9 WIRED WIRES MUST BE TRANSFORMER RUN IN CONDUIT TO 24 HR NUT, FACILITY POWER WASHER 120VAC, 60Hz, 850mA 18 VAC 72 VA POST ANTENNA MOUNTING TO Cabinet Ground Post...
-
Page 8: Wiring The 659En Line Fault Monitor (If Required)
IPGSM-4GC Commercial Fire Communicator – Installation and Setup Guide Wiring the 659EN Line Fault Monitor (Required for ULC) The IPGSM-4GC is compatible with Fire Panels when the model 659EN Line Fault Monitor, (also known as the HFS- 659EN), is installed. Note, the wire colors may vary. -
Page 9: Step 5 - Program The Communicator
IPGSM-4GC Commercial Fire Communicator – Installation and Setup Guide STEP 5 – Program the Communicator You must use the 7720P Programming tool to program the IPGSM-4GC. When using the 7720P Programming tool, the values given below are for most installations. Press the [#] key to accept the displayed default value (xxx) or enter the new value and press the [#] key for the next prompt. -
Page 10: Step 6 - Configure The Fire Panel
IPGSM-4GC Commercial Fire Communicator – Installation and Setup Guide To exit the programming mode, press [N] in response to the "Review?" prompt. Then press [Y] to the "Exit Prog Mode?" prompt. Upon exiting, the root file is updated to log the changes made. A message is displayed telling the user that this step is being executed. -
Page 11: Dialer Capture Module Information
IPGSM-4GC Commercial Fire Communicator – Installation and Setup Guide Dialer Capture Module Information LED Indicator STATUS RED – Steady ON Messages exist in buffer. RED – Flashing No messages to be sent. Waiting for messages. GREEN – Steady ON Normal Indication. -
Page 12: Powerboost1 Information
IPGSM-4GC Commercial Fire Communicator – Installation and Setup Guide PowerBoost1 Information LED Indicator STATUS AC (green) AC power available. ACTIVE (green) Cyclical flashing – normal communications. Repetition of 3 flashes – loss of communications. LOW BATT (yellow) Missing or low battery. -
Page 13: Communicator Information
IPGSM-4GC Commercial Fire Communicator – Installation and Setup Guide Communicator Information Cellular Status LED ON – NOT registered with AlarmNet. OFF – Registered with AlarmNet. Voice Session – FAST BLINK – Download session with Compass Short blink every second in progress. -
Page 14: Rf Specifications
Codes and their appropriate Restore Codes are reported to the Central Station. IPGSM-4GC communicator fault – The Fire Panel sends out a E380, and E352 message via Telco #1, these are then relayed to the central station via the IPGSM-4GC. -
Page 15: Ipgsm-4Gc Trouble Detection Information
IPGSM-4GC Trouble Detection Information Telco 1 is used for the Fire Panel to output contact ID messages to the IPGSM-4GC, and Telco 2 is used by the IPGSM- 4GC to report faults to the Fire Panel. If Telco 1 is not operational, the Fire Panel will use Telco 2 to report events if there are no faults in the Communicator. - Page 16 IPGSM-4GC Commercial Fire Communicator – Installation and Setup Guide NOTES – 14 –...
- Page 17 IPGSM-4GC Commercial Fire Communicator – Installation and Setup Guide NOTES – 15 –...
- Page 18 IPGSM-4GC Commercial Fire Communicator – Installation and Setup Guide NOTES – 16 –...
- Page 19 IPGSM-4GC Commercial Fire Communicator – Installation and Setup Guide NOTES – 17 –...
- Page 20 IPGSM-4GC Commercial Fire Communicator – Installation and Setup Guide NOTES – 18 –...
- Page 21 IPGSM-4GC Commercial Fire Communicator – Installation and Setup Guide NOTES – 19 –...
- Page 22 IPGSM-4GC Commercial Fire Communicator – Installation and Setup Guide NOTES – 20 –...
-
Page 23: Wiring Diagram
All circuits are power limited except the backup battery which is non-power limited. Non-power limited wiring must be separated from the power limited wiring by at least 1/4 inch. If desired, use a Honeywell 955WH Tamper Switch with the 28-2 bracket. ... - Page 24 For the latest documentation and online support information, please go to: http://www.honeywellpower.com Contact Technical support at 1-800-778-9958 Ext. 3131 WARRANTY For the latest warranty information, please go to: http://www.honeywellpower.com/warranty.html 10 Whitmore Road, Woodbridge, Ontario L4L 7Z4 Canada Ê800-12458RŠ Copyright 2012 Honeywell International Inc. www.honeywellpower.com 800-12458 7/12 Rev. C...