Table of Contents
Advertisement
Advertisement
Table of Contents

Related Manuals for RIEJU MR 300


Summary of Contents for RIEJU MR 300
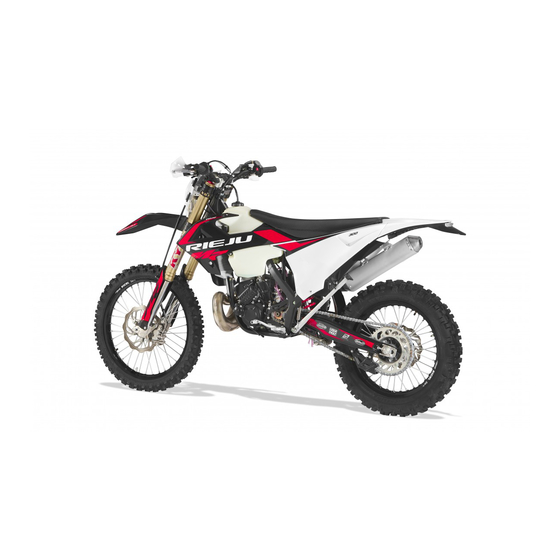
- Page 1 MR 300 – 250 - 200 Owner’s manual...
- Page 2 The availability of each model should be checked at the official RIEJU sales network. © Copyright 2014 - Rieju S.A. All rights reserved. Reproduction of this publication in whole or in part is prohibited. Rieju S.A. C/ Borrassà 41 E-17600 Figueres GIRONA-SPAIN...
- Page 3 This manual for service stations was made by RIEJU S.A. to be used by the workshops of dealers, sub-agencies RIEJU and advanced owner. It is assumed that users of this publication for the maintenance and adjustment of RIEJU vehicles has a basic knowledge of the principles of mechanics and technique procedures of vehicle repair.
-
Page 4: Table Of Contents
Índice General information Introduction Legal notices Notices and warnings Preliminary warnings Location of components Identification Steering lock Specifications Electric diagram Table of tightening torques General Engine Multifunction gauge Homologation Operating instructions Starting procedure Breaking-in Daily inspection before riding Cleaning Storage OBD Operation Maintenance Maintenance table... - Page 5 Índice 27. Chain guide 28. Chain guide wear 29. Chain guide shoe 30. Front Suspension 31. Front suspension oil 32. Bolts, nuts and fasteners 33. Petrol tube 34. Fuel system 35. Steering head adjustment 36. General lubrication 37. Steering bearing 38.
-
Page 6: General Information
General information... -
Page 7: Introduction
Introduction RIEJU thanks you for your trust. By choosing the new RIEJU MR you have just joined the great RIEJU team, and as a user of the number one brand of off-road bikes, you deserve the distinguished care that we would like to offer you, both after purchasing your RIEJU and in the explanations that we set out in this manual. -
Page 8: Preliminary Warnings
Never carry a passenger. Your RIEJU is not approved for this purpose, nor does it have space on the seat, handlebars or footrests for the passenger. In addition, the extra weight can impair handling. -
Page 9: Location Of Components
General information Location of components Number Name Number Name Front reflectors. Licence plate holder with rear light, position, intermittent and rear reflector. Headlight position, long and Front brake disc short beam. Front turn signals. Front brake calliper Rear-view mirrors. Front fork Overflow pipe. - Page 10 General information Number Name Number Name Muffler Suspension linkage Rear brake fluid tank Footpegs Seat Rear brake pedal Rear shock absorber gas tank Centrifugal regulation Kick-starter Crankcase guard VIN chassis number Exhaust Radiator Manufacturer’s identification plate Rear brake disc Rear brake calliper...
- Page 11 General information Location of components Number Name Number Name Choke lever Fuel tank cap Clutch fluid reservoir Steering lock Multifunction gauge Stop Front brake fluid tank Throttle Clutch lever Front brake lever Turn signals, lights, horn and starter Number Name Number Name Long and short-beam lights...
-
Page 12: Identification
The chassis number is also stamped on the right side of the steering column. Steering lock Your RIEJU has a steering lock. It is located on the right side of the lower fork flange. To lock the steering: 1. Turn the handlebar all the way to the left. -
Page 13: Specifications
By chain Secondary reduction 4,16 (12/50) MR 200 3,30 (13/42) 3,67 (13/49) MR 250 // MR 200-250-300 3,69 (13/48) MR 300 Competition models only Chain 110 Links // 5/8 "x 1/4" with seals (112 links) competition model only Type of clutch... - Page 14 General information Type Central backbone frame in 25 CrMo 4 steel, aluminium alloy subframe Measurements of Front Excel 1.6 x 21 - 90/90 - 21 tires and rims M/C 54R MICHELIN ENDURO MEDIUM F TT Rear Excel 2.15 x 18 - 140/80 – 18 (250cc/300cc) // 120/90 –...
-
Page 15: Electric Diagram
General information... - Page 16 General information...
- Page 17 General information...
-
Page 18: Table Of Tightening Torques
General information Table of tightening torques Engine Measure Torque(Nm) Engine axles Handlebar Measure Torque(Nm) Screw Lower handlebar flange Screw Upper handlebar flange Screw Vlutch Frame Torque(Nm) Screw Crankcase guard Screw Left-hand side protector Screw Tie Rod cylinder Head Subframe Torque(Nm) ®... -
Page 19: Engine
General information Stand Measure Torque (Nm) ® Screw Stand Loctite Rear brake Measure Torque (Nm) Screw Brake pedal ® Screw Rear brake pump Loctite Electricity Measure Torque (Nm) Screw Battery Gear shift pedal Measure Torque (Nm) Screw Gear shift pedal Kick-starter Measure Torque (Nm) - Page 20 General information Nº Part name Measure Torque (Nm) Kick-starter-to-axle bolt M6x20 Kick-starter pedal bolt M6x75...
- Page 21 General information Nº Part name Measure Torque (Nm) Cylinder nut Clutch cover bolt Water pump drain bolt Spark plug Cylinder head bolt Reed block bolt Ignition cover bolt Engine drain plug Oil fill bolt Ratchet plate bolt Stator bolts Ignition motor coil bolt Selector spring fixing bolt Primary nut Clutch spring bolts...
-
Page 22: Multifunction Gauge
General information Multifunction gauge Adjustment push-button Mode push-button SWITCHE D ON CLOC K When the motorcycle is started, the Format: display panel is activated and remains on. If the units are in Km. ----> 24h. The dashboard will display the normal If the units are in mi. -
Page 23: Homologation
Homologated fuel and starter cable 1 / 1 Blow-by tube assembly Each of the approved components must be part of the vehicle and in case of breakage, loss or malfunction the owner is advised to consult his official RIEJU dealer to correct the problem. -
Page 24: Operating Instructions
Operating instructions... -
Page 25: Starting Procedure
Operating instructions Starting procedure To start your RIEJU with the kick-starter follow the following steps: 1. Open the fuel tank tap. 2. Release the kick-starter. 3. Give two strong fuel strokes. 4. Engage the choke lever (1). 5. Operate the kick-starter vigorously. -
Page 26: Daily Inspection Before Riding
Operating instructions Daily inspection before riding Prior to each use of your RIEJU motorcycle it is necessary to carry out the following checks: Is there enough fuel? Open the fuel cap and, by moving the motorcycle sideways with the handlebar, you will see and hear the fuel, so you will know the approximate contents. - Page 27 RIEJU dealer, they know what should be done in each case. This can affect your safety.
- Page 28 RIEJU service centre. The official RIEJU service centre will be happy to assist you and to ensure your safety.
- Page 29 RIEJU service centre. Is the condition of the chain and its tension...
-
Page 30: Cleaning
Cleaning To clean your RIEJU follow these steps: 1. Cover the exhaust system to prevent water from entering. 2. Cover the steering lock with a piece of duct tape. -
Page 31: Obd Operation
Operating instructions brakes and rubber parts. • Place the motorcycle in such a way that the two wheels do not touch the ground (if this is not possible put cardboard under the wheels). • Cover the motorcycle to protect it from dust and dirt. - Page 32 ISO 15765-4 CAN protocol. To connect the 4-way socket of the motorcycle’s electrical system to diagnostics machine (18-pin connector), it is necessary to use an interface cable, which can be purchased from RIEJU spare parts department under reference EM10225TT-CLR-1.
-
Page 33: Maintenance
Maintenance... -
Page 34: Maintenance Table
Maintenance The maintenance requirements set out in this table are simple and necessary for the good maintenance of your motorcycle. * Check / Replace / Grease / element Adjust Clean Inspect Change Lubricate 1.-clutch 10 hours 20 hours when needed 10 hours when 2.-clutch discs... - Page 35 Maintenance 37.-steering bearing 30 hours 38.-Wheel bearing 30 hours when needed 39.-swingarm and linkage 20 hours when needed 20 hours when 40.-rear suspension Every 2 years when needed needed 41.-chain 10 hours when needed 42.-tires 5 hours when needed 12 hours slow 43.-Battery charge charge * If the vehicle is used in competition, maintenance intervals should be shortened.
-
Page 36: Maintenance
This model uses MAGURA FOR CLUTCH COMMAND mineral oil for the clutch hydraulic circuit. 2. CLUTCH DISCS For this check, adjustment, or change, please contact your official RIEJU service centre. 3. THROTTLE CABLE • Check that the throttle control (1) turns smoothly. -
Page 37: Air Filter
Maintenance To find the correct temperature at which the spark plug should work, remove it and examine the ceramic insulator around the electrode. If the ceramic has a light brown colour, the temperature of the spark plug matches that of the engine. -
Page 38: Cleaning The Filter
Maintenance Cleaning the filter 1. Clean inside the filter box with a damp cloth (1). 2. Remove the cage (2) from the air filter (3). 3. Clean the filter in a liquid bath for cleaning filters using a soft brush. 4. -
Page 39: Transmission Oil
Maintenance 3. Tighten the idle screw slightly. 4. Accelerate and decelerate a few times to ensure that the idle does not change. Readjust if necessary DANGER Riding with a damaged throttle cable can be dangerous. Check that the throttle cable has a minimum clearance of 3mm on the control. -
Page 40: Piston And Ring
3 or 4 times. 9. Screw the oil filler cap. 8. PISTON AND RING For this check, adjustment, or change, please contact your official RIEJU service centre. 9. CYLINDER HEAD, CYLINDER AND EXHAUST VALVE For this check, adjustment, or change, please contact your official RIEJU service centre. -
Page 41: Muffler Fibre
4. Replace the muffler and reassemble the assembly. 11. MUFFLER FIBRE The muffler of your RIEJU is an absorption muffler. The absorbent element is the muffler fibre. If there is an increase in exhaust noise, the muffler fibre must be replaced. - Page 42 Maintenance NOTE: Initially, a permanent-type antifreeze is used at the factory. It is green, contains 30% ethylene glycol and has a freezing point of - 18ºC. DANGER Chemical liquids are harmful to the human body. Follow the manufacturer's instructions. WARNING Use of incorrect liquid solutions can cause damage to the engine and cooling system.
- Page 43 Maintenance Change coolant It must be changed periodically for a long engine life. 1. Wait for the engine to cool completely. 2. Put the motorcycle in the use position. 3. Remove the radiator cap. 4. Place a container under the drain screw (2) which is located on the underside of the water pump cover.
-
Page 44: Radiator Tube And Connections
Maintenance 17. RADIATOR TUBE AND CONNECTIONS Radiator tubes Check that the radiator tubes are not cut or damaged and that the connections are not leaking. Radiator Check that the radiator fins (1) are not obstructed (insects mud). Clean obstructions with a low pressure water jet. WARNING Using high pressure water can damage radiator fins and reduce their effectiveness. -
Page 45: Brakes Wear
3 mm on the front and 3.5 mm on the rear. WARNING For this change we recommend that you go to your official RIEJU service centre who, in addition, will check the possible wear of your brake discs. Changing the front brake pads... - Page 46 Maintenance Changing the rear brake pads To change the rear brake pads follow these steps: 1. Remove the pin protector (1). 2. Loosen and remove the pin (2). 3. Remove the pads (3). 4. Keep the metal plate (4) and the fibre plate (5) in case the new pads do not have them.
-
Page 47: Brake Fluid
Maintenance 20. BRAKE FLUID Inspect brake fluid replace periodically. It must also be changed if it is contaminated with water or dirt. Recommended liquid: LIQUI MOLY DOT4. DANGER Do not mix different types of brake fluid. The liquid used to fill or renew the circuit must meet the standard specified on the liquid tank of each circuit. -
Page 48: Brake Pump Piston And Dust Cover (Front And Rear)
WARNING Interventions on tires and spokes require the assistance of a specialist, so we recommend that you go to your official RIEJU service centre. 27. CHAIN GUIDE Lubricate the chain guide (4) with the same product used to lubricate the chain. -
Page 49: Chain Guide Shoe
Maintenance 29. CHAIN GUIDE SHOE Visually check the top and bottom of the chain shoe (5) on the swingarm (6). If it is worn or damaged, replace it. Lubricate the chain guide with the same lubrication product as the chain. 30. -
Page 50: Front Suspension Oil
DANGER Riding with a damaged petrol tube or simply starting the engine can result in a fire consequently accident (and corresponding injuries) ALWAYS USE THE ORIGINAL PETROL TUBE, YOUR OFFICIAL RIEJU SERVICE CENTRE WILL PROVIDE YOU WITH ONE. -
Page 51: Fuel System
Maintenance 34. FUEL SYSTEM Check the status of: The rubber of the tank cap, the tank cap, the tank breather tube and the tank. 35. STEERING HEAD ADJUSTMENT The steering should always be adjusted so that the handlebar rotates freely, but without play. To check the steering adjustment, lift the bike off the ground, using a bracket under the chassis. -
Page 52: General Lubrication
Its chain is made of seals, therefore you must use a specific lubricant for this type of chain. Your official RIEJU service centre will gladly supply you with one. 37. STEERING BEARING For this check, adjustment, or change, please contact your official RIEJU service centre. - Page 53 Maintenance Removing the shock absorber To remove the rear shock absorber from its location in the frame, follow these steps: 1. Stabilize the motorcycle with a central stand or with a special bench. 2. Keep the rear wheel from touching the ground with the help of a chock.
-
Page 54: Chain
Maintenance 8. Remove the upper shock screw from the shock absorber to the frame (6) 9. Carefully remove the shock absorber from the right side of the motorcycle as illustrated in the photograph (7). To reassemble the shock absorber on the motorcycle, follow the same steps in reverse order 41. -
Page 55: Tires
In the medium and long term, the economic thing is to change the complete transmission kit at each chain change. Your official RIEJU service centre will gladly supply you with one. Lubrication: Its chain is of the type that has... -
Page 56: Battery Charge
Maintenance 43. BATTERY CHARGE The battery ( HJTZ7S-FP Z) is maintenance free 4.5 Ah / 12.8 V / 14.4 V / 270cca Capacity / Voltage / Charging voltage limit Battery change The battery is located under the seat, inside the battery case. -
Page 57: Settings
Settings... -
Page 58: Introduction
The settings chapter is for a user with high mechanical knowledge and experience. Otherwise these adjustments must be carried out by your official RIEJU service centre. Carburator setting Opening of the throttle valve and influences The elements of the carburettor that alter the... -
Page 59: Carburettor Needle
Settings Carburettor needle The needle and the needle diffuser together have an effect from 25% to 75% load. The needle moves inside the diffuser; when the needle narrows, from being cylindrical (1) to being conical (2), its position determines the amount of fuel admitted. -
Page 60: Correction Factors
Settings Correction factors 250 / 300cc. (For changes in height or temperature). Needle position / Air screw opening Correction factor 1.06 or higher 1,06~1,02 1,02~0,98 0,98~0,94 0,94 or less Needle position Lower clip 1 position Same Same Same Raise clip 1 position Opening screw free Tighten 1 turn Tighten ½... -
Page 61: Secondary Transmission Ratio
If the ratio is shortened, your RIEJU will lose top speed but gain in acceleration and at low speeds will be more manageable on difficult terrain. NOTE: Pay attention to engine rpm. If the ratio is extended, your RIEJU will gain top speed will lose acceleration manageability at low speeds. -
Page 62: Suspension Settings
Settings If it is fork bottoming, it is recommended to slightly increase the oil level (approx 10 ml.). WARNING Make sure that both fork bottles have the same volume/oil level for regular performance. SUSPENSION SETTINGS From 65 to 75kg. 4,0 N/mm From 75 to 85kg. -
Page 63: Rear Shock Absorber (Kyb)
Settings REAR SHOCK ABSORBER (KYB). • Rebound (1) - located at the bottom of the shock absorber. • Low speed compression (2) - located at the top of the shock absorber (screw). • High speed of compression 17mm. - located at the top of the shock absorber (4) •... -
Page 64: Adjusting Your Motorcycle
Settings absorber can also help reduce the pre-load of the spring. • Muddy ground Tighten compression damping replace the spring with a harder one on the fork. Hardening the compression and the rebound in the rear shock absorber, can also help increase the pre-load of the spring. - Page 65 Settings extension and the shock absorber. If it cannot be corrected, it can be indicative of too hard a spring or an excessive oil level in the fork. WARNING Make only one adjustment on the set each time and test the effect it has on the motorcycle. Suspension adjustment is a very critical adjustment, because if it is not done correctly it can deprive even the best rider of full...
-
Page 66: Adjustment Of The Pre-Loading Of The Centrifugal Spring
Settings ADJUSTMENT OF THE PRE-LOADING OF THE CENTRIFUGAL SPRING Dismantling and adjustment: 1. Remove the plug (1) with a 27mm wrench. 2. Secure the adjustment screw (2) with a 2.5mm Allen key and loosen the locknut (3) with a 6mm angled spanner. 3. -
Page 67: Troubleshooting
Troubleshooting... - Page 68 Seized cylinder / piston / Contact the official RIEJU official connecting rod. service. Seized transmission assembly. Contact the official RIEJU official service. The electric The starter relay fuse is blown Remove seat and check fuse. starter does not The battery is not charged...
- Page 69 Dirty carburettor jets. Remove the carburettor and clean the jets. Worn or damaged crankshaft Contact the official RIEJU official bearings. service. Contact the official RIEJU official The engine emits Ignition problem.
- Page 70 Troubleshooting FAULT CAUSE SOLUTION The gears are Clutch does not disengage. Contact the official RIEJU official not engaged. service. Shift fork bent or blocked. Contact the official RIEJU official service. Gear locked in transmission. Contact the official RIEJU official service.
- Page 71 Drain the oil from the fork and refill viscosity. with an oil of suitable viscosity. Twisted front fork. Contact the official RIEJU official service. Too much pressure in the tire. Check the tires pressure. suspension poorly adjusted.
- Page 72 Troubleshooting Fallo Causa Solución The motorcycle Bent chassis. Contact the official RIEJU official tends to lean to service one side. Poorly adjusted steering. check steering play adjustment. Bent steering axle. Contact the official RIEJU official service Contact the official RIEJU official Bent front fork.
-
Page 73: Warranty Manual
Warranty manual... - Page 74 The warranty period shall commence on the day of delivery of the vehicle to the purchaser by a RIEJU licensing dealer, or in the case of demonstration models, on the date the vehicle first starts operating. The seller is liable for any lack of conformity...
- Page 75 RIEJU will have the prerogative to decide at its sole discretion whether to repair or replace defective parts. The owner of the spare parts, if any, will be RIEJU , without any other consideration. The RIEJU authorized dealer who has been entrusted with the repair of defects will not be authorized to make binding declarations on behalf of RIEJU.
- Page 76 Warranty manual charge or any service provided free of charge under this warranty will be excluded. The warranty for spare parts within the warranty period will expire on the expiration date of the warranty period of the respective product. 3.) If a defect cannot be repaired and its replacement is disproportionate to the manufacturer, the secured consumer shall be entitled to cancellation of the contract (payment of compensation) or partial reimbursement of the purchase price (discount), instead of motorcycle repair.
- Page 77 This page has been left blank intentionally.
- Page 78 RIEJU, S.A. C/ Borrassà, 41 E-17600 FIGUERES, GIRONA (SPAIN) Tel: +34 972 50 08 50 / Fax: +34 872 50 69 50 www.riejumoto.com / e-mail: rieju@riejumoto.com...