Table of Contents
Advertisement
Homeowner's Installation and Operating Manual
If this heater is not properly installed, operated, and maintained, a house fire may result.
For safety, follow all installation, operation and maintenance directions. Contact local
building officials about restrictions and installation inspection requirements in your
area.
DO NOT DISCARD THIS MANUAL: Retain for future use
SAFETY NOTICE
Convection
Heater Model
2460, 2461,
2462
7001135 1/07 Rev. 19
Advertisement
Table of Contents

Related Manuals for Vermont Castings DutchWest 2460


Summary of Contents for Vermont Castings DutchWest 2460
- Page 1 For safety, follow all installation, operation and maintenance directions. Contact local building officials about restrictions and installation inspection requirements in your area. DO NOT DISCARD THIS MANUAL: Retain for future use Convection Heater Model 2460, 2461, 2462 SAFETY NOTICE 7001135 1/07 Rev. 19...
-
Page 2: Table Of Contents
Dutchwest The Dutchwest models covered in this Owner’s Guide have been tested and listed by Inchcape Testing Services / Warnock Hersey of Middleton, Wiscon- sin. The test standards utilized were ANSI/UL 1482 for the United States and CAN/CGA - B366.2 for Canada. Dutchwest models are not listed for mobile home installations. -
Page 3: Specifications
4. Under specific conditions used during EPA emissions testing. 5. Based on preliminary results obtained during EPA emissions testing. 7001135 Specifications 2460 22” (560 mm) 25³⁄₄” (654 mm) 21” (530 mm) 24¹⁄₂” (620 mm) 1135 29³⁄₄”... -
Page 4: Installation
Dutchwest SAFETY NOTICE: IF YOUR DUTCHWEST CON- VECTION HEATER IS NOT PROPERLY INSTALLED, OPERATED AND MAINTAINED, A HOUSE FIRE MAY RESULT. FOR SAFETY, FOLLOW ALL INSTALLA- TION, OPERATION AND MAINTENANCE DIREC- TIONS. CONTACT LOCAL BUILDING OFFICIALS ABOUT RESTRICTIONS AND INSTALLATION INSPECTION REQUIREMENTS IN YOUR AREA. - Page 5 The single-wall chimney connector should be made of 24 gauge or heavier steel, and must have a minimum internal diameter of 6” (150 mm) for models 2460 and 2461, or 8” (200 mm) for model 2462. Install single-wall chimney connector not less than 18”...
- Page 6 Dutchwest Double-Wall Connector Information on assembling and installing double-wall connectors is provided by the manufacturer of the double-wall pipe. Follow the manufacturer’s installation instructions exactly. Most manufacturers of prefabri- cated double-wall insulated chimneys also offer double- wall connector pipes. Using a chimney and connector pipe from the same manufacturer helps simplify the assembly and installation.
- Page 7 Securing the Connector to a Masonry Chimney The Dutchwest Convection heaters may be connected to either a freestanding masonry chimney or a masonry fireplace chimney. Freestanding Installations If the chimney connector must pass through a combus- tible wall to reach the chimney, follow the recommenda- tions in the wall pass-through section that follows.
- Page 8 Dutchwest Fireplace Installations - Through the Fireplace The Convection heaters may be installed either without legs* as a fireplace insert, or with standard legs at- tached - depending on the safety regulations that apply to your situation, the height of the fireplace opening and your own preference.
- Page 9 Minimum Dimensions for Noncombustible Floor floor protection Protectors (Depth x Width): 6/27/00 djt Model U.S. Canada 2460 38” x 44” 42” x 48” (1067mm x 1219mm) 2461 38” x 48” 42” x 52” (1067mm x 1320mm) 2462 42” x 52”...
- Page 10 Dutchwest To install the heater without legs as a fireplace insert, the floor must be completely noncombustible, such as an unpainted concrete floor over earth. Many fireplaces do not satisfy the “completely non- combustible” requirement because the brick or con- crete hearth in front of the fireplace opening usually is supported by heavy wooden framing as in Figure 13.
- Page 11 In addition, both Fireplace Adaptor and Fireplace Insert installations have special floor protection requirements that are addressed in the section on Floor Protection. 7001135 Model: 2460 2461 Side Walls (S) 20” (510mm) 24” (610mm) 23” (580mm) Trim (T) 12” (300mm) 12” (300mm)
-
Page 12: Clearances
Dutchwest Designing a Safe Installation The section that follows contains charts with the infor- mation that you’ll need to make your installation safe. Included are a chart to tell you exactly where to cut the hole in the ceiling so that the stove will meet clearance requirements, a chart that gives stove clearances for all installations, and a chart to illustrate the required sizes of wall shields for various installations. - Page 13 Stove and Chimney Connector Clearance Charts Model 2460 Small Convection, and Model 2461 Large Convection: UNPROTECTED SURFACES Parallel Installations Stove Clearance Side No heat shields [A] 22” (560 mm) [B] 24” (610 mm) Rear exit, rear h.s. [G] 22” (560 mm) [H] 14” (360 mm) Top exit , rear h.s.
- Page 14 Measurements are from the centerline of the flue collar to the wall, not the wall protector. UNPROTECTED SURFACES Parallel Installations Chimney Connector Side MODEL 2460 (Small Convection) Listed, Approved Double-wall [A] 33” (840 mm) Single Wall, with Connector Heat Shields [A] 33” (840 mm) Single Wall, without Connector Heat Shields [A] 33”...
- Page 15 DutchWest Convection Heaters, Models #2460 (Small), #2461 (Large), and #2462 (Extra Large) 48” (1220mm) Rear Exit 36” (910mm) Centered Behind Stove ST428 Fig. 16 Rear wall protection. ST428 rear wall protection 7/00 ST430 Fig. 18 Corner wall protection. 7001135 Wall Heat Shield Dimensions 60”...
-
Page 16: Assembly
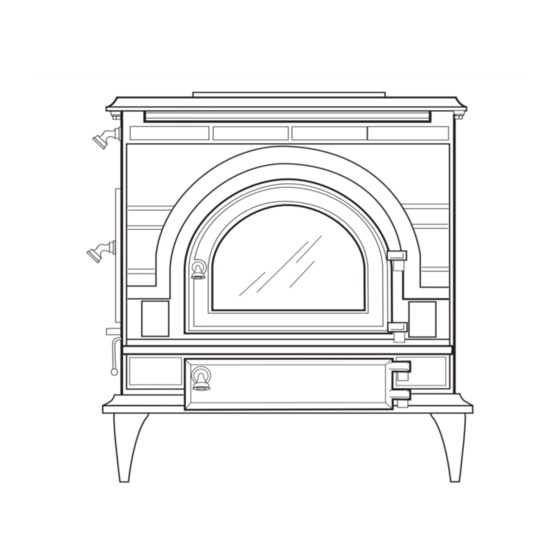
Dutchwest Your convection heater requires some assembly. Follow the directions carefully and refer to the parts diagram at the back of this manual. CAUTION: The Dutchwest Convection Heater is very heavy. To prevent personal injury or damage, either to the stove or your home, have two or more people to help move it. -
Page 17: Operation
Heater Controls and Features Air Controls The Dutchwest Convection Heater has two air controls that regulate the amount of air drawn into the stove. Generally, more air entering the stove allows the fire to burn hotter and faster, while less air decreases heat output while prolonging the overall burn time. - Page 18 Dutchwest Damper Function The Damper is operated by moving the handle on the upper left side of the stove. (Fig. 24) It has two positions: OPEN, to start the fire and load fuel, and CLOSED, for greatest efficiency and heat. When the damper is closed, exhaust gases pass through an insu- lated catalytic burner before flowing into the chimney.
- Page 19 Use the Air Control Settings that Work Best for You No single combination of control settings will fit every situation. Each installation will differ depending on the quality of the fuel, the amount of heat desired, and how long you wish the fire to burn. Control settings also depend on your particular instal- lation’s “draft,”...
- Page 20 Dutchwest How to Build and Maintain a Wood Fire Loading Wood Your Dutchwest Convection Heater accepts wood from both the front and side. Front loading is useful for kin- dling a new fire and adding an occasional log, however, we recommend side loading as most convenient when adding several logs at a time.
- Page 21 Further suggestions... * If the charcoal bed is relatively thick and your fuel is well-seasoned, it is possible to add fresh fuel (smaller pieces first), close the door and damper, and reset the air control within five minutes. * When refueling, avoid breaking the charcoal bed into small pieces.
-
Page 22: Maintenance
Dutchwest Keep Your Stove Looking New and Working Its Best Care of the Cast Iron Surface An occasional dusting with a dry rag will keep the painted cast iron of your Dutchwest Convection Heater looking new. If the paint needs retouching, allow the stove to cool completely. - Page 23 3. Apply a thin bead of stove cement in the newly- cleaned groove. 4. Lay the gasket into the groove. Wait until you are a couple inches from the end before you cut it. 5. Test the gasket by closing the door on a slip of paper as described above.
- Page 24 Dutchwest Cleaning the Chimney System The chimney system is composed of the chimney and the pipe that connects the stove to the chimney. Inspect the chimney and chimney connector at least twice monthly, and clean if necessary. When you first begin using the stove, check daily for creosote —...
- Page 25 The Chimney Connector TWO WEEKS: • Inspect the chimney connector and chimney. Clean if necessary. TWO MONTHS: • Inspect the chimney and chimney connector. Pay particular attention to the horizontal runs of chim- ney connector, and the elbows. Clean the system if necessary.
- Page 26 Dutchwest Remove and Inspect the Combustor • Wear safety glasses, a dust mask, and gloves. • Remove the four bolts that secure the stove top plate. There are two each on both the left and the right side, just under the top plate overhang. With the bolts removed, lift the top.
- Page 27 In any chemical reaction, including the combustion process, there are certain conditions which must be met before the reaction can take place. For example, a reaction may require a certain temperature, or a certain concentration of the reactants (the combustion gases and oxygen), or a certain amount of time.
- Page 28 Dutchwest Your stove is only one part of a system that includes the chimney, the operator, the fuel, and the home. The other parts of the system will affect how well the stove works. When there is a good match between all the parts, the sys- tem works well.
- Page 29 Single Venting Your stove requires a dedicated flue. Do not connect the stove to a flue used by any other appliance. Chimney draft is a natural form of energy and follows the path of least resistance. If the stove is vented to a flue that also serves an open fireplace or another appliance, the draft will also pull air in through those avenues.
-
Page 30: Parts List
Dutchwest CFM Corporation reserves the right to make changes in design, materials, specifications, prices and discontinue colors and products at any time, without notice. Dutchwest Convection Heater Models 2460, 2461, 2462 Item/Description Bottom Outer Back Inner Bottom Inner Back (After 9/97 No Outside Air Slot) - Page 31 Dutchwest Convection Heater Models 2460, 2461, 2462 (continued) Item/Description Inner Top Inner Top Ass’y (Inner Top, Web, Gasket, Tabs & Bolts) Inner Top Ass’y (Inner Top, Web, All Hardware, Baffle, All Gaskets) Inner Top Web Inner Top Channel Cap Air Distributor Baffle...
- Page 32 Warranty Limited 3 Year Warranty CFM Corporation warrants that this woodburning stove will be free of de- fects in material and workmanship for a period of three years from the date you receive it, except that the catalyst, thermostat assembly, handles, glass door panels, cement, and gasketing shall be warranted as described below.