Table of Contents
Advertisement
Advertisement
Table of Contents

Related Manuals for Keurig DRINKWORKS Home Bar


Summary of Contents for Keurig DRINKWORKS Home Bar
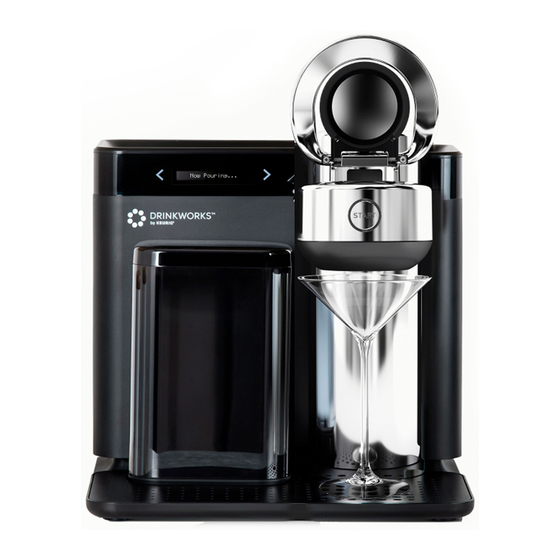
- Page 1 Cheers! Bar quality drinks at the touch of a button. HOME BAR CARE GUIDE...
-
Page 2: Drinkmaker Warnings
Drinkmaker warnings. Read and follow all warnings and instructions before use. Misuse of this drinkmaker may result in serious personal injury or property damage. Welcome. Positioning Care Set up the drinkmaker on a flat, weight- Perform maintenance only as directed in bearing, stable, heat-resistant surface the Home Bar Care Guide. -
Page 3: Carbonation Warnings
Carbonation warnings. Electrical warnings. System contains CO gas under pressure. Do not puncture CO Cartridge or expose to heat, When using electrical appliances, basic safety precautions should be followed, fire, or flame. Inspect for any dents, puncture, or damage before use, and do not use if damaged. including the following: Keep out of reach of children. -
Page 4: Table Of Contents
Contents: Cords and Grounding (Cont.) SHORT CORD INSTRUCTIONS: A short power supply cord is provided to reduce the risk DANGER - Improper connection of the of becoming entangled in or tripping over a equipment-grounding conductor can result longer cord. If an extension cord is used: (1) in a risk of electric shock. -
Page 5: About Your Home Bar
About your Home Bar. Using your Home Bar. Positioning the drinkmaker. Place your drinkmaker in an open, uncluttered area in your kitchen or bar area. Leave the following distance around your drinkmaker: At least 2 inches (5 centimeters) from any wall. For the best performance of the drinkmaker’s cooling and cleaning features, we recommend that you always keep your drinkmaker plugged in and powered on. -
Page 6: Using Your Home Bar
Using your Home Bar. Using your Home Bar. Chilling… Making a drink. Your drinkmaker will chill water to 35º F in an Fill the Water Tank as instructed by the Display. internal reservoir. The drinkmaker will begin cooling the water as soon as you add water to the Water Tank. - Page 7 Close the Pod Door by pulling the Handle down. Wait for When the recipe is ready, the START Button will flash drinkmaker to recognize your drink and prepare the recipe. blue. Press the START Button to make a drink! NOTE: If you do not push the START Button within 60 seconds, the light will stop flashing blue.
-
Page 8: Get Connected
Using your Home Bar. Tips for pouring a beer. Get connected. Your drinkmaker comes with built-in Bluetooth Low Energy 4.2 technology. This technology ® When making a beer, consider using a frosted glass. Give allows your drinkmaker to communicate with the Drinkworks™ App about its performance in the inside of your glass a quick rinse with cold water. - Page 9 Drinkmaker controls. Menu functions. Arrows and START Button. Accessing the drinkmaker menu. Display Screen To access the built-in drinkmaker functions, press and hold the START Button for 3 seconds. Press the Touch Arrow Buttons on either side of the Display to move through the options. Messages appear on the Display screen.
-
Page 10: Home Bar Care & Cleaning
Home Bar care & cleaning. Cleaning the Water Tank and Water Tank Lid The Water Tank and Water Tank Lid should be periodically inspected and cleaned. Neither the Water Tank or Water Tank Lid should be cleaned in the dishwasher. They should be cleaned with Cleaning the Drinkmaker Exterior a damp, soapy, lint-free, non-abrasive cloth and rinsed thoroughly. - Page 11 Hold for 3 Run the Rinse Cycle Run the Clean Cycle Seconds Periodically run the drinkmaker Rinse Cycle. The Rinse Cycle empties and refills the internal Access the Clean Cycle at any time from the menu by holding chilling tank so that drinks can be made with fresh water. Access the Rinse Cycle from the down the START Button for 3 seconds.
- Page 12 10 mins Add three Drinkworks™ Cleaning Tablets to the Wait for Drinkworks™ Cleaning Tablets to completely Water Tank. dissolve (approximately 10 minutes). Place a half-gallon container under the Tap. Press START Button to begin cleaning (takes about 20 minutes). The drinkmaker will Display “CLEANING…” until this step is complete.
- Page 13 Refill the Water Tank to the MAX Fill and replace it on Your drinkmaker has a built in UV light to help keep your water the drinkmaker. fresh. To prolong the life of the drinkmaker and maintain the quality of drinks, we recommend that you run the Clean Cycle every 30 days.
- Page 14 Cartridge care and replacement. Press and hold the blue CO Gas Release Button to release any remaining pressure, which will unlock the cartridge from the drinkmaker. When pressurized, the Press & The on-board carbonation system. cartridge will be in the locked position. Hold Read and follow all warnings and instructions before using the Drinkworks™...
- Page 15 Drinkworks™ CO Cartridge Install Replace the CO Side Door. Slide the front tabs on CO Side Door into their corresponding slots. Insert full Drinkworks™ CO Cartridge at a 45-degree angle Pivot the CO Side Door towards the back of the into the receiving end on the drinkmaker*.
-
Page 16: Drinkmaker Status
Drinkmaker status. Troubleshooting. The START Button light ring indicators: My drinkmaker does not recognize my authentic Drinkworks™ Pod. Unlit If the drinkmaker fails to recognize your authentic Drinkworks™ The drinkmaker is off or in standby mode. To wake up from Pod, try opening the Pod Door and re-inserting the Pod. - Page 17 Drinkmaker will not make a non-carbonated drink My drinkmaker is taking a long time to cool down. What should I do? • • After placing the Drinkworks™ Pod in the Pod Basket, make sure the Pod Door is all the To avoid long cool down times always keep your drinkmaker plugged in a powered way down and the blue button is flashing.
-
Page 18: Helpful Hints
Helpful hints. Home Bar Warranty. Plug drinkmaker directly into a Remove Drinkworks™ Pod after use Drinkworks™ drinkmaker will be free of We can only guarantee the proper functioning defects in materials or workmanship under and lifetime of your drinkmaker if you use grounded outlet Do not leave your Pod in your drinkmaker. - Page 19 The Drinkworks™ name and logo are the property of Bedford Systems LLC. All third-party trademarks or logos referenced in this guide are the property of their respective owners. KEURIG is a trademark of Keurig Green Mountain, Inc., used under license. ® © 2018 Bedford Systems LLC...