
Related Manuals for Shure MXA710 Series


Summary of Contents for Shure MXA710 Series
- Page 1 MXA710 2-Foot and 4-Foot Linear Array Microphone Shure MXA710 linear array microphone user guide. Learn how to install the mic in a variety of rooms and how to use Shure's trusted IntelliM ix DSP platform. Version: 4 (2020-G)
-
Page 2: Table Of Contents
Switch and Cable Recommendations for Dante Network Reset Modes Setting Latency Installation Guide Network Audio and Shure Control Data Choosing Where to Install the MXA710 QoS (Quality of Service) Settings Suspending the Microphone from the Ceiling Installing the Wall-Mounting Bracket... - Page 3 Shure Incorporated Specifications Important Product Information MXA710 Frequency Response Information to the user Lobe Sensitivity Contact Customer Support IMPORTANT SAFETY INSTRUCTIONS 3/37...
-
Page 4: Mxa7102-Foot And 4-Foot Linear Array Microphone
Shure Incorporated MXA710 2-Foot and 4-Foot Linear Array Microphone Getting Started To control MXA710 microphones, use Shure Designer software. After completing this basic setup process, you should be able • Discover the MXA710 in Designer • Design microphone coverage •... -
Page 5: Step 3: Adjust Microphone Coverage
Shure Incorporated Select Optimize. Check the audio routes and settings to make sure they fit your needs. You might need to: ◦ Delete unnecessary routes. ◦ Verify that AEC reference signals are correctly routed. ◦ Fine-tune DSP blocks as needed. -
Page 6: General Description
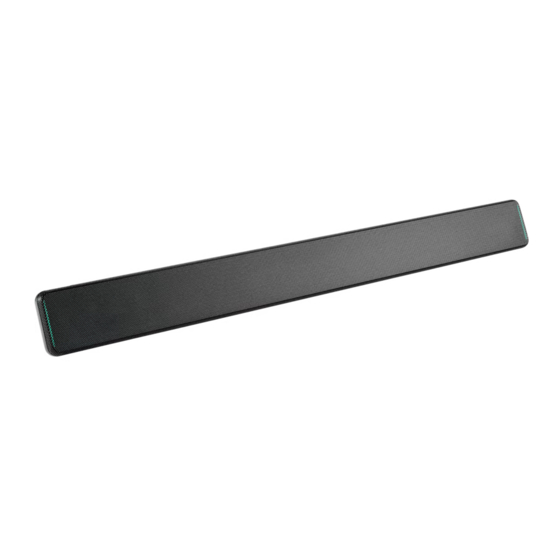
® ™ The Shure Microflex Advance MXA710 Linear Array Microphone represents the next evolution in Shure array microphone technology, designed for high-quality audio capture in premium AV conferencing environments. The linear form factor of the MXA710 allows for placement virtually anywhere in a meeting space, including on a wall, around a display, on a ceiling, or in a conference room table. -
Page 7: Mxa710 Parts
Shure Incorporated MXA710 Parts Mute status LED Customize LED color and behavior in Designer by going to: Device configuration > Settings > Lights. Default Settings Microphone Status LED Color/Behavior Active Green (solid) Muted Red (solid) Hardware identification Green (flashing) Firmware update in progress... -
Page 8: Model Variations
Sits behind the microphone grille. To access, find a grille hole that aligns with the left edge of the mute status LED and the "S" of the Shure logo. Use a small paperclip or other tool to press and hold the button. You may need to try a few different holes to press the reset button. -
Page 9: Cable Requirements
Find the left edge of the microphone light, which sits behind the grille. Insert the paperclip into the grille hole that aligns with the left edge of the microphone light and the "S" of the Shure lo go. Press and hold to reset the microphone. If you don't feel a button, try the grille holes below and around the first one. -
Page 10: Reset Modes
Reset Modes • Network reset (press for 4-8 seconds): Resets all Shure control and audio network IP settings to factory defaults. • Full factory reset (press for more than 8 seconds): Resets all network and configuration settings to the factory defaults. -
Page 11: Suspending The Microphone From The Ceiling
Shure Incorporated Accessory Install location Other hardware required? A710-TB Tile Bridge Drop ceiling tile A710-TB Tile Bridge A710-FM Flush Mount Table, wall, or hard ceiling A710-MSA Mic Stand Accessory Mic stand Mic stand A710-DS Desk Stand Credenza or other flat surface... -
Page 12: Installing The Wall-Mounting Bracket
Shure Incorporated * Not included Shure also sells the A710-TB tile bridge, which attaches to the microphone's screw holes like the suspension cable in step 1 above. Use the hardware included with the tile bridge to attach to the microphone. - Page 13 Shure Incorporated To get started, you will need: • Wall-mounting bracket • Cover plate (US or UK) and screws (if using) • 4 drywall anchors and screws • Screwdriver • Drill • Cat5e or better Ethernet cable If you're mounting over a junction box, remove the existing cover plate.
-
Page 14: Vesa Mis-B Compatibility
To remove the microphone, press the tab at the top of the bracket with a screwdriver or other tool and slide the micro phone up. Other mounting options: Shure also sells the A710-FM flush mount kit, which attaches to the microphone's mounting keyholes like the wall bracket in step 7 above. VESA MIS-B Compatibility The 4 screw holes (for M4 x 10 mm screws) on the bottom of the microphone are compatible with VESA MISB mounting prod... -
Page 15: Controlling Devices With Shure Designer Software
Controlling Devices with Shure Designer Software To control this device's settings, use Shure Designer software. Designer enables integrators and system planners to design au dio coverage for installations using MXA microphones and other Shure networked devices. -
Page 16: Mxa710 Coverage Examples
Shure Incorporated • Ceiling installations: For best coverage, avoid using narrow lobes. • Lobes are bidirectional in some positions because of the microphone's pickup pattern. MXA710 Coverage Examples Use these images to understand how the coverage patterns work in different installations. Always listen to lobes as you move them into position. - Page 17 Shure Incorporated Wall Horizontal (4-foot microphone) 3 lobes 17/37...
- Page 18 Shure Incorporated Ceiling (2-foot microphone installed flush with ceiling) 3 lobes. Some are bidirectional in certain positions. 18/37...
- Page 19 Shure Incorporated Table (2-foot microphone) 3 lobes. Some are bidirectional in certain positions. 19/37...
-
Page 20: Using Autofocus To Improve Coverage
Shure Incorporated Using Autofocus to Improve Coverage This microphone uses built-in Autofocus technology to fine-tune each lobe's position in real time, even if meeting participants lean back or stand up. You'll see the lobes moving in Designer's coverage map as participants shift positions. Autofocus only responds to in-room sound sources. -
Page 21: Adjusting Levels
Shure Incorporated Adjusting Levels Gain levels on MicroflexAdvance microphones must be set for each saved coverage preset to ensure an optimized gain struc ture for all seating scenarios. Always adjust the levels before making any changes to automix settings to ensure the best per... -
Page 22: Intellimix Dsp
Shure Incorporated • MXA310 • P300 • IntelliMix Room • ANIUSB-MATRIX • MXN5-C • MXA Network Mute Button To use the Optimize workflow: Place all relevant devices in a location. Select Optimize. Designer optimizes microphone and DSP settings for your equipment combination. -
Page 23: Noise Reduction
Shure Incorporated P300: Go to Schematic and click any AEC block. Choose the reference source, and the reference source changes for all AEC blocks. MXA910: Route a far-end signal to the AEC Reference In channel. IntelliMix Room: Go to Schematic and click an AEC block. Choose the reference source. Each block can use a different refer... -
Page 24: Delay
Shure Incorporated Target Level (dBFS) Use -37 dBFS as a starting point to ensure adequate headroom, and adjust if necessary. This represents the RMS (aver age) level, which is different from setting the input fader according to peak levels to avoid clipping. -
Page 25: Automix Modes
Shure Incorporated Sets the level of signal reduction when a channel is not active Hold Time Sets the duration for which the channel remains open after the level drops below the gate threshold Maximum Open Channels Sets the maximum number of simultaneously active channels Priority When selected, this channel gate activates regardless of the number of maximum open channels. -
Page 26: Mute Synchronization
Mute status is synchronized in the devices using logic signals or USB connections. To use mute synchronization, enable logic on connected devices using the web application or Shure Designer software. Many Shure devices have logic enabled automatically. -
Page 27: Switch And Cable Recommendations For Dante Networking
Network Audio and Shure Control Data MicroflexAdvance devices transport two types of data over the network: Shure Control and Network Audio. Shure Control The Shure Control carries data for the control software operation, firmware updates and 3rd party control systems (AMX, Crestron). Network Audio This network carries both the Dante digital audio and the control data for Dante Controller. -
Page 28: Qos (Quality Of Service) Settings
Considerations for Shure devices controlled by DDM: • When you add Shure devices to a Dante domain, set the local controller access to Read Write. Otherwise, you won't be able to access to Dante settings, perform a factory reset, or update device firmware. -
Page 29: Dante Flows For Shure Devices
AES67 AES67 is a networked audio standard that enables communication between hardware components which use different IP au dio technologies. This Shure device supports AES67 for increased compatibility within networked systems for live sound, inte grated installations, and broadcast applications. -
Page 30: Sending Audio From A Shure Device
AES67 flow, the AES67 session ID and IP address are required. Shure devices: The transmitting device must support SAP. In Dante Controller, a transmit device (appears as an IP address) can be routed like any other Dante device. -
Page 31: Using A Third-Party Control System
Shure Incorporated Dante Audio & Controller Port TCP/UDP Protocol Description SNMP Used by Dante † [319-320]* Dante clocking 2203 Custom Required for packet bridge 4321, Dante Dante audio 14336-14600 [4440, 4444, Dante Dante audio routing 4455]* † 5353 mDNS Used by Dante... -
Page 32: Specifications
Shure Incorporated • A710-MSA Mic Stand Adapter • A710B-2FT-HOUSING (black) • A710W-2FT-HOUSING (white) • A710AL-2FT-HOUSING (aluminum) • A710B-4FT-HOUSING (black) • A710W-4FT-HOUSING (white) • A710AL-4FT-HOUSING (aluminum) Specifications General All specifications measured from narrow lobe width. Values for all widths are within ± 3 dB of these specifications unless otherwise noted. - Page 33 Shure Incorporated Operating Temperature Range −6.7°C (20°F) to 40°C (104°F) Storage Temperature Range −29°C (20°F) to 74°C (165°F) Audio Frequency Response 100 Hz to 20 kHz AES67 or Dante Digital Output 6 total channels (4 independent transmit channels, 1 Automix output, 1 AEC reference in chan...
-
Page 34: Mxa710 Frequency Response
Shure Incorporated MXA710-4FT 79.1 dB Built-in Digital Signal Processing Automatic mixing, Acoustic Echo Cancellation (AEC), Noise Reduction, Automatic Gain Control, Com pressor, Delay, Equalizer (4-band Parametric), Mute, Gain (140 dB range) Acoustic Echo Cancellation Tail Length Up to 250 ms... - Page 35 Shure Incorporated Measured at 1 kHz, on-axis IMPORTANT SAFETY INSTRUCTIONS READ these instructions. KEEP these instructions. HEED all warnings. FOLLOW all instructions. DO NOT use this apparatus near water. CLEAN ONLY with dry cloth. DO NOT block any ventilation openings. Allow sufficient distances for adequate ventilation and install in accordance with the manufacturer’s instructions.
- Page 36 EMC conformance to Environment E2: Commercial and Light Industrial. Testing is based on the use of supplied and recommended cable types. The use of other than shielded (screened) cable types may degrade EMC performance. Changes or modifications not expressly approved by Shure Incorporated could void your authority to operate this equipment. Industry Canada ICES-003 Compliance Label: CAN ICES-3 (B)/NMB-3(B) Authorized under the verification provision of FCC Part 15B.
-
Page 37: Contact Customer Support
This product meets the Essential Requirements of all relevant European directives and is eligible for CE marking. The CE Declaration of Conformity can be obtained from Shure Incorporated or any of its European representatives. For contact information please visit www.shure.com...