Advertisement
Quick Links
CMD6129 Quick Start
Connect the camera
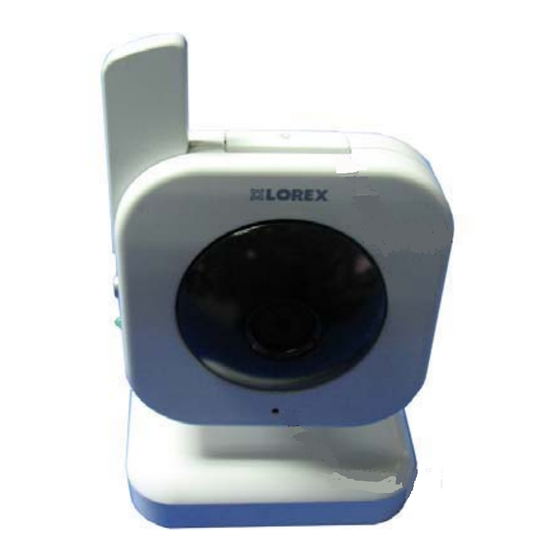
Connect the camera to a power outlet with supplied power adapter for the camera, the power supply jack
is in the rear of the camera base. Then set the slide switch in the left side to 'on' position, the camera is
now switched on, and meanwhile the light below the dip switch is also on.
Sound Input: Below the camera lens there is a built-in microphone to input the sound which can be
outputted in the monitor (Figure 1).
Night Light: In the top of the camera is a night light button, users can press it to switch on the light for
the use in dark (Figure 1).
Figure 1
Figure 2
Sound Trigger: This digital transmission kit has a unique sound trigger feature. Monitor beeps to alert
users when sound is above preset sound level. Users can adjust the sound trigger sensitivity by turning
the 'trigger' knob located in the right side of the camera (Figure 2).
Connect the monitor
Connect the monitor to a power outlet with supplied power adapter for the monitor. There are two options.
For desktop stand use, put the monitor into the monitor base, and then plug the power adapter to the
jack in the rear of the monitor base. Accordingly, the light in the front of the monitor base will be on. For
hand-held use, just plug the power adapter to the 'DC 9V' jack in the left side of the monitor, and the light
above the jack will be on. Then press the 'power' button in left side of the monitor the switch on the
monitor.
A/V Out: For Audio/Video output, plug the stereo end of the A/V cable to one of the 'AV OUT' jacks.
There are two Audio/Video output jacks, one is in the left side of the monitor, the other one is in the rear
of the monitor base, just beside the power jack.
Notes: When using the jack in the rear of the monitor base, image will be automatically displayed in the
external display device which is connected to the monitor base when the monitor is put onto the base.
Night Light: Press the night light button in the right side of the monitor to switch on/off the night light in
the camera, the function of this button is the same as the one in the top of the camera.
Alarm: For sound trigger feature, monitor beeps when sound is above preset sound level. The alarm
I
Advertisement

Related Manuals for Lorex CMD6129


Summary of Contents for Lorex CMD6129
- Page 1 CMD6129 Quick Start Connect the camera Connect the camera to a power outlet with supplied power adapter for the camera, the power supply jack is in the rear of the camera base. Then set the slide switch in the left side to ‘on’ position, the camera is now switched on, and meanwhile the light below the dip switch is also on.
- Page 2 volume can be adjusted by turning the ‘Alarm’ knob in the right side of the monitor. Volume: Press the ‘V+’ and ‘V-’ to adjust the volume. And these two buttons will be the up and down navigation buttons after entering the menu interface. Manual/Auto: For more than one camera use, press button ‘M’...
- Page 3 EV: This menu is to adjust the exposal value. There are 6 grades from the lowest to highest exposal value. Power Saving: This is for the adjustment of automatic power saving time when there is no operation in the monitor. Users can choose 1 minute, 2, 5 or 10 minutes. Press ‘Cancel’ to cancel the operation. Setting: This is for the settings of the monitor.
- Page 4 Increase the separation between the equipment and receiver. Connect the equipment into an outlet on a circuit different from that to which the receiver is connected. Consult the dealer or an experienced radio/TV technician for help. CE directive 93/68/EEC, EMC directive 89/336/EEC, LV directive 73/23/EEC This class B digital apparatus complies with Canadian ICES-003 The term “IC:”...