Table of Contents
Advertisement
Advertisement
Chapters
Table of Contents

Related Manuals for Uniden UBC9000XLT


Summary of Contents for Uniden UBC9000XLT
- Page 1 U BC9000XL T Scanner Auto UBZZO1248AZ OPERATING GUIDE...
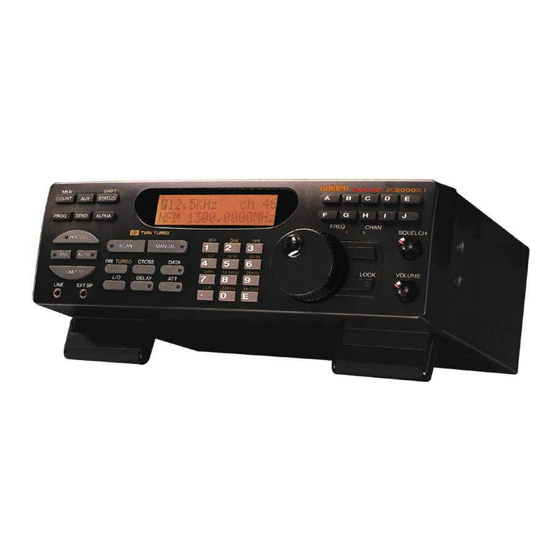
- Page 2 U BC9000XL T Controls IfEE Programming and Status Keys 6. Display Bank Keys ON/OFFNOLUME and SQUELCH Controls Rotary Tuning Controls Numeric and Special Function Keys Scan Keys Mode Keys Search Keys Output Jacks. II1Iden :a;t- U8CeoooXLT ' J~~~II!~!Ii!~~ ~~I.IHI.jJS...
- Page 3 Before you use this scanner, please read and observe WARNING! Uniden does not represent this unit to be waterproof. To reduce the risk of fire or electrical shock, do not expose this unit to rain or moisture. Uniden@ and Bearcat@ are registered trademarks of Uniden Corporation @1995 Uniden Corporation.
-
Page 4: Table Of Contents
Table of Contents Introduction Included with the UBC9000XLT Feature Highlights..4 Getting Started... .. 6 Base Installation... 6 What is Scanning? . -
Page 5: Introduction
And with AUTO STORE, you can automatically program any channel. With the UBC9000XLT, you can scan all 500 channels with Turbo Scan. In the Search Mode, you can choose super fast Turbo Search. In addition, the UBC9000XLT has AUTO SORT feature for faster scanning within each bank. -
Page 6: Included With The Ubc9000Xl T
Included with the UBC9000XL T Telescoping Antenna (AT124) Read this Operating Guide thoroughly before you use the scanner. If any of the above items are missing or damaged, contact the place of purchase immediately. Australian Warranty Program AC Adaptor (AAD8500U) -
Page 7: Feature Highlights
Feature Highlights TwinTurboScan/Search - enables the UBC9000XLT to scan up to 100 channels per second and search up to 300 steps per second (in 5kHz steps). Because the frequency coverage is so large (see "Specifications," page 53, for band listing), a very fast scanning system is essential. - Page 8 Variable Frequency Steps (Increments)-In Manual Mode, lets you change the steps between frequencies. Channel/Frequency Lockout-Lets channels or frequencies from the scanning or search cycle. Signal Attenuation-Reduces unusually strong signals often found on the WFM (wide frequency modulation) bands. Data Skip-Lets you set the scanner to automatically continue searching or scanning when it encounters an unmodulated or data signal.
-
Page 9: Getting Started
Standard 240V AC Wall Outlet AC Adaptor! Charger (AAD8500U) Base Installation 1. Insert the DC plug end of the AC Adaptor into the DC 13.8Vjack on the rear panel. 2. Plug the AC Adaptor into a standard 240V AC wall outlet. 3. -
Page 10: What Is Scanning
What is Scanning? Unlike standard AM or FM radio stations, most two-way communications (listed below) do not transmit continuously. The UBC9000XL T scans programmed channels at the rate of up to 100 channels per second until it finds an active frequency. Scanning stops on an active frequency, and remains on that channel as long as the transmission continues. -
Page 11: Setting The Squelch
CTCSS Operation This section applies only if you are installing and using an optional CTCSS Tone Board with your scanner. Installing the CTCSS Board InstallingtheCTCSSToneBoardis a simpleprocedure, a nd requires only a few minutesfollowingthe stepsbelow. CAUTION: Be sure to turn the scanner off and disconnect the power cord before attempting to open the scanner. - Page 12 2. Think of the Squelch Control as a gate. Turn SQUELCH fully counterclockwise. This raises the "Squelch Gate" so high that no signals can get through. SQUELCH 3. Turn SQUELCH fully clockwise until you hear a hiss. This lowers the "Squelch Gate" so that everything gets through... noise, weak signals, and strong signals.
-
Page 13: Usingthe Rotary Tuner
Using the Rotary Tuner Rotary Tuner and Controls This unique feature allows easy, rapid, and precise selection of frequencies and channels in the UBC9000XLT. Frequency/Channel Mode Selector or frequency mode. When the CHAN LED is on, you can step rapidly through channels with the Rotary Tuner. -
Page 14: Programming Channels
Programming Channels Before you can scan, you must program the channels within a bank. You can store one frequency per channel, up to 500 channels. These are the banks and their associated channels: Bank Channel Number 26 -50 51 - 75 76 - 100 101 - 125 126 - 150... -
Page 15: Programmingby Manuaientry
Programming By Manual Entry Use these keys: EJEl8 (PROGIlSENOIIAlPHA) c::s @ @ c::> (DB.AY.) Scan and Numeric Keys 1. Select a frequency. Example: Program MHzinto Channel1. 482.7625 2. Press to enter the MANUAL) Manual Mode. 3. Enter the channel number, then press I MANUAL) 4. -
Page 16: Programming With The Rotary Tuner
If an error is made during programming, or if the frequency is out of range, this screen appears. Enter a valid channel or frequency number. If the frequency is stored in another channel, the display will indicate the original channel for that frequency. To program more channels, repeat steps 3 and 4. -
Page 17: Programmingwithsearch
3. Select a frequency. Example: 123.7750 4. Enter the Frequency. Then press 5. To turn to a new frequency, select FREQ withthe Rotary Tuner Mode Selector then turn rightto step up, leftto step down. Example: 123.7875 (turn right) Note: The channel indicatorflashes on the display, indicatingthat the frequency displayed is not programmed in that channel. - Page 18 1. Select a frequency range. See page 53. Example: 450.000MHz to 456.000 MHz 2. Press MANUAL) 3. Enter the frequency and press enter the lower limit of the search range. Example: 450.000 MHz 4. Enter the frequency and press enter the upper limit of the search range.
- Page 19 1. Press to enter the SEI\O Transfer Mode. Enter the channel number. Example: Channel 3. Press~. 4. Press to Program the frequency. 6c. Programthe frequency intothe first open channelof another bank. 1. Press to enter the SEI\O Transfer Mode. 2. Choose a bank. Example: Press [C] Note: Press EJ bank...
-
Page 20: Programmingwith
Programming With This procedure searches a frequency range and automatically stores active'requencies into empty channels of the selected bank(s). Note: Be sure to set SQUELCH before you begin a search. See "Setting the Squelch" on page 8. Use these keys: EXTSI' Programming, Search, Scan, Mode, Numeric, and Bank Keys and Rotary Tuning Controls... - Page 21 5. Press [ I to enter the Auto AUTO Store Mode. 6. Select the bank(s) for programming. The selected bank indicator(s) stop blinking. Example: Press 7. Press[ to begin the Auto SRC] Store. The LED on the [AUTO I key flashes.
-
Page 22: Deletinga Programmed Frequency
Deleting a Programmed Frequency Use this procedure when you want to delete a frequency from a channel without storing a new frequency in its place. Use these keys: EIfiI @u <:::) c::::!) <::::!> Programming, Search, Scan, Numeric Keys, and-Rotary Tuning Controls 1. -
Page 23: Programming Channels With Alpha Characters
3a. To select the transfer channel, press SEND 3b. Then enter the channel number... 3c.Thenpress~. 4. Press to transfer the frequency. Programming Channels with Alpha Characters Use this feature to name programmed channels (up to 250 channels) for easy reference. Example: Channel 1, Local Police. - Page 24 I... 1. Press (PROG Then press ALPHA). 2. Enter the channel number... Note: You must select a programmed channel. Example: Channel 1 Then press Edit Screen appears. 3. Turn the Rotary Tuner left/right to choose a letter from the upper line of characters. Example: "L"...
-
Page 25: To Delete Alpha Characters
To Delete Alpha Characters Use these keys: ~i!~...i...!,ij~]~ \...~...!~~~.u.~..~. Program, Search, Scan, Mode, Numeric Keys, and Rotary Tuning Controls 1. Press MANUAL) I... 2. Press PROG Then press ALPHA). 3. Enter the channel number with the alpha characters you want to delete, then press 4. - Page 26 7. Press to storethe changes. I, I Press ( MANUAL), SCAN Mode. [Bank A Select chan from 1 to sod) or ( to exitthe ProgramAlpha PROG ch 1] \It- ::1~...
-
Page 27: The Scan Mode
Scanning All Programmed Channels and Banks Use these keys: (PROGIlSENOIIAlPHA) Scan, Mode, Numeric, and Bank Keys 1. Turn on the scanner Press to beginscanning. SCAN 2. When the scanner stops on a channel you can: 2a. Press to stay on the MANUAL) channel. -
Page 28: Turning Banks On Or Off
Turning Banks ON or OFF After you have programmed channels in several of the scanner's banks you can customize which channels you scan by turning the banks on or off. 1. Press ( SCAN 2. To a Bank OF turn letter or numb F, press the xample:... -
Page 29: Lockingout Channels
Locking Out Channels The lock-out feature lets you further customize the channels that you want to scan at a particular time. For example, .if a stored frequency broadcasts almost all the time, the scanner will stop on it and stay. You can lock out that channel when you are more interested in the other channels for the current scanning session. - Page 30 Unlocking a Channel 1. Press MANUAL) 2. Enter the channel or press the Channel Mode Selector and use the Rotary Tuner to find the channel you want to unlock. 3. Press ( 4. Press (SCANI to resume scanning. Unlocking All Channels in selected Scan Banks. 1.
-
Page 31: Using Priorityscan
Using Priority Scan You can program one Priority Channel in each of the first 10 banks. During Priority Scanning, your scanner checks these special channels every two seconds, whether or not the scanner has located an active channel. Use these keys: (PAOGIlSENDIIALPHA) Scan, Mode, and Numeric Keys, and Rotary Tuning Controls. -
Page 32: The Search Mode
The Search Mode In the Search Mode, the scanner looks for any active frequencies within a range of frequencies you select. It is best to select a narrow range, so that you have a better chance of finding all the active channels. Use Search if you don't have a frequency directory handy, or if new stations have been added since the directory was published. -
Page 33: Scrollingfrequencies Duringa Search
Scrolling Frequencies During a Search Scrolling temporarily suspends a search and allows you to manually move up or down through the frequencies. Use these keys: (~][:~~ 8 PROO 11 SEND 11 ALPHA §lWN SCAN ..~. ~~=.~~D::~ Search Keys, and Rotary Tuning Controls To begin scrolling, press ~to step up Or press ~to... -
Page 34: Usingturbosearch
Using Turbo Search Turbo Search increases the search speed from 100 frequencies per second to 300 frequencies per second in ranges where the frequencies are spaced 5 kHz apart. Use these keys: ME" SHFT ( CX>I.M I I STATUS) (PROOIlsec>IIALPHA) (eOOAN AUTO EXTSI'... -
Page 35: Lockingout Frequencies
Locking Out Frequencies This feature is similar to locking out a programmed channel, except you can only lock out 50 frequencies. Use these keys: "_i ALPHA) SEND PAOQ Search, Mode, Numeric Keys, and Rotary Tuning Controls While searching press ( scanner stops on an undesired frequency. -
Page 36: Unlocking All Frequencies
Unlocking All Frequencies 1. Press~ to stopthe search. 2. Findany locked-out f requency. Press and hold ( seconds. You hear a double beep when all frequencies are unlocked. Birdies Birdies are internally generated frequencies that cause the scanner to stop during search. If you have problems with these frequencies, use the lockout features to keep the scanner from stopping. -
Page 37: Additional Scanner Features
Additional Scanner Features Use these keys: §T'MN SCAN U NE EXT SP Status, Search, Mode, Numeric and Special Function Keys Using Data Skip Some frequencies carry un-modulated signals or data signals (such as pager preamble signals or telefax signals). You can set the scanner to continue scanning after a 3-second delay, when it encounter such signals. -
Page 38: Changing The Frequency Step
Changing the Frequency The frequency step is the minimum space between frequencies in the Manual or Search Mode. Your scanner is pre-programmed with a default frequency step for each of its frequency bands. You can override the default frequency step to search in larger or smaller increments when searching, during Auto Store, or when stepping through frequencies with ~, Tuner. -
Page 39: Setting The Signal Mode
Setting the Signal Mode Your scanner is capable of receiving three signal modes: Amplitude Modulation Narrow Frequency Modulation Wide Frequency Modulation Each of the scanner's frequency bands is pre-programmed with a default signal mode. If you want to override the default signal mode for a particular frequency, use these keys: ,""}'MiiM',""'","',"""""""','""""",,,~,','i,' I=.~.~;~.!.~...~~;;;~... -
Page 40: Using Signal Attenuation
Using Signal Attenuation When the ATT LED is on, the incoming signal strength is attenuated (reduced) by about 15 dB. This prevents unusually strong signals from over-loading the scanner. In the Scan Mode, you must individually program each channel you want to use the Signal Attenuation feature. -
Page 41: Preventing Accidental Programming
Preventing Accidental Programming The UBC9000XL T has a lockfeature to prevent accidental programming entries. To disable the keys, move the rear , and [ SEND AUTO to ON. panel switch When you press a message appears. [AUTO Using COUNT to Monitor Channel Activity The Count feature counts the number of times scanning stops on an active channel. -
Page 42: 482.7625Mhz
3. Press MANUAL), the count for each channel. Counter counts up to 99. To reset the counter for individualchannels 1. Press MANUAL). 2. Enter the channel number or use ~, Rotary Tuner to select the channel. 3. Press twice. Note: Turning off power resets the counter for all channels. To turn COUNT off: Press (COUNT... -
Page 43: Displaying Bank Memorystatus
Displaying Bank MemoryStatus This feature shows the programming status of the channels in a bank. Use these keys: ~}"~"":"tt""t'""""""?"~,,,,,:: li~;;;~;;.; c:::> ~ "---J c:::> (DElAY.) Status, Scan, and Numeric Keys, and Rotary Tuning Controls 1. Press MANUAL) 2. Enter the channel number or use the Rotary Tuner to select any channel in the bank. -
Page 44: Using Auto Recording
Microphone inputs. 1. Connect the REMOTE jack of your tape recorder to the AUX jack on the rear of the UBC9000XLT. This can be used to start and stop your recorder. 2. Put a tape in your recorder, and put it in the Record mode. -
Page 45: Viewing Scanner Status Information
Viewing Scanner Status Information This feature lets you quickly review the settings for several features of the UBC9000XLT. Use these key: Status, Search, and Scan Keys In Scan Mode: 1. Press MANUAL) 2. - Page 46 In Search Mode: 1. Press ~to stop the search. 2. Press and hold I STATUS) seconds. You hear two beeps, then the status information scrolls across the display. Bank C CTCSS:OFF000.0 Bank C HI-CUT:OFF Bank C RECORD :OFF Bank C DIMMER: BRIGHT for two .0KHz...
-
Page 47: Displaylight
for Display Light and Hi-Cut Use these keys f""~'""""~','",'"""""",'"",'",,,"~",""f iii~lltli SCAN 11 I . SAC 11 AUTO .1 PR T\JRI!O cress c::;J c;;> c:=> c::!> c::!> LINE EXT SP Status and Special Function Keys Display Light The Display Light has three settings: BRIGHT, DIM, and OFF. 1. -
Page 48: Ctcss Operation
This section applies only if you are installing and using an optional CTCSS Tone Board with your scanner. Installing the CTCSS Board Installing the CTCSS Tone Board is a simple procedure, and requires only a few minutes following the steps below. CAUTION: Be sure to turn the scanner off and disconnect the power cord before attempting to open the scanner. - Page 49 4. Align the pins on the CTCSS Board with the sockets on the mother board. Make sure they go straight into the sockets. The 4 pin socket is toward the front of the scanner. The 3 pin socket is toward the back of the scanner.
-
Page 50: Usingctcss
Using CTCSS The CTCSS (Continuous Tone Control Squelch System) feature allows squelch to be broken during scanning only when a CTCSS Tone is received. To program a channel for CTCSS, use these keys: Program, Search, Scan, Mode, and Numeric Keys, and Rotary Tuning Controls 1. -
Page 51: To Change The Ctcss Tone Frequency
6. Use the Rotary Tuner to select a tone frequency. (See page 49 for a list of tone frequencies.) 7. Press to program the frequency. After programing the frequency, the scanner returns to step three. Continue programming CTCSS frequencies, or press to exit. -
Page 52: Ctcss Tone Frequencies
7. Use the Rotary Tuner to select a new frequency. (See below for a list of CTCSS tone frequencies.) 8. Press After programming the frequency, the scanner returns to step four. Continue programming CTCSS frequencies, or press to exit. I MANUAL) Note: To remove a CTCSS Tone Frequency, from a channel, program the frequency as "... -
Page 53: Care And Maintenance
Do not rub the display window. Do not use excessive amounts of water. Repairs Do not attempt any repairs. The scanner contains no user-serviceable parts. Contact the Uniden Customer Service Division or take the scanner to a qualified repair technician. -
Page 54: Troubleshooting
If you still cannot get satisfactory results and want additional information, or to return the unit for service, please call Uniden Customer Service Division. The address and phone number are listed in the Warranty. (at the end of this manual) -
Page 55: Optionalaccessories And Replacement Parts
Optional Accessories and Replacement Parts External Speaker (ESP25, SQ) Hard Wire Cord (PSOO2) Telescoping Antenna (AT124) Mobile Mounting Bracket Assembly Kit (MBOO1) &?qIb ~ CTCSS Board (BCOO5) AC Adaptor (AAD 8500U) Cigarette Lighter Power Cord Adaptor (PSOO1) -
Page 56: Specifications
Banks: Total 20 banks Channels: 500 channels Search Band: Total 16 Search bands(AM, NFM, WFM) Frequency Range: Coverage Frequency (MHz) 25.0000 - 29.0000 - 56.0000 - 70.0000 - 88.0000 - 107.9500 108.0000 - 136.9875 137.0000 - 173.9950 174.0000 - 221.9500 222.0000 - 399.9875 400.0000 -... - Page 57 Uniden, (C) Improperly installed, (D) Repaired by someone other than an authorized Uniden Repair Agent for a defect or malfunction covered by this warranty, (E) Used in conjunction with any equipment or parts...
- Page 58 ..". I!n@ @1995 Uniden Australia Pty. Limited. All rights reserved. UBZZO1248AZ Printed in the Philippines...