Table of Contents
Advertisement
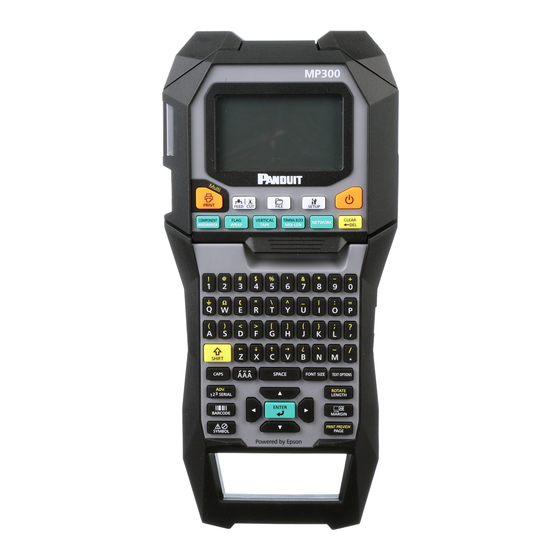
MP300 PRINTER
Operator's Manual
Read this document carefully to use this product safely and correctly. If your
product is faulty, please read the warranty card on the website and contact the
store you purchased it from. If you require further assistance, contact your local
customer service.
Please also visit us at www.panduit.com for help and support. You can
download the latest version of this Operator's Manual from the website.
Content menu
Specifications ......................................................... 2
Using The Printer With Easy-Mark Plus .......... 3
Troubleshooting ................................................... 4
Part Names And Functions ................................ 5
Start Here ................................................................ 7
Cleaning ................................................................... 14
Initializing The Settings ...................................... 15
Label Functions ..................................................... 16
Key Menu Index .................................................... 44
Frame And Table Lists .......................................... 62
Symbol List ............................................................. 64
Technical Support ................................................ 66
Notation used in this manual
Indicates information that, if ignored, could possibly result in serious
WARNING
personal injury or even death due to incorrect handling.
Indicates information that, if ignored, could possibly result in
CAUTION
personal injury, physical damage, or damage to equipment due to
incorrect handling.
Attention
Indicates important information about the printer.
Indicates additional information and points which may be useful to
MEMO
know regarding a topic.
Indicates a place with more detailed information.
Shows an image of the label to be used as an example.
,
,
Indicates the buttons on the printer.
Indicates the menu items, messages shown on the display, or the
"Name"
name of a manual. Example: "On", "Start print?"
©2019 Panduit Corp. ALL RIGHTS RESERVED.
M00126700EN
Advertisement
Table of Contents

Related Manuals for Panduit MP300


Summary of Contents for Panduit MP300
- Page 1 Indicates a place with more detailed information. Please also visit us at www.panduit.com for help and support. You can Shows an image of the label to be used as an example. download the latest version of this Operator's Manual from the website.
- Page 2 Specifications Specifications Body Li-ion battery specifications Dimensions Approx. 5.35 x 11.61 x 3.82 (inches) Ambient temperature Using the printer with (W x D x H) Easy-Mark Plus Approx. 136 x 295 x 97 (mm) During operation 0 to 40 degrees C Weight Approx.
- Page 3 For detailed instructions to install and use Easy-Mark Plus, go Easy-Mark Plus www.panduit.com or contact the Panduit Identification Technical Support Group. Troubleshooting Visit the Panduit website to find the most current MP300 firmware upgrade file and instructions. Part Names and "Technical Support Contact information: phone #, email. Functions address"...
- Page 4 QR CODE too big! Perform either of the following: If none of the above has solved the problem or the symptom is other than the above, contact Panduit Identification Technical Use a wider tape. Reduce the text or cell size.
- Page 5 Part Names and Functions Specifications 1. Feeds and then cuts the tape. 2. Tape eject slot Using the printer with 3. Prints a label. Hold down and press this to print with a special print function. Easy-Mark Plus 4. Creates a label for Wiremarker. Hold down and press this to change to Component mode.
- Page 6 Part Names and Functions Display 1. Label Mode Specifications 2. Current label length and width The unit can be switched between inch and cm. Using the printer with "inch/cm" Easy-Mark Plus 3. Caps Lock ON 4. Page Number Troubleshooting 5.
- Page 7 Start Here 1. Installing the Li-ion battery WARNING Specifications Be sure to use the dedicated Li-ion battery (C52CE97010) . Using a battery Before using the printer for the first time, charge the other than the one specified may cause fire, explosion, leakage, overheating Using the printer with Li-ion battery (C52CE97010).
- Page 8 Start Here Using alkaline batteries Connecting the Computer Specifications You can use alkaline batteries instead 1. Connect the USB cable to the printer. of the Li-ion battery. When using Using the printer with alkaline batteries, install them in the 2.
- Page 9 Start Here 2. Installing a tape cartridge Specifications Using the printer with 1. Rewind the ink ribbon if 3. Install a tape cartridge. needed. Easy-Mark Plus CAUTION • Make sure that the power is turned off. Use a pen • Be sure to use the specified tape cartridge. Troubleshooting or a pencil.
- Page 10 Start Here 3. Turning the power on Specifications Feeding the tape 1. Press Using the printer with Easy-Mark Plus CAUTION Troubleshooting Be sure to feed the tape every time after you install a tape cartridge. Part Names and Functions 1.
- Page 11 Start Here 4. Entering text Specifications Using the printer with Easy-Mark Plus 1. Press Deleting text 1. Press 2. Press Troubleshooting A character is backspaced. 3. Press Part Names and Functions 4. Press A list of characters appears. Deleting all text Start Here For the accent marks that can be 1.
- Page 12 Start Here 5. Printing label Specifications Using the printer with 1. Press CAUTION Easy-Mark Plus • Do not insert your fingers into the tape eject slot. Setting the label auto cut to Off • Do not pull the tape until the printing is completed. Troubleshooting "Auto cut"...
- Page 13 Frame and Table Lists time, remove the batteries (Li-ion battery or alkaline the nature of the adhered surface before use. Panduit Corp. takes no responsibility for any damage or loss due to the batteries), disconnect the AC adapter, and remove the above mentioned causes.
- Page 14 Cleaning Specifications Printhead CAUTION Clean the printhead with a cotton swab. Turn off the printer and remove the batteries before cleaning. Using the printer with If the AC adapter is connected, disconnect the AC adapter cable Easy-Mark Plus from the printer. Troubleshooting Exterior Part Names and...
- Page 15 Initializing the Settings Initialize the settings if the printer does not operate normally Specifications such as when the display is interrupted. Using the printer with Attention Easy-Mark Plus This function initializes the settings. Take extreme care before initializing it. All the created text will be lost and the settings Troubleshooting you made will be reset.
- Page 16 Click the illustration of the label you wish to create, or function you wish to use, to display information such as the creation procedure Specifications or setting procedure. Label Modes Using the printer with Easy-Mark Plus Troubleshooting PANDUIT Part Names and Functions Wiremarker Mode Component Mode Wrap Mode Flag Mode...
- Page 17 Label Functions Customizing Labels Specifications Using the printer with Easy-Mark Plus Troubleshooting Swapping the Text Label with symbol Serialized labels Barcode label Part Names and Functions Start Here Cleaning Advanced serialized Format/Style Font size Text orientation labels Initializing the Settings Label Functions Key Menu Index Length...
- Page 18 Label Functions Useful Functions Specifications Using the printer with Easy-Mark Plus Troubleshooting Saving/Recalling Frequently Upgrading Firmware and Printer Settings Used Labels printing from Easy-Mark Plus Part Names and Functions Start Here Cleaning Initializing the Settings Label Functions Key Menu Index Frame and Table Lists Symbol List Technical Support...
- Page 19 Wiremarker Mode Create one label with the same text Specifications repeated Using the printer with Easy-Mark Plus You can repeatedly print text so that it can be seen regardless of the angle from which the cable is viewed. Troubleshooting 1. Press Part Names and 2.
- Page 20 Wiremarker Mode Creating Labels with continuous self-lam Specifications Tape Using the printer with Self-Lamination Overwrap Easy-Mark Plus Use the dedicated Self- Lamination Overwrap. Troubleshooting This label tape comes with transparent film. The film can be wrapped around the Part Names and label to prevent it from getting dirty.
- Page 21 Component Mode Create die-cut tape labels of different set- Specifications tings at once Using the printer with Easy-Mark Plus You can create many die-cut labels at once. Troubleshooting 1. Press 2. Enter the text for the first label and press Part Names and Functions 3.
- Page 22 Wrap Mode Creating Labels to Wrap around Cable Specifications You can repeatedly print text so that it can be seen Using the printer with regardless of the angle from which the cable is viewed. Easy-Mark Plus Troubleshooting Label length Part Names and Tape width Functions Margin...
- Page 23 Flag Mode Creating Labels to Wrap around Cable like a Flag Specifications This label is useful for differentiating cables because the flag Using the printer with portion of the label wrapped around the cable is easy to see. Easy-Mark Plus Troubleshooting Space length Block 1...
- Page 24 Tape Mode Creating Labels with Text in the Horizontal Specifications Orientation Using the printer with Easy-Mark Plus Print labels with text in the horizontal orientation. Troubleshooting 1. Press 2. Enter the text. Part Names and Functions 3. Press Start Here Cleaning Initializing the Settings...
- Page 25 Vertical Mode Creating Labels with Text in the Vertical Specifications Orientation Using the printer with Easy-Mark Plus Print labels with text in the vertical orientation. Troubleshooting 1. Press 2. Enter the text. Part Names and Functions 3. Press Start Here Cleaning Initializing the Settings...
- Page 26 MIX-LEN Mode Creating Multiple Labels at Once Specifications You can create many mixed length labels at once. Using the printer with Easy-Mark Plus Troubleshooting Label length Margin Margin Tape width Part Names and Functions Labels number Start Here 1. Press 4.
- Page 27 Terminal Block Mode Creating Labels for Terminal Block Specifications Using the printer with Easy-Mark Plus You can create labels optimized for terminal blocks by setting the pitch length and label length. Troubleshooting 1. Press 2. Select the length type and then press Part Names and In this example, we will select "Pitch".
- Page 28 Network Mode Creating Labels for Patch Panel Specifications You can create the optimal labels for your patch panel by Using the printer with setting the label length and number of ports. Easy-Mark Plus Troubleshooting Separator Port length Part Names and Functions Ports number Start Here...
- Page 29 Network Mode Creating Labels for 66-Block Specifications You can create labels for 66-Block so that large numbers of connectors can easily be identified. Using the printer with Easy-Mark Plus Troubleshooting Separator Port length Part Names and Functions Ports number Start Here 1.
- Page 30 Network Mode Creating Labels for 110-Block Specifications You can create labels to identify at a glance the numbers for Using the printer with the wires or pins connected to a 110-Block. Easy-Mark Plus Troubleshooting Upper count Part Names and Functions Lower count Start Here 1.
- Page 31 Customizing Labels Swap the Order of Multiple Lines Specifications Swaps the text line by line. Using the printer with Easy-Mark Plus Troubleshooting MEMO Part Names and You may not be able to swap the lines depending on the label Functions type you create.
- Page 32 Customizing Labels Creating Barcode Labels Creating Labels with Symbols Specifications Using the printer with Easy-Mark Plus 1. Press MEMO Troubleshooting • You may not be able to add a barcode depending on the label 2. Select a category with and press type you create.
- Page 33 Customizing Labels Creating Serialized Labels with Copies Creating Serialized Labels Specifications 1. Set the sequential numbers. Up to four digits including numbers (0 to 9) and alphabet Using the printer with "Creating Serialized Labels" letters (a to z and A to Z) can be entered. Easy-Mark Plus 2.
- Page 34 Customizing Labels Creating Serialized Labels with Collate Specifications function Using the printer with When printing serialized labels and using copies, the order of Easy-Mark Plus the labels can be changed. The default setting of the "Collate" function is "No". Troubleshooting Example: With the settings Start: 1, End: 3, Increment: 1, the labels will be printed in three sets.
- Page 35 Customizing Labels Creating Labels with Advanced Serialization Specifications Using the printer with Easy-Mark Plus Use when creating a serialization across multiple pages in a label. Troubleshooting Part Names and Functions Block 1 Block 2 Block 3 Start Here 1. Create the blocks. In this example, we have created three pages.
- Page 36 Customizing Labels Setting the Format and Style (Text Options Specifications MEMO Menu) The setting items displayed when you press differ Using the printer with depending on the label type you create. Easy-Mark Plus Procedure for setting Text Options menu Troubleshooting 1.
- Page 37 Customizing Labels Bold & Italic Specifications Italic, Normal, Bold, B+I Changes the text in bold or italics. Using the printer with Length Easy-Mark Plus This setting is the same as when is pressed. "Setting the Label Length" Troubleshooting Margins This setting is the same as when is pressed.
- Page 38 Customizing Labels Changing the Font Size Changing the Font Size Manually Specifications The font size automatically adjusts to fit the text within the Using the printer with To change the font size of a page, line by line, press . Then label area.
- Page 39 Customizing Labels Setting the Label Length Changing the Text Orientation Specifications Changes the text orientation to vertical or horizontal. You can set the length of label or block. Using the printer with Easy-Mark Plus MEMO MEMO You may not be able to change the text orientation depending on the •...
- Page 40 Customizing Labels Specifying the Font Size Adding Page Specifications You can change the font size of a block/page line by line. Using the printer with By dividing text into blocks, you can change the style and Easy-Mark Plus the number of lines block-by-block. Display Label Troubleshooting...
- Page 41 Customizing Labels Enlarge print Mirror print Specifications You can create a label that is larger than the width of a single label. Using the printer with Print the created content separately on multiple labels and Easy-Mark Plus then put them together to use as a single label. 1.
- Page 42 Saving Frequently Used Labels By saving frequently used labels, you will be able to easily recall and print from them next time. Specifications Up to 100 labels can be saved. Saving a label Printing the saved label Using the printer with Easy-Mark Plus 1.
- Page 43 Changing the Printer Settings Auto cut Die-Cut pos Specifications Auto cut: Adjusts the text position on a die-cut label. Sets whether or not to cut automatically. Width pos: Adjusts the vertical positioning of text. Using the printer with Half cut: Length pos: Adjusts the horizontal positioning of text.
- Page 44 Key Menu Index Click the keys boxed in blue to Specifications display the menu list page. Using the printer with Easy-Mark Plus Troubleshooting Part Names and Functions Start Here Cleaning Initializing the Settings Label Functions Key Menu Index Frame and Table Lists Symbol List Technical Support...
- Page 45 Feed and Cut Specifications Using the printer with Easy-Mark Plus Tape feed Tape feed Troubleshooting Feed and cut Part Names and Functions Start Here Cleaning Initializing the Multi print Settings *2size Enlarge print Label Functions *2size *3size Key Menu Index *4size *3size Special print...
- Page 46 Serialize Specifications Using the printer with Easy-Mark Plus Serialize Text Serialize Text Serialize Text Troubleshooting Enter start value Enter end value Enter increment value Part Names and Functions Start Here Cleaning Initializing the Advanced Serialize Settings Label Functions Repeat Number Key Menu Index 1 time 2 times...
- Page 47 Barcode 1 Width EAN-8 Small Specifications Enter barcode Medium information Large Using the printer with Easy-Mark Plus Width Troubleshooting EAN-13 Small Enter barcode Medium information Part Names and Large Functions Bar code Start Here EAN-8 Width CODE128 EAN-13 Small Enter barcode Cleaning CODE128 Medium...
- Page 48 Barcode 2 Specifications Using the printer with Easy-Mark Plus Width Ratio Check Digit Troubleshooting Small Enter barcode Medium information Part Names and Large Functions Bar code Width Ratio Start Here Check Digit EAN-8 CODABAR Small EAN-13 Enter barcode Medium information Cleaning CODE128 Large...
- Page 49 Margins Specifications Margins Using the printer with Minimum 1mm Easy-Mark Plus Short Middle 10mm Troubleshooting Long 18mm Tape width /3 Part Names and Functions Tape width Start Here MEMO The setting items displayed when you press differ depending Cleaning on the label type you create. Initializing the Length Settings...
- Page 50 Text Options 1 Layout Left Specifications Center Justify Using the printer with Right Easy-Mark Plus Table Frame & Table "Table" Troubleshooting Table Frame Part Names and Frame "Frame" Functions Style Edit menu Start Here Layout Outline Frame & Table Normal Style Gray Cleaning...
- Page 51 Text Options 2 Specifications Using the printer with Easy-Mark Plus Troubleshooting Part Names and Functions Edit menu Char. Width Smaller Start Here Layout Smaller Center Frame & Table Small Under Style Narrow Cleaning Small Char. spacing Normal Center Border & Line Wide Initializing the Under...
- Page 52 Text Options 3 Specifications Margins Using the printer with Minimum 1mm Easy-Mark Plus Short Middle 10mm Troubleshooting Long 18mm Tape width /3 Part Names and Tape width Functions Edit menu Orientation Start Here Layout AB A Frame & Table 1 Line Style Cleaning 1/5 to 5/5...
- Page 53 Wrap Specifications Using the printer with Easy-Mark Plus Margins Troubleshooting Length Type Repeat text Short Diameter Part Names and Middle Functions Enter length Long Length Tape /3 Start Here Label length Tape Enter length Cleaning Initializing the Flag Settings Label Functions Key Menu Index Orientation Hori.1...
- Page 54 Mix-Len Specifications Margins Using the printer with Easy-Mark Plus Orientation Short Label length Labels num Hori. Middle Enter number Auto Troubleshooting Vert.1 of labels Long Vert.2 Label length Tape /3 Part Names and Enter length Tape Functions Start Here Cleaning Initializing the Terminal block Settings...
- Page 55 Patch Panel Specifications Ports length Separator Using the printer with Easy-Mark Plus Enter length None Network Orientation Length Type Ports num Line P.Pan/F.Plate Hori. Ports Enter number Troubleshooting 66-Block Vert.1 of ports Label Dotted 110-Block Label length Vert.2 Part Names and Frame Enter length Functions...
- Page 56 110-Block Specifications Using the printer with Easy-Mark Plus Troubleshooting Part Names and Functions Start Here Blocks type Text type Upper count 2pairs Lower count Cleaning Network Pins Label length 3pairs Enter start value Enter start value P.Pan/F.Plate Seri. 4pairs Enter length Initializing the 66-Block.
- Page 57 Clear Specifications Using the printer with Easy-Mark Plus Troubleshooting Part Names and Functions Start Here Cleaning Clear Text Text Only Initializing the Text & Setting Settings Label Functions Key Menu Index Frame and Table Lists Symbol List Technical Support...
- Page 58 Setup Menu 1 Specifications Using the printer with Half cut Auto cut Easy-Mark Plus Troubleshooting Part Names and Print density Functions -3 to +3 Preference Start Here Auto cut Drop stop Print density Drop stop Cleaning Die-Cut pos Width pos Backlight Initializing the Die-Cut pos...
- Page 59 Setup Menu 2 Specifications Using the printer with Easy-Mark Plus Language Troubleshooting Dansk Deutsch Part Names and English Functions Español Preference Français Start Here Auto cut Italiano Print density Nederlands Drop stop Norsk Cleaning Die-Cut pos Português-Br Backlight Português-EU Initializing the Language Settings Suomi...
- Page 60 File Storage Menu Specifications Using the printer with Easy-Mark Plus Troubleshooting Part Names and Functions Start Here Local File Save Cleaning Recall Delete Initializing the Print Settings End? Label Functions Key Menu Index Frame and Table Lists Symbol List Technical Support...
- Page 61 Accent Specifications Ā Ą Ă ā ą ă Á À Â Ã Ä Å Æ á à â ã ä å æ Č Ċ Ć ć č ċ Ç ç Using the printer with Easy-Mark Plus Ď đ ď Đ ð...
- Page 62 Frame and Table Lists Specifications Frame Using the printer with Easy-Mark Plus Troubleshooting Part Names and Functions Start Here Cleaning Initializing the Settings Label Functions Key Menu Index Frame and Table Lists Symbol List Technical Support...
- Page 63 Frame and Table Lists Specifications Table Using the printer with Easy-Mark Plus Troubleshooting Part Names and Functions Start Here Cleaning Initializing the Settings Label Functions Key Menu Index Frame and Table Lists Symbol List Technical Support...
- Page 64 Symbol List Ansi Environment Specifications Using the printer with Fire Easy-Mark Plus Arc Troubleshooting GHS whmis Arrows Part Names and Functions Greek Start Here Audio visual Cleaning Imo Initializing the Brackets Settings Laboratory Label Functions...
- Page 65 Symbol List Number Specifications Using the printer with Easy-Mark Plus Office Troubleshooting Part Names and PPE Functions Start Here Prohibition Cleaning Initializing the Public signs Settings Label Functions Punctuation Key Menu Index Shipping Frame and Table Lists Warning Symbol List...
- Page 66 • Latin America: 52.33.3777.6000 Troubleshooting Free Downloads • Asia Pacific: 65.6305.7575 Path: Support / Download Center / Software Part Names and Functions PANDUIT TECHNICAL SUPPORT Firmware Printers • Detailed Operator’s Manual 1-866-871-4571 Start Here • Replacement Quick Reference Card GA-TECHSUPPORT@PANDUIT.COM •...