
Related Manuals for Sennheiser Evolution Wireless G4


Summary of Contents for Sennheiser Evolution Wireless G4
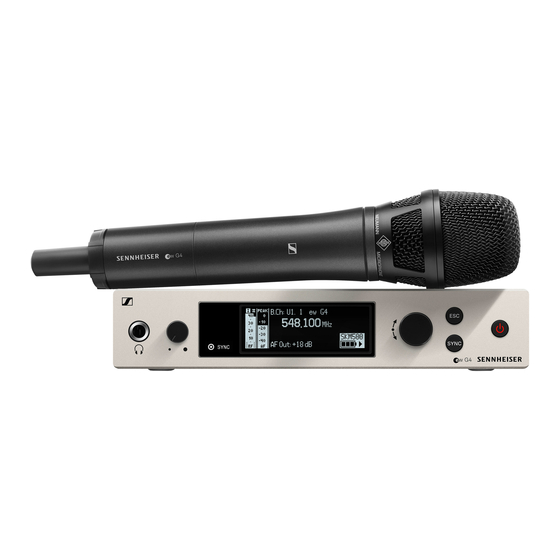
- Page 1 G4 300 series / 500 series ew 300 handheld system Instruction Manual Sennheiser electronic GmbH & Co. KG Am Labor 1, 30900 Wedemark, Germany, www.sennheiser.com ew 300-500 G4 - v1.1...
- Page 2 EM 300-500 G4 rack receiver ► You can find more detailed information about the EM 300-500 G4 in the following sections: • Installation and Startup: “Installing the EM 300-500 G4” • Operation: “Using the EM 300-500 G4” • Technical Data: “EM 300-500 G4”...
- Page 3 SKM 300 G4 handheld transmitter ► ► You can find more detailed information about the SKM 300 G4 in the fol- lowing sections: • Installation and Startup: “Installing the SKM 300 G4” • Operation: “Using the SKM 300 G4” • Technical Data: “SKM 300 G4”...
-
Page 4: Microphones And Cables
Capacitor, cardioid, black 008652 KK 204 BK Neumann Capacitor, super-cardioid, nickel 008653 KK 205 Neumann Capacitor, super-cardioid, black 008654 KK 205 BK You can find more information about the individual microphone mod- ules on their respective product pages at www.sennheiser.com. -
Page 5: Accessories For Rack Mounting
Accessories Accessories for rack mounting GA 3 rack mount kit 19” rack adapter for mounting the EM 100 G4, EM 300 G4, EM 500 G4 or SR 300 IEM G4 in a 19” rack. Article no. 503167 ► AM 2 antenna front mounting kit Antenna front mounting kit for installing antenna connections on the front of the rack when using the EM 100 G4, EM 300 G4, EM 500 G4 or SR 300 IEM G4 together with the GA 3 rack mounting kit. -
Page 6: Additional Accessories
Accessories Additional accessories Color labeling set • KEN 2, color labeling set for SKM handheld transmitters, article no. 530195 ► Microphone clamp • MZQ 1, microphone clamp for SKM handheld transmitters, article no. 076670 ► MUTE switch • RMS 1, remote mute switch for SK 300 G4, article no. 503164 ►... -
Page 7: The Frequency Bank System
The frequency bank system The frequency bank system There are different frequency ranges in the UHF band available for trans- mission. The following frequency ranges are available for the ew 300- 500 G4 series: • Aw+ range: 470 – 558 MHz •... -
Page 8: Connectors On The Rear Of The Device
Installing the EM 300-500 G4 Installing the EM 300-500 G4 These sections contain detailed information about installing and starting up the EM 300-500 G4. You can find information about operating the EM 300-500 G4 under “Using the EM 300-500 G4”. Connectors on the rear of the device Product overview for the rear of the EM 300-500 G4... - Page 9 Installing the EM 300-500 G4 Connecting/disconnecting the EM 300-500 G4 to/ from the power supply system Only use the supplied power supply unit. It is designed for your receiver and ensures safe operation. To connect the EM 300-500 G4 to the power supply system: Insert the plug of the power supply unit into the DC IN socket of the re- ▷...
-
Page 10: Creating A Data Network
Connect the other end of the network cable to a network switch. ▷ ► For more information about controlling devices via the Sennheiser Wireless Systems Manager (WSM) software, refer to the instruc- tion manual for the software. You can download the software here:... -
Page 11: Outputting Audio Signals
Installing the EM 300-500 G4 Outputting audio signals The EM 300-500 G4 has a balanced XLR-3M output socket and an unbal- anced 6.3 mm jack output socket. Always use only one of the two BAL AF OUT output sockets for each ▷... -
Page 12: Connecting Antennas
Gently angle the rod antennas to the left and right as shown in the fig- ▷ ure. If you are using more than one receiver, we recommend using remote antennas and, as needed, Sennheiser antenna accessories. For more information, visit the ew G4 product page at www.sennheiser.com. - Page 13 Installing the EM 300-500 G4 Installing the EM 300-500 G4 in a rack CAUTION Rack mounting poses risks When installing the device in a closed or multi-rack assembly, please con- sider that, during operation, the ambient temperature, the mechanical loading and the electrical potentials will be different from those of devices which are not mounted into a rack.
- Page 14 Installing the EM 300-500 G4 Mounting a single receiver in a rack To mount the receiver in a rack, you will need the GA 3 rack mounting kit (optional accessory). To fasten the mounting angle of the GA 3 rack mounting kit: Unscrew and remove the two recessed head screws (M4x8) on each ▷...
- Page 15 Installing the EM 300-500 G4 Mounting two receivers side by side in a rack When you mount two receivers side by side, it is only possible to front mount antennas when you use the ASA 214 antenna splitter in com- bination with the AM 2 front mounting kit and an additional GA 3 rack mounting kit.
-
Page 16: Installing The Skm 300 G4
Inserting and removing the batteries/rechargeable batteries You can operate the wireless microphone either with batteries (AA, 1.5 V) or with the rechargeable Sennheiser BA 2015 battery. ▷ Screw the rear part of the wireless microphone in the direction of the arrow (counter-clockwise) off of the handle of the wireless microphone. - Page 17 Installing the SKM 300 G4 Battery status Charge status of the batteries: ► Charge status is critical (LOW BATT): ►...
-
Page 18: Replacing The Microphone Module
Installing the SKM 300 G4 Replacing the microphone module You can find a list of the recommended microphone modules for the hand- held transmitter under “Microphones and cables”. To change the microphone module: Unscrew the microphone module. ▷ ▷ Screw the desired microphone module on. ►... -
Page 19: Changing The Colored Ring
Installing the SKM 300 G4 Changing the colored ring To change the colored ring: ▷ Pull the colored ring off as shown in the diagram. ► Attached a colored ring in the color you want as shown in the diagram. ▷... -
Page 20: Operating Elements On The Front Of The Device
Using the EM 300-500 G4 Using the EM 300-500 G4 These sections contain detailed information about using the EM 300- 500 G4. You can find information on installation and startup of the EK 300-500 G4 under “Installing the EM 300-500 G4”. Operating elements on the front of the device Product overview for the front of the EM 300-500 G4... - Page 21 Using the EM 300-500 G4 Switching the EM 300-500 G4 on and off To switch the receiver on: ▷ Short-press the STANDBY button. The receiver switches on and the Receiver Parameters standard dis- play appears. ► To switch the receiver to standby mode: ▷...
-
Page 22: Muting The Audio Output
Using the EM 300-500 G4 Muting the audio output mute the audio signal of the receiver: ▷ Press the STANDBY button in one of the standard displays. RX Mute On? display appears. ▷ Press the SET button. The audio signal is muted. cancel the muting: ▷... -
Page 23: Using The Headphone Output
Using the EM 300-500 G4 Using the headphone output You can use the headphone output on the front of the EM 300-500 G4 (6.3 mm jack) to listen to the audio signal. ATTENTION Danger due to high volume levels Volume levels that are too high may damage your hearing. Turn down the volume of the headphone output before you put on the ▷... -
Page 24: Lock-Off Function
Using the EM 300-500 G4 Lock-off function You can set the automatic lock-off function in the Auto lock menu (see “Auto Lock menu item”). When you have switched on the lock-off function, you will have to turn the receiver off and on again in order to operate it. To temporarily deactivate the lock-off function: ▷... - Page 25 Using the EM 300-500 G4 Displays on the EM 300-500 G4 display panel Status information such as reception quality, battery status, audio level, etc. is displayed on the home screen of the display panel. See “Home screen”. The display panel also displays the operating menu, which you can use to configure all of the settings.
-
Page 26: Buttons For Navigating Through The Menu
Using the EM 300-500 G4 Buttons for navigating through the menu To navigate through the EM 300-500 G4 operating menu, you need the fol- lowing buttons. ► ► Short-press the ESC button • Cancels the entry and returns to the previous display Long-press the ESC button •... -
Page 27: Home Screen
Home screen After you switch on the receiver, the display panel initially displays the Sennheiser logo. After a short time, the home screen is then displayed. The home screen has three different standard displays. On the home screen, turn the jog dial to switch between the standard ▷... - Page 28 Using the EM 300-500 G4 Receiver Parameters standard display ► RF RF level (radio frequency) • RF signal level display • including the display of the squelch threshold (see “Squelch menu item”) AF audio level (audio frequency) • Displays the audio level of the received transmitter When the display shows full deflection, the audio input level is exces- sively high.
- Page 29 Using the EM 300-500 G4 10Equalizer setting • Current equalizer setting • See “Equalizer menu item” 11MUTE muting function • Receiver or transmitter is muted • See “Muting the audio output” 12Battery status of the transmitter • SKM 300 G4: see “Inserting and removing the batteries/recharge- able batteries”...
- Page 30 Using the EM 300-500 G4 Soundcheck standard display The Soundcheck standard display shows the transmission quality between the transmitter and the receiver. ► By doing a soundcheck, you can ensure adequate transmission quality in the entire area in which you want to use the transmitter. You can do the soundcheck without the help of another person.
-
Page 31: Menu Structure
Using the EM 300-500 G4 Menu structure The figure shows the complete EM 300-500 G4 menu structure in an over- view. ►... -
Page 32: Squelch Menu Item
Using the EM 300-500 G4 Squelch menu item You can adjust the squelch threshold in the Squelch menu item. Setting range: • 5 to 25 dBμV, adjustable in 2-dB steps The squelch threshold is displayed on the home screen in the RF signal lev- el area. - Page 33 Using the EM 300-500 G4 To open the Squelch menu item: On the home screen, press the jog dial to open the operating menu. ▷ ▷ Turn the jog dial until the Squelch menu item appears in the selection frame. ▷...
-
Page 34: Easy Setup Menu Item
Using the EM 300-500 G4 Easy Setup menu item You can scan for unused frequencies using the Easy Setup menu item. When you have connected multiple EM 300-500 G4 devices to a network via the RJ-45 interfaces (see “Creating a data network”), you can perform the frequency setup for all of the connected receivers. - Page 35 Performing multi-channel frequency setup As an alternative to the following procedure, multi-channel frequency setup can also be performed using the Sennheiser Wireless Sys- tems Manager (WSM) software. For more information about con- trolling devices via the Sennheiser Wireless Systems Manager (WSM) software, refer to the instruction manual for the software.
- Page 36 Using the EM 300-500 G4 ▷ Perform the frequency scan on the master receiver as described above. From the scan results in the master receiver, select a frequency bank ▷ with enough free channels. After you make your selection, the display panels of the other receivers will display the message Assign New Frequency?.
- Page 37 Using the EM 300-500 G4 ▷ Select an unused frequency for one of the connected receiver on the master receiver. The frequency selected on the master receiver will also be shown on the display panel of the connected receivers. Press the jog dial (SET) on the particular receiver to save your selected ▷...
-
Page 38: Frequency Preset Menu Item
Using the EM 300-500 G4 Frequency Preset menu item In the Frequency Preset menu item, you can adjust the receiving frequen- cy of the receiver by adjusting the frequency bank and the channel. To open the Frequency Preset menu item: On the home screen, press the jog dial to open the operating menu. -
Page 39: Name Menu Item
Using the EM 300-500 G4 Name menu item In the Name menu item you can enter a name for the radio link. To open the Name menu item: ▷ On the home screen, press the jog dial to open the operating menu. Turn the jog dial until the Name menu item appears in the selection ▷... -
Page 40: Af Out Menu Item
Using the EM 300-500 G4 AF Out menu item In the AF Out menu item, you can set the audio level that is output via the receiver audio outputs. Setting range: • –24 dB to +24 dB in 3 dB steps To open the AF Out menu item: On the home screen, press the jog dial to open the operating menu. -
Page 41: Equalizer Menu Item
Using the EM 300-500 G4 Equalizer menu item In the Equalizer menu item, you can change the frequency response of the output signal. You can reduce the bass range and boost the treble range. To open the AF Out menu item: On the home screen, press the jog dial to open the operating menu. -
Page 42: Auto Lock Menu Item
Using the EM 300-500 G4 Auto Lock menu item In the Auto Lock menu item you can activate or deactivate the auto lock- off function. You can find information about temporarily deactivating the lock-off function during operation under “Lock-off function”. To open the Auto Lock menu item: ▷... - Page 43 Using the EM 300-500 G4 Advanced -> Tune menu item In the Tune menu item of the Advanced submenu, you can configure the receiving frequencies for the frequency banks U1 to U6. You can save a total of 32 frequencies in the U frequency bank. Only adjusting the frequency Open the Tune menu item in the Advanced menu.
- Page 44 Using the EM 300-500 G4 Advanced -> Sync Settings menu item In the Sync Settings menu item of the Advanced submenu, you can con- figure the parameters to be sent to the transmitters and activate or deac- tivate transmission. The parameters are defined separately for the SK, SKM and SKP.
- Page 45 Using the EM 300-500 G4 Advanced -> Fullscreen Warnings menu item In the Warnings menu item of the Advanced submenu, you can activate or deactivate warnings for certain cases. The warning in question will flash across the entire screen. ► You can activate or deactivate the following warnings: AF Peak •...
- Page 46 Using the EM 300-500 G4 Advanced -> Reset menu item In the Reset menu item of the Advanced submenu, you can reset the set- tings of the receiver. ► Advanced -> IP Address menu item In the IP Address menu item of the Advanced submenu, you can configure the IP addresses.
- Page 47 Using the SKM 300 G4 Using the SKM 300 G4 These sections contain detailed information about using the SKM 300 G4. You can find information on installation and startup of the SKM 300 G4 un- der “Installing the SKM 300 G4”. Operating elements of the SKM 300 G4 handheld transmitter ►...
- Page 48 • See “Advanced > Mute Mode menu item” Switching the SKM 300 G4 handheld transmitter on and off To switch on the SKM 300 G4: Hold down the ON/OFF button until the Sennheiser logo appears on the ▷ display. ►...
-
Page 49: Muting The Handheld Transmitter (Af Mute)
Using the SKM 300 G4 Muting the handheld transmitter (AF mute) You can mute the audio signal by pressing the MIC button. To do this, the MIC button function must be configured to AF On/Off. You can find more information about this subject under “Advanced > Mute Mode menu item”. -
Page 50: Deactivating The Rf Signal (Rf Mute)
Using the SKM 300 G4 Deactivating the RF signal (RF mute) You can deactivate the RF signal in two ways: Deactivating the RF signal with the button You can mute the RF signal by pressing the MIC button. To do this, the MIC button function must be configured to RF On/Off. You can find more information about this subject under “Advanced >... - Page 51 Using the SKM 300 G4 Deactivating the RF signal with the ON/OFF button You can deactivate the RF signal with the ON/OFF button. To deactivate the RF signal: ▷ Press the ON/OFF button. RF Mute On? appears. ▷ Press the SET button. The transmission frequency is displayed, however the wireless micro- phone is not transmitting an RF signal.
- Page 52 Using the SKM 300 G4 Lock-off function You can set the automatic lock-off function in the Auto lock menu (see “Auto Lock menu item”). When you have switched on the lock-off function, you will have to turn the transmitter off and on again in order to operate it. To temporarily deactivate the lock-off function: ▷...
- Page 53 Using the SKM 300 G4 Displays on the SKM 300 G4 handheld transmitter display panel You can view the following information on the transmitter display. ► AF audio level • Displays the audio level with peak hold function • See “Sensitivity menu item” Frequency •...
- Page 54 Using the SKM 300 G4 Select a standard display Move the multi-function switch to select a standard display: ▷ Frequency/Name standard display ► 548.100 ew300 G4 MUTE Channel/Frequency standard display ► B.Ch: 20.12 548.100 MUTE Name/Channel standard display ► ew300 G4 B.Ch: 20.12 MUTE...
- Page 55 Using the SKM 300 G4 Buttons for navigating the SKM 300 G4 menu Navigating through the menu To open the menu: Press the SET button. ▷ The operating menu is shown on the transmitter display panel. To open a menu item: ▷...
-
Page 56: Sensitivity Menu Item
Using the SKM 300 G4 Sensitivity menu item • Adjusting the input sensitivity – AF audio level Setting range: 0 dB to -48 dB in 6 dB steps The AF audio level is also displayed when the wireless microphone is mut- ed, e.g. - Page 57 Using the SKM 300 G4 Name menu item • Entering names ► In the Name menu item you can enter any name you want for the wireless microphone (e.g. the names of the musicians). The name can be shown in the Frequency/Name Name/Channel stan-...
- Page 58 Using the SKM 300 G4 Advanced > Tune menu item • Configuring the transmission frequency and frequency bank U When you have configured the wireless microphone to a system bank and you call up the Tune menu item, channel 1 of the frequency bank U is auto- matically set.
- Page 59 Using the SKM 300 G4 Advanced > Mute Mode menu item • Configuring the function of the MIC button ► AF On/Off mode • When you press the MIC button, no audio signal is transmitted. RF On/Off mode • When you press the MIC button, the RF signal is deactivated. Push To Mute mode •...
- Page 60 Using the SKM 300 G4 Advanced > MIC LED menu item • Configuring the background lighting of the MIC button ► In the MIC LED menu item you can configure and deactivate the back- ground lighting of the MIC button regardless of the settings of the “Ad- vanced >...
- Page 61 Using the SKM 300 G4 Advanced > RF Power menu item • Configuring the transmission power ► You can configure the transmission power in three steps in the RF Power menu item. Please note the information at the following address: General conditions and restrictions for the use of frequencies Setting range: Low: 10 mW...
- Page 62 Using the SKM 300 G4 Advanced > Reset menu item • Resetting the wireless microphone ► When you reset the wireless microphone, only the selected settings of the pilot tone and the U1 to U6 frequency banks are retained. Advanced > Software Revision menu item •...
-
Page 63: Establishing A Radio Link
Establishing a radio link Establishing a radio link To establish a radio link between the transmitter and receiver, the same frequency must be set in both devices. You can do this in a number of different ways: 1. Use the Easy Setup function to perform an automatic frequency set- up (see “Easy Setup menu item”). -
Page 64: Synchronizing Devices
Synchronizing devices Synchronizing devices You can synchronize ew 300-500 G4 series transmitters and receivers via the receiver’s infrared interface. You can adjust the Parameters to be transferred to the transmitter here: “Advanced -> Sync Settings menu item”. To synchronize the devices: Switch the transmitter and the receiver on. - Page 65 Synchronizing devices The parameters are transferred to the transmitter. The blue LED blinks during transmission. When the transfer is complete, a tick appears in the receiver’s display as a confirmation. Then the receiver will return to the current standard display. To cancel synchronization: ▷...
-
Page 66: Product Variants
Product variants Product variants EM 300-500 G4 product variants Made in Germany ► EM 300-500 G4-K+ 925 – 937.5 MHz Art. no. 507790 EM 300-500 G4-GBw 606 – 678 MHz Art. no. 507791 EM 300-500 G4-Gw 558 – 626 MHz Art. - Page 67 Product variants SKM 300 G4 product variants Made in Germany ► SKM 300 G4-S-K+ 925 – 937.5 MHz Art. no. 507727 SKM 300 G4-S-GBw 606 – 678 MHz Art. no. 507728 SKM 300 G4-S-Gw 558 – 626 MHz Art. no. 507729 SKM 300 G4-S-Bw 626 –...
- Page 68 EM 300-500 G4 RF characteristics ► Modulation Wideband FM Receiving frequency ranges Aw+: 470 – 558 MHz AS: 520 – 558 MHz Gw1: 558 – 608 MHz Gw: 558 – 626 MHz GBw: 606 – 678 MHz Bw: 526 – 698 MHz Cw: 718 –...
- Page 69 AF characteristics ► Compander system Sennheiser HDX EQ presets (switchable, act on line and monitor outputs): Preset 1: Flat Preset 2: Low Cut –3 dB at 180 Hz Preset 3: Low Cut High Boost –3 dB at 180 Hz +6 dB at 10 kHz...
- Page 70 SKM 300 G4 RF characteristics ► Modulation Wideband FM Receiving frequency ranges Aw+: 470 – 558 MHz AS: 520 – 558 MHz Gw1: 558 – 608 MHz Gw: 558 – 626 MHz GBw: 606 – 678 MHz Bw: 526 – 698 MHz Cw: 718 –...
- Page 71 AF characteristics ► Compander system Sennheiser HDX AF frequency response 80 – 18,000 Hz Signal-to-noise ratio ≥ 115 dBA (1 mV, peak deviation) Total harmonic distortion (THD) ≤ 0.9 % Setting range for input sensitivity 48 dB in 6 dB steps Overall device ►...
- Page 72 Pin assignment 6.3 mm mono jack plug, unbalanced ► • Connect to: • EM 100 G4 Audio Out • EM 300-500 G4 Audio Out 6.3 mm stereo jack plug for headphone jack ► • Connect to: • EM 100 G4 headphone input •...
-
Page 73: Cleaning And Maintenance
Cleaning and maintenance Cleaning and maintenance Note the following information when cleaning and maintaining evolution wireless G4 series products. CAUTION Liquids can damage the products’ electronics. Liquids entering the product housing can cause a short-circuit and damage the electronics. ▷ Keep all liquids away from the products. - Page 74 Cleaning and maintenance ▷ Screw the sound inlet basket back onto the microphone module. From time to time, you should also clean the microphone module contacts: ▷ Wipe the contacts of the microphone module with a soft, dry cloth.
- Page 75 CONTACT Contact Instruction manual as a PDF You can find this instruction manual as a PDF (German and English) in the download section of the Sennheiser website at www.sennheiser.com/ download. Download area for the Sennheiser website ▷ Enter ew G4 into the search bar to show the instruction manuals for products in the ew G4 series.