
Related Manuals for True Fitness 400 Series


Summary of Contents for True Fitness 400 Series
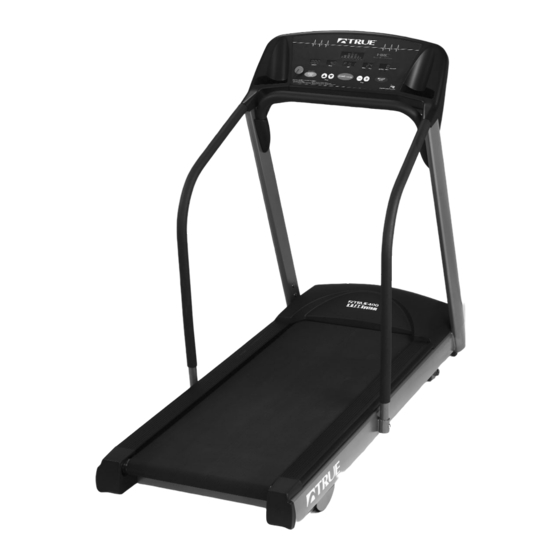
- Page 1 400 Series Owner’s Manual RESIDENTIAL TREADMILL Manual/Pre-Program/Heart Rate Control...
- Page 2 Thank You For Selecting A True Treadmill In 1981, Frank Trulaske launched True Fitness Technology, Inc. and began manufacturing hand-crafted treadmills. His team's Our original goal was to build the obsession world’s best treadmills, and today with quality we believe we’re doing it!”...
-
Page 3: Table Of Contents
Safety Instructions Setting Up Your Treadmill Assembly Treadbelt Adjustment Control Panel Functions Basic Treadmill Operation Quick Reference Operating Instr. Manual Operation Programmed Workouts User Programs Heart Rate Control (workouts) Cruise Control Important Points About Heart Rate Control The F.I.T. Formula Beginning Your Exercise Program 30-32 Care and Maintenance Troubleshooting Guide... -
Page 4: Safety Instructions
Safety Instructions Important Safety Instructions When using this treadmill, basic precautions should always be followed, including the following: Read all instructions before using this treadmill. Consult your physician before beginning any exercise program. Danger: To reduce the risk of electric shock, always unplug this treadmill immediately after use and before cleaning. - Page 5 Safety Instructions Keep the power cord away from heated surfaces. Never drop or insert any object into any opening. To disconnect, turn the power switch to the OFF position, then remove the plug from the outlet. Do not allow animals on or near your treadmill. Make sure the power cord has enough slack to allow the treadmill to raise freely without being limited by the cord or caught in the incline rack.
-
Page 6: Setting Up Your Treadmill
Setting Up Your Treadmill Allow only one person at a time on your machine. Do not operate treadmill without the safety key attached to the console and the lanyard clipped to your clothing at approximately waist height. Always straddle the treadbelt and allow the belt to begin moving before stepping onto the belt. -
Page 7: Setting Up Your Treadmill
Setting Up Your Treadmill Important Electrical Requirements Your True treadmill requires a dedicated 110 volt, alternating current (AC), 15 amp grounded outlet circuit. This means nothing else can be plugged into the same power circuit. Most household power circuits are rated for this 110VAC 15-amp requirement, but you must ensure the treadmill does not share the circuit with anything else. -
Page 8: Assembly
Assembly Assembly Hardware Kit: 1. Safety key 2. 5mm T-handle hex key 3. 5mm hex key/Philips screwdriver 4. 3mm hex key 5. 2mm hex key 6. 8mm x 15mm hex screws (4) 7. 8mm x 50mm hex screws (2) 8. 6mm x 15mm hex screws (4) 9. - Page 9 Assembly Detach the rubber band from the upper wiring harness and route the cable down the pedestal leg support and out the bottom hole as shown. Step 4: Tilt the pedestal up and slide it down the pedestal supports, being careful not to pull out the upper wiring harness.
-
Page 10: Treadbelt Adjustment
Treadbelt Adjustment Do not tighten any pedestal or handrail screws until instructed. Step 5: The proper side of each handrail is designated by a label. Install the handrails by sliding over the handrail stub next to the handlebar. Install two 2mm x 15mm screws at the top of each handrail. -
Page 11: Treadbelt Adjustment
Treadbelt Adjustment 1. Stand beside the treadmill, place the safety key onto the control panel and follow operating instructions for running the treadmill at 5 mph. 2. If the belt is off-center to the right, turn the left roller adjustment bolt counter clock-wise 1/4 turn. If the belt is off-center to the left, turn the left roller adjustment bolt 1/4 turn clockwise. -
Page 13: Basic Treadmill Operation
Basic Treadmill Operation Basic Treadmill Operation Starting Your Treadmill Safely Straddle the treadbelt by placing your feet on the straddle covers. Attach the lanyard to your clothing at about waist height. Place the safety key on the key holder on the console. Set your weight using the keys and press Press the... -
Page 14: Basic Treadmill Operation
Basic Treadmill Operation A Note About Calorie Expenditure Calculations True treadmills use the calorie expenditure formula as described in Guidelines for Exercise Testing and Prescription from the American College of Sports Medicine. This is the most widely accepted formula for running and walking. Due to variations in human exercise efficiency, your actual calorie expenditure may vary by as much as 10% from the treadmill’s estimate. -
Page 15: Quick Reference Operating Instr
Quick Reference Operating Instructions Women should be careful to place the transmitter below their bra line. Some moisture is necessary between the strap and your skin. Sweat from your exercise works best, but ordinary tap water may be used prior to your workout if desired. The Treadmill’s Heart Rate Display Before you start your workout, as you stand on or near the treadmill, you will know the treadmill is properly receiving... -
Page 16: Manual Operation
Manual Operation Set Program Level Using Press Set Time Using Keys (15:00-99:00 Minutes) Press Manual Operation For a Quick Start, simply press start moving at 0.5 mph. Note: Confirm that the body weight setting is correct as displayed in the Time window. If it is not, adjust it with keys and press Adjust speed using keys, and adjust grade using... -
Page 17: Programmed Workouts
Programmed Workouts Making Time and/or Distance Count Down instead of Up After adjusting your weight if necessary, press or until the lights in the time and distance windows flash. Press to set distance and press , time and distance will begin counting down. When the time or distance reaches zero, the treadbelt will continue to move and whichever readout reached zero (time or distance) will begin counting up. - Page 18 Programmed Workouts To stop or pause your workout: slow machine to below 2 mph by pressing then press program and save your workout information. To restart a program, press . To end your workout, press and remove the safety key. To reset distance, time, and calories during your workout: press and hold until the readout is reset.
-
Page 19: User Programs
User Programs User Programs During a manually-controlled workout, your 400 treadmill always "records" the changes you make in speed or incline. This recording can be saved as a User Program that you can "play back" to use as custom-designed workouts. Up to 50 changes in speed or incline can be recorded. -
Page 20: Heart Rate Control (Workouts)
Heart Rate Control Workout After you have spent some time learning how your heart responds to different levels of speed and grade, you will have a better understanding of how to select the maximum speed and maximum grade required to reach your target heart rate. Consult your physician to determine your target heart rate. -
Page 21: Heart Rate Control Workout
Heart Rate Control Workout Adjust maximum speed with the Adjust workout time with the . (This does not include warm-up/cool down time.) Adjust maximum grade with the Press to begin your workout. Note: if you keep pressing through the workout setup parameters. You can press at any time to accept the current parameters and begin your workout. - Page 22 Heart Rate Control Workout Warm Up Stage Increase speed and grade gradually to slowly increase your heart rate to within 10 bpm of your target. For best results, you should take about five minutes to get to that point. The treadmill will operate in a manually-controlled mode during the warm-up stage.
-
Page 23: Heart Rate Control (Workouts)
Heart Rate Control Workout rate control and begin your cool down stage. As your heart rate increases or decreases from your target, the treadmill will automatically make adjustments to speed and/or grade to keep your heart rate near your selected target. -
Page 24: Cruise Control
Cruise Control Cruise Control This is the simplest way to enter target heart rate training. While in manual or any program you can enter Target Heart Rate Control by simply pressing the key. For best results, you should be at least five minutes into your workout and warmed up. -
Page 25: Cruise Control
have an additional 4% of grade available in the HRC stage. i.e.: If you enter the HRC stage at 1% grade your maximum attainable grade will be 5%. If you do not enter the HRC stage with grade, no grade will be available during the HRC stage of your workout. -
Page 26: Important Points About Heart Rate Control
Important Points About Heart Rate Control maximum grade of 6%. The walker is limited to a maximum speed of 4.0 mph and grade will be used if required to elevate the heart rate up to a maximum of 6%. Important Points About Heart Rate Control The Heart Rate Monitor transmitter strap provided with your treadmill should be worn directly against your skin at about one inch below the pectoral muscles/breast line. - Page 27 Important Points About Heart Rate Control A grounded outlet is critical for the HRC system to function properly. Use a dedicated 110 VAC, grounded outlet to help prevent interference. Two users wearing the same kind of transmitter at the same time and in close proximity may cause false heart rate display readings.
-
Page 28: The F.i.t. Formula
The F.I.T. Formula their speed or grade at anytime. The warm-up stage is not predetermined by the amount of time input prior to workout, and the user may take as much time as they wish to approach their target heart rate. The warm-up stage ends when the user’s heart rate is 10 beats below the pre-set target heart rate. - Page 29 Frequency: How Often You Exercise You should exercise three to five times a week to improve your cardiovascular and muscle fitness. Improvements are BEGINNING EXERCISE minimal with less PROGRAM frequent exercise. ESTABLISHING AEROBIC FITNESS Intensity: How Hard MAINTAINING You Exercise AEROBIC FITNESS Intensity of exercise is...
- Page 30 The F.I.T. Formula workload in order to reach your target heart rate. The first increase may be necessary after two to four weeks of regular exercise. Never exceed your target heart rate zone. Increase the speed and/or incline on the treadmill to raise your heart rate to the level recommended by your doctor.
- Page 31 exercise log to monitor your progress. T T r r e e a a d d m m i i l l l l S S p p e e e e d d a a n n d d G G r r a a d d e e v v s s . . M M E E T T s s Grade 10.0 10.4 10.7 11.1 11.4 11.8 12.1 6 10.2 11.0 11.4 11.8 12.3 12.7 13.1 13.5 13.9 14.3...
-
Page 32: The F.i.t. Formula
The F.I.T. Formula 100% minute minus your age. To find your pulse, locate a vein on your neck or inside your wrist, then count beats for ten seconds, then multiply by six. (See chart above.) It’s also important to know your target training zone or target heart rate. -
Page 33: Beginning Your Exercise Program
Beginning Your Exercise Program current level of fitness. Reducing the intensity of your workout is recommended. The age-adjusted target heart rates indicated in the previous chart reflect averages. A variety of factors (including medication, emotional state, temperature, and other conditions) can affect the exercise heart rate appropriate for you. - Page 34 Beginning Your Exercise Program Cool-Down: Slow and Relaxed Exercise Cooling down relaxes your muscles and gradually lowers your heart rate. Slowly reduce your workload until your heart rate is below 60 percent of your maximum heart rate. The cool down should last at least five minutes, followed by some light stretching to enhance your flexibility.
- Page 35 Beginning Your Exercise Program Maintaining Aerobic Fitness If you can sustain 20 continuous minutes in your target heart rate zone, begin to increase the length and intensity of your workout: Exercise four to six days a week or on alternate days. Try to reach and maintain 70-85 percent of your maximum heart rate with moderate to somewhat hard exercise.
-
Page 36: Care And Maintenance
Care and Maintenance your appetite. Take exercise breaks throughout the day to help increase metabolism (calorie expenditure). Sports Training When you are training to improve strength and performance: Exercise four to five days a week. Alternate exercise days and intervals of hard to very hard exercise with easy to moderate exercise. -
Page 37: Care And Maintenance
With typical use (one user, 30 minutes a day), your treadmill does not require any lubrication. However, if it is used more frequently, it may require regular lubrication of the treadbelt. Please contact True Fitness for lubrication recommendations in these cases. Regular Cleaning Daily: Perspiration should be wiped from the control console and treadmill surfaces after your workout. -
Page 38: Troubleshooting Guide
Troubleshooting Guide SYMPTOM CAUSE Circuit breaker on treadmill trips A. Damaged motor when the power cord is plugged B. Damage or defective into wall. motor power supply Circuit breaker on treadmill trips board when inputting speed and start- C. Damaged motor control ing. -
Page 39: Diagnostics
SYMPTOM CAUSE Treadbelt tracks left to right A. Uneven floor B. Rear roller not adjusted for sloped floor Treadmill trips household A. Defective breaker circuit breaker B. Circuit too small C. Circuit over-loaded Treadbelt feels unsmooth, jerks A. Object between belt and intermittently deck B. - Page 40 Diagnostics E1:STALL Incline not moving when commanded E2:OVERSPEED This error occurs when an acceleration >2.1 mph occurs. Error cleared by turning off power switch then turning it back on. E2:CAL Feedback cannot reduce or increase speed to target. Error cleared by calibrating.
- Page 41 Founded 1981 865 Hoff Road O’Fallon, MO 63366 1-800-426-6570 www.truefitness.com ®2002 TRUE FITNESS TECHNOLOGY, INC. TRUE is a registered trademark of TRUE FITNESS Specifications subject to change Rev. 10/02...