Table of Contents
Advertisement
Quick Links
Advertisement
Table of Contents

Related Manuals for Stihl SE 133 ME


Summary of Contents for Stihl SE 133 ME
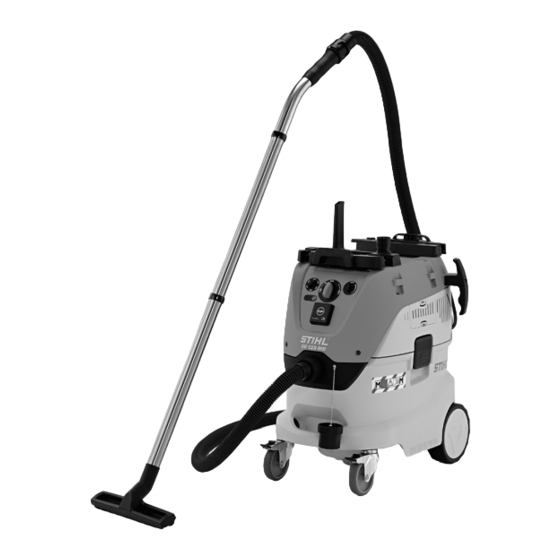
- Page 1 STIHL SE 133 ME Instruction Manual...
-
Page 3: Table Of Contents
English Contents 7.2 Switching off the wet/dry vacuum cleaner... 16 Introduction ......... 2 Checking the wet/dry vacuum cleaner . -
Page 4: Introduction
English 1 Introduction 17.1 Wet/dry vacuum cleaner STIHL SE 133 ME ..25 1 Introduction 17.2 Extension Cords ........25 17.3 Sound and vibration levels . -
Page 5: Symbols Used With Warnings In The Text
English 3 Overview Symbols used with warnings in the text 3 Overview WARNING Wet/dry vacuum cleaner This symbol indicates dangers that can cause serious injuries or death. ► The measures indicated can avoid serious injuries or death. NOTICE This symbol indicates dangers that can cause damage to property. -
Page 6: Controls And Led
English 3 Overview 1 Top part 14 Connecting cord The top part contains the controls, the electric motor and The connecting cord connects the wet/dry vacuum the filters. cleaner to the mains plug. 2 Retainer 15 Filter housing cap The retainer attaches various makes of tool box to the The filter housing cap closes the filter housing. -
Page 7: Accessories Provided
English 3 Overview 3 Rotary control 3 Crevice tool The rotary control is used to set the wet/dry vacuum The crevice tool is used for picking up in hard-to-reach cleaner to the inside diameter of the attached suction places. hose. 4 Suction tube 4 Rotary switch The suction tube carries dust, dirt and liquid that are... -
Page 8: Symbols
In this position of the rotary switch automatic filter cleaning is switched off. Intended use The wet/dry vacuum cleaner STIHL SE 133 ME is designed to be used for: – Picking up dust, dirt, splinters of glass, chips, sand and... -
Page 9: Requirements Concerning The User
English 4 Safety Precautions The wet/dry vacuum cleaner STIHL SE 133 ME is not ► Make sure that the user fulfills the following designed to be used for: requirements: – Picking up asbestos – The user is rested. – The user is physically, sensorially and –... -
Page 10: Work Area And Surroundings
– If picking up liquid: the float moves easily. ■ Bystanders, children and animals are not aware of the – Only an original STIHL accessory for this wet/dry vacuum dangers of the wet/dry vacuum cleaner and cannot assess cleaner is fitted. -
Page 11: Operation
► If foam appears: stop working, unplug the mains plug rating plate of the wet/dry vacuum cleaner. from the socket and consult a STIHL servicing dealer. ■ Wiring may be overloaded during operation if more than one electric power tool is connected to the same socket. -
Page 12: Transport
English 4 Safety Precautions 4.10 Storage ■ An incorrectly routed connecting cord or extension cord may be damaged and people may trip over it. People may WARNING be injured and the connecting cord or extension cord may be damaged. ■ Children are not aware of and cannot assess the dangers ►... -
Page 13: Preparing The Wet/Dry Vacuum Cleaner For Use
► Plug the mains plug of the wet/dry vacuum cleaner into an easily accessible socket. ► If it is not possible to carry out these steps: Do not use the wet/dry vacuum cleaner. Consult a STIHL servicing ► Undo screws (1). dealer. -
Page 14: Inserting And Removing Filter Bag
English 6 Assembling the wet/dry vacuum cleaner ► Insert screws (1) and tighten. Attaching the tool box Attaching the retainer for a tool box T 20 ► Unscrew screws (1). ► Unscrew the screws (2) and dispose of them. ► Place retainers (3 and 4) on top part. ►... -
Page 15: Inserting And Removing Disposal Bag
English 6 Assembling the wet/dry vacuum cleaner ► Close the sleeve (2) with the slide (4). ► Remove filter bag (3) from the container. ► Dispose of the filter bag (3) in accordance with the applicable regulations and in an environmentally responsible manner. -
Page 16: Fitting And Removing Suction Hose
English 6 Assembling the wet/dry vacuum cleaner ► Lift off the top part. 6.4.2 Removing the suction hose ► Pull the sleeve (1) off the suction connector (2). ► Pull the sleeve (1) out of the suction connector (2). ► Close the sleeve (1) with the slide (5). ►... -
Page 17: Fitting And Removing Accessories
English 7 Switching the wet/dry vacuum cleaner on and off 6.5.2 Removing the hand tube or adapter ► If connecting an electric power tool: Push adapter (5) onto suction connector of electric power tool (6). ► Squeeze sleeve (1) and pull off hand tube (3) or adapter (2). -
Page 18: Switching Off The Wet/Dry Vacuum Cleaner
English 8 Checking the wet/dry vacuum cleaner ► Set the rotary switch to the required mode, @ 9. Switching off the wet/dry vacuum cleaner ► If the filter (3) is dirty: Clean the filter. ► If the filter (3) is damaged: Replace the filter. ►... -
Page 19: Checking The Cooling Air Filter
► If the cooling air filter (4) is damaged: Replace the cooling ► If the float (1) still cannot be moved to and fro: Do not use air filter. the wet/dry vacuum cleaner. Consult a STIHL servicing ► Insert cooling air filter (4) into retainer (2). dealer. -
Page 20: Using The Wet/Dry Vacuum Cleaner
English 9 Using the wet/dry vacuum cleaner ► Set rotary control to the position of the measured inside 9 Using the wet/dry vacuum cleaner diameter. Picking up dust and dirt Setting the suction power ► If picking up Class M dust: The suction power can be set according to the application. -
Page 21: Operation With The Wet/Dry Vacuum Cleaner Being
English 10 After Finishing Work Operation with the wet/dry vacuum cleaner ► Switch on the electric power tool. The wet/dry vacuum cleaner will be switched on being switched on and off automatically by a automatically. connected power tool ► Operate the electric power tool. ►... -
Page 22: Emptying The Container
English 11 Transporting ► Clean the float. ► Allow filter to dry. ► Remove suction hose. ► Roll up the suction hose (4) and hang it on the holder (2) or secure with rubber strap (3). ► Clean the seal (1) with a damp cloth. ►... -
Page 23: Cleaning
English 13 Cleaning ► The wet/dry vacuum cleaner should be stored in such a ► Open cover (2). way that the following conditions are fulfilled: ► Remove filter (3). – The wet/dry vacuum cleaner is out of the reach of children. -
Page 24: Cleaning The Cooling Air Filter
► If the wet/dry vacuum cleaner or accessory is damaged: Do not use the wet/dry vacuum cleaner or accessory. Consult a STIHL servicing dealer. ► Press tab (1) and remove retainer (2) from top part (3). ► Remove cooling air filter (4). -
Page 25: Troubleshooting
► Clean the suction hose, hand tube or accessory is blocked up. accessory. The seal between the top part and the container ► Clean seal between top part and container or is dirty or damaged. ask a STIHL authorized dealer to replace it. 0458-660-0121-A... - Page 26 ► Clean the suction hose, hand tube or accessory is blocked up. accessory. The seal between the top part and the container ► Clean seal between top part and container or is dirty or damaged. ask a STIHL authorized dealer to replace it. 0458-660-0121-A...
-
Page 27: Specifications
17 Specifications – Cord length up to 20 m: 1.5 mm² – Cord length 20 m up to 50 m: 2.5 mm² 17.1 Wet/dry vacuum cleaner STIHL SE 133 ME 100 V to 127 V – Rated voltage: see rating plate –... - Page 28 20 EC Declaration of Conformity 20.1 Wet/dry vacuum cleaner STIHL SE 133 ME ANDREAS STIHL AG & Co. KG Badstraße 115 D-71336 Waiblingen Germany declare under our sole responsibility that –...
- Page 29 English 20 EC Declaration of Conformity 0458-660-0121-A...
- Page 30 English 20 EC Declaration of Conformity 0458-660-0121-A...
- Page 32 0458-660-0121-A englisch www.stihl.com *04586600121A* 0458-660-0121-A...