
Related Manuals for Danfoss Turbocor VTT Series


Summary of Contents for Danfoss Turbocor VTT Series
- Page 1 Service Manual Danfoss Turbocor® Variable Twin Turbo (VTT) Series Compressors VTT Series Compressors ® http://turbocor.danfoss.com...
- Page 2 THIS PAGE INTENTIONALLY LEFT BLANK...
-
Page 3: Table Of Contents
Table of Contents Contents Table of Contents ..........................3 List of Tables ............................6 List of Figures ............................. 7 Proprietary Notice ........................... 11 Introduction ............................. 13 1.1 Purpose ......................................13 1.2 Organization .....................................13 1.3 Commitment to Quality ................................14 1.4 Safety Summary ....................................14 1.4.1 Danger Notification ................................14 1.4.2 Caution Notification ................................14 1.4.3 Note ......................................14... - Page 4 Table of Contents 3.2.8.1 Removal and Installation ............................47 3.2.8.2 Verification..................................48 3.2.8.3 Running Check ................................48 3.2.9 Motor Cooling Exit Flange ..............................48 3.2.9.1 Removal and Installation ............................50 3.2.9.2 Torque Specifications ...............................50 3.2.10 Bottom Plug ..................................51 3.2.10.1 Removal and Installation ............................51 3.2.10.2 Torque Specifications .............................51 3.3 Power Side ......................................52 3.3.1 Motor Power Cover ................................52 3.3.1.1 Removal and Installation ............................53...
- Page 5 Table of Contents 3.7.1.10 PWM .....................................91 3.7.1.10.1 PWM Connections ............................93 3.7.1.11 250V DC-DC PWM Cable ............................93 3.7.1.11.1 Removal and Installation ........................... 93 3.7.1.11.2 Verification ..............................96 3.7.1.11.3 Torque Specifications ..........................98 3.7.1.12 Stator Temperature Sensor Feed Through .....................99 3.7.1.12.1 Removal and Installation ........................... 99 3.7.1.12.2 Stator Temperature Sensor Verification .....................100 3.7.1.12.3 Torque Specifications ..........................101 3.7.1.13 High and Low Pressure Temperature Sensors ....................
-
Page 6: List Of Tables
List of Tables List of Tables Table 1 - Compressor Component Identification (Service Side) ...................25 Table 2 - Compressor Component Identification (Power Side) .....................26 Table 3 - Compressor Component Identification (Service Side - Cover Off ) ..............27 Table 4 - Compressor Component Identification (Power Side - Cover Off ) ..............28 Table 5 - Compressor Component Identification (Power Side - Cables) ................29 Table 6 - IFV Pipe Assembly Torque Specifications ........................31 Table 7 - IFV Actuator Torque Specifications..........................34... -
Page 7: List Of Figures
List of Figures List of Figures Figure 1 - Danger Notification Example ............................14 Figure 2 - Caution Notification Example ............................14 Figure 3 - Note Example ..................................14 Figure 4 - Danger Notification Example ............................15 Figure 5 - ESD Label ....................................16 Figure 6 - IFV Flow ....................................19 Figure 7 - Motor Cooling Path ................................19 Figure 8 - VFD Cooling Path ................................20 Figure 9 - System Architecture and Control Interface (Revisions A and B) ...............22... - Page 8 List of Figures Figure 65 - Front Bearing Power Feed Through ..........................70 Figure 66 - Rear Bearing Sensor Feed Through ..........................71 Figure 67 - Rear Bearing Power Feed Through ..........................71 Figure 68 - VTT Service Electronics (Revisions A and B) ......................72 Figure 69 - VTT Service Electronics (Revisions C and Later) ....................72 Figure 70 - Thermal Paste Application ............................73 Figure 71 - CCM (Revisions A and B) ...............................75...
- Page 9 List of Figures Figure 130 - Suction Cover Removed ............................106 Figure 131 - Guide Pin Locations ..............................107 Figure 132 - End Cap Removal ............................... 107 Figure 133 - Shaft Dowel Pin Placement ............................ 108 Figure 134 - Impeller Bolt ................................108 Figure 135 - First Stage Impeller Removal ..........................
- Page 10 List of Figures Figure 194 - CIM (Revision C Shown) ............................149 Figure 195 - CIM Faceplate (Revisions A and B) ........................149 Figure 196 - CIM Faceplate (Revisions C and Later) ........................ 149 Figure 197 - CIM Connectivity (Revisions A and B) ......................... 150 Figure 198 - CIM Connectivity (Revisions C and Later) ......................
-
Page 11: Proprietary Notice
Proprietary Notice Copyright, Limitations of Liability and Revision Rights. This publication contains proprietary information to Danfoss Turbocor Compressors, Inc. (DTC). This publication is protected under the Copyright laws of the United States of America (USA) and most other countries. This work is owned by DTC, and was published as of the most recent revision of this publication, as indicated on the Title page of this document. - Page 12 THIS PAGE INTENTIONALLY LEFT BLANK 12 of 165 M-SV-VT-001-EN Rev. A...
-
Page 13: Introduction
Some potential safety situations may not be foreseen or covered in this manual. DTC expects personnel using this manual and working on Danfoss Turbocor compressors to be familiar with, and carry out, all safe work practices necessary to ensure safety for personnel and equipment. -
Page 14: Commitment To Quality
DTC is committed to quality service and customer satisfaction as outlined by our Quality Policy: to Quality Danfoss Turbocor is dedicated to satisfying our customers by providing “Best in Class” in terms of quality, value, and on-time delivery while striving for continuous improvement. -
Page 15: Precautions
Introduction 1.5 Precautions Consideration for personal safety and equipment safety is very important. The following sections cover safety precautions and methods that must be followed when servicing the compressor. 1.6 Refrigerant Type VTT series compressors are totally oil-free and optimized for use with refrigerant HFC-134a. 1.7 Electrical Isolation Before servicing either the Compressor or VFD, isolate the VFD power by completing the following of the VFD... -
Page 16: Esd Protection/Grounding
Introduction control procedures at all times when handling sensitive electronic components. This section outlines static control precautions that must be followed when providing service support in the field. Service support personnel should create a safe, static-free environment. Service personnel must use a commercially available service kit for handling static-sensitive devices. The kit typically includes: •... -
Page 17: Vtt O-Rings
Introduction 1.11 VTT O-rings Various O-rings are utilized throughout the VTT Compressor to contain the refrigerant. Prior the removal of any component utilizing an O-ring, the refrigerant must be properly recovered per industry-standard procedures. Upon O-ring replacement, a leak test should be performed. The following O-ring-specific steps are required when replacing any VTT O-ring: 1. - Page 18 THIS PAGE INTENTIONALLY LEFT BLANK 18 of 165 M-SV-VT-001-EN Rev. A...
-
Page 19: Compressor Fundamentals
Compressor Fundamentals Compressor operation begins with a demand signal applied to the Compressor through the CIM. The startup sequence is configurable in the startup settings. Refer to the OEM Programming Guide for further details. 2.1 Main Fluid Path The VTT Compressor is a two-stage centrifugal type compressor utilizing patent-pending IntraFlow™ technology. -
Page 20: Compressor And Vfd Cooling
Compressor Fundamentals 2.4 Compressor and Liquid refrigerant, having at least 2⁰C (Kelvin)/ 3.6°F (Rankine) sub-cooling at connection point, must VFD Cooling be piped to both the Compressor cooling inlet connection and the VFD cooling inlet connection. Refer to the VTT Applications Manual for cooling connections sizes. To cool the motor, sub-cooled liquid refrigerant enters the Compressor through the EXV and passes through a groove surrounding the motor Stator. -
Page 21: Compressor Energy And Signal Flow
Compressor Fundamentals 2.6 Compressor Energy During normal operation, 3-phase power is required to be connected to the VFD at all times, even and Signal Flow if it is not running. Power is distributed through the following components to maintain compressor operation: •... -
Page 22: Figure 9 - System Architecture And Control Interface (Revisions A And B)
Compressor Fundamentals Figure 9 - System Revisions A and B Architecture and Control Interface (Revisions A and B) 22 of 165 M-SV-VT-001-EN Rev. A... -
Page 23: Figure 10 - System Architecture And Control Interface (Revisions C And Later)
Compressor Fundamentals Figure 10 - System Revisions C and Later Architecture and Control Interface (Revisions C and Later) 23 of 165 M-SV-VT-001-EN Rev. A... - Page 24 THIS PAGE INTENTIONALLY LEFT BLANK 24 of 165 M-SV-VT-001-EN Rev. A...
-
Page 25: Compressor Components
Compressor Components This section provides Compressor component locations and functional descriptions, verification and troubleshooting methods, cable connection identification, and steps necessary to replace a component. At the time of this publication, there have been three (3) major revisions of the VTT Compressor. Throughout this section, the various component differences are identified if applicable. -
Page 26: Table 2 - Compressor Component Identification (Power Side)
Compressor Components Figure 12 - Compressor External Component Identification – Power Side Table 2 - Compressor Component Component Component Identification (Power Side) Power Cover Economizer Port Motor Cooling Exit Port P/T Sensor (Suction) Motor Cooling Electronic Expansion Valve (EXV) Discharge Flange Motor Cooling Inlet Port P/T Sensor (Discharge) 26 of 165... -
Page 27: Table 3 - Compressor Component Identification (Service Side - Cover Off )
Compressor Components Figure 13 - Compressor Component Identification – Service Side (Cover Off) Table 3 - Compressor Component Component Component Identification (Service Side - Cover Off) VTT Service Electronics Module Motor Cooling Valve Cable Front Bearing Power Cable Rear Bearing Sensor Cable Front Bearing Power Feed Through 10 Rear Bearing Sensor Feed Through Front Bearing Sensor Feed Through... -
Page 28: Table 4 - Compressor Component Identification (Power Side - Cover Off )
Compressor Components Figure 14 - Compressor Component Identification – Power Side (Cover Off) Table 4 - Compressor Component Component Component Identification (Power Side - Cover Off) Motor Terminal Block Bus Bar Spacer – Bus Bar Motor Power Feed Through Mains Input Bracket Tower Plate Ground Cable Stud 28 of 165... -
Page 29: Table 5 - Compressor Component Identification (Power Side - Cables)
Compressor Components Figure 15 - Compressor Sensors and Cables Topside Figure 16 - Compressor Sensors and Cables Topside Table 5 - Compressor Component Component Component Identification (Power Side - Cables) IFV Cables EXV Cable Discharge P/T Sensor Cable Suction P/T Sensor Cable 29 of 165 M-SV-VT-001-EN Rev. -
Page 30: External Components
Compressor Components 3.2 External Components 3.2.1 IFV Pipe Assembly The IFV directs a small fraction of the flow from the second stage Volute exit to the inlet of the first stage diffuser through the IFV Pipe. Figure 17 - IFV Pipe Assembly IFV Pipe Assembly ICM Body... -
Page 31: Ifv Pipe Assembly Verification
Compressor Components IFV Pipe Installation: 1. Verify all contact surfaces are clean and dry. If not, clean with a lint-free cloth. 2. Lubricate the new O-rings and place them on the IFV suction and discharge side flanges. 3. Place the IFV pipe in its proper location. 4. -
Page 32: Removal And Installation
Compressor Components Figure 18 - IFV Actuator 3.2.2.1 Removal and IFV Actuator Removal: Installation 1. Isolate the Compressor power as described in the “Electrical Isolation of the Compressor/VFD” section of this manual. 2. Disconnect the Red (power) and Black (signal) cables from the IFV by turning the collars, located on the cable ends, in a counter-clockwise rotation. -
Page 33: Programming (Required)
Compressor Components IFV Actuator Installation 1. Generously lubricate the O-ring groove on the adapter/valve stem and on the new O-ring with the Molykote G 4500 grease provided. 2. Install the IFV Actuator to the Bonnet/Function Module ensure the actuator is fully inserted with the wire connection ports facing up. -
Page 34: Calibration
Compressor Components 10. Press the Up Arrow button until you reach Parameter 26. 11. Press the Enter/Edit button. 12. Press the Up Arrow button to select 5. 13. Press the Enter/Edit button. 14. Hold the Enter/Edit button for 2 seconds to exit the programming mode. 3.2.2.3 Calibration 1. -
Page 35: Removal And Installation
Compressor Components 3.2.3.1 Removal and ICM Body Removal: Installation 1. Remove the IFV Actuator as described in the previous section. 2. Isolate the compressor and recover refrigerant. 3. Remove the four (4) hex bolts. 4. Rotate the Bonnet/Function Module as shown in Figure 22 (Bonnet/Function Module Removal). 5. -
Page 36: Torque Specifications
Compressor Components Figure 23 - Bonnet/Function Module O-ring Placement Table 8 - Bonnet/Function Module O-ring Descriptions Component Component Guide Ring O-ring for bonnet/function module ICM adapter O-ring for sealing ICAD ICM Bonnet Gasket motor with ICM valve O-ring for bonnet/function module ICM Body 3.2.3.2 Torque Specifications... -
Page 37: Removal And Installation
Compressor Components 3.2.4.1 Removal and IFV Cable Removal: Installation 1. Isolate the Compressor power as described in the “Electrical Isolation of the Compressor/VFD” section of this manual. 2. Disconnect the Red (power) and Black (signal) cables from the IFV Valve by turning the collars, located on the cable ends, in a counter-clockwise rotation. -
Page 38: Verification
Compressor Components Figure 27 - IFV Cable Retaining Clips IFV Cable Retaining Clip IFV Cable Retaining Clip IFV Cable Retaining Clip IFV Cable Installation: 1. Attach the Red (power) and Black (signal) cables to the IFV Valve by turning the collars, located on the cable ends, in a clockwise rotation. -
Page 39: Pressure/Temperature Sensor Cable Harness
Compressor Components 3.2.5 Pressure/ The Pressure/Temperature Sensor Cable Harness connects the two (2) combination pressure/ Temperature Sensor temperature sensors to the CCM. Cable Harness Figure 28 - Pressure/ Temperature Harness 3.2.5.1 Removal and Pressure/Temperature Sensor Cable Harness Removal: Installation 1. Isolate the Compressor power as described in the “Electrical Isolation of the Compressor/VFD”... -
Page 40: Figure 30 - Pressure/Temperature Sensor Harness Retaining Clips
Compressor Components Figure 30 - Pressure/ Temperature Sensor Harness Retaining Clips P/T Sensor Harness Retaining Clip P/T Sensor Harness Retaining Clip P/T Sensor Harness Retaining Clip Installation Instructions: 1. Plug the cable harness connector into the suction sensor and discharge sensor. 2. -
Page 41: Verification
Compressor Components 3.2.5.2 Verification 1. Connect the SMT to the compressor. 2. Verify that the suction and discharge pressures are to specification. Refer to the “Temperature/ Pressure Sensor Verification” section of this manual for the appropriate values. 3. Verify that the temperature values are as expected. Refer to Figure 31 (Pressure/Temperature Sensor R/T Curve) below for both the Suction and Discharge sensors. -
Page 42: Economizer Blank
Compressor Components 3.2.6 Economizer Blank The Economizer Blank is used when the economizer option is not being utilized. This is also used anytime the Compressor is removed from the chiller to prevent contamination ingress. Figure 32 - Economizer Blank Torque to 100 Nm (73 ft.lb.) (4 places) 3.2.6.1 Removal and Economizer Blank Removal:... -
Page 43: Motor Cooling Exv Assembly
Compressor Components 3.2.7 Motor Cooling EXV The Motor Cooling EXV controls the flow of refrigerant to cool the Compressor motor and bearing sections. Assembly The motor cooling flow enters the Compressor in the Stator cooling groove through the expansion valve, the flow then spirals around the motor Stator and into the rear of the Compressor. At this point the temperature is measured and is used to ensure the refrigerant is superheated to a set level. -
Page 44: Verification
Compressor Components Figure 35 - Actuator Coil Removal 4. Disconnect the liquid line connection at the EXV. 5. Remove the flange screws that attach the EXV to the Compressor housing. Note the orientation of the valve assembly. 6. Remove the O-ring from the Compressor housing. EXV Installation: 1. -
Page 45: Exv Protection
2. The new valve should be shipped in the open position but to ensure that the valve is completely open, use ETS 6 manual coil part number 034G5119 (purchase through local Danfoss supplier) and manually open the valve by turning the manual coil 20 times in the counter-clockwise rotation. -
Page 46: Torque Specifications
Compressor Components Figure 38 - Brazing the EXV 11. Once the valve has cooled back down, reinstall the electronic power head and retaining clip if removed. 3.2.7.4 Torque Specifications Table 11 - EXV Torque Description Ft.Lb. In.Lb. Specifications Flange, SHCS, M14x40 (Revision A) Flange, SHCS, M8x25 (Revisions B and later) 3.2.8 EXV Cable The EXV Cable connects the CCM to the EXV. -
Page 47: Removal And Installation
Compressor Components 3.2.8.1 Removal and EXV Cable Removal: Installation 1. Isolate the Compressor power as described in the “Electrical Isolation of the Compressor/VFD” section of this manual. 2. Remove the Service Side Cover. 3. Remove connector J15 EEV_MOT from the CCM. Figure 40 - CCM J15 Connector 4. -
Page 48: Verification
Compressor Components EXV Cable Installation: 1. Attach the Valve Actuator to the EXV. 2. Route the cable into the service side. 3. Connect the cable to the J15 EEV_MOT terminal on the CCM. 4. Secure the cable in the retaining clip. 5. -
Page 49: Figure 43 - Motor Cooling Exit Flange (Revision A Only)
Compressor Components Figure 43 - Motor Cooling Exit Flange (Revision A Only) Torque to 70 Nm (52 ft.lb.) (4 places) Figure 44 - Motor Cooling Exit Flange (Revisions B and Later) Torque to 70 Nm (52 ft.lb.) (2 places) 49 of 165 M-SV-VT-001-EN Rev. -
Page 50: Removal And Installation
Compressor Components 3.2.9.1 Removal and Motor Cooling Exit Flange Removal: Installation 1. Isolate the Compressor power as described in the “Electrical Isolation of the Compressor/VFD” section of this manual. 2. Isolate the Compressor and liquid line to the Motor Cooling Exit and recover the refrigerant. •... -
Page 51: Bottom Plug
Compressor Components 3.2.10 Bottom Plug The hole in the bottom of the compressor housing was designed to aid in the manufacturing of the compressor. A plug has been inserted at the factory and should not be removed in the field unless it is determined that the O-ring has failed and needs to be replaced. -
Page 52: Power Side
Compressor Components 3.3 Power Side 3.3.1 Motor Power Cover The Motor Power Cover provides protection for the connection of the cables from the VFD to the Compressor motor. There are two (2) variants of this cover as shown below. The most noticeable difference is there are four (4) mounting screws for the “A”... -
Page 53: Removal And Installation
Compressor Components 3.3.1.1 Removal and Motor Power Cover Removal: Installation 1. Isolate the Compressor power as described in the “Electrical Isolation of the Compressor/VFD” section of this manual. 2. Remove the four (4) or six (6) screws that hold the Motor Power Cover in place. 3. -
Page 54: Removal And Installation
Compressor Components Figure 49 - Mains Imput Bracket (Revisions C and Later) Torque to 10 Nm (7 ft.lb.) (4 places) 3.3.2.1 Removal and Mains Input Bracket Removal: Installation 1. Isolate the Compressor power as described in the “Electrical Isolation of the Compressor/VFD” section of this manual. -
Page 55: Motor Terminal Block
Compressor Components 3.3.3 Motor Terminal The Motor Terminal Block supports and separates the Motor Bus Bars and connects the VFD cables to Block the Compressor motor. This is the location where the Compressor receives 3-Phase AC voltage. Refer to Figure 50 (Motor Terminal Block) to locate the AC voltage input to the motor. Figure 50 - Motor Terminal Block Power Cable Nuts,... -
Page 56: Removal And Installation
Compressor Components 3.3.3.1 Removal and Motor Terminal Block Removal: Installation 1. Isolate the Compressor power as described in the “Electrical Isolation of the Compressor/VFD” section of this manual. 2. Remove the Motor Power Cover. 3. Remove the three (3) M10 nuts, flat washers, and lock washers off the top of the copper spacers. 4. -
Page 57: Torque Specifications
Compressor Components 3. Place the meter probe on one phase of the AC input posts and the other meter probe on another phase of the AC input as shown in Figure 51 (Measuring AC Input Voltage). 4. Verify that the meter shows the expected AC measurement within the range as indicated in Table 16 (Expected AC Voltage Range). -
Page 58: Tower Plate
Compressor Components 3.3.4 Tower Plate The Tower Plate covers access to the motor power connection of the internal motor cables while preventing refrigerant pressure from escaping. Figure 52 - Tower Plate Tower Plate Screws, Torque to 10 Nm (89 in.lb.) (10 places) 3.3.4.1 Removal and Tower Plate Removal: Installation... -
Page 59: Torque Specifications
Compressor Components Figure 53 - Tower Plate Torque Pattern 8. Leak test the Compressor to the appropriate pressure and industry standards. 9. Evacuate the Compressor to the appropriate pressure and industry accepted standards. 10. Charge the Compressor with refrigerant. 11. Restore power to the Compressor 3.3.4.2 Torque Specifications Table 18 - Tower Plate... -
Page 60: Removal And Installation
Compressor Components 3.3.5.1 Removal and Motor Power Feed Through Removal: Installation 1. Isolate the Compressor power as described in the “Electrical Isolation of the Compressor/VFD” section of this manual. 2. Isolate the Compressor from the refrigerant circuit and recover refrigerant. 3. -
Page 61: Figure 56 - Motor Power Feed Through Exploded View
Compressor Components Figure 56 - Motor Power Feed Through Exploded View O-ring Feed Through Screws, Torque to 10 Nm (89 in.lb.) (4 places) Motor Power Feed Through Installation: 1. Apply Super-O-Lube to the new O-ring and then fit it into the O-ring groove on the Motor Power Feed Through. -
Page 62: Verification
Compressor Components 18. Install the Motor Side Cover. 19. Leak test the Compressor to the appropriate pressure and industry standards. 20. Evacuate the Compressor to the appropriate pressure and industry accepted standards. 21. Charge the Compressor with refrigerant. 22. Restore power to the Compressor. 3.3.5.2 Verification 1. -
Page 63: Connections
Compressor Components 3.3.6.1 Connections Refer to Figure 57 (Connection to Stator) to identify connections to the motor. Figure 57 - Connection to Stator Motor Bus Bar (3 places) 3.3.6.2 Motor Verification Stator Insulation Verification • • • CAUTION • • • Do not attempt to perform an insulation test on a component under vacuum. -
Page 64: Figure 58 - Service Side Cover
Compressor Components Stator Resistance Verification To verify the Stator resistance, complete the following steps: 1. Isolate the Compressor power as described in the “Electrical Isolation of the Compressor/VFD” section of this manual. 2. Remove the Motor Power Cover. 3. Remove the three (3) M10 nuts and flat washers off the top of the copper spacers. 4. -
Page 65: Figure 59 - Stator Temperature Sensor Cable Connector
Compressor Components 3. Unplug the winding temperature harness from the J12 connector on the CCM. 4. Verify the resistance of each circuit at the external connector to CCM J12. Figure 59 - Stator Temperature Sensor Cable Connector Figure 60 - Stator Temperature Sensor Cable External Connector 5. -
Page 66: Table 20 - Stator Thermistor R/T Curve
Compressor Components Table 20 - Stator Temperature Resistance Temperature Resistance Temperature Resistance Thermistor R/T Curve º C Ω º C Ω º C Ω 803.1 1155.4 1498.3 842.7 1194.0 1535.8 882.2 1232.4 1573.3 921.6 1270.8 1610.5 960.9 1309.0 1647.7 1000.0 1347.1 1684.8 1039.0... -
Page 67: Figure 61 - Rear Bearing Sensor Feed Through
Compressor Components Stator Cooling Temperature Sensor Resistance Verification There is a Stator Cooling Temperature Sensor located in the rear of the Compressor. It is mounted to the Radial Bearing Assembly. This sensor contains a single circuit. Refer to Figure 160 (Stator Cooling Temperature Sensor) for details on the exact location of this sensor. -
Page 68: Figure 62 - Stator Cooling Temperature Sensor Pinout
Figure 62 - Stator Cooling Temperature Sensor Pinout Pin 11 Pin 10 68 of 165 M-SV-VT-001-EN Rev. A... -
Page 69: Service Side
Compressor Components 3.4 Service Side 3.4.1 Service Side Cover The Service Side Cover provides protection for the PWM, CCM, feed throughs, and cabling. Figure 63 - Service Side Cover Service Side Cover Screws Torque to 6 Nm (53 in.lb.) (8 places) 3.4.1.1 Removal and Service Side Cover Removal: Installation... -
Page 70: Front Bearing Power And Sensor Feed Throughs
Compressor Components 3.5.1 Front Bearing Power The Front Bearing Power Feed Through supplies power from the PWM to the front radial magnetic and Sensor Feed Throughs bearing actuators, while keeping refrigerant pressure from escaping. The Front Bearing Sensor Feed Through supplies shaft position signals from the bearing sensors to the CCM, while keeping refrigerant pressure from escaping. -
Page 71: Removal And Installation
Compressor Components Figure 66 - Rear Bearing Sensor Feed Through Figure 67 - Rear Bearing Power Feed Through 3.6.1.1 Removal and Rear Bearing Power and Sensor Feed Through Removal: Installation • Refer to the “Rear Bearings” section of this manual. 71 of 165 M-SV-VT-001-EN Rev. -
Page 72: Vtt Service Electronics Assembly
Compressor Components 3.7.1 VTT Service The VTT Service Electronics is an assembly that includes the CCM and PWM Amplifier. There are two (2) Electronics Assembly major revisions of the VTT Service Electronics assembly and these revisions are not interchangeable. Revisions “A” and “B” use Molex style connectors (Figure 68 (VTT Service Electronics (Revisions A and B)), while “C”... -
Page 73: Removal And Installation
• • • CAUTION • • • Follow established ESD procedures to prevent damage to sensitive electronic components when working on the Service Electronics Assembly. The CCM and PWM Boards cannot be serviced separately, therefore the Service Electronics Assembly will need to be replaced should there be a fault with either the CCM or the PWM. 3.7.1.1 Removal and Removal: Installation... -
Page 74: Ccm
Compressor Components 2. Attach the Service Electronics Assembly to the main housing using two (2) screws located at the heat sink but do not tighten. Be sure to include the two (2) ground wires on the left and the one (1) 250 VDC ground wire on the right. -
Page 75: Figure 71 - Ccm (Revisions A And B)
Compressor Components Figure 71 - CCM (Revisions A and B) Figure 72 - CCM (Revisions C and Later) 75 of 165 M-SV-VT-001-EN Rev. A... -
Page 76: Ccm Connections
Compressor Components The CCM receives the following voltages from the VTT VFD: • 5 VDC • 15 VDC • 24 VDC 3.7.1.2.2 CCM • J12 – Motor Temperature – upper left Connections • J16 – 24V DC In and J24 ground– lower left •... -
Page 77: Ccm-Cim 24V Cable
Compressor Components 3.7.1.3 CCM-CIM 24V The CCM-CIM 24V Cable passes 24V DC from the CCM to the CIM. Cable Figure 74 - CCM-CIM 24V Cable (Revisions A and B) Figure 75 - CCM-CIM 24V Cable (Revisions C and Later) 3.7.1.3.1 Removal and Removal: Installation 1. -
Page 78: Vdc Ccm-Cim Cable Verification
Compressor Components 4. Remove the cover to the controls panel where the CIM is located. 5. Remove the 24 VDC connector from the CIM. Figure 78 - 24 VDC Connector at CIM Comm Fault Fault Reset Reset Status AUX P/T SENSORS STAGING VFD COOLING STATUS... -
Page 79: Removal And Installation
Compressor Components Figure 80 - DC-DC-CCM Cable (Revisions C and Later) 3.7.1.4.1 Removal and Removal (Revisions A and B): Installation 1. Isolate the Compressor and VFD power as described in the “Electrical Isolation of the Compressor/VFD” section of this manual. 2. -
Page 80: Figure 83 - J16 (Revisions C And Later)
Compressor Components Removal (Revisions C and Later): 1. Isolate the Compressor and VFD power as described in the “Electrical Isolation of the Compressor/VFD” section of this manual. 2. Remove the Service Side Cover. 3. Disconnect the J16 connector from the CCM Board. Figure 83 - J16 (Revisions C and Later) J16 Connector... -
Page 81: Dc-Dc-Cim 24V Cable Verification
Compressor Components Installation (Revisions A and B): 1. Route the cable into the service side and into the DC-DC panel. 2. Connect the plugs on the CCM Board at 24 VDC (J16) and GND (J24). 3. Terminate the connectors on the DC-DC Board at 24 VDC (J4) and GND (J7). 4. -
Page 82: Figure 87 - J2 Connection At Cim
Compressor Components Figure 87 - J2 Connection at CIM Comm Fault Fault Reset Status Reset AUX P/T SENSORS STAGING VFD COOLING STATUS 24VDC CCM CAN RS485-1 RS485-2 I-Lock I-Lock POWER Status Status COMPRESSOR INTERFACE MODULE J2 Connector 4. Remove the Compressor Service Side Cover. 5. -
Page 83: Ccm-Cim Cable Verification
Compressor Components Installation: 1. Route cable between the CCM and CIM. 2. Connect cable to J2 CCM/CAN termination on the CIM. 3. Connect opposite end of cable to J17 CIM on CCM Board. 4. Secure cables in location. 5. Reinstall the covers. 6. -
Page 84: Table 22 - Terminal To Wire Color
Compressor Components Figure 93 - J4 Connector (Revisions C and Later) J4 Connector 3. Remove the connector J4 from the CCM. 4. Open the VFD front panel. 5. Remove wires from terminals 61, 68, 69, 12, and 19. Figure 94 - Terminal Identification Wire Color Terminal Number... -
Page 85: Ccm-Vfd Cable Verification
Compressor Components Installation: 1. Attach wires to terminals 61, 68, 69, 12, and 19. 2. Route Cable into service side box. 3. Connect plug to (J4) on CCM. 4. Replace the covers. 5. Restore power to the Compressor. 3.7.1.6.2 CCM-VFD Cable 1. -
Page 86: Front Bearing Sensor Cable Verification
Compressor Components Figure 96 - Front Bearing Sensor Connections Installation: 1. Isolate the Compressor power as described in the “Electrical Isolation of the Compressor/VFD” section of this manual. 2. Connect the 9-pin connector into J6 on the CCM Board. 3. Twist and push to connect the sensor cable connection to the feed through. 4. -
Page 87: Rear Bearing Sensor Cable
Compressor Components Figure 97 - 9-Pin Connector Figure 98 - Feed Through Connector 3.7.1.8 Rear Bearing The Rear Bearing Sensor Cable provides shaft position information from the Rear Bearing Sensor Feed Sensor Cable Through to the CCM. The Rear Bearing Sensor Cable also receives a signal from the Stator Cooling Temperature Sensor. -
Page 88: Removal And Installation
Compressor Components 3.7.1.8.1 Removal and Removal: Installation 1. Isolate the Compressor power as described in the “Electrical Isolation of the Compressor/VFD” section of this manual. 2. Remove the Service Side Cover. 3. Remove the 9-pin connector from J10 on the CCM Board. 4. -
Page 89: Rear Bearing Sensor Cable Verification
Compressor Components Installation: 1. Isolate the Compressor power as described in the “Electrical Isolation of the Compressor/VFD” section of this manual. 2. Connect the 9-pin connector into J10 on the CCM Board. 3. Install the Molex connector into J1 on the CCM Board. 4. -
Page 90: Motor Temperature Sensor Cable
Compressor Components Figure 102 - Feed Through Connector 3.7.1.9 Motor The motor temp sensor cable connects the motor temperature sensor to the CCM. Temperature Sensor Cable Figure 103 - Motor Temperature Sensor Cable 3.7.1.9.1 Removal and Removal: Installation 1. Isolate the Compressor power as described in the “Electrical Isolation of the Compressor/VFD”... -
Page 91: Motor Temperature Sensor Cable Verification
Compressor Components Figure 104 - CCM J12 Connection J4 Connector 4. Locate the feed through for the motor temp sensor and remove the connector. Installation: 1. Install the sensor on the feed through. 2. Attach the connector to MOT RTD (J12) on the CCM Board. 3. -
Page 92: Figure 105 - Pulse Width Modulation Amplifier (Revisions A And B)
Compressor Components Compressor Components Figure 105 - Pulse Width Rear Bearing Front Bearing Modulation Amplifier Power Cable Power Cable (Revisions A and B) J11 Connector Rear Bearing Front Bearing Power Cable Power Cable Figure 106- Pulse Width Modulation Amplifier (Revisions C and Later) J11 Connector 92 of 165 M-SV-VT-001-EN Rev. -
Page 93: Pwm Connections
Compressor Components • J11 – 250V DC In and Ground – mid right 3.7.1.10.1 PWM • Bearing Power Cables front and rear Connections 3.7.1.11 250V DC-DC The 250V DC-DC-PWM Cable provides a power connection between the DC-DC and the PWM. PWM Cable Figure 107 - 250V DC-DC- PWM Cable (Revisions A... -
Page 94: Figure 109 - Pwm J11 Connector (Revisions A And B)
Compressor Components Figure 109 - PWM J11 J11 Connector Connector (Revisions A and B) 4. Remove the 250V PWM ground wire from the service side. 5. Remove the cable from the service side. 6. Open the panel containing the DC-DC. 7. -
Page 95: Figure 111 - Pwm J11 Connector (Revisions C And Later)
Compressor Components Figure 111 - PWM J11 Connector (Revisions C and Later) J11 Connector 4. Remove the cable from the service side. 5. Open the panel containing the DC-DC. 6. Disconnect the 250 V (J2) connector from the DC-DC. Figure 112 - DC-DC J2 Connector (Revisions C and Later) J2 Connector... -
Page 96: Verification
Compressor Components 5. Replace the Service Side Cover. 6. Route the cable into the DC-DC panel. 7. Connect the ground cable to the J6 connector on the DC-DC. 8. Insert the connector to J2 on the DC-DC Board. 9. Close the DC-DC panel. 10. -
Page 97: Figure 115 - Pwm Connector - 6 Pin
Compressor Components Diode Test 1. Isolate the Compressor power as described in the “Electrical Isolation of the Compressor/VFD” section of this manual. 2. Disconnect the PWM Bearing Power Cables from the Compressor bearing feed throughs. 3. Unplug the 250V DC input to the PWM. 4. -
Page 98: Torque Specifications
Compressor Components Figure 117 - PWM Connector - 4 Pin Pin 1 Communication 1. Connect to the CCM using the SMT and enter the User ID and Access Code. 2. Open the Warnings and Faults Tool. 3. Verify that the CIM Compatibility, controller area network (CAN) Communications and VFD Communications Faults are not active. -
Page 99: Stator Temperature Sensor Feed Through
Compressor Components 3.7.1.12 Stator The Stator temperature sensor feed through passes the reading of the Stator temperature thermistors Temperature Sensor to the CCM for conversion to a digital signal used to determine actual motor winding temperature, Feed Through while keeping refrigerant pressure from escaping. Figure 118 - Stator Temperature Sensor Feed Through... -
Page 100: Stator Temperature Sensor Verification
Compressor Components 11. Remove the O-ring. Installation: 1. Verify all contact surfaces are clean and dry. If not, clean with a lint-free cloth. 2. Apply Super-O-Lube to the new O-ring and then fit it into the O-ring groove on the Stator Temperature Sensor Feed Through. -
Page 101: Torque Specifications
Compressor Components Figure 121 - Stator Temperature Sensor Feed Through Connector Running Check 1. Before starting the compressor, with the power on, using the SMT, verify Stator temperature reading is an acceptable value. 2. While the compressor is running, verify the Stator temperature fluctuates to expected values during operation. -
Page 102: Removal And Installation
Compressor Components Figure 123 - Suction Temperature Sensor Location Figure 124 - Discharge Temperature Sensor Location 3.7.1.13.1 Removal and Removal: Installation 1. Isolate the Compressor power as described in the “Electrical Isolation of the Compressor/VFD” section of this manual. 2. Recover refrigerant from compressor. 3. -
Page 103: Temperature/Pressure Sensor Verification
Compressor Components 3.7.1.13.2 Temperature/ • • • CAUTION • • • Pressure Sensor Verification Do not connect Mega Ohmmeter while the compressor is under a vacuum; this may cause damage. 1. Place the leads on terminal 1 & 3 of the pressure/temperature sensor. 2. -
Page 104: Internal Components
3.7.2 Internal Components 3.7.2.1 Front Bearings Front Bearing Power and Sensor Feed Through Removal: 1. Isolate the Compressor power as described in the “Electrical Isolation of the Compressor/VFD” section of this manual. 2. Isolate the compressor and recover refrigerant. 3. Remove the eight (8) M5x16 screws that hold the Service Side Cover in place. 4. -
Page 105: Figure 127 - Ifv Assembly Removal
Compressor Components 11. The compressor will need to be lifted up to gain clearance for the Volute removal. A 5x5 wood block under the rear foot and a piece of 6” u-channel under the front. This u-channel needs to be Figure 127 - IFV Assembly Flange Screws - 70 Nm Removal... -
Page 106: Figure 129 - Suction Cover Removal
Compressor Components Figure 129 - Suction Cover 13. Install the Short Guide Pins in these positions. Refer to the “Short Guide Pin” example in Removal Appendix B. Remove First (2 places) Jacking Holes (4 places) 14. Remove the remaining screws from the Suction Cover, use four (4) of the removed screws for jacking screws. -
Page 107: Figure 131 - Guide Pin Locations
Compressor Components 17. Remove the two (2) M12x55 screws located at the 10 and 2 o’clock position on the End Cap. 18. Insert the Short Guide Pins in these locations. Refer to Figure 131 (Guide Pin Locations). Figure 131 - Guide Pin Locations Guide Pin Locations (2 Places) -
Page 108: Figure 133 - Shaft Dowel Pin Placement
Compressor Components 21. Install three (3) Shaft Bolt Torquing Pins in the three (3) holes in the Axial Bearing Assembly. It will be necessary to turn the shaft bolt on the front of the compressor in order to engage the pins. -
Page 109: Figure 135 - First Stage Impeller Removal
Compressor Components Figure 135 - First Stage Impeller Removal “T” - Spacer First Stage Impeller Bolt 24. Remove the “T”- Spacer. 25. Install a nylon shaft protector and cap over the end of the compressor shaft. Refer to the “Volute Assembly Sleeve”... -
Page 110: Figure 137 - Volute Removal - Step One
26. Remove the screws from the Volute at the 10 o’clock, 2 o’clock, and 6 o’clock positions, and install the Long Guide Pins in these locations. Refer to the “Long Guide Pin” example in Appendix B. Figure 137 - Volute Removal - Step One Screw Removal/Long Guide Pin Locations... -
Page 111: Figure 139 - Second Stage Impeller Removal
Compressor Components Figure 139 - Second Stage Impeller Removal Second Stage Impeller 30. Carefully lower the Volute to the floor. 31. Remove the Second Stage Impeller. This will require the use of a heat gun to heat up the impeller. Do not use a torch! 32. -
Page 112: Figure 141 - Front Touchdown Bearing
Compressor Components 33. Once all of the eight (8) screws have been removed, insert four (4) of the removed screws into the Touchdown Bearing/Labyrinth Seal Plate jacking screw locations. Tighten them evenly in a crisscross pattern. This will slowly push the Touchdown Bearing/Labyrinth Seal Plate away from the compressor housing. -
Page 113: Figure 143 - Front Bearing Feed Through Internal Connectors
Compressor Components 34. Remove the four (4) shims that are located behind the front touchdown bearing. 35. Release the internal cable tie from the bearing sensor feed through cable. 36. Disconnect the internal connectors from the Front Bearing Sensor Feed Through and the Front Bearing Power Feed Through. -
Page 114: Figure 145 - Front Bearing Sensor Feed Through
Compressor Components Front Bearing Power and Sensor Feed Through Installation: 1. Verify all contact surfaces are clean and dry. If not, clean with a lint-free cloth. 2. Apply Super-O-Lube to the new feed through O-rings and then fit them into the O-ring grooves. 3. -
Page 115: Figure 147 - Touchdown Bearing/Labrynth Seal Plate Torque Pattern
Compressor Components 6. Reconnect the external bearing sensor and power cables to the feed throughs. 7. Install the four (4) shims that are located behind the front touchdown bearing. 8. Install the Touchdown Bearing/Labyrinth Seal Plate. Finger-tighten all eight (8) M8x30 screws evenly in a crisscross pattern in two (2) stages. -
Page 116: Figure 148 - Volute Torque Pattern
Compressor Components Figure 148 - Volute Torque Pattern NOTE Figure 148 (Volute Torque Pattern) has the Volute removed in order to provide better clarity. 18. Install the First Stage Impeller and align it to the witness marks. This will require the use of a heat gun to heat up the impeller. -
Page 117: Figure 149 - Suction Housing Torque Pattern
Compressor Components 27. Move from corner to corner (four (4) positions 90° apart), moving 180° then 90° and tighten these four (4) screws ONLY two (2) turns each, until those four (4) screws have seated the Suction Housing against the Volute. Performing this tightening sequence prevents damage to the O-Ring. -
Page 118: Verification
Compressor Components 46. Leak test the Compressor to the appropriate pressure and industry standards. 47. Evacuate the Compressor to the appropriate pressure and industry accepted standards. 48. Charge the Compressor with refrigerant. 49. Restore power to the Compressor. 3.7.2.1.1 Verification 1. -
Page 119: Front Twin Bearing Assembly
Compressor Components 3.7.2.2 Front Twin Bearing The Front Twin Bearing maintains the shaft position during Compressor operation. Power is sent from Assembly the PWM to allow the bearing to levitate the shaft. The Front Twin Bearing sends position signals back to the CCM. - Page 120 Compressor Components 18. Remove the remaining screws from the Suction Cover, use four (4) of the removed screws for jacking screws. 19. Locate the jacking screw holes on the flange and install the four (4) removed screws. Tighten them evenly in a crisscross pattern. This will slowly push the Suction Cover away from the Volute. 20.
-
Page 121: Rear Bearings
Compressor Components 47. Slowly tighten the four (4) jacking screws evenly, in a crisscross pattern. Continue this until the Twin Bearing Assembly can be removed by hand. 48. While supporting the shaft, carefully slide out the Twin Bearing Assembly 49. Slide a small piece of Mylar underneath the shaft and gently lower the shaft onto the Stator. Figure 152 - Twin Bearing Mylar Insertion Mylar Insertion Point... -
Page 122: Figure 154 - End Cap Removal
Compressor Components Figure 154 - End Cap Removal End Cap Screws - 70 Nm (52 ft.lb.) (12 places) 5. Disconnect the Rear Bearing Sensor and Rear Bearing Power connectors. Refer to Figure 155 (Rear Bearing Sensor and Rear Bearing Power Harness). Figure 155 - Rear Bearing Sensor and Rear Bearing Power Harness... -
Page 123: Figure 156 - Rear Feed Through Removal
Compressor Components Figure 156 - Rear Feed Through Removal Rear Bearing Power Feed Through Rear Bearing Sensor Feed Through 10. Remove the four (4) screws that secure the Axial Bearing Assembly. 11. Insert four (4) 6 mm jacking screws to aid in the removal of the Axial Bearing Assembly. This will be required due to the magnetic force keeping the assembly in place. -
Page 124: Figure 158 - Axial Bearing Removal
Compressor Components Figure 158 - Axial Bearing Removal Axial Bearing Screws - 30 Nm (22 ft.lb.) (4 places) Axial Bearing Assembly 12. Remove the three (3) M5x35 screws that secure the Thrust Disk and carefully slide the Thrust Disk off the Compressor shaft. •... -
Page 125: Figure 160 - Stator Cooling Temperature Sensor
Compressor Components 13. Remove the M4x20 screw, washer, and lock washer that secure the Stator Cooling Temperature Sensor. Figure 160 - Stator Cooling Temperature Sensor Stator Cooling Temperature Sensor Stator Cooling Temperature Sensor Screw - 4 Nm (35 in.lb.) 14. Insert two (2) pieces of Mylar between the Compressor shaft and the Rear Radial Bearing Assembly. -
Page 126: Figure 162 - Radial Bearing Screws
Compressor Components 15. Remove the four (4) M8x65 screws that secure the Radial Bearing Assembly. Figure 162 - Radial Bearing Screws Radial Bearing Screws, Torque to 30 Nm (22 ft.lb.) (4 places) 16. Insert the four (4) jacking screws into the jacking screw locations as indicated in Figure 163 (Radial Bearing Assembly Jacking Screw Locations). -
Page 127: Figure 164 - Radial Bearing Assembly Removal
Compressor Components 17. Slowly tighten the four (4) jacking screws evenly, in a crisscross pattern. Continue this until the Radial Bearing Assembly can be removed by hand. 18. While supporting the shaft, carefully slide out the Radial Bearing Assembly. • • • CAUTION • • • Do not allow the Radial Bearing Assembly to contact/rub the Compressor shaft during removal. -
Page 128: Figure 166 - Thrust Disk Alignment Pins
Compressor Components Rear Compressor Assembly 1. Reconnect the internal Stator harness connector. 2. While supporting the shaft, remove the Mylar and carefully insert the Radial Bearing Assembly into place. 3. Install the four (4) M8x65 screws that secure the Radial Bearing Assembly and tighten them in a crisscross pattern in two (2) stages. -
Page 129: Figure 167 - Rear Bearing Sensor Feed Through
Compressor Components Figure 167 - Rear Bearing Notch Sensor Feed Through Figure 168 - Rear Bearing Notch Power Feed Through 14. Carefully insert both feed throughs into the housing and reconnect the internal connectors. 15. Install the eight (8) M5x20 feed through screws and tighten in a crisscross pattern in two (2) stages. •... -
Page 130: Bearing Verification
Compressor Components 3.7.2.2.1 Bearing 1. Disconnect the PWM connector from the bearing power feed through. Verification 2. Verify bearing coil resistance at the feed through pins according to Table 30 (Rear Bearing Coil Resistance). Refer to Figure 169 (Rear Bearing Power Feed Through Pin Identification). 3. -
Page 131: Torque Specifications
Compressor Components 3.7.2.2.3 Torque Specifications Table 31 - Internal Description Ft.Lb. In.Lb. Components Torque Specifications Power Cover, SHCS, M5x16 Service Side Cover, SHCS, M5x16 Power Cable Nut, Brass M10x1.5 Rear Bearing Power Feed Through, SHCS, M6x20 Rear Bearing Sensor Feed Through, SHCS, M6x20 Stator Temperature Sensor Feed Through, SHCS, M6x20 End Cap, SHCS, M12x55 Axial Bearing Assembly, SHCS, M8x40... - Page 132 THIS PAGE INTENTIONALLY LEFT BLANK 132 of 165 M-SV-VT-001-EN Rev. A...
-
Page 133: Variable Frequency Drive Components
Variable Frequency Drive Components A VFD is an electronic motor controller that converts DC into a variable AC waveform output. The frequency and voltage of the output are regulated to control the motor speed or torque. The VFD can vary the speed of the motor in response to commands from the CCM. 4.1 VFD Modules There are three (3) VTT VFD Modules specifically designed and programmed to operate with the VTT Compressor Module and cannot be replaced by a generic drive. -
Page 134: Vfd Card Connections
Variable Frequency Drive Components Figure 171 - VFD Control Card VFD Control Card 4.2.1 VFD Card The VFD Control Card is connected to the CCM via an RS-485 cable. Figure 172 (RS-485 and Interlock Connections Connection Details) illustrates the connection to the VFD Control Card. Refer to the “VTT Service Electronics Assembly”... -
Page 135: Removal And Installation
Variable Frequency Drive Components Table 32 - RS485 Details Wire Color Terminal Number Black Green White Blue Silver Screw NOTE There is an option for customer-supplied cabling, if the colors do not match, make a note of the terminal number to the color wire. 4.2.2 Removal and Removal: Installation... -
Page 136: Vfd Orifice
Variable Frequency Drive Components 4.3 VFD Orifice The VFD orifice must be fitted to the VFD VFD module at the cold plate tube refrigerant inlet. This orifice controls flow of refrigerant to the VFD module. Figure 173 - VFD Orifice Figure 174 - Cold Plate Tubes 4.3.1 VFD Orifice •... -
Page 137: Vfd Valve
Variable Frequency Drive Components 4.4 VFD Valve The VFD Valve must be fitted to the VFD at the cold plate tube refrigerant outlet. This valve regulates refrigerant pressure and temperature. Figure 175 - VFD Valve • Inlet - 16 mm (5/8 in.) Female 4.4.1 VFD Valve •... -
Page 138: Vfd Pressure Control Valve Cable
Variable Frequency Drive Components 4.5 VFD Pressure Control The VFD Pressure Control Valve Cable connects the CIM to the VFD Pressure Control Valve Motor. Valve Cable Figure 176 - VFD Pressure Control Valve Cable 4.5.1 VFD Pressure Control Valve Pin Connections Figure 177 - VFD Pressure Control Valve Pin... -
Page 139: Vfd Pressure Control Valve Removal And Installation
Variable Frequency Drive Components 4.5.2 VFD Pressure Removal: Control Valve Removal 1. Isolate the VFD power as described in the “Electrical Isolation of the Compressor/VFD” section of and Installation this manual. 2. Unscrew the M12 connector from the top of the VFD cooling valve. Figure 178 - VFD Pressure Control Valve M12 Connection... -
Page 140: Vfd Dc-Dc Cable
Variable Frequency Drive Components Installation: 1. Screw the M12 connector on top of the VFD Pressure Control Valve. 2. Terminate the cable to J6 on the CIM. 3. Secure the cable. 4. Restore power to the VFD. Figure 180 - CIM (Revisions A and B) Wire Diagram Comm... -
Page 141: Figure 182 - Dc-Dc J1 Connector
Variable Frequency Drive Components Figure 182 - DC-DC J1 Connector J12 Test Point J1 Connector J13 Test Point 4. Disconnect the HV DC Ground cable from the DC-DC Board. 5. Remove the cover from the VFD. 6. Disconnect the cables from + Regen 82 and – Regen 83. Figure 183 - VFD + Regen 82 and –... -
Page 142: Vfd Dc-Dc Cable Verification
Variable Frequency Drive Components Installation: 1. Route the cable into the DC-DC box. 2. Connect to (J1) HV IN on the DC-DC Board. 3. Connect the HV DC Ground cable to the DC-DC Board. 4. Secure the cable where it goes into the box. 5. -
Page 143: Oem Module Components
OEM Module Components 5.1 DC-DC Module The DC-DC converter provides the compressor with +24V DC (with respect to 0V) and HV+ (+250V DC with respect to HV-) for the bearing PWM amplifier. The DC-DC Converter receives a high voltage DC supply from the VFD module. -
Page 144: Dc-Dc Connections
OEM Module Components 5.1.1 DC-DC Connections 1. HV DC IN J1 2. 250 V DC OUT J2 3. 24 V DC OUT J4 4. Ground M4, M5, J6, and J7 5.1.2 Removal and Removal (Revisions A and B): Installation 1. Isolate the VFD power as described in the “Electrical Isolation of the Compressor/VFD”... -
Page 145: Figure 187 - Dc-Dc J2 And J4 Connections
OEM Module Components Figure 187 - DC-DC J2 and J4 Connections M4 Ground J7 Connector M5 Ground J6 Connector J2 Connector J4 Connector 4. Disconnect the grounding wires from M4, M5, J6, and J7. 5. Remove the securing hardware holding the DC-DC frame to the panel. 6. -
Page 146: Figure 189 - Dc-Dc J2 And 4 Connections
OEM Module Components Figure 189 - DC-DC J2 and 4 Connections J4 Connector J2 Connector 4. Remove the securing hardware holding the DC-DC frame to the panel. 5. Remove the DC-DC from the panel. Installation (Revisions A and B): 1. Place the DC-DC in the panel and secure in place. 2. -
Page 147: Fan Removal And Installation
OEM Module Components 5.1.2.1 Fan Removal and Removal: Installation 1. Isolate the Compressor power as described in the “Electrical Isolation of the Compressor/VFD” section of this manual. 2. Remove the four (4) M4x35 socket head cap screws with a 3 mm hex bit. 3. -
Page 148: Torque Specifications
OEM Module Components 4. On the DC-DC, using an appropriately rated voltage meter, verify HV DC input is correct for the applied voltage by checking at VDC+ (J12) and VDC- (J13) test points. • The measured voltage should be at least 1.35 x the AC input voltage 5. -
Page 149: Compressor Interface Module (Cim)
OEM Module Components 6.1 Compressor Interface The CIM is where all field connections, such as RS485, EXV and analog/digital wiring, is made to Module (CIM) communicate with the compressor. As previously stated, there are two (2) variants of the CIM. Revisions A and B do not contain the connector numbers on the front plate (e.g., J5). -
Page 150: Figure 197 - Cim Connectivity (Revisions A And B)
OEM Module Components Figure 197 - CIM Connectivity (Revisions A and B) Figure 198 - CIM Connectivity (Revisions C and Later) 150 of 165 M-SV-VT-001-EN Rev. A... -
Page 151: Cim Verification
OEM Module Components 6.1.1 CIM Verification 1. With power applied to the compressor, connect to the CIM using the SMT and enter the User ID and Access Code. 2. Open the Warnings and Faults Tool. 3. Verify that the CIM Compatibility, CAN Communications, and VFD Communications Faults are not active. - Page 152 THIS PAGE INTENTIONALLY LEFT BLANK 152 of 165 M-SV-VT-001-EN Rev. A...
-
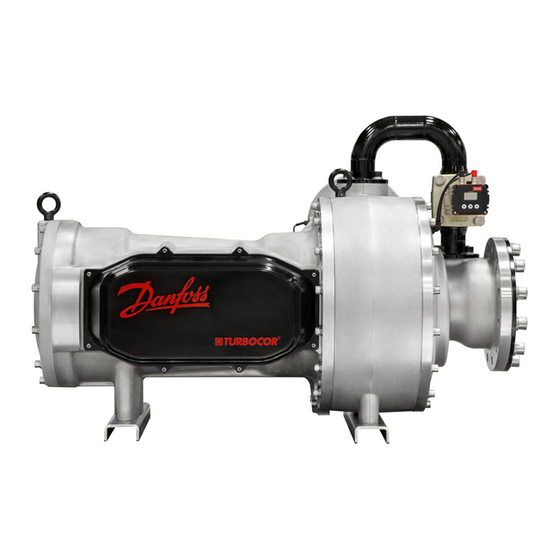
Page 153: Compressor Removal And Installation
Compressor Removal and Installation Figure 200 - Compressor Assembly • • • CAUTION • • • 7.1 Refrigerant Containment Isolation and recovery of the refrigerant must be performed by a qualified service technician adhering to industry/ASHREAE standards. 1. Close the suction, discharge, and economizer isolating valves as appropriate. 2. -
Page 154: Figure 201 - Compressor Power Cable Removal
Compressor Removal and Installation Figure 201 - Compressor Power Cable Removal Conduit Bracket Power Cable Nuts, Torque to 10 Nm (8 ft.lb.) (3 places) Copper Spacer, Washer, & Lock Washer (3 places) Ground Post, Torque nut to 20 Nm (15 ft.lb.) 7. -
Page 155: Compressor Installation
Compressor Removal and Installation 12. Reinstall the Service Side Cover. 13. Once the transfer of refrigerant is complete, bring the compressor back to atmospheric pressure according to industry standards using dry nitrogen. 14. Disconnect the motor cooling inlet and exit lines. 15. - Page 156 Compressor Removal and Installation 11. Repeat Step 10 for the discharge pipe flange and the compressor discharge flange. 12. Slowly release the load from the crane so that compressor weight is supported by the compressor mounts. 13. Confirm that there are no axial, radial, or torque loads on the compressor flanges. 14.
-
Page 157: Torque Specifications
Compressor Removal and Installation 7.3.1 Torque Specifications Table 37 - Motor Description Ft.Lb. In.Lb. Terminal Block Torque Specifications Power Cover, SHCS, M5x16 Service Side Cover, SHCS, M5x16 Power Cable Nut, Brass M10x1.5 Ground Screw Ground Cable Nut, M10x1.5, Brass Suction Flange, SHCS, M20x2.5 Discharge Flange, SHCS, M20-2.5 Economizer Flange, SHCS, M16x2 Motor Cooling Exit Flange, SHCS, M14x2... - Page 158 THIS PAGE INTENTIONALLY LEFT BLANK 158 of 165 M-SV-VT-001-EN Rev. A...
-
Page 159: Appendix A: Acronyms
Controller Area Network Compressor Control Module Compressor Interface Module Direct Current DC-DC DC to DC Converter Deutsches Institut für Normung Danfoss Turbocor Compressors Inc. ECON Economizer EEPROM Electrically Erasable Programmable Read-Only Memory Electronic Expansion Valve Electostatic Discharge Electronic Expansion Valve... - Page 160 THIS PAGE INTENTIONALLY LEFT BLANK 160 of 165 M-SV-VT-001-EN Rev. A...
-
Page 161: Appendix B: Special Tooling Specifications
Appendix B: Special Tooling Specifications Figure B1 - Volute Assembly Sleeve 0.05 A B 0.10 UNLESS OTHERWISE SPECIFIED: ALL DIMENSIONS ARE IN MILLIMETERS SURFACE FINISH: TOLERANCES: WHOLE No.s: 0.5 ONE DECIMAL PLACE: 0.1 2 DECIMAL PLACES: 0.05 ANGULAR: 0.5 161 of 165 M-SV-VT-001-EN Rev. -
Page 162: Figure B2 - Long Guide Pin
Appendix B: Special Tooling Specifications Figure B2 - Long Guide Pin 165.0 15.0 150.0 OPTIONAL CENTER FOR MANUFACTURING 12.50 3 UNDERCUT UNLESS OTHERWISE SPECIFIED: ALL DIMENSIONS ARE IN MILLIMETERS M12 X 1.75mm THREAD SURFACE FINISH: TOLERANCES: WHOLE No.s: 0.5 ONE DECIMAL PLACE: 0.1 2 DECIMAL PLACES: 0.05 ANGULAR: 0.5 Figure B3 - Short Guide Pin... -
Page 163: Figure B4 - Thrust Disk Alignment Pin
Appendix B: Special Tooling Specifications Figure B4 - Thrust Disk Alignment Pin Ø5.0 x 0.8 85.0 7.6 (REF.) 22.1 UNLESS OTHERWISE SPECIFIED: ALL DIMENSIONS ARE IN MILLIMETERS SURFACE FINISH: TOLERANCES: WHOLE No.s: 0.5 ONE DECIMAL PLACE: 0.1 2 DECIMAL PLACES: 0.05 ANGULAR: 0.5 163 of 165 M-SV-VT-001-EN Rev. -
Page 164: Figure B5 - Shaft Bolt Torquing Pin
Appendix B: Special Tooling Specifications Figure B5 - Shaft Bolt Torquing Pin UNLESS OTHERWISE SPECIFIED: ALL DIMENSIONS ARE IN MILLIMETERS SURFACE FINISH: TOLERANCES: WHOLE No.s: 0.5 ONE DECIMAL PLACE: 0.1 2 DECIMAL PLACES: 0.05 ANGULAR: 0.5 164 of 165 M-SV-VT-001-EN Rev. A... - Page 165 Our products can be found in a variety of applications such as rooftops, chillers, residential air conditioners, heatpumps, coldrooms, supermarkets, milk tank cooling and industrial cooling processes. http://turbocor.danfoss.com Danfoss Turbocor 1769 E. Paul Dirac Drive 1769, Tallahassee FL 32310 USA | +1 850 504 4800 © Danfoss | DCS (CC) | 2017.06 M-SV-VT-001-EN Rev. A...