Table of Contents
Advertisement
Available languages
Available languages
Quick Links
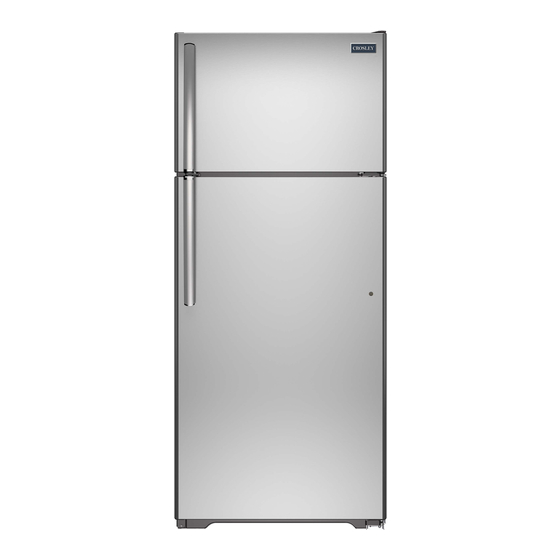
Top-Freezer Refrigerators
Models: XPS15BTH, XTS18GSH, XTS18GTH, XTE18GTH
Contents
Safety Information . . . . . . . . . . . . . . . . .3
Using the Refrigerator
Temperature Control . . . . . . . . . . . . . .5
Shelves . . . . . . . . . . . . . . . . . . . . . . . .5
Drawers . . . . . . . . . . . . . . . . . . . . . . . .6
Automatic Ice Maker . . . . . . . . . . . . . .7
Care And Cleaning . . . . . . . . . . . . . . . .8
Installation Instructions
Preparing to Install the Refrigerator . . .9
Water Line Installation . . . . . . . . . . . .10
Installing the Door Handle . . . . . . . . .13
Reversing the Door Swing . . . . . . . . .14
Write the model and serial numbers here:
Model # _______________________________
Serial # _______________________________
Find these numbers on a label on the left side, near
the middle of the refrigerator compartment .
49-1000109 Rev . 0 08-18 GEA
Troubleshooting Tips
Normal Operating Sounds . . . . . . . . .18
Limited Warranty . . . . . . . . . . . . . . . . .21
Consumer Support . . . . . . . . . . . . . . .22
Owner's Manual
and Installation
Instructions
Español
Para consultar una version
en español de este manual
de instrucciones,visite sitio
de internet crosley.com .
Advertisement
Table of Contents

Related Manuals for Crosley XPS15BTH


Summary of Contents for Crosley XPS15BTH
- Page 1 Installation Instructions Models: XPS15BTH, XTS18GSH, XTS18GTH, XTE18GTH Contents Safety Information . . . . . . . . . . . . . . . . .3 Troubleshooting Tips Normal Operating Sounds .
- Page 2 America's iconic brand, backed by America's best appliance warranty! 10 Year Limited Warranty FREE on all Crosley Appliances! MANUFACTURER'S CROSLEY'S EXTENDED APPLIANCE COMPONENT LIMITED WARRANTY LIMITED WARRANTY Refrigerator or Compressor 1 Year Freezer Gearcase/ Top-Load Washer 1 Year Transmission Front-Load...
- Page 3 IMPORTANT SAFETY INFORMATION READ ALL INSTRUCTIONS BEFORE USING THE APPLIANCE To reduce the risk of fire, explosion, electric shock, or injury when using your WARNING refrigerator, follow these basic safety precautions: ■ T his refrigerator must be properly installed ■ T o prevent suffocation and entrapment hazards and located in accordance with the Installation to children, remove the fresh food and freezer Instructions before it is used .
- Page 4 IMPORTANT SAFETY INFORMATION READ ALL INSTRUCTIONS BEFORE USING THE APPLIANCE CONNECTING ELECTRICITY WARNING ELECTRICAL SHOCK HAZARD Plug into a grounded 3-prong outlet Do not remove the ground prong Do not use an adapter Do not use an extension cord . Failure to follow these instructions can result in death, fire, or electrical shock .
- Page 5 Temperature Control The temperature control adjusts the refrigerator from its warmest to coldest settings . Your refrigerator will come with the recommended factory setting on “Colder”. For colder temperature, turn the knob clockwise to setting “Coldest”. For warmer temperature, turn the dial counter-clockwise to setting “Cold”. To turn off the cooling in both compartments, turn the knob counter-clockwise to setting “Off”. Note that this does not shut off power to the refrigerator . Fresh Food Compartment Shelves Shelf supports at various levels allow you to custom-space your shelves .
- Page 6 Storage Drawers Not all features are on all models . Snack Drawer Fruit and Vegetable Drawers The snack drawer can be moved to the most useful Excess water that may accumulate in the bottom of the location for your family’s needs . drawers should be emptied and the drawers wiped dry .
- Page 7 Automatic Icemaker (on some models) Not all features are on all models . A newly-installed refrigerator may take 12–24 hours to Icemaker begin making ice . CAUTION Avoid contact with the moving parts of the ejector mechanism, or with the heating element (located on the bottom of the ice maker) that releases the cubes .
- Page 8 Care And Cleaning Cleaning the Outside Moving the Refrigerator The door handles and trim (on some models) . Clean with Be careful when moving the refrigerator away from a cloth dampened with soapy water . Dry with a soft cloth . the wall .
- Page 9 Installation Instructions Models 15, 18 BEFORE YOU BEGIN CLEARANCES Read these instructions completely and carefully. Allow the following clearances for ease of installation, IMPORTANT – proper air circulation and plumbing and electrical • Save these instructions for connections . local inspector’s use . • S ides 3/4” (19 mm) IMPORTANT –...
- Page 10 Be sure that the kit you select allows at least 6’ Appliances Reverse Osmosis Water System, the only (1 .8 m) as described above . approved installation is with a GE Appliances RVKit. NOTE: The only Crosley approved plastic tubing For other reverse osmosis water systems, follow the is that supplied in GE Appliances SmartConnect™ manufacturer’s recommendations .
- Page 11 Installation Instructions INSTALLING THE WATER LINE (Cont.) FASTEN THE SHUTOFF VALVE BEFORE YOU BEGIN (Cont.) Read these instructions completely and carefully. NOTE: Commonwealth of Massachusetts Plumbing WARNING Codes 248CMR shall be adhered to . Saddle To reduce the risk of valves are illegal and use is not permitted in electric shock or injury during installation, Massachusetts .
- Page 12 Installation Instructions INSTALLING THE WATER LINE (Cont.) CONNECT THE TUBING TO THE CONNECT THE TUBING TO THE REFRIGERATOR REFRIGERATOR (Cont.) NOTES: 1/4” Tubing • Before making the connection to the Copper Clamp refrigerator, be sure the refrigerator power cord Tubing is not plugged into the wall outlet .
- Page 13 1 . Place a plug button on the opposite side of the fresh food door across from the handle . 2 . Remove the backing on the Crosley badge and carefully place it covering the hole opposite the handle on the freezer door . Be sure the badge is oriented the correct way before applying it to the door .
- Page 14 Installation Instructions REVERSING THE DOOR SWING BEFORE YOU START WARNING Follow all steps when reversing 1 .1 Unplug the refrigerator from its electrical the door swing . Failure to follow these instructions, outlet . leaving off parts, or overtightening screws, can lead 1 .2 Empty all door shelves, including the dairy to the door falling off and result in injury and property compartment .
- Page 15 Installation Instructions REVERSING THE DOOR SWING (Cont.) WARNING REVERSING THE HARDWARE Follow all steps when reversing the door swing . Failure to follow these instructions, 4 .1 Interchange the hinge and screws at top leaving off parts, or overtightening screws, can lead right with screws at top left of cabinet .
- Page 16 Installation Instructions REVERSING THE DOOR SWING (Cont.) REVERSING THE DOOR REVERSING THE DOOR HANDLES HANDLES (Cont.) STAINLESS STEEL HANDLE PLASTIC HANDLE ASSEMBLY 5 .1a . Remove handle screws from the top of 5 .1b . Remove handle screws from the top of fresh food door .
- Page 17 Installation Instructions REVERSING THE DOOR SWING (Cont.) RE-HANGING THE DOORS RE-HANGING THE DOORS (CO 6 .1 Re-hang the fresh food door 6 .1 Re-hang the fresh food door 6 .1 .1 Lower the fresh food door onto the 6 .2 .1 Lower the freezer door onto the center bottom hinge pin .
- Page 18 Normal Operating Sounds Newer refrigerators sound different from older refrigerators . Modern refrigerators have more features and use newer technology . Do you hear what I hear? These sounds are normal. HUMMM... T he new high ■ Y ou may hear the fans spinning at high ■...
- Page 19 . This helps keep the gaskets from sticking and bending out of shape . Doors may be shipped with TRUE Smooth finished doors (Stainless, Slate, Gloss Black and Gloss White, or Silver Metallic) protective film that has to be will have a clear plastic film on the door that must be removed after install. removed before use . Have more questions? For more information on your refrigerator or other Crosley appliances, please visit Crosley.com. 49-1000109...
- Page 20 Notes 49-1000109...
- Page 21 Your appliance is covered by a limited warranty, as listed below, by GE Appliances . All warranty service is provided by our GE Appliances Factory Service Centers, or an authorized service technician . To schedule service, call Crosley at 800 .544 .4780 . Please have your serial number and your model number available when calling for service .
- Page 22 Consumer Support Crosley Website Have a question or need assistance with your appliance? Try the Crosley Website 24 hours a day, any day of the year at Crosley.com . You can also shop for more great Crosley products on our website.
-
Page 23: Table Of Contents
Manual del Propietario Refrigeradores e Instalación Modelos: XPS15BTH, XTS18GSH, XTS18GTH, XTE18GTH Contents Información de Seguridad . . . . . . . . . .3 Solución de Problemas Sonidos normales de operación . . . .18 Operación del Refrigeradore... - Page 24 Secadora a Gas/ Motor/Elemento de 1 Año Eléctrica Calefacción Elementos para Cocina Eléctrica Hornear/ Asar/ de la 1 Año Superficie Arrancadoras y Cocina a Gas 1 Año Módulos de Chispa Visite Crosley.com/mycrosley y registre la garantía limitada extendida . 49-1000109...
-
Page 25: Control
INFORMACIÓN IMPORTANTE DE SEGURIDAD LEA TODAS LAS INSTRUCCIONES ANTES DE USAR A fin de reducir el riesgo de incendio, explosión, descargas eléctricas o lesiones al usar ADVERTENCIA su refrigerador, siga estas precauciones básicas de seguridad: ■ E ste refrigerador se deberá instalar y ubicar ■ A fin de evitar riesgos de que los niños sufran asfixia o adecuadamente de acuerdo con las Instrucciones de queden atrapados, retire las puertas de comidas frescas y Instalación antes de ser usado . - Page 26 INFORMACIÓN IMPORTANTE DE SEGURIDAD LEA TODAS LAS INSTRUCCIONES ANTES DE USAR CONEXIÓN DE LA ELECTRICIDAD ADVERTENCIA RIESGO DE DESCARGA ELÉCTRICA Enchufe en un tomacorriente con conexión a tierra de 3 cables . No elimine el cable de conexión a tierra . No use un adaptador .
-
Page 27: Estantes
Control de la temperatura l control de temperatura ajusta el refrigerador desde la configuración más caliente a la más fría . Su refrigerador cuenta con la configuración recomendada de fábrica en “Colder” (Frío Medio). Para acceder a una temperatura más fría, gire la perilla en dirección de las agujas del reloj a la configuración “Coldest” (Frío Máximo). Para acceder a una temperatura más caliente, gire la perilla en dirección contraria a las agujas del reloj a la configuración... -
Page 28: Gavetas
Gavetas de almacenamiento No todas las características están presentes en todos los modelos . Gaveta de refrigerio Gavetas para frutas y vegetales La gaveta de refrigerio se puede mover a la posición más útil Se debe retirar el exceso de agua que se pueda acumular al según las necesidades de su familia . -
Page 29: Máquina De Hielos Automática
Máquina de hielos automática (en algunos modelos) No todas las características están presentes en todos los modelos . Un refrigerador recientemente instalado puede tomar entre 12 Hielera y 24 horas para empezar a hacer hielo . PRECAUCIÓN Evite el contacto con las partes en movimiento del mecanismo expulsor o con el elemento de calefacción (ubicado en la parte inferior de la máquina de hielo) que expulsa los cubos . -
Page 30: Cuidado Y Limpieza
Cuidado y limpiez Limpieza exterior Mover el refrigerador Las manijas de la puerta y accesorio (en algunos modelos) . Tenga cuidado al mover el refrigerador lejos de la pared . Limpie con un paño humedecido con agua jabonosa . Seque Todos los tipos de cubiertas de piso se pueden dañar, con un paño seco . -
Page 31: Instrucciones Para La Instalación
Instrucciones para la instalación Modelos 15, 18 ÁREA ANTES DE COMENZAR Permita el siguiente espacio para una fácil Lea estas instrucciones por completo y con detenimiento . instalación, apropiada circulación del aire y – IMPORTANTE • Guarde estas instrucciones para conexiones de plomería y eléctricas . - Page 32 6 pies (1,8 m) como se describe arriba . aprobada es con un kit de Ósmosis Inversa de GE NOTA: La única tubería de plástico aprobada de Crosley Appliances . Para otros sistemas de agua de ósmosis es la que viene provista con los kits de tubería para el inversa, siga las instrucciones del fabricante .
- Page 33 Instrucciones para la instalación CÓMO INSTALAR LA TUBERÍA DEL AGUA (EN ALGUNOS MODELOS) ANTES DE EMPEZAR DIRIJA LA TUBERÍA Lea cada paso completamente antes de proceder. Dirija la tubería entre la línea del agua fría y el refrigerador . ADVERTENCIA Dirija la tubería a través de un orificio perforado en A fin de reducir el la pared o en el piso (detrás del refrigerador o del riesgo de descarga eléctrica o lesión durante gabinete de la base adyacente) lo más cerca posible a la instalación, primero deberá...
- Page 34 Instrucciones para la instalación CÓMO INSTALAR LA TUBERÍA DEL AGUA (Cont.) CONECTE LA TUBERÍA AL CONECTE LA TUBERÍA AL REFRIGERADOR REFRIGERADOR (Cont.) NOTAS: Abrazadera de la tubería • Antes de hacer la conexión al refrigerador, Tubería asegúrese de que el cable de corriente del de 1/4”...
-
Page 35: Instalación De La Manija
. la puerta de comidas frescas en forma cruzada a la manija . 2 . Retire el protector de la insignia de Crosley y colóquelo cuidadosamente sobre el orificio opuesto al mango de la puerta del freezer . Asegúrese de que la insignia esté... - Page 36 Instrucciones para la instalación CÓMO INVERTIR EL VAIVÉN DE LA PUERTA ANTES DE INICIAR ADVERTENCIA Siga todos los pasos al invertir 1.1 D esconecte el refrigerador del tomacorriente la dirección de la apertura de la puerta . Si no se siguen eléctrico . estas instrucciones, dejando piezas sin uso o ajustando 1.2 D esocupe todos los estantes de la puerta, tornillos en exceso, esto podrá...
- Page 37 Instrucciones para la instalación CÓMO INVERTIR EL VAIVÉN DE LA PUERTA (Cont.) CÓMO INVERTIR LOS ELEMENTOS ADVERTENCIA Siga todos los pasos al invertir DE SOPORTES la dirección de la apertura de la puerta . Si no se siguen 4 .1 Intercambie la bisagra y los tornillos en la parte estas instrucciones, dejando piezas sin uso o ajustando superior derecha con tornillos en la parte superior tornillos en exceso, esto podrá...
-
Page 38: De La Puerta
Instrucciones para la instalación CÓMO INVERTIR EL VAIVÉN DE LA PUERTA (Cont.) CÓMO INVERTIR LAS MANIJAS DE CÓMO INVERTIR LAS MANIJAS DE LAS PERTAS LAS PERTAS(Cont.) MANIJA DE ACERO INOXIDABLE ENSAMBLE DE LA MANIJA PLÁSTICA 5 .1a . Retire los tornillos de la manija de la parte 5 .1b . - Page 39 Instrucciones para la instalación CÓMO INVERTIR EL VAIVÉN DE LA PUERTA (Cont.) CÓMO VOLVER A COLGAR LAS CÓMO VOLVER A COLGAR LAS PUERTAS PUERTAS (Cont.) 6 .1 Vuelva a colgar la puerta de los alimentos frescos 6 .2 Vuelva a colgar la puerta del congelador 6 .1 .1 Baje la puerta de alimentos frescos al perno 6 .2 .1 Baje la puerta del congelador al pasador de la bisagra inferior .
- Page 40 Sonidos De Funcionamiento Normal El sonido de los refrigeradores nuevos es diferente al de aquellos más antiguos . Los refrigeradores modernos cuentan con más funciones y utilizan una tecnología más nueva . ¿Escuchas lo que yo escucho? Estos sonidos son normales. HUMMM...
- Page 41 . del uso . ¿Tiene más preguntas? Para más información sobre su refrigerador u otros electrodomésticos de Crosley, visítenos en Crosley.com. 49-1000109...
- Page 42 Notas 49-1000109...
- Page 43 Centros de Servicio de Fabricación de Electrodomésticos GE Appliances, o por un técnico autorizado del servicio técnico . Para programar el servicio técnico, comuníquese con Crosley al 800 .544 .4780 . Cuando llame para solicitar el servicio técnico, tenga los números de serie y modelo disponibles .
- Page 44 . Servicio Programado El servicio de reparación de Crosley está a sólo un paso de su puerta . Para programar el servicio técnico, comuníquese al 800 .544 .4780 durante el horario de atención comercial . Garantía Limitada de 10 Años de CROSLEYCARE ®...