Table of Contents
Advertisement
Advertisement
Table of Contents

Related Manuals for Korg XE20


Summary of Contents for Korg XE20
-
Page 2: Table Of Contents
Main Features ................. 3 Appendix ................32 Checking the software version ..........32 Part Names ................4 Restoring the XE20 to factory default settings ..... 32 Calibrating an expression pedal ..........32 Front panel .................. 4 Troubleshooting ............... 32 Rear panel ................... 4 List of chords recognized ............ -
Page 3: Main Features
....page 13 Owner’s Manual (this document, PDF) This explains how to use the detailed functions of the XE20. Playing along with a style (auto- Voice Name List (PDF) -
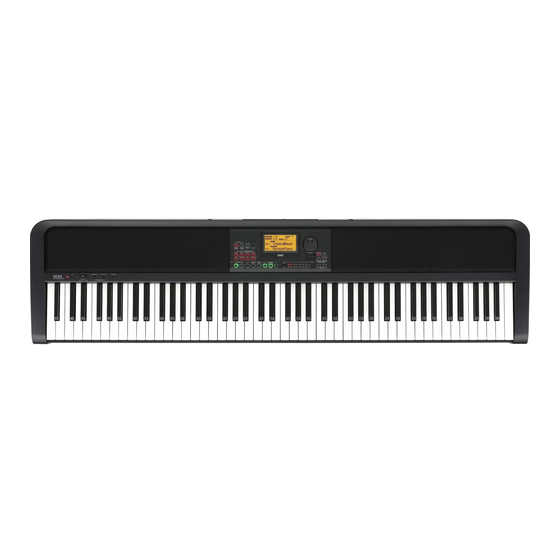
Page 4: Part Names
Part Names Part Names Front panel Display (page 6) Music stand holes (page 7) Built-in speakers Built-in speakers (page 7) (page 7) Keyboard Rear panel Headphone jack ..............page 7 DC 19V jack ..............page 7 FOOT CONTROLLER jack ............ page 8 Cable hook .................. -
Page 5: Control Panel
Part Names Control panel Power button ( ) ................. page 7 SET LIST section ..............page 14, 21 • BANK/WRITE button VOLUME knob ................page 7 • Buttons 1–4 PIANO1/2 button ................ page 13 STYLE/SONG section STYLE SET button .............. -
Page 6: Display
Part Names Display Chord Displays the name of the chord played within the chord recognition range. : Displays the tempo of the style or song. : Lights up to display the beat USB icon Tempo lock icon (page 15) of the style or song. Displays when a USB flash drive is Displays when the tempo is plugged into the USB TO DEVICE... -
Page 7: Preparing To Play
Make sure that the power on this instrument is turned off. Connect the DC plug of the included AC adapter to the DC 19V jack located on the rear panel of the XE20. Be sure to use only the included AC adapter. Using any other AC adapter may cause malfunctions. -
Page 8: Using A Pedal
Using a pedal You can plug a pedal into the FOOT CONTROLLER jack on the rear panel or into the pedal jack on the underside of the XE20 to use as a damper pedal, or to control the volume. Use the SETTING function to make the pedal settings, according to which kind of pedal you will connect (see page 25 “Changing the pedal polarity”... -
Page 9: Preparing To Play: What Is Auto-Accompaniment
Preparing to Play: What is Auto-Accompaniment? Preparing to Play: What is Auto-Accompaniment? What is auto-accompaniment? Auto-accompaniment is a function that automatically plays an accompaniment to match the chords that you play in the left hand (the accompaniment part). 1. Playing along with auto-accompaniment Press the STYLE/[MUSIC STYLE] button. - Page 10 Preparing to Play: What is Auto-Accompaniment? 2. Adding a melody line when playing Now, try playing a melody line along with the accompaniment. Press the STYLE/[MUSIC STYLE] button. Select a style by turning the dial. In this example, we will select “209:Jazz Brush”. Press the button to activate the keyboard split when the SPLIT button is off.
- Page 11 Press the INTRO/ENDING button C F Ending plays back You can use the other functions of the XE20 to further broaden your performance. We hope you’ll enjoy these features, as we explain the details beginning on the next page.
-
Page 12: Basic Operations
Basic operations About modes Selecting sounds and changing values The XE20 features two different modes, a style mode and a song Use the dial, the + and − buttons and the CATEGORY buttons mode. t/u when selecting sounds or changing the values of the settings. -
Page 13: Playing The Xe20 (Style Mode)
Playing the XE20 (style mode) Playing the XE20 (style mode) Selecting a grand piano What is a style set? Keyboard sets that are most suitable for each style y Press the PIANO1/2 button. (accompaniment) are available. These are called “style sets.”... -
Page 14: Selecting A Set List
Playing the XE20 (style mode) Selecting a set list Changing the sounds on the left and right (split) Set lists are used to save and quickly recall your favorite settings (style, tempo, effects and so on; see page 21 “Saving the set You can divide the keyboard into a high note range (for upper list (WRITE)”). -
Page 15: Playing In Time With The Metronome
Playing the XE20 (style mode) Playing in time with the metronome Note: Pressing the TAP TEMPO/[TEMPO LOCK] button any more times will start the accompaniment (tap start You can practice along with the tempo and beat of the metronome. function). You can turn the tap start function disable (see page 26 “Tap Auto Start”). -
Page 16: Setting The Key And Octave
Playing the XE20 (style mode) y Adjusting the tempo: The Tempo ( �� ) can be set from 30 to „ Changing the octave for each part 240 using the corresponding ×100, ×10, and ×1 keys. For Example: To set the Tempo to ( �� ) = 85, press the ×10 key Press the part button for the part you want to change while eight times and the ×1 key five times;... - Page 17 Playing the XE20 (style mode) Turning the reverb on/off This switches the reverb (an effect that make the sound linger) on/off. Press the REVERB button. When you press the button while reverb is being applied, the reverb will shut off.
-
Page 18: Auto-Accompaniment (Style Mode)
Auto-accompaniment is a function that automatically plays When you turn the split on, all keys to the left of the split accompaniment to match the chord that you specify. The XE20 point (the lower part) will become the “chord recognition features accompaniment patterns in various styles, such as range.”... -
Page 19: Making Changes To The Auto-Accompaniment
Auto-accompaniment (style mode) Making changes to the auto- Using the SYNCHRO START and SYNCHRO START/ STOP functions accompaniment This function allows you to start the accompaniment when you Adding an intro or setting a variation play the keyboard (SYNCHRO START), or accompany you only when you are playing the keyboard (SYNCHRO START/STOP). -
Page 20: Choosing A Music Style And Playing
Auto-accompaniment (style mode) Choosing a music style and playing Adjusting the volume of the keyboard and accompaniment parts Instead of choosing a style, you can select a music style and You can adjust the volume balance between the keyboard and then play or record. -
Page 21: Saving The Set List (Write)
Auto-accompaniment (style mode) Saving the set list (WRITE) Recording your performance A set list contains saved settings such as style, tempo, keyboard You can record as you play along with the auto-accompaniment. set and effect settings. Once you have customized the settings Follow steps 1–5 in “Playing with a style you choose”... -
Page 22: Song Mode
Select the song type using the CATEGORY buttons t/u, and use the dial or the +/– buttons to select the song. The XE20 has 21 built-in demo songs. This shows you how to The song types and SONG/[DEMO SONG] button states are listen to the songs. -
Page 23: Editing A Song
Song mode Editing a song Playing back part of a song in a loop This feature lets you play back part of a song over and over (loop You can edit the user songs. playback). „ Quick loop playback Erasing part of a recording (erase function) Press the LOOP button to loop the playback of the current Here’s how to erase part of what you played using the keyboard measure. - Page 24 Song mode Overlaying parts when recording (overdubbing Deleting a user song function) This will delete a user song that you have selected. You can overlay parts that you play using the keyboard part Select a user song. when recording a user song. You can also record changes in the Press the ERASE button.
-
Page 25: Setting Functions
No Assign: Use this when you are not using a pedal. Damper: This is the factory default setting. Select this when using a damper pedal or a pedal switch like the Korg DS- 1H, PS-1 or PS-3. Expression: Select this when using a expression pedal like the Korg EXP-2. -
Page 26: List Of Setting Functions
Pedal Function No Assign See page 25 “Changing the pedal function”. Damper* Expression P.03 Pedal Polarity -(KORG)* See page 25 “Changing the pedal polarity”. +(Reverse) P.04 MasterTuning 427.5 ... 440.0* ... Sets the overall tuning for the instrument (drums excepted). - Page 27 SETTING functions Page Parameter Settings Contents of settings P.10 Local Control Sets whether the sound generator of this instrument will play or not (“On” to play, “Off” to not play) when the keyboard is played. On: Notes that you play on the keyboard and MIDI data will be sent to the internal sound generator and to the USB TO HOST port.
-
Page 28: Media Functions
Note: Specifications vary by product, so the sounds that play Connect a USB flash drive. back on the XE20 may sound different from the instrument on See “Connecting and removing USB flash drives” which you created the original data. (page 28). -
Page 29: List Of Media Functions
0). The “###” characters above are a placeholder for the file number. The WAV, MP3, SMF and MID files in the “XE20” folder can be loaded into this instrument as user songs. When you insert a USB flash drive into the XE20, the instrument searches for the relevant files in the “XE20”... -
Page 30: Connecting To An External Device
You can connect audio equipment such as powered monitor speakers or a home stereo to the AUDIO OUT jacks on the rear panel of the XE20, which lets you hear what you play on this Press the [SHIFT] button to return to the previous mode. -
Page 31: Connecting To A Computer
Connecting to an external device Connecting to a computer Connect the USB TO HOST port on the back of the XE20 to your computer with a USB cable to exchange MIDI or audio data. Using USB-MIDI „ What is MIDI? -
Page 32: Appendix
If the pedal does not work correctly, repeat this Press the power button while holding down the [SHIFT] process from step 1. button. The software version number of the XE20 will be displayed following the opening screen. Troubleshooting Turn off the power, and then turn it on again. - Page 33 Appendix I hear unwanted noise. … When the volume for a part is raised, the digital signal processing may overload the signal, which could cause distortion or other noises. This is not a malfunction. Try lowering the volume on each part button. …...
-
Page 34: List Of Chords Recognized
Appendix List of chords recognized These are the main chords that will be recognized when the chord recognition on this instrument is set to “Fingered2”. Major Major 6th 3-note 2-note 4-note 2-note Major 7th 4-note 3-note 2-note Sus 2 3-note 2-note 3-note Dominant 7th... -
Page 35: Specifications
(approx. 100,000 notes), 12 tracks consumption (4 keyboard parts + 8 auto- accompaniment parts), original Dimensions XE20: 1,312 × 336 × 118 mm / 51.65 × 13.23 × 4.65 format (can convert to SMF0) (width × depth inches (excluding music stand) × height) XE20SP: 1,312 ×... -
Page 36: Midi Implementation Chart
*2: Includes setting of inquiry and master volume. *3: When the MIDI Clock setting of the Setting function is External, the XE20 will recieve this message. *4: Depending on the selected program, there may be cases in which it is not possible to sound the whole range. - Page 38 © 2020 KORG INC. Published 03/2020...