Zoom 3095 Quick Manual
Installing the usb mini modem on mac os x 10.5 (leopard)
Hide thumbs
Also See for 3095:
- Firmware update (3 pages) ,
- User manual (36 pages) ,
- Quick start (4 pages)
Advertisement
Quick Links
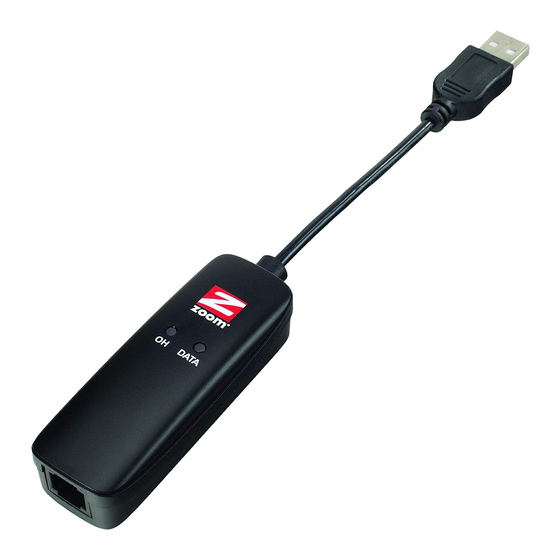
Installing the USB Mini modem on Mac OS X 10.5 (Leopard)
Connect the modem to your computer
1. Connect the cable end of the modem to a USB port on the back or side of your computer.
(Note: Do not connect the modem to a USB port on a keyboard.)
2. Connect the phone jack on the modem to the supplied phone cord, and plug the other end of
the cord into the wall telephone jack.
Configure the modem
1. On the Dock, select System Preferences and then Network to open the Network pane.
2. In the network connections services list, select USB Modem.
Note: If the modem does not appear in the list, click the + (Add) button at the bottom. Select
USB Modem from the Interface drop-down menu, enter a Service Name, and click Create.
3. Click the Advanced button on the right pane.
4. Click the Modem tab and select the following:
Vendor: Zoom
Model: Universal (115k)
5. If your ISP has given you DNS or Proxies information, open those tabs and enter the
information.
6. Click OK to return to the main Network pane.
7. Enter the telephone number and account information your Internet Service Provider (ISP) has
given you, and click Apply. (Note: You can accept the Default configuration.)
Advertisement

Related Manuals for Zoom 3095


Summary of Contents for Zoom 3095
- Page 1 3. Click the Advanced button on the right pane. 4. Click the Modem tab and select the following: Vendor: Zoom Model: Universal (115k) 5. If your ISP has given you DNS or Proxies information, open those tabs and enter the information.
- Page 2 8. Click Connect. 9. When you finish your Internet session, click the Disconnect button. Congratulations! Your installation and setup are complete.