
Related Manuals for HighPoint RocketRAID 3700 Series


Summary of Contents for HighPoint RocketRAID 3700 Series
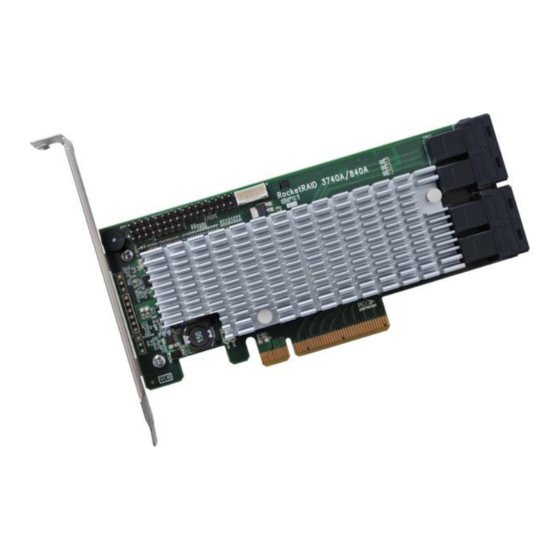
- Page 1 RocketRAID 3700 Series SAS 12Gb/s PCI-Express 3.0 x8 RAID Controller User’s Guide v1.03...
- Page 2 Backup your important data before using HighPoint's products and use at your own risk. In no event shall HighPoint be liable for any loss of profits, or for direct, indirect, special, incidental or consequential damages arising from any defect or error in HighPoint's products or manuals.
-
Page 3: Table Of Contents
4.2.1 Driver and WebGUI Installation (Windows) ................11 4.2.2 Driver and WebGUI Installation (Linux) ..................11 4.2.3 Driver and WebGUI Installation (Mac) ..................12 4.3 Using the HighPoint WebGUI ........................ 12 Verify the Controller Status ......................... 12 Creating an Array ............................13 Adding Spare Disks ............................ -
Page 4: Highpoint Rocketraid 3700 Overview
1. HighPoint RocketRAID 3700 Overview RocketRAID 3700 series host bus adapters are the world’s most price competitive 12G SAS/SATA RAID controllers, and deliver unprecedented end-to-end Generation 3.0 PCI Express transfer performance with Professional class RAID Storage reliability and management capabilities. -
Page 5: Board Layout & Hardware Installation
LED pins are provided for Active/Fail status for each of the device channels. For more information about LED functionality and connection requirements, please refer to the document below: http://www.highpoint-tech.com/PDF/LED_connection.pdf Alarm Buzzer Audible alarm will sound if a disk failed status occurs. -
Page 6: What's In The Box
3. What’s in the Box Make sure the following items are included in your purchase: • RR3700 controller card • Low Profile Bracket • Quick Installation Guide 4. Using the RocketRAID 3700 4.1. Using the RocketRAID Series HBA BIOS 4.1.1 RocketRAID BIOS Setting Utility The RocketRAID controller BIOS utility is an interface that provides management commands and controller related settings. -
Page 7: Using The Bios Utility
4.1.2 Using the BIOS Utility The following keys are utilized by the RocketRAID BIOS utility: Arrow keys – Use these to move between different menu items. Enter – Open the selected toolbar command/execute the selected command. Esc – Move back to the previous menu, cancel the selected operation, or exit the BIOS Utility. 4.1.3 BIOS Commands Create: This command is used to open the RAID Creation menu. - Page 8 contain critical data. Create Arrays: Select Create from the toolbar and press the Enter key. Use the arrow keys to select the RAID level and press the Enter key. Use the arrow keys to highlight the Array Name option and press the Enter key. The array name dialogue box will appear.
-
Page 9: Delete Arrays
For redundant RAID arrays (RAID 5, 50), select the Cache Policy: Write Back – Provides higher write performance for redundant RAID arrays. Data is at risk when there is a power failure, system kernel panic and unresponsive abnormal conditions. Write Through – Writes directly to the disks (may reduce the risk of data loss during a critical failure, but at the cost of lower performance). -
Page 10: Settings
Select which disk or array will act as the boot disk, if the motherboard BIOS instructs the card to act as the boot device. ▪ When booting up the system, press CTRL + H during the HighPoint RocketRAID splash screen to enter the BIOS RAID creation utility. ▪... -
Page 11: Driver & Webgui Installation
Download and prepare the Windows Driver and WebGUI from the product download page. RocketRAID 3700: http://www.highpoint-tech.com/USA_new/series_rr3700a-Download.htm After installing the RAID controller, boot to the Windows operating system. Windows should automatically detect the card as a new “RAID Controller” under device manager. -
Page 12: Driver And Webgui Installation (Mac)
Please refer to the Online Help guide for more information about using the WebGUI: http://www.highpoint-tech.com/help/ Double click the Desktop ICON to start the Web browser. It will automatically log-in to the HighPoint RAID Management. The password can be set after the first log-in. To change the password, select Setting>Security from the... -
Page 13: Creating An Array
Creating an Array To create an array: 1. Log into HRM 2. Select the proper controller from the drop down on the top left 3. Click Logical 4. Click Create Array... - Page 14 Array Type: An array is a collection of physical disks that will be seen as one virtual drive by your Operating System (OS). The RR3700 is capable of creating the following array types: • RAID 0 — Striping • RAID 1 — Mirroring •...
-
Page 15: Adding Spare Disks
Adjusting the block size towards your disk usage can result in some performance gain. In a typical RAID configuration, data of the virtual drive is striped (or spread across) the physical drives. Having a smaller array block size will increase the likelihood of accessing all physical drives when processing large I/O requests. Multiple physical drives working in parallel increases the throughput, meaning better performance. - Page 16 To add spare disks: 1. Log into the HRM 2. Click Logical 3. Click Spare Pool: 4. Check the box for the disk you want as a spare under Available Disks 5. Click Add Spare, and confirm by selecting OK from the pop-up window: 6.
-
Page 17: Obtaining Logical Device Information
Obtaining Logical Device Information The Logical device tab is the default page after clicking the Logical tab of the HRM. This page contains information about your RAID arrays and the individual disks your system detects. Logical Device Information Arrays you create and the properties associated with them will appear here. Maintenance Once an array has been created, the Maintenance menu provides options to maintain or edit it. -
Page 18: Array Information & Maintenance Options: Critical Status
Array Information & Maintenance Options: Critical Status Arrays in the Critical status can be accessed and utilized, but are no longer fault tolerant. A Critical array should be rebuilt as soon as possible to restore redundancy. A critical status array has all the normal status options except the following: •... -
Page 19: Physical Device Information
An array with the Disabled status means that the RAID level does not have enough disks to function. • Your data will be inaccessible • Rebuilding will not trigger, since the RAID array does not have enough parity data to rebuild. Your options in Maintenance are: •... -
Page 20: System Setting
You can specify the amount of system resources you want to dedicate to rebuilding the array. There are 5 levels of priority [Lowest, Low, Medium, High, Highest] Port Number (default: 7402) The default port that the HighPoint HRM listens on is 7402. You may change it to any open port. Password Settings Changing your HRM password... -
Page 21: Email Setting
Recovering your HRM password If you forget your password, you can delete the file hptuser.dat. Then you need to restart the computer and open the WEBGUI to set a new password For Windows Users: 1. Open file explorer 2. Navigate to C:/Windows/ 3. -
Page 22: Event Tab
Figure 1. Example event log email Event Tab In the event tab, you can see log entries associated with the HighPoint device. The event log provides useful information when troubleshooting your set up. In the event tab, there are four options available: Download –... -
Page 23: Shi (Storage Health Inspector)
SHI (Storage Health Inspector) • S.M.A.R.T Attributes • Schedule a task(Task list and Health Inspector Scheduler) SHI outputs information collected using SMART (Self-Monitoring Analysis and Reporting Technology) Hard Drive Technology. The data provided on this tab helps you to anticipate any disk failures based on a variety of monitored hard disk properties. -
Page 24: How To Use The Health Inspector Scheduler
How to Use the Health Inspector Scheduler The Health Inspector Scheduler (HIS) enables you to schedule disk/array checkups to ensure disks/array are functioning optimally. How to Create a New Verify Task All Redundant RAIDs will appear under New Verify Task 1. -
Page 25: Troubleshooting
Troubleshooting This section provides guidelines to some problems you may encounter: • Handling Critical Arrays • Handling Disabled Arrays • PC hangs when card is installed. Handling Critical Arrays When your disk status turns critical, your array as a whole is still accessible, but one or more disks is faulty (depending on your RAID level), and the array is in danger of failing. -
Page 26: Rebuilding Stops Due To Bad Sectors
Rebuilding Stops Due to Bad Sectors If rebuilding fails to complete due to bad disk sector errors (check in the Event Log), there is an option to continue rebuilding on error in the HighPoint HRM. 1. Log into the HRM 2. -
Page 27: Help
Online Help redirects you to additional documentation concerning the HighPoint HRM. Register Product takes you to the HighPoint Online Web Support Portal. On this page you can create a new customer profile where you can register your product, or post an online support ticket. - Page 28 Table 1.HRM Icon Guide Critical – missing disk A disk is missing from the array bringing it to ‘critical’ status. The array is still accessible but another disk failure could result in data loss. Verifying The array is currently running a disk integrity check. Rebuilding The array is currently rebuilding meaning you replaced a failed disk or added a new disk to a ‘critical’...
- Page 29 Critical – missing disk A disk has been removed or experienced failure, and user needs to reinsert disk or add a new disk. Rebuilding The array is currently rebuilding. Verifying The array is performing a data consistency check. Array status will show ‘verifying’. Disabled The array does not have enough disks to maintain the RAID level.
- Page 30 Table 2. RAID Level Reference Guide Type Description Min. Usable Advantage Disadvantage Application disks space Just a bunch Each drive can be accessed as a No fault tolerance - failure of one Backup JBOD of disk 100% single volume drive results in complete data loss Offers the highest performance No fault tolerance - failure of one Temporary file,...
-
Page 31: Customer Support
5. Customer Support If you encounter any problems while utilizing the RocketRAID series HBA, or have any questions about this or any other HighPoint Technologies, Inc. product, feel free to contact our Customer Support Department. Web Support: http://www.highpoint-tech.com/websupport/ HighPoint Technologies, Inc. websites:...