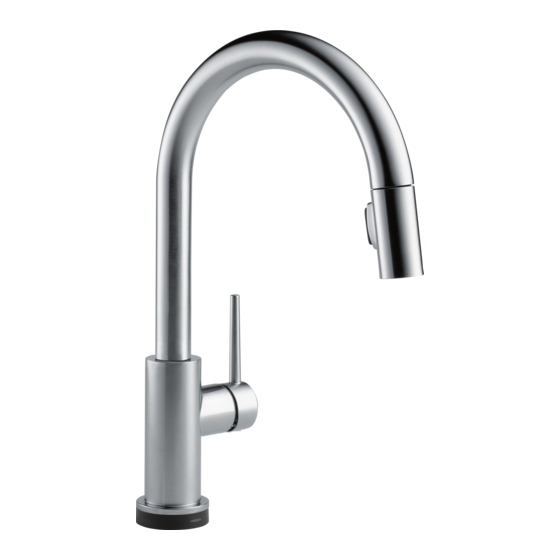
Delta 9159T-DST Quick Start Manual
Touch faucet
Hide thumbs
Also See for 9159T-DST:
- Quick start manual (60 pages) ,
- Installation instructions manual (16 pages) ,
- Manual (12 pages)

Related Manuals for Delta 9159T-DST


Summary of Contents for Delta 9159T-DST
- Page 1 Quick Start Guide Guía del comienzo rápido Guide de début rapide 9159T-DST, 9959T-DST, Series/Series/Seria...
-
Page 2: Table Of Contents
Table of contents Tools and supplies you will need.............. page 2 What is included with my Touch Faucet?........... pages 3 & 4 Installation Instructions................. pages 5-30 Maintenance......................pages 31-34 Replacement Parts…………………………………………………........ pages 35 & 36 Warranty……………………………………………………………......... page 37 Before proceeding you MUST determine if you are going to install your new touch faucet as a single hole faucet (no escutcheon) or use the 10"... -
Page 3: Tools And Supplies You Will Need
Tools and supplies you will need. Herramientas y piezas que necesitará. Outils et fournitures dont vous aurez besoin. Flashlight Linterna Lampe de poche Eye Protection Protección para los ojos Protection oculaire Adjustable Wrenches Llaves Ajustables de Herramientas Clés réglables Phillips Screwdriver Destornillador de cabeza en cruz Tournevis phillips... -
Page 4: What Is Included With My Touch Faucet
What is included with my Touch Faucet? ¿Qué se incluye con mi llave de agua Touch? Qu’est-ce qui est inclus avec mon robinet? Touch Faucet parts Piezas de la llave de agua / grifo Touch Pièces du robinet tactile Bagged parts for STEP 1. Piezas para el PASO 1. -
Page 5: Qué Se Incluye Con Mi Llave De Agua/ Grifo Touch
What is included with my Touch Faucet? ¿Qué se incluye con mi llave de agua Touch? Qu’est-ce qui est inclus avec mon robinet? -
Page 6: Installation Instructions
Parts for Step 1. Piezas para el Paso 1. Pièces pour l’étape 1. - Page 7 Single Hole Instalación para Installation dans Installation un agujero un trou...
- Page 9 UNDER MOUNT - If your sink is mounted TOP MOUNT - If your sink is mounted from underneath your counter as shown on top of your counter as shown here, here, YOU MUST use the under mount DO NOT use the under mount isolator isolator (A) when installing your faucet.
- Page 10 Instalación de llaves de Installation du robinet Faucet Installation for agua para fregaderos avec un ÉVIER MONTÉ TOP MOUNT SINKS. DE MONTAJE SUPERIOR PAR-DESSUS.
- Page 11 Instalación de llaves de Installation du robinet Faucet Installation for agua para fregaderos avec un ÉVIER MONTÉ TOP MOUNT SINKS. DE MONTAJE SUPERIOR PAR-DESSUS.
- Page 12 Instalación de llaves de Installation du robinet Faucet Installation for agua para fregaderos avec un ÉVIER MONTÉ UNDER MOUNT SINKS. DE MONTAJE INFERIOR PAR-DESSOUS.
- Page 13 Instalación de llaves de Installation du robinet Faucet Installation for agua para fregaderos avec un ÉVIER MONTÉ UNDER MOUNT SINKS. DE MONTAJE INFERIOR PAR-DESSOUS. Lip (A) MUST La lengüeta fit into mount- debe encajar ing hole. en el agujero de montaje. La lèvre (A) DOIT s’ajuster dans le trou...
- Page 14 Parts for Step 2. Piezas para el paso 2. Pièces pour l’étape 2.
- Page 19 Hale, hacia abajo, Tirez modérément sur le Pull down moderately to moderadamente para tuyau pour vous assurer ensure connection has asegurar que ha hecho qu’il est bien fixé. been made. la conexión.
- Page 20 Parts for Step 3. Piezas para el Paso 3. Pièces pour l’étape 3.
- Page 23 Installations incorrecte. Incorrect Installations. Instalacións incorrecta.
- Page 25 Parts for Step 4. Piezas para el Paso 4. Pièces pour l’étape 4.
- Page 26 Finger tighten. One additional revolution with wrench. Apriete con los dedos Una vuelta adicional usando Serré à la main una llave de herramientas 1 tour supplémentaire avec une clé...
- Page 28 One additional revolution with wrench. Finger tighten. Una vuelta adicional usando una llave Apriete con los dedos de herramientas Serré à la main 1 tour supplémentaire avec une clé...
-
Page 32: Maintenance
Maintenance Mantenimiento Entretien... - Page 33 Maintenance cartridge (7) by pulling directly back on stem. If faucet exhibits very low flow – Replace cartridge and reassemble. Unscrew hose from spray head and clean WARNING: Failure to securely tighten bonnet debris from screen (1) (the screen is located just inside the spray) .
- Page 34 Manual Bypass of Electronic Features Remove the battery pack (1) from the Momentarily connect the “+” terminal of the battery cable (2). battery (1) to the “-” terminal of the solenoid (2) and the “-” terminal of the battery to the “+” Disconnect the two spade contacts (1) terminal of the solenoid.
- Page 35 Cleaning and Care gently with a damp cloth and blot dry with Care should be given to the cleaning of a soft towel. Glass cleaner can be used on this product. Although its finish is extreme- SS (Stainless) finish to remove ly durable, it can be damaged by harsh fingerprints and maintain color match.
- Page 36 RP64462 RP60520 Solenoid Assembly Adapter & O-Ring Ensamble de Solenoide Adaptador y Aro-O Électrovanne Adaptateur et joint torique RP50784 Clip & O-Ring Gancho y Anillo “O” Agrafe et Joint torique RP53468 RP64124 Check Valves Battery Box Válvulas Checadoras Caja de la Batería Clapets de non-retour Boîtier de piles RP13938...
-
Page 37: Piezas De Repuesto
LSpecify Finish RP71656L LEspecifíque el Acabado Bar Spout Assembly with Magnet LPrécisez le Fini Ensamble del Tubo de Salida RP71655L Kitchen Spout Assembly with Magnet Ensamble del Tubo de Salida RP64069L RP62589L Sprayer Assembly Handle, Set Screw Ensamble de rociador &... -
Page 38: Warranty
® be free from defects in material & workmanship for a period of 5 years. Delta Faucet Company recommends using a professional plumber for all installation & repair. Delta will replace, FREE OF CHARGE, during the warranty period, any part or finish that proves defective in material and/or workmanship under normal installation, use &... -
Page 39: Garantie
® vices de fabrication par une garantie de 5 ans. Delta recommande de faire appel à un plombier compétent pour l'installation et la réparation du robinet. Pendant la période de garantie, Delta remplacera GRATUITEMENT toute pièce ou tout fini, présentant une défectuosité... - Page 40 For installation and troubleshooting help see www.deltafaucet.com/ QS-72805 Rev. A 10/12/11...