
Related Manuals for Toshiba e750


Summary of Contents for Toshiba e750
- Page 1 User’s Manual Pocket PC e750 OCKET PC e750 POCKET PC e750 POCKET PC e750 TOSHIBA Choose freedom. www.toshiba.co.jp/worldwide...
-
Page 2: Copyright Information
Introduction Thank you very much for your purchase of this Toshiba Pocket PC e750. Please be sure to read this user’s manual before using the Toshiba Pocket PC, and ensure that you are aware of the correct handling procedures. Please be sure to read the “Safety precautions” section in this document to learn about important safety issues. - Page 3 Limitation of liability Toshiba Corporation is in no way liable for any damage resulting from earthquakes, lightning, wind, flood; or fire, actions on the part of a third party, or other accidents beyond the control of Toshiba Corporation; intentional acts, negligence or misuse on the part of the user, or any usage under abnormal conditions.
-
Page 4: Safety Precautions
Safety instructions All safety instructions must be read carefully and must be fully understood, before attempting to use your Toshiba Pocket PC. This manual contains the safety instructions that must be observed in order to avoid potential hazards that could result in personal injuries or could damage your computer. - Page 5 Power Supply Cables or plugs as exposure to electric shock hazards could result. Always contact an authorized service provider, if repair or replacement is required. TOSHIBA Pocket PC e750 Meaning WARNING Indicates a potentially hazardous situation, which could result in death or serious injury (*1) if you do not follow instructions.
- Page 6 Always immediately turn the battery switch to the “off” position and disconnect the AC Adaptor from the power outlet in the event the Pocket PC emits an unusual odor or sound or generates smoke. TOSHIBA Pocket PC e750...
- Page 7 AC Adaptor in violation of this Warning. Never connect or disconnect the AC Adaptor with wet hands. Connecting or disconnecting the AC Adaptor to a power source with wet hands could cause electric shock. TOSHIBA Pocket PC e750 Introduction...
- Page 8 Never pull on the Power Supply Cable to disconnect the Power Supply Cable from an outlet. Pulling on the Power Supply Cable could cause a fire or electric shock as a result of damage to the Power Supply Cable. TOSHIBA Pocket PC e750 viii...
- Page 9 Dispose of used batteries Do not dispose of used batteries with your ordinary waste. Dispose of the batteries as required by local ordinances or regulations. Use only batteries recommended by Toshiba as replacements. NOTES Under certain conditions, data may be lost, including:...
- Page 10 If you connect your Pocket PC to a computer via the docking cradle for data transfer or data restoration purposes, Toshiba will not be responsible for any Pocket PC or computer malfunction, problems with data transfer or data modifications/loss that may occur in these environments.
- Page 11 Ulteriori informazioni: “Il prodotto é conforme ai requisiti della direttiva Ytterligare information: TOSHIBA Pocket PC e750 “The product complies with the requirements of the Low Voltage Directive 73/23/EEC and the EMC Directive 89/336/EEC.” “Das Produkt entspricht den Anforderungen der Niederspannungs Richtlinie 73 23/EG und der EMC-Richtlinie 89/336/EG.”...
- Page 12 EMC (Electromagnetic compatibility) and safety standards. However, Toshiba cannot guarantee that this product still observes these EMC standards if options or cables not produced by Toshiba are connected or implemented. In this case, the persons who have connected / implemented those options / cables have to make sure that the system (PC plus options / cables) still fulfils the required standards.
- Page 13 Only peripherals complying with the FCC class B limits may be attached to this equipment. Operation with non-compliant peripherals or peripherals not recommended by Toshiba is likely to result in interference to radio and TV reception. Shielded cables must be used between the external devices and the computer’s USB ports, external monitor port,...
- Page 14 This device complies with Part 15 of the FCC Rules. Operation is subject to the following two conditions: (1) This device may not cause harmful interference, and (2) this device must accept any interference received, including interference that may cause undesired operation. TOSHIBA Pocket PC e750 Introduction...
-
Page 15: Table Of Contents
TOSHIBA Pocket PC e750 Table of Contents Chapter 1 Getting Started Welcome ...1-1 Where to Find Information...1-2 Chapter 2 Basic Skills Parts Names and Function ...2-1 Power Button...2-3 Battery Switch ...2-4 Battery/Alarm LED ...2-4 Wireless Communication Switch (Wireless LAN/Bluetooth model only) ...2-5... - Page 16 Programs ...2-22 Navigation Bar and Command Bar ...2-23 Pop-up Menus ...2-24 Notifications...2-24 Enter Information on Your Toshiba Pocket PC...2-25 Entering Text Using the Input Panel ...2-25 Writing on the Screen ...2-28 Drawing on the Screen ...2-31 Recording a Message...2-32 Using My Text...2-33 Find and Organise Information ...2-34...
- Page 17 Chapter 7 Getting Connected Transfer Items Using Infrared ...7-2 Connect to the Internet...7-2 Connect to Work ...7-4 End a Connection ...7-7 Connect Directly to an E-mail Server ...7-8 Get Help on Connecting ...7-8 TOSHIBA Pocket PC e750 Programs...5-1 Explorer...6-1 ...7-1 Getting Started xvii...
- Page 18 Example: Obtain TLS Certificate from server (3)...8-19 Example: Obtain PEAP Certificate from a file (1) ...8-20 Example: Obtain PEAP Certificate from a file (2) ...8-21 Example: Obtain PEAP Certificate from a file (3) ...8-22 TOSHIBA Pocket PC e750 Getting Started ...8-1 xviii...
- Page 19 Chapter 9 Bluetooth Specifications ...9-1 Major specifications...9-2 Bluetooth Settings...9-3 Enabling Bluetooth on Your Toshiba Pocket PC..9-3 Bluetooth Environmental Settings ...9-3 Advanced Settings ...9-4 Preparing to Connect with Bluetooth ...9-5 Using COM Service ...9-8 Establishing an ActiveSync connection with a computer ...9-8 Using DUN/LAP Service...9-9...
- Page 20 Notes Page ...11-5 Quick Notes ...11-5 Slide Show...11-5 VGA Slide Show ...11-9 Controlling Transition Effects ...11-10 Merging Presentations...11-10 IA Screen Mirror ...11-11 Getting Started ...11-11 On-line Help ...11-11 Copyright and Contact Information ...11-12 TOSHIBA Pocket PC e750 Getting Started ...11-1...
- Page 21 Clear Memory ...12-4 Troubleshooting for Wi-Fi...12-5 Appendix A Specifications ... A-1 Appendix B FAQ for Wi-Fi... B-1 Appendix C Error Messages for Bluetooth...C-1 Appendix D Glossary for Bluetooth...D-1 Appendix E TOSHIBA's Worldwide Computer Representatives ... E-1 TOSHIBA Pocket PC e750...
-
Page 22: Chapter 1 Getting Started
Chapter 6. A Calendar reminder alerts you that it is time to catch the bus. You grab your Toshiba Pocket PC device and catch the bus just in time. Because ActiveSync keeps the information on your device up-to-date, you leisurely review your task list, make notes about the new books and CDs you want to buy, and read and respond to e-mail messages. -
Page 23: Where To Find Information
See this source: This User's Manual and device Help. To view Help, tap and then Help. The Toshiba Pocket PC Companion CD. The Quick Start Card or ActiveSync Help on your computer. To view Help, click Help and then Microsoft ActiveSync Help. -
Page 24: Chapter 2 Basic Skills
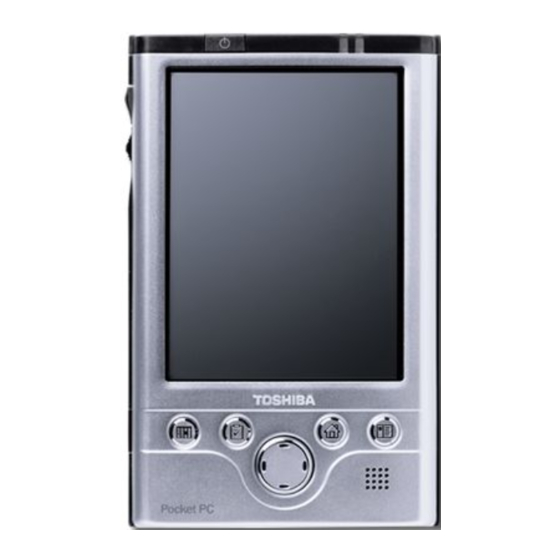
TOSHIBA Pocket PC e750 Basic Skills Your Toshiba Pocket PC e750 is easy to learn how to use. This chapter describes the use and customization of your Toshiba Pocket PC e750. Parts Names and Function Main unit and optional Expansion Pack (front view) -
Page 25: The Cradle
Cradle Connection Port The Cradle Initial Setting of Program Buttons Program button 1 = Calendar Program button 2 = Tasks Program button 3 = Home Program button 4 = Contacts Program button 5 = Voice recorder User's Manual DC IN Socket Expansion Pack (optional) USB Port Basic Skills... -
Page 26: Power Button
The power button performs the functions described in the table below. Power button Press and hold. Press it quickly. User's Manual Microphone Stereo Headphone Jack Toshiba Scroller Battery Pack Lock Optional Expansion Pack DC-IN Socket When the power is The power turns on. The power turns on. -
Page 27: Battery Switch
The battery switch supplies/cuts off the battery power to the Toshiba Pocket PC e750. The setting of this switch at shipment is “stop”. When using the Toshiba Pocket PC for the first time, slide this switch to the left (the “supply” side) with the stylus. -
Page 28: Wireless Communication Switch (Wireless Lan/Bluetooth Model Only)
Wireless Communication Switch (Wireless LAN/Bluetooth model only) 1. To enable Wireless module, make sure the Wireless Communication Switch is turned on. (The default setting is Power Off. Slide the switch to the left to turn the power on.) 2. If this is your first time turning on the switch, the IP Address Page will pop up for you to set the IP address, Subnet mask and Default gateway. -
Page 29: How To Use The Stylus
On the pop-up menu that appears, tap the action you want to perform. When you operate the touch screen of the Toshiba Pocket PC e750, use the supplied stylus. If the tip of the stylus is damaged, do not use it. If you operate the touch screen with a damaged stylus or a ballpoint pen, the touch screen may be damaged. -
Page 30: Battery Charging
Battery Charging When using the Toshiba Pocket PC e750 for the first time, set the battery switch to the supply side, and then charge the battery with the supplied AC adapter. How to Charge the Battery You can use two charging methods. -
Page 31: How To Attach/Detach The Main Battery Pack
You cannot turn on the power if the Battery Pack Lock is at the Release position. You can change the main battery without data loss because the Toshiba Pocket PC e750 has a rechargeable backup battery. However, the capacity ot the backup battery is limited, therefore when you change the main battery, attach the new main battery and switch the Battery Pack Lock to the lock side as soon as possible. -
Page 32: How To Use The Optional High Capacity Battery Pack
You can replace the main battery with the High Capacity Battery without data loss because the Pocket PC e750 has a rechargeable backup battery. However, the capacity ot the backup battery is limited, therefore when you change the main battery, attach the new main battery and switch the Battery Pack Lock to the lock side as soon as possible. -
Page 33: How To Prolong Battery Life
Do not leave the Toshiba Pocket PC in a place of high or low temperature. It may shorten battery life. If you have not used the Toshiba Pocket PC for several days, its battery charge level reading may be inaccurate. -
Page 34: Battery Charge Level And Stored Data Protection
The battery gradually discharges even if the device is not being used. When the Toshiba Pocket PC is left for a long time, the battery of the Toshiba Pocket PC may completely discharge. As a precaution, it is recommended that you save the Toshiba Pocket PC’s memory data to your computer or to a storage card. -
Page 35: Parts And Functions Of The Expansion Pack
Only use a Microsoft Pocket PC compatible keyboard. When pressed, the Release Button releases the Expansion Pack from the Pocket PC e750. Connecting the Expansion Pack to the Pocket PC 1. Plug the Guide Pins into the corresponding jacks on the Pocket PC. -
Page 36: How To Use The Optional Usb Host Cable
How to use the optional USB Host Cable The optional USB Host Cable allows you to connect a USB keyboard to the Pocket PC. To connect a USB keyboard to the Pocket PC: 1. Turn off the power. 2. Plug the optional USB Host Cable to the Pocket PC. 3. -
Page 37: Initial Setup
Initial Setup When using the Toshiba Pocket PC e750 for the first time, follow the initial setup procedures below after the battery has been charged. 1. Move the battery switch to the “supply” position. The Toshiba Pocket PC e750 powers on automatically and the Welcome screen appears. -
Page 38: Inserting A Cf Ii Card
Inserting a CF II Card 1. Turn off the power. 2. Remove the dummy card. 3. Insert the CF II card confirming the direction of the card. Line up the side grooves of the card and the groove edge of the card slot. Insert the card smoothly and completely. - Page 39 To remove a card: 1. Turn off the power. 2. Lightly press down the release button with the stylus. The button will pop out. Press down on the release button again. The card will withdraw slightly from the slot. 3. Pull the card straight up to remove. Use the stylus to release the CF II card.
-
Page 40: Inserting An Sd Card
1. Turn off the power. 2. Remove the dummy card. 3. Insert the card with its contact surface (metal contact surface) facing the back of the Toshiba Pocket PC e750. 4. Press down on the card until it clicks. To remove a card: 1. -
Page 41: Connecting To A Computer
Connecting to a Computer Before connecting your Toshiba Pocket PC to a computer, check the following: ActiveSync has been installed on your computer. (See Chapter 3.) The position of connecting port on the computer may differ according to the computer type. -
Page 42: To Connect Directly Using A Connection Cable
Basic Skills To connect directly using a connection cable: Connect the Pocket PC directly to your computer using an optional USB Client cable. When the Pocket PC is connected to another device via a USB Client cable do not plug the AC adapter directly into the Pocket PC as this may lead to interference. -
Page 43: Today Screen
Today Screen When you turn on your device for the first time each day (or after 4 hours of inactivity), you’ll see the Today screen. You can also display it by tapping and then Today. On the Today screen, you can see at a glance important information for the day. - Page 44 Following are some of the status icons you may see. Status Icon If more notification icons need to be displayed than there is room to display them, the Notification icon, notification icons. User's Manual Meaning Turns all sounds on and off Main battery is charging Main battery is low Main battery is very low...
-
Page 45: Programs
Drag the stylus off the label so that the command is not carried out. The following table contains a partial list of programs that are on your device. Look on the Toshiba Pocket PC Companion CD for additional programs that you can install onto your device. Icon... -
Page 46: Navigation Bar And Command Bar
Navigation Bar and Command Bar The navigation bar is located at the top of the screen. It displays the active program and current time, and allows you to switch to programs and close screens. Use the command bar at the bottom of the screen to perform tasks in programs. -
Page 47: Pop-Up Menus
Pop-up Menus With pop-up menus, you can quickly choose an action for an item. For example, you can use the pop-up menu in the contact list to quickly delete a contact, make a copy of a contact, or send an e-mail message to a contact. -
Page 48: Enter Information On Your Toshiba Pocket Pc
Enter Information on Your Toshiba Pocket PC You have several options for entering new information: Use the input panel to enter typed text, either by using the soft keyboard or other input method Write directly on the screen Draw pictures on the screen... -
Page 49: To Type With The Soft Keyboard
When you use the input panel, your device anticipates the word you are typing or writing and displays it above the input panel. When you tap the displayed word, it is inserted into your text at the insertion point. The more you use your device, the more words it learns to anticipate. -
Page 50: To Use Block Recognizer
To use Block Recognizer: With Block Recognizer you can input character strokes using the stylus that are similar to those used on other devices. 1. Tap the 2. Write a letter in the box. When you write a letter, it is converted to typed text that appears on the screen. -
Page 51: Writing On The Screen
Writing on the Screen In any program that accepts writing, such as the Notes program, and in the Notes tab in Calendar, Contacts, and Tasks, you can use your stylus to write directly on the screen. Write the way you do on paper. You can edit and format what you’ve written and convert the information to text at a later time. -
Page 52: To Convert Writing To Text
To convert writing to text: Tap Tools and then Recognize. If you want to convert only certain words, select them before tapping Recognize on the Tools menu (or tap and hold the selected words and then tap Recognize on the pop-up menu). If a word is not recognized, it is left as writing. - Page 53 If the conversion is incorrect, you can select different words from a list of alternates or return to the original writing. To do so, tap and hold the incorrect word (tap one word at a time). On the pop-up menu, tap Alternates.
-
Page 54: Drawing On The Screen
Drawing on the Screen You can draw on the screen in the same way that you write on the screen. The difference between writing and drawing on the screen is how you select items and how they can be edited. For example, selected drawings can be resized, while writing cannot. -
Page 55: Recording A Message
Recording a Message In any program where you can write or draw on the screen, you can also quickly capture thoughts, reminders, and phone numbers by recording a message. In Calendar, Tasks, and Contacts, you can include a recording in the Notes tab. In the Notes program, you can either create a standalone recording or include a recording in a written note. -
Page 56: Using My Text
Basic Skills Using My Text When using Inbox or MSN Messenger, use My Text to quickly insert preset or frequently used messages into the text entry area. To insert a message, tap My Text and tap a message. Select the message you wish to edit and make desired change. -
Page 57: Find And Organise Information
Find and Organise Information The Find feature on your device helps you quickly locate information. On the data type, and then tap Go to start the search. To quickly find information that is taking up storage space on your Pocket PC, select Larger than 64 KB in Type. You can also use the File Explorer to find files on your device and to organize these files into folders. -
Page 58: Customize Your Toshiba Pocket Pc
*.exe, or *.zip file, a Setup.exe file, or several versions of files for different device types and processors. Be sure to select the program designed for the Toshiba Pocket PC and your device processor type. 3. Read any installation instructions, Read Me files, or documentation that comes with the program. -
Page 59: To Add A Program To The Start Menu
4. Connect your Pocket PC and computer. 5. Double-click the *.exe file. If the file is an installer, the installation wizard will begin. Follow the directions on the screen. Once the software has been installed on your computer, the installer will automatically transfer the software to your device. -
Page 60: Setting A Password
Setting a Password You can protect data or settings from a third person by setting a password which is requested when turning power on. 1. Tap and then Settings. On the Personal tab, tap Password. 2. Select the type of password you would like to use. 3. - Page 61 …or set the Screen light on External power 3. Set the Brightness level. 4. When finished, tap OK to return to the System tab screen. User's Manual Basic Skills Tap and set the Screen light brightness level by move the cursor up or down. If Power Save is activated, the Screen light turns off.
-
Page 62: Setting Power
Setting Power You can set to confirm the battery remaining power and the time that elapses until the power turns off after the last operation. 1. Tap and then Settings. On the System tab, tap Power. 2. Set the Power. 3. - Page 63 4. Select CPU speed tab to set the CPU performance. To conserve battery power, select 200 MHz. Note: this will decrease performance. Tap Apply to change the setting, then the confirmation screen is displayed. If you tap YES, your LCD screen will become black and come back in a few seconds, and then the setting has changed.
-
Page 64: Setting Memory
Setting Memory You can adjust the data storing memory and the program running memory. You can also confirm the free space of a storage card and so on. Memory for the Pocket PC is managed automatically. To change Memory allocation: 1. -
Page 65: Flash Rom Disk (Nand Flash Memory)
Basic Skills Flash ROM Disk (NAND Flash Memory) The Flash ROM Disk (NAND Flash Memory) contains the built-in storage for the Pocket PC. Data, files or programs can be stored on the Flash ROM Disk from the following sources: File Explorer, Pocket Word, Pocket Excel, Notes of Pocket Outlook, and DataBackup. -
Page 66: Setting Advanced Sounds
Setting Advanced Sounds This program allows you to adjust the volume of the built-in speaker and headphone speaker on your Pocket PC. 1. To adjust the system volume, tap Start, Settings, Personal tab, Sounds & Notifications. 2. Tap Start and then Settings. On the System tab, tap Advanced Sounds. -
Page 67: Setting Microphone
Basic Skills 4. If using headphones, select the Headphone tab and make adjustments as shown in the next figure. Setting Microphone This program sets the Automatic Gain Control (AGC). 1. Tap and then Settings. On the System tab, tap Microphone. 2. -
Page 68: Chapter 3 Microsoft Activesync
Add and remove programs on your device. Before you begin synchronization, install ActiveSync on your PC from the Toshiba Pocket PC Companion CD. For more information on installing ActiveSync, see your Quick Start card. ActiveSync is already installed on your device. -
Page 69: Change The Synchronization Schedule
Once you have set up ActiveSync and completed the first synchronization process, you can initiate synchronization from your device. To switch to ActiveSync on your device, tap For information about using ActiveSync on your PC, start ActiveSync on your PC and then see ActiveSync Help. For more information about ActiveSync on your device, switch to ActiveSync, tap Change the synchronization schedule... -
Page 70: Chapter 4 Microsoft Pocket Outlook
TOSHIBA Pocket PC e750 Microsoft Pocket Outlook ® Microsoft Pocket Outlook includes Calendar, Contacts, Tasks, Inbox, and Notes. You can use these programs individually or together. For example, e-mail addresses stored in Contacts can be used to address e- mail messages in Inbox. -
Page 71: Calendar: Scheduling Appointments And Meetings
Calendar: Scheduling Appointments and Meetings Use Calendar to schedule appointments, including meetings and other events. You can check your appointments in one of several views (Agenda, Day, Week, Month, and Year) and set Calendar to remind you of appointments with a sound or other method. You can customize the Calendar display, such as changing the first day of the week, by tapping Options on the Tools menu. -
Page 72: To Create An Appointment
To create an appointment 1. If you are in Day or Week view, tap the desired date and time for the appointment. 2. Tap New. 3. Using the input panel, enter a description and a location. Tap first to select the field. 4. -
Page 73: Using The Summary Screen
Using the Summary Screen When you tap an appointment in Calendar, a summary screen is displayed. To change the appointment, tap Edit. Creating Meeting Requests You can use Calendar to set up meetings with users of Outlook or Pocket Outlook. The meeting request will be created automatically and sent either when you synchronize Inbox or when you connect to your e-mail server. -
Page 74: Contacts: Tracking Friends And Colleagues
Contacts: Tracking Friends and Colleagues Contacts maintains a list of your friends and colleagues so that you can easily find the information you’re looking for, whether you’re at home or on the road. Using the device infrared (IR) port, you can quickly share Contacts information with other device users. -
Page 75: To Create A Contact
To create a contact: 1. Tap New. 2. Using the input panel, enter a name and other contact information. You will need to scroll down to see all available fields. 3. To assign the contact to a category, scroll to and tap Categories and select a category from the list. -
Page 76: Finding A Contact
Finding a contact There are four ways to find a contact: , then Find, enter the contact name (first, last, or middle), phone number, or address, select Contacts for the type, and then tap From Contacts, start typing a contact name until you see it displayed on the screen. -
Page 77: Tasks: Keeping A To Do List
Tasks: Keeping a To Do List Use Tasks to keep track of what you have to do. To change the way information is displayed in the list, tap Tools and then Options. To create a task: 1. Tap New. User's Manual Microsoft Pocket Outlook Select the category of tasks you want displayed in the list. -
Page 78: Using The Summary Screen
2. Using the input panel, enter a description. 3. You can enter a start date and due date or enter other information by first tapping the field. If the input panel is open, you will need to hide it to see all available fields. 4. -
Page 79: Notes: Capturing Thoughts And Ideas
Notes: Capturing Thoughts and Ideas Quickly capture thoughts, reminders, ideas, drawings, and phone numbers with Notes. You can create a written note or a recording. You can also include a recording in a note. If a note is open when you create the recording, it will be included in the note as an icon. -
Page 80: To Create A Note
To create a note: 1. Tap New. 2. Create your note by writing, drawing, typing, and recording. For more information about using the input panel, writing and drawing on the screen, and creating recordings, see Chapter 2. User's Manual Microsoft Pocket Outlook Tap to return to the note list (the note is saved automatically). -
Page 81: Inbox: Sending And Receiving E-Mail Messages
Inbox: Sending and Receiving E-mail Messages Use Inbox to send and receive e-mail messages in either of these ways: Synchronize e-mail messages with Microsoft Exchange or Microsoft Outlook on your PC. Send and receive e-mail messages by connecting directly to an e-mail server through an Internet Service Provider (ISP) or a network. -
Page 82: Using The Message List
Using the Message List Messages you receive are displayed in the message list. By default, the most recently received messages are displayed first in the list. When you receive a message, tap it to open it. Unread messages are displayed in bold. User's Manual Microsoft Pocket Outlook Select the service and folder you want to display. -
Page 83: Composing Messages
When you connect to your e-mail server or synchronize with your computer, by default, you’ll receive messages from the last five days only, the first 100 lines of each new message, and file attachments of less than 100 KB in size. The original messages remain on the e-mail server or your computer. -
Page 84: Managing E-Mail Messages And Folders
3. Compose your message. To enter preset or frequently used messages, tap My Text and select a message. 4. Tap Send when you’ve finished the message. If you are working offline, the message is moved to the Outbox folder and will be sent the next time you connect. -
Page 85: Toshiba Pocket Pc E750
TOSHIBA Pocket PC e750 Companion Programs The companion programs consist of Microsoft Pocket Excel, MSN Messenger, Windows Media™ Player for Toshiba Pocket PC, Microsoft To switch to a companion program on your device, tap Programs on the menu, and then tap the program name. - Page 86 Pocket Word contains a list of the files stored on your device. Tap a file in the list to open it. To delete, make copies of, and send files, tap and hold a file in the list. Then, select the appropriate action on the popup menu. You can enter information by working in different modes, which you select from the View menu.
-
Page 87: Typing Mode
Typing Mode Using the input panel, enter typed text into the document. For more information on entering typed text, see Chapter 2. To format existing text and to edit text, first select the text. You can select text as you do in a Word document, using your stylus instead of the mouse to drag through the text you want to select. -
Page 88: Writing Mode
Writing Mode In writing mode, use your stylus to write directly on the screen. Ruled lines are displayed as a guide, and the zoom magnification is greater than in typing mode to allow you to write more easily. For more information on writing and selecting writing, see Chapter 2. -
Page 89: Drawing Mode
Drawing Mode In drawing mode, use your stylus to draw on the screen. Gridlines appear as a guide. When you lift your stylus off the screen after the first stroke, you’ll see a drawing box indicating the boundaries of the drawing. Every subsequent stroke within or touching the drawing box becomes part of the drawing. -
Page 90: Pocket Excel
Pocket Excel Pocket Excel works with Microsoft Excel on your computer to give you easy access to copies of your workbooks. You can create new workbooks on your device, or you can copy workbooks from your computer to your device. Synchronize workbooks between your computer and your device so that you have the most up-to-date content in both locations. -
Page 91: Tips For Working In Pocket Excel
Tips for Working in Pocket Excel Note the following when working in large worksheets in Pocket Excel: View in full-screen mode to see as much of your worksheet as possible. Tap View and then Full Screen. To exit full-screen mode, tap Restore. -
Page 92: Setting Up
Setting Up Before you can use MSN Messenger, you must set up the instant mes- saging account(s) to use. For MSN Messenger Service, you must have a Microsoft Passport or Hotmail account. For Exchange Instant Messaging, you must have an Exchange account. To set up an account and sign in: 1. -
Page 93: Chatting With Contacts
To see others online without being seen, in the Tools menu, tap My Status and select Appear Offline. If you block a contact, you will appear offline but will remain on the blocked contact’s list. To unblock a contact, tap and hold the contact, then tap Unblock on the pop-up menu. - Page 94 To know if the contact you are chatting with is responding, look for the message under the text entry area. For more information on using MSN Messenger, tap User's Manual Companion Programs View full chat. View status of the chat. and then Help.
-
Page 95: Windows Media Player
Media. Use Microsoft Windows Media Player on your computer to copy digital audio and video files to your Toshiba Pocket PC. You can play Windows Media and MP3 files on your Toshiba Pocket PC. For more information about using Windows Media Player for Toshiba... -
Page 96: Microsoft Reader
Sample books and a dictionary are also included in the MSReader folder in the Extras folder on the Toshiba Pocket PC Companion CD. Use ActiveSync to download the files from your computer to your activated device as described in the Read Me file in the Microsoft Reader folder. -
Page 97: Using The Library
Using the Library The Library is your Reader home page; it displays a list of all books stored on your device or storage card. To open the Library: On the Reader command bar, tap Library. On a book page, tap the book title, and then tap Library on the popup menu. -
Page 98: Reading A Book
Reading a Book Each book consists of a cover page, an optional table of contents, and the actual pages of the book. Navigation options are listed in the bottom portion of the cover page. The first time you open a book, you will probably want to go to the first page or to the table of contents, if there is one. -
Page 99: Using Reader Features
Using Reader Features Reading a book electronically gives you several options not available with paper books. These options are available on any book page. Select text by dragging across the text on the page. Then, tap an option on the pop-up menu, as described here: Search for Text: Find text in a book by tapping Find on the pop-up menu. -
Page 100: Pictures
Pictures You can use Pictures to view .jpg pictures stored on your device or on a storage card, send pictures to others, view a slideshow of your pictures, or set a picture as the background on the Today screen. Edit Pictures You can rotate, crop, zoom, and adjust the brightness and color contrast of your .jpg pictures. -
Page 101: Set Picture As Background
Set Picture as Background You can use one of your own .jpg pictures as the background on the Today screen, and specify how you want it displayed on the screen, such as adjusting the transparency level. 1. In Pictures, tap the picture you want to set as the background. 2. -
Page 102: Chapter 6 Pocket Internet Explorer
TOSHIBA Pocket PC e750 Pocket Internet Explorer Use Microsoft either of these ways: During synchronization with your computer, download your favorite links and mobile favorites that are stored in the Mobile Favorites subfolder in Internet Explorer on the computer. Connect to an Internet service provider (ISP) or network and browse the Web. -
Page 103: Mobile Favorites
Mobile Favorites If you are using Microsoft Internet Explorer 5.0 or later on your computer, you can download mobile favorites to your device. Synchronizing mobile favorites downloads Web content to your device so that you can view pages while you are disconnected from your ISP and computer. Use the Internet Explorer plug-in installed with ActiveSync to create mobile favorites quickly. -
Page 104: To Save Device Memory
To save device memory Mobile favorites take up storage memory on your device. To minimize the amount of memory used: In the settings for the Favorites information type in ActiveSync options, turn off pictures and sounds, or stop some mobile favorites from being downloaded to the device. -
Page 105: Using Pocket Internet Explorer
Using Pocket Internet Explorer You can use Pocket Internet Explorer to browse mobile favorites and channels that have been downloaded to your device without connecting to the Internet. You can also connect to the Internet through an ISP or a network connection and browse the Web. -
Page 106: To Browse The Internet
2. Tap the page you want to view. You’ll see the page that was downloaded the last time you synchronized with your computer. If the page is not on your device, the favorite will be dimmed. You will need to synchronize with your computer again to download the page to your device, or connect to the Internet to view the page. -
Page 107: Chapter 7 Getting Connected
TOSHIBA Pocket PC e750 Getting Connected You can use your device to exchange information with other mobile devices as well as your computer, a network, or the Internet. You have the following connection options: Use the infrared (IR) port on your device to send and receive files between two devices. -
Page 108: Transfer Items Using Infrared
Transfer Items Using Infrared Using infrared (IR), you can send and receive information, such as contacts and appointments, between two devices. To send information: 1. Switch to the program where you created the item you want to send and locate the item in the list. 2. -
Page 109: To Create A Modem Connection To An Isp
To create a modem connection to an ISP: 1. Obtain the following information from your ISP: ISP dial-up access telephone number, user name, password, and TCP/IP settings. Some ISPs require information in front of the user name, such as MSN/username. 2. -
Page 110: Connect To Work
To create an Ethernet connection to an ISP: 1. You do not need to create a new connection on your device. Instead, you must purchase and configure an Ethernet card that is compatible with your device. 2. Obtain the following information from your ISP: user name, password, and domain name. -
Page 111: To Create An Ethernet Connection To A Network
6. In the Select a modem list, tap your modem type. If you are using any type of external modem, in the Select a modem list, select the modem by name. If a listing does not exist for your external modem, tap Hayes Compatible on COM1. - Page 112 5. If you need to enter specific server information, tap the appropriate adapter. Most networks use DHCP, so you should not have to change these settings unless your network administrator instructs you to do 6. If necessary, connect the network card to the network by using a network cable.
-
Page 113: End A Connection
To edit proxy settings: 1. Tap > Settings > Connections tab. 2. To change proxy server settings, in My Work Network, tap Edit my proxy server. 3. Select This network connects to the Internet and This network uses a proxy server to connect to the Internet. 4. -
Page 114: Connect Directly To An E-Mail Server
Connect Directly to an E-mail Server You can set up a connection to an e-mail server so that you can send and receive e-mail messages by using a modem or network connection and Inbox on your device. The ISP or network must use a POP3 or IMAP4 e-mail server and an SMTP gateway. -
Page 115: Chapter 8 Wi-Fi (Ieee 802.11B) Wireless Lan
The IEEE 802.11b WLAN Adapter can connect your Toshiba Pocket PC e750/e755 wirelessly to an existing IEEE 802.11b wireless network or from its own Wireless Network. Using the adapter in the Toshiba Pocket PC e750/755, you can enjoy the complete mobile and high-speed wire- less Internet connectivity while in range of a Wi-Fi compatible access point. -
Page 116: Join To Existing Network
Join to Existing Network Pocket PC2003 has a interface that enables you to join to a existing net- work. If Pocket PC2003 detects a wireless network, it will show the above menu. Also, if you join to encrypted network(s), Pocket PC2003 will require entering a Network (WEP) key. -
Page 117: Turn Off/On Wireless Lan Connection
Turn Off/On Wireless LAN connection If you want to turn off/on the wireless LAN, tap the arrows icon on the navigation bar and launch the Connectivity window. If you tap the "Turn Wireless off/on"" link on the window you can turn off/on the wireless LAN module Power Off/On Wireless LAN modules TMU (Traffic Monitor Utility) supplies Wireless power off/on function. -
Page 118: Ip Address
IP Address IP Address Page Use IP Address Page to view and edit the IP address, Subnet mask and Default gateway. Click Connectivity (Arrows) icon > Settings > Advanced > Network Card > Network Adapters > "IEEE 802.11b WLAN Adapter" You can also launch that Start >... -
Page 119: Name Servers Page
Name Servers Page Use Name Servers Page to view and edit DNS, Alt DNS, WINS and Alt WINS. Click Connectivity (Arrows) icon > Settings > Advanced > Network Card > Network Adapters > "IEEE 802.11b WLAN Adapter" > Name Servers You can also launch that Start >... -
Page 120: Alt Dns
Alt DNS Alt DNS stands for Alternative Domain Name System. Used to substitute main DNS when necessary. Alt WINS Alt WINS stands for Alternative Windows Internet Naming Service. Used to substitute main WINS when necessary. Wireless LAN Configuration Set up a wireless network Networks that you have already configured are preferred networks and are listed in Wireless networks. -
Page 121: Configure Wireless Network
To connect only to networks you have already configured, clear Automatically connect to non-preferred networks. To change the network to connect listed in preferred network, tap and hold a network that you want to connect and select "Connect" from menu. To delete network listed in preferred network, Tap and hold a network that you want to delete and select "Remove Settings"... -
Page 122: Configure Network Authentication Screen
Configure Network Authentication Screen A wireless network can be added either when the network is detected, or manually by entering settings information. To determine if authentication Information is needed see your network administrator Data encryption (WEP Enabled) Click here to enable data encryption. The Key is provided for me automatically: Check here if you can obtain WEP key automatically from AP. -
Page 123: Tmu-Traffic Monitoring Utility
Enable network access using IEEE 802.1X: Check here to enable 802.1x validation function. EAP type: Select protocol for using 802.1x validation function. TLS (EAP-TLS) Protocol used by Windows 2000 Server etc. PEAP Protocol use by Windows .NET Server 2003 etc. Please ask your network administrator for further details of the 802.1x val- idation procedure. -
Page 124: Manager Screen
Manager Screen Enable Wireless LAN Indicator: If you check this, the wireless LAN indicator is displayed in the navigation bar. Transmission Rate: Select transmission rate to be used from the pull-down menu. If you select "Fully Auto", the adapter is automatically set to the most suitable transmission rate. -
Page 125: Link Screen
Wi-Fi (IEEE 802.11b) Wireless LAN Link Screen Link Quality: Link Quality shows quality of wireless LAN signal. Link Information: Link Informaiton shows some informaion about your wirless LAN adapter. User's Manual 8-11... -
Page 126: Info Screen
SSID: Displays the SSID currently connected to the access point or 802.11 ad hoc network. Channel: The number of the channel being used by the access point or 802.11 ad hoc network. Tx Rate: Displays the transmission rate used. BSSID: Displays the BSSID set on the access point or 802.11 ad hoc network. -
Page 127: Toshiba Enroller
Toshiba Enroller Configure "Toshiba Enroller", the tool for obtaining and administering cer- tificates used for 802.1x validation. Please ask your network administrator for configuration details. Certificate for TLS User: Enter the user name of the person obtaining the client certificate. -
Page 128: Rootcert Page
RootCert Page Open Certificate: Opens the root certificate. When the root certificate is opened,the person it has been issued to, the persons issued by, and the period of validity will be displayed. The root certificate is provided by the cer file. -
Page 129: Manage Page
Manage Page Property: Displays Information on certificates obtained. Delete: Deletes certificates. Please use the greatest possible care when deleting certificates. When using EAP-TLS, one client certificate and one root certificate are required as a minimum. When using PEAP, one root certificate is required as a minimum. -
Page 130: Advanced Page
Advanced Page Requested Page: Part of URL to be accessed when obtaining client certificates. Cert Template: Template used when obtaining client certificates. Cert Attribute: Attribute used when obtaining client certificates. Certificate for TLS: If you check here, Obtain ClientCert and RootCert simultaneously. Under normal circumstances configuration is not needed unless requested by your network administrator. -
Page 131: Toshiba Certificate Import Wizard
Toshiba Certificate Import Wizard Toshiba Certificate Import Wizard helps you obtain certificates from net- work or disk to certificate store more easily. Toshiba Certificate Import Wizard requires ActiveSync environment to obtain certificate from server. Please prepare the Cradle and PC that can connect to Certification Authority (CA) Server. -
Page 132: Example: Obtain Tls Certificate From Server (1)
Wi-Fi (IEEE 802.11b) Wireless LAN Example: Obtain TLS Certificate from server (1) Obtaining a certificate for TLS always requires an ActiveSync connection. Please place your PDA into the cradle and tap "Next >" button. After tap- ping, if there are any problems about active syncing. Wizard will pop-up the problem. -
Page 133: Example: Obtain Tls Certificate From Server (2)
Example: Obtain TLS Certificate from server (2) You have to enter your user name, password, and CA server name (or IP) to obtain certificates from server. After filling parameters, tap the "Next >" button, If there is something wrong with the parameters, Wizard will pop- up the problem. -
Page 134: Example: Obtain Peap Certificate From A File (1)
Wi-Fi (IEEE 802.11b) Wireless LAN Example: Obtain PEAP Certificate from a file (1) If your network supports PEAP authentication you can obtain certificate from file. At this case, you'll try to obtain certificate via file. If you choice "From network" You will take same steps as obtaining certificate of TLS. -
Page 135: Example: Obtain Peap Certificate From A File (2)
Please choose certificate from file. Certificate file should be provided from you network administrator. If you don't have that, please contact to your network administrator. Toshiba Certificate Import Wizard supports only DER encoded root certifi- cate. If you try to import other format certificate file, Wizard will pop-up the error. -
Page 136: Example: Obtain Peap Certificate From A File (3)
Wi-Fi (IEEE 802.11b) Wireless LAN Example: Obtain PEAP Certificate from a file (3) If you succeeded in obtaining the Certificate from the server, the certifi- cate that you got will show up on the screen like the figure above. Since PEAP authentication doesn't require client certification, the wizard will not show information about client certification. -
Page 137: Chapter 9 Bluetooth
This section describes only Toshiba Bluetooth software. Specifications By enabling the Bluetooth device on your Toshiba Pocket PC, you will be able to wirelessly communicate with Bluetooth-enabled PC's, modems and other peripherals, and chat with other Toshiba Pocket PC's. -
Page 138: Major Specifications
(owner information) Schedule Task 1. Approx. 7,600 characters for Toshiba Pocket PCs with the Microsoft Pocket PC 2002/2003 operating system. Depending on the specifications of the device to which you are connected, sent and received data may not be properly stored in the respective device. -
Page 139: Bluetooth Settings
Bluetooth Settings Enabling Bluetooth on Your Toshiba Pocket PC. Enable Bluetooth on the Toshiba Pocket PC using the "Wireless Communication Switch". The Bluetooth Settings screen will appear. The Bluetooth Settings screen will also appear when the power is turned on using one of the program buttons. -
Page 140: Advanced Settings
Security On. If you want to set the Connectability Mode to Non-connectable and you are operating your Toshiba Pocket PC in an environment in which there are three or more operating Bluetooth devices, you should also set the Discoverability Mode to Non-discoverable. -
Page 141: Preparing To Connect With Bluetooth
Refer to the following for additional operations. To use COM service To use DUN/LAP service To use OPP service To use FTP service Even if icon of Bluetooth program was lost from program menu, it can be recovered automatically. please execute following program using explorer, if you need. - Page 142 Once the search is completed, the remote device list will be updated with the latest remote device information. 3. Tap and hold on the name of the device to which you want to connect, then tap Update Service on the popup menu. The Bluetooth Authentication screen appears on Local Device.
- Page 143 Bluetooth If the Security Mode on either Local Device or the remote device is set to Security On, authentication is performed to confirm the remote device when connecting. If either device has already been authenticated or the Security Mode on either Local Device or the remote device is set to Non-secure, the Bluetooth Authentication screen does not appear.
-
Page 144: Using Com Service
Preparations The computer to which you want to connect must be Bluetooth enabled and have ActiveSync installed. Your Toshiba Pocket PC must also have been synchronized with the PC using a cradle or a cable at least once to establish a "partnership' to the PC. -
Page 145: Using Dun/Lap Service
The screen closes and the Today screen appears. For further operations, please refer to "Accessing the Internet" and "Sending and Receiving E-mail" in the user's guide of your Toshiba Pocket PC. When you disconnect from or exit the Internet or your e-mail application, the Bluetooth connection is also terminated. -
Page 146: Sending A Contact
Sending a contact 1. Tap Start and Contact, then tap and hold on the contact you want to send. A popup menu appears. You can select multiple contacts by dragging them. You can also send a contact by tapping the Tools menu. 2. -
Page 147: Sending A Schedule
Sending a schedule 1. Tap Start and Schedule, then tap and hold on the schedule that you want to send. A popup menu appears. You can also send a schedule by tapping the Tools menu. 2. Tap Send by BT on the popup menu. The device search screen appears. -
Page 148: Exchanging Business Cards
Exchanging business cards 1. Tap Start > Contact > Tools menu. 2. Tap Exchange by BT. The device search screen appears. 3. Select View All Devices and tap Device Search. The device list appears. 4. Select the device to which you want to connect by tapping the device name, then tap Connect. -
Page 149: Using Ftp Service
Using FTP Service This section explains how to use FTP service to transfer files to and from another Toshiba Pocket PC. Starting Bluetooth FTP 1. Tap Start > Programs > Bluetooth FTP. The server selection screen appears. 2. Tap Search. -
Page 150: Sending A File
Sending a file 1. In the Local Device window, tap and hold on the folder or file that you want to send. A popup menu appears. Tap on the file to start the associated application. You can also send a file by dragging that file to the remote device window. -
Page 151: Ftp Authentication Setting On Bluetooth Ftp Server
FTP Authentication setting on Bluetooth FTP server 1. Tap Start > Programs > Bluetooth FTP.Server 2. Tap Tools on command bar. 3. Tap Options on Tools menu. The OBEX Authentication screen appears. You can enter the FTP password. The FTP password is not registered in initial setting. Before using it, we recommend you to set up the FTP password. -
Page 152: The Bluetooth Settings Screen
Tap Tools on the command bar to display the Tools menu. Searching for peripheral devices When you tap Devices Search on the Tools menu, the Toshiba Pocket PC searches for Bluetooth devices in the vicinity while a message is displayed on the screen indicating that the local device is searching for peripheral devices. -
Page 153: View Menu
Deleting ghost devices Tap Delete Ghost Device on the Tools menu to delete all devices displayed in the device list as ghosts. View menu Tap View on the command bar to display the View menu. Details Tap Details on the command bar to display the device names in the device list. - Page 154 Device. It is recommended that you set the Security Mode to Security On. If you want to set the Connectability Mode to Non-connectable and you are operating your Toshiba Pocket PC in an environment in which there are three or more operating Bluetooth devices, you should also set the Discoverability Mode to Non-discoverable.
-
Page 155: Version Information
Tap Local Device on the Options menu to display the Device Information screen for Local Device. The default device name is Toshiba BT. To change the name of the device, enter a new name in the Device Name box and tap OK. -
Page 156: Chapter 10 Optional Functions
Launching an Application From the Home , Programs, and then Home to display the Home screen. You can also launch the Home by pressing the Toshiba Pocket PC Home button. Tap to select Paste or Add. -
Page 157: About Running
Also, you can launch an application by moving the cursor button or scroller to select and pressing the center of the cursor button to confirm. You can add tabs up to a maximum of 10 kinds and icons up to 18 in a tab. -
Page 158: Display Icon List
Display Icon List The following list shows the tabs and icons for the initial setup. Tabs Running Main Programs Games Moving an Application Icon into Another Tab The moved icon is placed next to the last icon on the tab screen. You cannot move an icon into a tab which already contains 18 icons. -
Page 159: Deleting An Icon
If the Application file is not designated, or if the Application name is not entered, you cannot add a new icon. You cannot launch the icon added from the storage card, if the same card is not inserted in the Toshiba Pocket PC. User's Manual Optional Functions Tap to designate a folder you want to browse. -
Page 160: Tab Setting
Tab Setting You can set to add, delete or rename the tab on the Tab Settings screen. You can also set to display a desired image on your screen background. To add a tab: 1. Tap Tools and then Tab Settings to display the Tab Settings screen. 2. -
Page 161: Text Colour Setting
Text Colour Setting: You can set the colour of application name for each tab using Text Color. 1. Tap the tab whose colour you want to set to display the selected tab screen. 2. Tap View and then Text Color to display the color list. You can set the colour of the application name as desired. -
Page 162: Icon Settings
Icon settings 1. Moving icons (using the pop-up menu) 1. Tap and hold the icon you want to move on the tab screen. 2. When the pop-up menu appears, select Cut from the menu. 3. Tap on the tab to which you want to move the icon, then tap Paste from the Edit menu to move the icon and display it on the tab screen. -
Page 163: Tab Settings
4. Browse Dialog 1. Tap the Folder box to select the folder to be browsed. 2. Tap the Type box to select the type of file to be browsed. 3. The list of the files of the specified type and in the specified folder appears on the screen. - Page 164 4. Adding tabs 1. Select Tab Settings from the Tools menu. The Tab Settings screen appears. 2. Tap the New button. An input screen appears. 3. Input the name you want to give the tab (up to 10 characters) into the New tab box.
-
Page 165: How To Make A Backup
How to Make a Backup You can make a backup of the Toshiba Pocket PC data to the storage device. If you have backed up your data on the storage device, you can restore that data in your Toshiba Pocket PC. You can also delete backup file data from the storage device. -
Page 166: Making A Backup
6. Tap OK to return to the previous screen. If the available storage device capacity is inadequate to contain the data from the e750, the backup process stops. Check the storage device capacity before starting the backup. If the CF/SD card is write protected, you cannot save the backup data. -
Page 167: Carrying Out The Restore Operation
If the same file name exists in the main memory of your Toshiba Pocket PC e750, the file data is replaced with the backup data from the storage device. If files exist in the main memory but not in the backup file, they will not be overwritten. - Page 168 9. Tap OK. Your Toshiba Pocket PC e750 is reset and restarts automatically. The data backup in Pocket PC 2002 can not be restored to Pocket PC 2003 by DataBackup. User's Manual Optional Functions Press to delete. Press to refresh.
-
Page 169: System Information
System Information The System Information program displays the system information such as CPU clock, CPU stepping, Boot Loader Version, OS Version, PIC Version, MAC address (WirlessLAN model only), and UUID. The information is displayed by accessing the Identity, Memory, Drivers, System, and Wireless tabs. -
Page 170: Memory Tab
Memory tab The Memory tab presents information about the systems RAM, ROM, and Flash ROM Disk. Driver tab The Driver tab displays the drivers used by the system’s software applications. User's Manual Optional Functions 10-15... -
Page 171: System Tab
System tab The System tab displays CPU, operating system, and other system information. Wireless tab The Wireless tab displays information about the Built-in Wireless LAN adapter. User's Manual Optional Functions 10-16... -
Page 172: Tools Menu
Optional Functions Tools Menu The Tools menu displays the system information and allows it to be exported to a text (*.txt) file. “Export” exports all system information parameters to a text (*.txt), and “About” displays the system information version. User's Manual 10-17... -
Page 173: Chapter 11 Ati Presentation Pack
Pocket PC. IA Presenter can run as a standalone mobile PowerPoint player using your portable device’s LCD screen. But with IA Presenter and the Toshiba Expansion Pack linked to an LCD projector or a monitor, you can create powerful presentations from your Pocket PC. -
Page 174: Installing The Ati Presentation Pack
The Options... command on the Tools Menu opens the General, File, Dis- play, and VGA Output tabs. These tabs are explained in the on-line Help file, which can be accessed from the Tools Menu by tapping Help... Or, after opening one of the tabs, select Help from the Windows Start Menu. Installing the ATI Presentation Pack All components of the ATI Presentation Pack are installed together by doing as follows:... -
Page 175: Choosing Dimensions For The Converted .Iap File
Choosing Dimensions for the Converted .IAP File The conversion filter supports both PPT and PPS PowerPoint files. The conversion options are: Pocket PC LCD Size – 320 x 240: Select this option if you only want to display the presentation on the LCD screen of your Pocket PC. However, if you have tried the 320 x 240 button and then find that images on the Pocket PC screen have been “stretched”... -
Page 176: Slide Sorter
You can project the currently selected slide to VGA Display by activating the VGA Slide Toggle command on the View Menu, or by tapping the VGA Slide Output Toggle icon at the rightmost side of the Toolbar. To end the projection, select the command again to toggle it off. Slide Sorter Slide Sorter view fills the entire application space with either large or small thumbnails, depending on whether Large Thumbnail or Small... -
Page 177: Notes Page
Notes Page Notes Page view displays the current slide content in the upper pane, with the lower pane displaying the speaker notes that were entered for the original PowerPoint presentation, or entered/edited in IA Presenter. The upper pane operation is the same as in Normal view. The lower pane is both a Notes display window and an editing window. - Page 178 ATI Presentation Pack Pop-Up Menu for Slide Show Mode If the Show Popup-Menu Button option is checked in the Tools > Options > Display tab, a small transparent icon will be shown in the upper left corner of the LCD screen. Tapping on the small icon will activate the Slide Show mode’s pop-up control menu.
- Page 179 ATI Presentation Pack VGA Zoom This mode works only when IA Presenter is in VGA Slide Show view. After you select the VGA Zoom mode, you will be able to specify a portion of the screen which will be projected to the VGA screen, and also a zoom ratio for that specific area.
- Page 180 ATI Presentation Pack VGA Zoom Ratio The VGA Zoom Ratio command opens a submenu of pre-defined “zoom ratio” options. When you invoke VGA Zoom mode by selecting it on the pop-up menu, the current setting on the VGA Zoom Ratio submenu will be activated.
-
Page 181: Vga Slide Show
End Show This command terminates the Slide Show playback mode and returns to the mode you were using prior to entering Slide Show mode. The Action button on your Pocket PC can also be used to exit Slide Show mode. VGA Slide Show VGA Slide Show mode operates almost identically to the Slide Show mode, except for the following operational differences:... -
Page 182: Controlling Transition Effects
Controlling Transition Effects Any transition effects that were assigned in your original PowerPoint file will be retained when the IA Presenter Converter converts it to an .iap file on your Pocket PC. However, IA Presenter also furnishes many attractive transition effects that can be assigned to the .iap file. -
Page 183: Ia Screen Mirror
IA Screen Mirror IA Screen Mirror projects an exact emulation of your mobile device’s screen contents (LCD display) onto a connected external VGA output device or television monitor via the Composite video or S-video terminals. It allows you to project and display multiple LCD screens on the VGA screen simultaneously, “freeze”... -
Page 184: Copyright And Contact Information
Copyright and Contact Information ® and IMAGEON ® Microsoft , Windows Windows CE™ is a trademark, of Microsoft . ® IA Album , IA Presenter of IA Style, Inc., and Information In Action™ is a trademark of IA Style, Inc. The names of other actual companies, products, and brand names mentioned herein may be trade names, service marks, trademarks, or registered trademarks of their respective owners. -
Page 185: Chapter 12 Additional Information
TOSHIBA Pocket PC e750 Additional Information Troubleshooting Check the following guide for the possible cause of a problem and how to correct it. Symptom Cause Even if the power The battery power is button is pressed the exhausted. power does not turn on. - Page 186 The screen is dark. The screen is hard to see. Cannot connect to your computer. ActiveSync does not function when your Toshiba Pocket PC is connected to your computer with a cradle or USB cable. Cannot access the Internet. User's Manual...
- Page 187 Symptom Following message is displayed: “NOT ENOUGH BATTERY POWER. USB devices can not be used. Because PDA's battery power is low.” Following message is displayed: "TOO MUCH USB CONNECTION " "Connecting USB devices are too much." Following message is displayed: “USB OVER CURRENT DETECT USB device is turned off.
-
Page 188: Resetting
Reset is equivalent to "Restarting" of a computer. Reset your Pocket PC when a button or tapping the screen does not respond. When your Toshiba Pocket PC is reset, all data that was not stored during operation will be deleted. Stored data will be saved. -
Page 189: Troubleshooting For Wi-Fi
Troubleshooting for Wi-Fi If you encounter some problems while using our product, please refer to this troubleshooting section Symptom Cannot connect to the network The host computer cannot wirelessly connect with my Pocket PC? Cannot edit the "Channel" and "Country" field in "Infrastructure"... -
Page 190: Appendix A Specifications
User's Manual Appendix A 80mm x 16mm x 125mm (W x D x H) 196.5g Humidity: 30 to 80% RH, when only the Toshiba Pocket PC is operating Temperature capable of charging: 5°C (41°F) to 40°C (104°F) Lithium Ion battery ®... - Page 191 Interfaces DC-IN Headphone Microphone SD card slot Cradle connection port Audio Accessories Although the display is manufactured using an extremely high order of technology, there may be a case that some dots do not light or always light. It is not a malfunction. User's Manual 3.5mm, stereo mini plug compatible Integrated with 3.5mm stereo mini plug...
-
Page 192: Appendix B Faq For Wi-Fi
TOSHIBA Pocket PC e750 FAQ for Wi-Fi A. Compatibility A1: Should I useequipment with the same brand as the IEEE802.11b WLAN Adaptor’s to enable the wireless communication? This is not necessary. IEEE802.11b WLAN Adaptor is Wi-Fi certified which means that it will work well with different branded equipment as long as the equipment is also Wi-Fi certified. - Page 193 B2: How can I connect my Pocket PC to the usable Wireless Network? Please click Start > Settings > System > Wireless LAN Utility > Scan to view Scan Page where you can find the usable Wireless Network. If you cannot see all the networks you are expecting, please click “Rescan”...
- Page 194 B4: What is 802.11 Ad Hoc Network? What should I do to form an 802.11 Ad Hoc Network? 802.11 Ad Hoc Mode is used to create a peer-to-peer connection without an Access Point. The SSID must be the same among stations to enable the wireless communication within the local area network.
- Page 195 3. Set your Pocket PC as 802.11 Ad Hoc Mode and choose the same SSID to join the 802.11 Ad Hoc Network (choose the DHCP to get the IP assigned). 4. Check and make sure the Wireless LAN Adaptor in the 802.11 Ad Hoc Network have the same IP group.
- Page 196 C2: How do I wirelessly browse the Internet? 1. If your network uses DHCP (Dynamic Host Configuration Protocol), an IP address and DNS (or WINS) will be assigned automatically. On your Pocket PC, simply click Start > Setting > Connections > Network Adaptors >...
- Page 197 FAQ for Wi-Fi D. Settings D1: What is SSID? What should I set in the SSID field? SSID stands for Service Set Identification, which is the ID to form the Wireless Network. You can set up to 32 characters in the SSID field. For the Infrastructure Mode, you should set the SSID the same as the Access Point been connected with.
- Page 198 E. Security E1: What is WEP? WEP stands for Wired Equivalent Privacy, a security service, used to prevent the unauthorized access to your wireless network. E2: How many WEP security service modes does my Wireless LAN support? WEP stands for Wired Equivalent Privacy that is the security service for the Wireless Network.
- Page 199 F3: How does the data transmission rate work? IEEE802.11b WLAN Adaptor allows you to choose one of the six data rate options: Fixed 1Mbps, Fixed 2Mbps, Fixed 5.5Mbps, Fixed 11 Mbps, Auto Select 1 or 2 Mbps, and Fully Auto. The farther the distance between two communicating devices, the slower the data rate should be used.
-
Page 200: Appendix C Error Messages For Bluetooth
Unable to retrieve Local Device information due to insufficient mem- ory. Check the amount of available memory. Solution Reset the Toshiba Pocket PC, increase the memory, and then restart Bluetooth Settings. Remote device search failed due to insufficient memory. Check the amount of available memory. - Page 201 Unable to delete remote device. Solution Try deleting the remote device again or reset the Toshiba Pocket PC. The device name that you entered exceeds the maximum byte count of 248 bytes. Enter a different device name. Cause The name of Local Device exceeds 248 bytes after UTF-8 code conversion.
- Page 202 Display the service list again. Unable to register connection information. Solution Close Bluetooth Settings, turn off the power of the Toshiba Pocket PC, and then turn the power on again, or reset the Toshiba Pocket PC. Unable to retrieve connection information.
- Page 203 Bluetooth Settings has not been started. Cause The Bluetooth Settings program has not been started because a Bluetooth device's power is not on in the Toshiba Pocket PC. Solution Check the wireless switch to on position. And turn on Bluetooth power from utility.
- Page 204 Cause The memory capacity was insufficient because a buffer could not be allocated. Solution Shut down other operating programs or reset the Toshiba Pocket PC. Unable to retrieve device information. Unable to send business card. Unable to receive business card.
- Page 205 Error messages during FTP service The FTP server could not be started because the FTP client is operating. Cause A request to start the Bluetooth FTP server was received from a peripheral device while the Bluetooth FTP client is operating on Local Device.
- Page 206 Enter the folder name. Cause After creating or changing a folder, either nothing has been entered for the name or the name consists of spaces or begins with a period. Solution Enter a correct folder name. The following characters cannot be used in the folder name. \ / ; , : * ? "...
- Page 207 Local Device was unable to search for peripheral devices. Solution Try the operation again. Bluetooth Settings cannot be started. Cause The Bluetooth may not be enabled in the Toshiba Pocket PC. Solution Perform the steps to start Bluetooth Settings. (Folder name) does not exist. Cause The folder that you tried to locate in Local Device does not exist.
-
Page 208: Appendix D Glossary For Bluetooth
Each Bluetooth SD Card has a unique device address that is listed on the card as BDA:XXX... X. Local Device In Bluetooth communications, this refers to the local Toshiba Pocket PC. It is also called a client. Remote Device In Bluetooth communications, this refers to the connected partner device. - Page 209 GUI Bluetooth terms Authentication Status For remote devices that have performed Bluetooth authentication, Pair- able is displayed. For unauthenticated devices, Untrusted is displayed. Authentication This is the process of confirming an authentication password to allow a remote Bluetooth device to connect to Local Device. If the authentication passwords on both devices do not match, the connection is refused.
- Page 210 Glossary for Bluetooth Device Name This is the name of a Bluetooth device. It can be a maximum of 248 bytes (after UTF-8 code conversion). Discoverability Mode This setting determines whether Local Device can be discovered by other Bluetooth devices. Discovered This is a device discovered during the search for peripheral devices.
-
Page 211: Appendix E Toshiba's Worldwide Computer Representatives
TOSHIBA Pocket PC e750 TOSHIBA's Worldwide Computer Representatives Country Address/Internet Austria Toshiba Europe GmbH Leibnizstr. 2, 93055 Regensburg Email: technik.notebook@toshiba-tro.de www.computer.toshiba.at Azerbaijan Azerbaijan Electronics (AZEL) Floor 5, 65 Fizuli str., 370014 Baku Toshiba Information Systems Belgium Belgium Excelsiorlaan 40 1930 Zaventem, www.toshiba.be Bulgaria IMPEX Sofia Ltd. - Page 212 Finland Scribona Suomi Oy/Toshiba Digital Media Sinimäentie 8 A / PL 83 SF-02630 Espoo www.toshiba-dm.com France Toshiba Systemes (France) S.A. 7, Rue Ampere; B.P. 131, F - 92804 Puteaux Cedex www.toshiba.fr/pc Toshiba Europe GmbH Germany Leibnizstr. 2, 93055 Regensburg www.computer.toshiba.de E-mail: technik.notebook@toshiba-tro.de...
- Page 213 Morocco C.B.I. Compagnie Bureautique Informatique / Lotissement ATTAOUFIK, Rue N° 1 Immeuble 29, Sidi Maarouf / 20190 Casablanca, Maroc Netherlands Toshiba Inf. Systems Benelux Rivium Boulevard 41, NL - 2909 LK Capelle a/d Ijssel www.toshiba.nl Norway Scribona Norway A/S Stålfjæra 20, P.O.Box 51, Kalbakken, N-0901 Oslo www.toshiba.se...
- Page 214 Sweden Toshiba Digital Media Sundbybergsvägen 1, P.O. Box 1374, S- 171 27 Solna www.toshiba.se Switzerland Toshiba Europe Gmbh, Swiss Sales branch, Chriesbaumstrasse 4, CH 8604 Volketswil Email: computer.service@toshiba.ch Turkey Bekom Bilgisayar Sistemleri San. ve TIC. A.S., Buyukdere Cad. Lale Is Hani No. 62, Mecidiyeköy, Istanbul www.toshibatr.com...
- Page 215 Al-Futtaim Electronics, Central Services Operation, Garhound Area, P.O. Box:531 Dubai, U.A.E. Al-Futtaim Electronics, Central Services Operation, Mina- Area, P.O. Box:26605, Abudhabi, U.A.E. Toshiba America Information Systems, Inc.; 9740 Irvine Blvd., Irvine, CA 92713-9724 www.toshiba.com Yugoslavia CT Computers, Vladimira Popovica 6 (main office), Savski nasip 7 (service dept.)