
Related Manuals for Ariston A9GG1 FC/EX Series


Summary of Contents for Ariston A9GG1 FC/EX Series
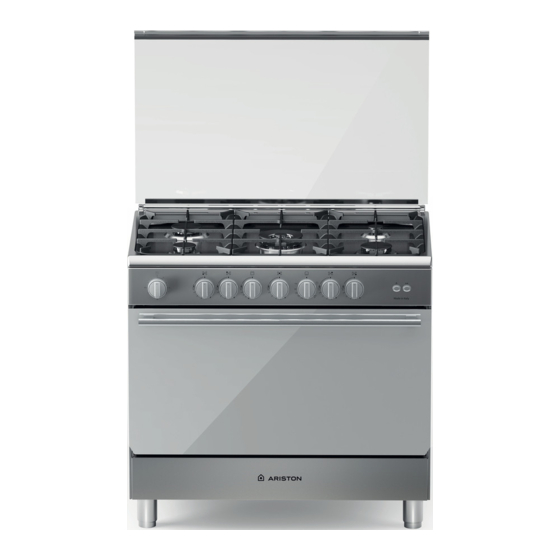
- Page 1 A9GG1 FC(X)/EX A9GG1 FC(X)/EX.1 A9GG1 FC(X)/J BAM95CGG3 BAM951EMSS BAM951EGSS Cooker with gas oven and gas grill lnstructions for installation and use - . e. ·�Js,�.:>� ·L.1, J � � 'J �?' J>.-i � �L.oJ,u...
- Page 2 If you have any doubts, do not use the cooker. For repairs call only an authorised after-sales the appliance, contact your nearest Ariston Service Centre. servicing centre and request the use of original spare parts Never leave the packing components (plastic bags, foamed only.
-
Page 3: Instructions For Installation
INSTRUCTIONS FOR INSTALLATION The following instructions should be read by a qualified technician stoves, etc. ) which are able to increase the temperature of to ensure that the appliance is installed, regulated and serviced the cylinder above 50°C. correctly in compliance with current standards. Important: Remember to unplug the appliance from the FITTING THE FEET mains before making adjustments or doing maintenance. - Page 4 A) REPLACE THE HOSE HOLDER consumption and ensure a longer life for your appliance. • Replace the hose holder mounted on the appliance with that CONNECTION WITH A HOSE supplied in the bag of “cooker accessories.” Make the connection using a gas hose that complies with require- Important: The hose holder for liquid gas is marked 8, the hose ments set forth by the current standards.
- Page 5 bottom); - ignite the oven burner, turning the knob pointer to the maximum setting; - shut the oven door; - access the thermostat or tap by-pass (see fig. 10); - back off the thermostat by-pass by about 3 turns; - after 5 or 6 minutes, turn the knob pointer to the minimum set- ting;...
- Page 6 BURNER AND NOZZLE CHARACTERISTICS Natural Gas G20 Liquid Gas G30-G31 Table 1 Burner Flow * Nozzle Diameter Thermic power By-pass Nozzle By-pass Nozzle Flow * Flow (mm) kw(p.c.s. *) 1/100 1/100 1/100 1/100 1/100 (mm) (mm) (mm) Nomin. Reduc. Rapid 2.80 0.80 (Big) (R)
-
Page 7: Technical Characteristics
TECHNICAL CHARACTERISTICS Nominal external dimensions HEATING ELEMENT POWERS Height at hob cm. 85 (provided on some models only) Height with lid raised cm. 141 40 W oven light Depth with door closed cm. 59 roaster motor Depth with door open cm. - Page 8 THE DIFFERENT FUNCTIONS OF THE COOKER WARNING: Do not use grill burner and oven burner together. The various functions featured with the oven are controlled using Due to technical and security reasons the use grill and oven the knobs and buttons on the control panel.. burner at same time is forbidden.
- Page 9 OVEN LIGHT/ROTISSERIE SWITCH • Always use lids with pots and pans. - Gas cooker models are fitted with a round switch; Burner Cookware Diameter ( cm ) - press this to turn on both the oven light and the rotisserie mo- Fast (R) 24-26 tor;...
- Page 10 Double burner for large cookware (26-28 cm in diameter) (fig. EXTRACTION OF THE LID To facilitate the cleaning of the lid the lid can be removed sim- • Single burner for medium sized cookware (16-20 cm in dia- ply by opening it completely and pulling it upwards. meter) (fig.
- Page 11 REPLACING THE OVEN LAMP N.B.: the first time the grill is used smoke will come out of the • Unplug the oven from the mains; oven. Before inserting foods for cooking, wait until any oil resi- • Remove the glass cover of the lamp-holder; dues on the burner have completely burnt away.
- Page 12 PRATICAL ADVICE FOR OVEN COOKING Food to be cooked Cooking position Temperature Pre-heating time C o o k i n g (Kg) of shelves from (°C) (minutes) time (minutes) bottom Pasta Lasagne 70-85 Cannelloni 50-60 Pasta bakes au gratin 50-60 Meat Veal 85-90...
- Page 13 ;__;1�14 � y � lt llt..W I � l� ,j wJ .jl l �I 6,4j �6,4j Ja..,I o,, ..s ;..-li (=4fa) (&) (�j) (�j) u� I 85-70 4,ilj '..l . ·�ts 60-50 r.,,-' - - 60-50 ù�:U_,_fo..., � 90-85 .� 100-90 e:: 4,.
- Page 14 .ii_,,.J\ , ... i,,a•ti A.,iJW\ ._.�\ � i.,,ili � I j-< .l.!_,..] 1 _y,,:. :\.l\.b',1 . .ii-.,..JI I)'- s>L;�I J..:,sl � <$1 J,,! :.) _fiS:, t" , ) � \ ..; :...,. \ ,; �.l � o� 41..,.è � o. i _,.:;,._,.. 0\. S 1:i1 �\ � 1 :i w klb.ii.ll o �\.
- Page 15 'J .i�i ù-" "-"-!y _,\ � �\;'J _,\ � I �IY:, � �l_,'J 4 .i_j.o ;il..: • (e,., 0 _;_,..) l""" 28X28 ,:y:. Ji:i _,..) (28-26fa) 0� .i� i 4l �1 }1 4 .i _ j.o ,.i..: • •(e , .
- Page 18 .>'"" lÀI I • 4-,...�1 4 .; UJI J�'J\ (i.t.� 0JJ .:.1j1)ol1 � i) 0J . F.> ..,..i1) J,...l l � t lài) ("""85 1, 1 u.)ll .,;.,:. r"' 141 t) .u..i, twJi1 J..1. , 6 f""" 59 ,jl..yLtll J �I �...
- Page 19 Z¥¢üÐó ¾ë Ο¢Ð» ¦Â ¦ ¦ 20 ﻏﺎز طﺑﯾﻌﻲ ﺟﻲ 31ﻏﺎز ﺳﺎﺋل ﺟﻲ03- ﺟﻲ 1 اﻟﻘﺎﺋﻣﺔ اﻧﺳﯾﺎب ﻓوھﺎت اﻧﺳﯾﺎب ﻓوھﺎت ﻣﺟرى اﻧﺳﯾﺎب ﺟﻲ / إﺗش ﻣﺟرى ﺣراري ﻗطر اﻟداﺋرة ﺣﺎرق 1/1 ﻓوھﺎت 1/إﺗش ﺟﻲ/إﺗش ﺟﺎﻧﺑﻲ ﺟﺎﻧﺑﻲ ﻗوة ﻛﯾﮫ دﺑﻠﯾو )ﺑﻲ ﺳﻲ ()م...
- Page 20 ﺗﻀﺒﻴﻂ ﻣﺒﻄﺊ ﻣﺤﺎرق اﻟﻄﺎوﻟﺔ اﻟﺨﺎص ﺑﺎﻟﺤﻨﻔﻴﺔ ﺷﺪا ﺗﺎﻣﺎ by-pass ، ﻳﺠﺐ أن ﻳﺘﻢ ﺷﺪ ال ﺑﺮوﺑﺎن ﺑﻮﺗﺎن إذا آﺎن اﻟﺠﻬﺎز ﺳﻴﺸﺘﻐﻞ ﺑﻮاﺳﻄﺔ اﻟﻐﺎز اﻟﺴﺎﺋﻞ ﻳﺮﺟﻰ اﻟﺮﺟﻮع إﻟﻰ اﻟﺸﻜﻞ أو ﻣﻦ اﻟﻨﻮع وﻳﺘﻮﻓﺮ اﻟﺠﻬﺎز، ﺣﺴﺐ اﻟﻤﻮدﻳﻼت، ﻋﻠﻰ ﺣﻨﻔﻴﺔ ﻣﻦ اﻟﻨﻮع ﻟﺨﺎص ﺑﺘﻀﺒﻴﻂ اﻟﻤﺒﻄﺊ داﺧﻞ اﻟﻤﺨﺮوﻃـ، وﻳﻤﻜﻦ اﻟﻮﺻﻮل إﻟﻴﻪ ﺑﻮاﺳﻄﺔ ﻣﻔﺘﺎح ﺑﺮاﻏﻲ ﺻﻐﻴﺮ ا...
- Page 24 33560001 21/03/2017...