Advertisement
Quick Links
©2017
INSTALLATION INSTRUCTIONS FOR OUTDOOR AIR DAMPERS
USED WITH KG/KC/KH/LGH/LCH/ZG/ZC/ZH 024-090 UNITS
Note - Disregard shipping and packing list and installation
sections when dampers are factory-installed.
Shipping and Packing List
Package 1 of 1 contains:
1- Outdoor air damper (OAD) assembly
1- Hood pivot bracket (15D17, 15D19)
1- Bag assembly containing (15D17, 15D19):
1-P160/J160 jumper harness
1-J39/P39 harness (15D19)
#10 self-drilling screws (15D19)
2-Wiring diagrams (15D17)
3-Wiring diagrams (15D19)
1- Outdoor air hood carton containing:
1-Hood top (15D18, 15D20)
2-Hood sides (left and right)
1-Hood front filter bracket
1-Filter
1-Bottom filter bracket (15D17, 15D19)
1-Bag assembly containing:
#10 sheet metal screws
1-#10 - 32 X 1/2" screw (15D17, 15D19)
Foam tape (15D18, 15D20)
Check parts for shipping damage. Receiving party should
contact last carrier immediately if shipping damage is found.
WARNING
Improper installation, adjustment, alteration, ser
vice or maintenance can cause property damage,
personal injury or loss of life. Installation and ser
vice must be performed by a licensed professional
HVAC installer or equivalent, service agency, or the
gas supplier
OUTDOOR AIR DAMPERS
506882-02
4/2017
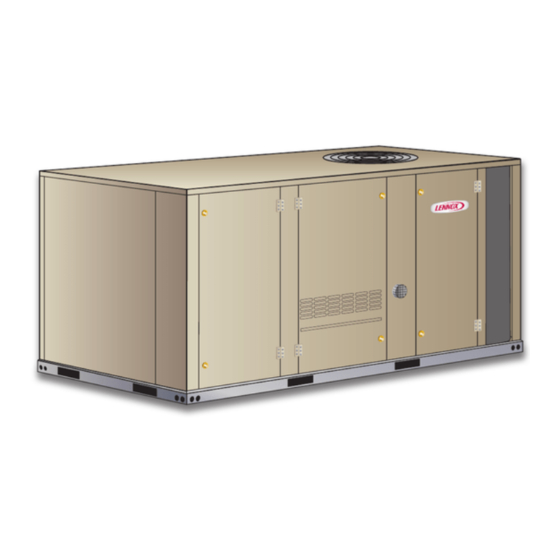
OUTDOOR AIR DAMPERS
Supersedes 11/2016
Application
Optional outdoor air dampers provide fresh outdoor air.
See table 1 for usage.
C1DAMP21A-1 and Z1DAMP21A-2
Electro-mechanical units (KC/KG/KH/ZC/ZG/ZH) -
The damper opens to a set position when the blower is
operating. To operate the damper only during the
occupied time period, an optional thermostat or energy
management system must be installed that provides an
occupied signal to the unit's thermostat connection.
Units equipped with an M3 A55 Unit Controller (LC/LG) -
The damper opens to a set position when the blower is
operating and an occupied signal is provided to the Unit
Controller.
C1DAMP11A-2 & Z1DAMP11A-2
Damper is manually operated; damper position is
manually set at installation and remains in that position.
Unit
LCH/LGH 036–072
KC/KG/KH 024-090
LCH/LGH 036–072
KC/KG/KH 024-090
ZC/ZG/ZH 036-060
ZC/ZG/ZH 036-060
As with any mechanical equipment, contact with
sharp sheet metal edges can result in personal in
jury. Take care while handling this equipment and
wear gloves and protective clothing.
Page 1
Motorized Dampers:
Manual Dampers:
TABLE 1
Type
LB #
Motorized
613924-07
Manual
613924-08
Motorized
613924-09
Manual
613924-10
CAUTION
Cat. #
15D17
15D18
15D19
15D20
Advertisement

Related Manuals for Lennox KG Series


Summary of Contents for Lennox KG Series
- Page 1 ©2017 OUTDOOR AIR DAMPERS 506882-02 4/2017 OUTDOOR AIR DAMPERS Supersedes 11/2016 INSTALLATION INSTRUCTIONS FOR OUTDOOR AIR DAMPERS USED WITH KG/KC/KH/LGH/LCH/ZG/ZC/ZH 024-090 UNITS Note - Disregard shipping and packing list and installation Application sections when dampers are factory-installed. Optional outdoor air dampers provide fresh outdoor air. Shipping and Packing List See table 1 for usage.
- Page 2 Install Motorized Damper Assembly Install Motorized Damper Assembly LGH/LCH/KG/KC/KH Units ZG/ZC/ZH Units 1- Disconnect all power to unit. 1- Disconnect all power to unit. 2- On LGH/LCH/KG/KC/KH units equipped with 2- Remove and discard unit back panel. Retain screws and factory-installed dampers, go to Outdoor Air Hood - two door brackets which secure panel.
- Page 3 Wiring Harnesses - J/P3, P4, J/P39, J/P160 WIRING HARNESS CONNECTIONS ZG/ZC/ZH UNITS 1- Remove the filter access panel and locate the unit DISCONNECT P3 JUMPER PLUG connection J3/P3. FROM J3 UNIT JACK 2- Remove P3 jumper plug and discard. DISCARD P3 UNIT 3- Locate the following harnesses provided in kit: KG/KC/KH Units - P160/J160...
- Page 4 Slide hood from left to right until it is properly Wiring Diagrams positioned. See figure 9. LGH/LCH/KG/KC/KH Units - 3- Factory-Installed Dampers Only - Remove screws Affix the applicable wiring diagram on the inside of the securing hood to unit. Lift hood upward allowing the hood to slide from left to right.
- Page 5 9- Slide filter into the slot on the bottom filter bracket. OUTDOOR AIR HOOD Make sure arrows on filter match airflow direction. LGH/LCH/KG/KC/KH SHOWN HOOD PIVOT Secure the hood top filter bracket to the hood top BRACKET using the thread forming screw provided. See figure 11.
- Page 6 assembly and brackets to unit using retained screws. Install Manual Damper See figure 13. 1- Disconnect all power to the unit. 5- Secure the bottom of the assembly with retained screws. 2- On LGH/LCH/KG/KC/KH units equipped with factory-installed dampers, go to Outdoor Air Hood - 6- Replace filter access panel.
-
Page 7: Assemble Hood
Outdoor Air Hood - Manual Damper INSERT MIST ELIMINATOR FILTER Hood is shipped in the return air section when the dampers are factory-installed. 1- Assemble hood as shown in figure 15. Â Â Â Â Â Â Â Â 2- Install mist eliminator filter as shown in figure 16. Â... - Page 8 the top line of chart 1 and label the point “B” (74°F, Determine Outdoor Air Percentage 23°C shown). 3- Measure mixed air (outdoor and return air) Outdoor air percentage can be estimated in the same temperature. Mark that point on the top line of chart manner for both manual and motorized dampers.
- Page 9 Units Not Equipped With A Unit Controller Damper Minimum Position Adjustments The damper motor stop is preset to provide 100% outdoor air and is adjustable in fixed increments. For Units Equipped With M2 and M3 Unit Controllers units supporting more than 1 blower speed, the The damper minimum position or positions are damper minimum set point should be determined with adjusted using the Unit Controller input screen.
- Page 10 3- Read the damper percentage open. Minimum Damper Position Range Units Equipped With Unit Controller - The motorized outdoor air damper operation is optimized The damper percentage open was entered into the as shown in the shaded area of Chart 2. Unit operation Unit Controller.