Table of Contents
Advertisement
Quick Links
Install Guide
EN
Installationsanleitung
DE
Guide d'installation
FR
Guida d'installazione
IT
Installatiegids
NL
Guía de instalación
ES
Guia de Instalação
PT
Kurulum Kılavuzu
TR
Instrukcja montażu
PL
Installationsguide
SV
SC
Инструкция по инсталляции
RU
Installationsvejledning
DK
TC
How to... for Internal IDE Drives
3+32
3+33
3+34
3+35
3+36
13+37
13+38
13+39
13+40
13+41
23+42
23+44
23+45
23+46
Advertisement
Table of Contents

Related Manuals for Philips SPD6007BM/00


Summary of Contents for Philips SPD6007BM/00
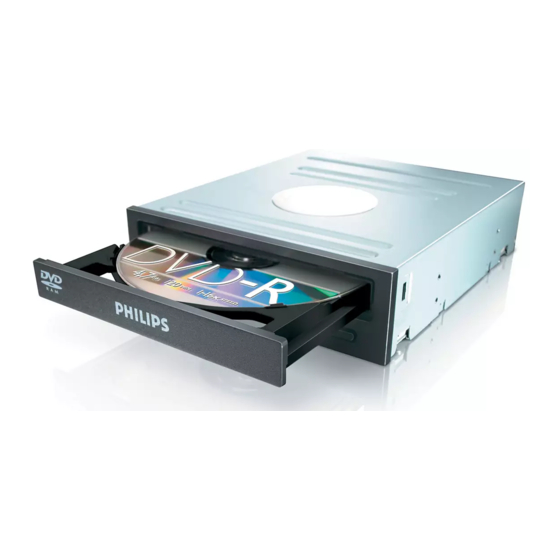
- Page 1 How to... for Internal IDE Drives Install Guide Installationsanleitung Guide d'installation Guida d'installazione Installatiegids Guía de instalación Guia de Instalação Kurulum Kılavuzu Instrukcja montażu Installationsguide Инструкция по инсталляции Installationsvejledning 3+32 3+33 3+34 3+35 3+36 13+37 13+38 13+39 13+40 13+41 23+42 23+44 23+45 23+46...
-
Page 2: How To Install
How to install? Please refer to your PC manual or contact your local dealer for more information. Fare riferimento al manuale del PC o contattare il proprio rivenditore locale per ulteriori informazioni. Einbau des Laufwerks Comment installer? Come installare Hoe installeren? Weitere Informationen finden Sie im PC-Handbuch bzw. - Page 3 Contenuto della confezione: A: La nuova unità Dit zit er in de doos: A: Uw nieuwe station Toccare un elemento di metallo non verniciato (p.es. l’elemento riscaldante o uno non verniciato del case del computer). In questo modo si eviteranno danni al computer dovuti a scariche elettrostatiche. Raak een ongelakt metalen object aan (b.v.
- Page 4 Disconnect the power cable from the PC. Ziehen Sie das Netzkabel vom Computer ab. Débranchez le câble d’alimentation de l’ordinateur. Disconnettere il cavo di alimentazione dal PC. Trek de netstekker uit de PC. Open your computer. You may have to unleash screws which are mostly located at the back of your computer.
- Page 5 Als u een station gaat vervangen moet u hem verwijderen en kijken welke instelling het had ("Master" of "Slave"). Onthoud deze instelling en ga naar stap 10. In caso di integrazione di un'unità, controllare l'impostazione dell'unità che resta nel PC ("Master" o "Slave", vedere il punto 11) e annotare l'ALTRA impostazione.
- Page 6 These are the connections (on the back of your drive) you will have to use for connecting the drive to the computer. Das sind die Anschlüsse (an der Rückseite Ihres Laufwerks), die Sie für den Anschluss Ihres Laufwerks an den Computer verwenden müssen. Ce sont les connecteurs (à...
- Page 7 Individuare il cavo IDE, che potrebbe mostrare questi segni distintivi: Zoek de IDE-kabel die lijkt op dit voorbeeld: Collegare il cavo IDE come per A (2 dispositivi) o B (solo 1 dispositivo). Non scegliere 2 dispositivi "Master" o "Slave" per lo stesso cavo. Sluit de IDE-kabel aan zoals bij A (2 apparaten) of B (slechts 1 apparaat).
- Page 8 Connect the IDE cable A: Coloured line. B: Notch and closed hole. C: Pin1. Schließen Sie das IDE-Kabel an. A: Farbige Leitung. B: Kerbe und geschlossenes Loch. C: Pin1. Raccordez le câble IDE A : Ligne de couleur B : Encoche et trou bouché C : Broche 1 Collegare il cavo IDE A: Linea colorata.
- Page 9 Secure the drive with the screws (if possible on both sides). Befestigen Sie das Laufwerk mit den Schrauben (wenn möglich an beiden Seiten). Fixez l’appareil à l’aide des vis (si possible des deux côtés). Fissare l'unità con le viti (se possibile su entrambi i lati). Schroef het station vast (zo mogelijk aan beide zijden).
- Page 10 Restart your computer. Starten Sie Ihren Computer neu. Allumez l’ordinateur. Riavviare il computer. Start uw computer opnieuw op.
-
Page 12: Cómo Instalarlo
¿Cómo instalarlo? Por favor consulte el manual del PC o póngase en contacto con su distribuidor local para obtener más información. Aby uzyskać dodatkowe informacje, przeczytaj dokumentację komputera lub skontaktuj się z lokalnym sprzedawcą. Como instalar? Nasıl kurulur? Instalacja Hur går installationen till? Consulte o manual de seu PC ou entre em contato com seu revendedor local para obter mais informações. - Page 13 W opakowaniu znajduje się: A: Nowy napęd Innehållet i lådan: A: Din nya drivenhet Dotknij niepomalowanego metalowego elementu (np. grzejnika lub niepomalowanej części obudowy komputera). Zapobiegnie to uszkodzeniu komputera przez wyładowanie elektrostatyczne. Rör vid en omålad metalldel (t.ex. en värmeledning eller en omålad del av datorns hölje). Då...
- Page 14 Desconecte el cable de alimentación del PC. Desligue o cabo de alimentação do PC. Güç kablosunu bilgisayardan çıkarın. Odłącz kabel zasilający od komputera. Dra ut nätsladden från datorn. Abra el ordenador. Tendrá que quitar los tornillos que suelen ir colocados en la parte posterior del ordenador.
- Page 15 Jeśli wymieniasz napęd, wyjmij go i sprawdź, w jakim trybie pracował ("Master" czy "Slave"). Zapamiętaj ustawienie i przejdź do punktu 10. Om du byter ut en enhet, ta ut den och se efter hur den har ställt in ("Master" eller "Slave"). Kom ihåg den här inställningen och gå...
- Page 16 Estas son las conexiones (en la parte posterior de la unidad) que tendrá que utilizar para desconectar la unidad del ordenador. Estas são as ligações (parte de trás da unidade) que é preciso utilizar para ligar a unidade ao computador. Bunlar, sürücüyü...
- Page 17 Znajdź kabel IDE, który może wyglądać na przykład tak: A : Kolorowa linia. B : Nacięcie i zamknięty otwór. C : Wtyk 1. Lokalisera IDE-kabeln. Den kan se ut som i exemplet nedan. A : Färgad rand. B : Spår och slutet hål. C : Stift 1.
- Page 18 Conecte el cable IDE: A : Línea de color. B : Muesca y orificio cerrado. C : Patilla 1. Ligue o cabo IDE: A : Linha colorida. B : Ranhura e orifício fechado. C : Pino 1. IDE kablosunu bağlayın: A : Renkli hat.
- Page 19 Asegure la unidad con los tornillos (si es posible en ambos lados). Utilize os parafusos para fixar a unidade (se possível, de ambos os lados). Sürücüyü vidalarla iyice sıkıştırın (mümkünse her iki tarafı). Przymocuj napęd śrubami (jeżeli jest to możliwe, obustronnie). Säkra enheten med skruvar, om möjligt på...
- Page 20 Reinicie el ordenador. Reinicie o computador. Bilgisayarınız yeniden başlatın. Uruchom ponownie komputer. Starta datorn.
-
Page 22: Installation
Как выполнить инсталляцию? Installation How to install? Обратитесь к руководству вашего PC или свяжитесь с вашим дилером для получения дополнительной информации. Please refer to your PC manual or contact your local dealer for more information. Se i manualen til din computer eller kontakt den lokale forhandler, hvis du har brug for mere information. - Page 23 This can be found in the box: A: Your new drive Touch an unpainted metal part (eg. your heating or an unpainted part of your computer case). This will avoid any damage to your computer by electrostatic discharge. Это можно найти в окне: A: Ваш...
- Page 24 Отсоедините кабель питания от вашего PC. Tag strømkablet fra computeren ud. Disconnect the power cable from the PC. Откройте компьютер. Для этого нужно отпустить винты, расположенные чаще всего на задней стенке компьютера. Более подробно см. в руководстве по компьютеру. Åbn computeren. Du skal muligvis løsne nogle skruer, der ofte sidder bag på...
- Page 25 If you replace a drive, take it out and check which setting it has ("Master" or "Slave"). Remember this setting and go to step 10. If you add a drive, check the drive has which remains in the PC ("Master" or "Slave", see step 11), remember the OTHER setting.
- Page 26 Здесь находятся соединения (на задней стенке вашего дисковода), которые должны использоваться для подключения дисковода к компьютеру. Dette er de forbindelser (bag på drevet), som du skal bruge, når drevet skal tilsluttes computeren. These are the connections (on the back of your drive) you will have to use for connecting the drive to the computer.
- Page 27 Find the IDE-cable which may look like this example: A: Coloured line. B: Notch and closed hole. C: Pin1. Connect the IDE cable like in A (2 devices) or B (only 1 device). Do not choose 2 "Master" or 2 "Slave" devices on 1 cable. Найдите...
- Page 28 Присоедините кабель IDE A: Цветной провод B: Углубление или глухое отверстие. C: Pin1. Tilslut IDE-kablet A : Farvet linje. B : Indskæring og lukket hul. C : Stikben1. Connect the IDE cable A: Coloured line. B: Notch and closed hole. C: Pin1.
- Page 29 Закрепите дисковод винтами (по возможности с обеих сторон). Fastgør drevet med skruerne (om muligt på begge sider). Secure the drive with the screws (if possible on both sides). Установите крышку, снятую вами на шаге 5. Sæt det dækslet på igen (det du tog af under pkt.
- Page 30 Запустите ваш компьютер. Genstart computeren. Restart your computer.
-
Page 31: More Info Or Help Needed
Philips optical disc drives are manufactured with utmost care. In case of problems, it often appears that the drive itself is not defective. You can simply solve most of these problems by using the support tools offered by Philips. When you’re experiencing problems: Please check the information in the "How to…"... -
Page 32: Weitere Informationen Oder Hilfe Erforderlich
Fehlersucheleitfäden und die neuesten Software-Updates. Wenn Sie während der Installation oder der Verwendung weitere Probleme vorfinden, wenden Sie sich bitte an die Philips Kundenbetreuung über die E-Mail-Adresse oder die Telefonnummern, die Sie auf www.philips.com/contact finden. Bevor Sie einen Garantieanspruch geltend machen, müssen Sie auf www.philips.com/support eine Rücksendenummer beantragen oder die... -
Page 33: Vous Avez Besoin D'aide Ou De Plus D'informations
Vous avez besoin d'aide ou de plus d'informations ? Les lecteurs de disques optiques Philips sont fabriqués avec le plus grand soin. Lorsqu’un problème survient, il apparaît souvent que le lecteur lui-même n’est pas défectueux. La plupart des problèmes peuvent simplement être résolus à l’aide des outils d'assistance proposés par Philips. -
Page 34: Per Ulteriori Informazioni O Assistenza
Consultare il sito Web all'indirizzo www.philips.com/storageupdates Risoluzione dei problemi Le unità disco ottiche della Philips sono prodotte con la massima cura. In caso di problemi, spesso risulta che non è l’unità in quanto tale ad avere dei problemi. Potete risolvere semplicemente la maggior parte di questi problemi utilizzando gli strumenti di supporto offerti da Philips. -
Page 35: Meer Informatie Of Hulp Nodig
Meer informatie of hulp nodig De optische schijfstations van Philips zijn met de grootst mogelijke zorg gemaakt. Als zich problemen voordoen, blijkt vaak dat het station zelf geen defecten heeft. U kunt de meeste van deze problemen eenvoudig oplossen door de hulpprogramma's van Philips te gebruiken. -
Page 36: Si Necesita Más Información O Ayuda
Visite www.philips.com/storageupdates Solución de problemas Las unidades de discos ópticos de Philips están fabricadas con el máximo cuidado. En caso de problemas, con mucha frecuencia ocurre que la unidad no está defectuosa realmente. Puede solucionar la mayoría de problemas utilizando las herramientas de soporte que ofrece Philips. -
Page 37: São Necessárias Mais Informações Ou Ajuda
São necessárias mais informações ou ajuda As unidades de disco óticas da Philips são fabricadas com o máximo cuidado. No caso de problemas, é comum que a própria unidade não pareça ter defeitos. É possível solucionar a maioria desses problemas simplesmente utilizando as ferramentas de suporte oferecidas pela Philips. -
Page 38: Sorun Giderme
çözümleyebilirsiniz. Bir sorunla karşılaştığınızda: Lütfen "Nasıl yapılır…" kılavuzundaki bilgileri okuyun. Etkileşimli yardım, sorun giderme ve en yeni yazılım güncellemeleri için Philips destek web sitelerini ziyaret edin: www.philips.com/storageupdates ve www.philips.com/support. Kurulum veya kullanım sırasında başka bir zorlukla karşılaşırsanız, www.philips.com/contact adresinde bulabileceğiniz e-posta adresi veya telefon numaraları... -
Page 39: Potrzebna Pomoc Lub Dodatkowe Informacje
W razie trudności w trakcie instalacji lub użytkowania, skontaktuj się z Biurem Obsługi Klienta firmy Philips, pisząc na adres e-mail lub dzwoniąc pod numery telefoniczne podane na stronie www.philips.com/contact. Przed złożeniem reklamacji napędu należy otrzymać zwrotny numer referencyjny na stronie www.philips.com/support lub skontaktować... -
Page 40: Mer Information Eller Hjälp Behövs
På Philips supportwebbplatser www.philips.com/storageupdates och www.philips.com/support hittar du interaktiv support, felsökningsinformation och de nyaste programvaruuppdateringarna. Om du råkar ut för fler svårigheter vid installation eller användning kontaktar du Philips Customer Care via den e-postadress eller de telefonnummer som finns på www.philips.com/contact. - Page 42 Hazardous/toxic Substance Name of the Parts (Pb, lead) Housing DVD loader PWBs O: Indicates that this toxic or hazardous substance contained in all of the homogeneous materials for this part is below the limit requirement in SJ/T11363 – 2006. X: Indicates that this toxic or hazardous substance contained in at least one of the homogeneous materials used for this part is above the limit requirement in SJ/T11363 - 2006.
- Page 43 последних актуализаций. Если во время инсталляции или эксплуатации вы столкнулись с дополнительными трудностями, вам следует обратиться в Philips Customer Care по электронной почте или по телефону, которые можно найти в Интернете по адресу www.philips.com/contact. Прежде,чем предъявить претензии в рамках гарантии на дисковод,вы...
-
Page 44: Mere Information Og Hjælp
Mere information og hjælp Besøg www.philips.com/storageupdates Philips’ optiske discdrev er fremstillet med stor omhyggelighed. I tilfælde af problemer viser det sig ofte, at selve drevet ikke er defekt. Du kan ganske enkelt løse de fleste af disse problemer ved at bruge de supportværktøjer, som Philips tilbyder. - Page 46 More info or help needed Visit www.philips.com/storageupdates Philips optical disc drives are manufactured with utmost care. In case of problems, it often appears that the drive itself is not defective. You can simply solve most of these problems by using the support tools offered by Philips.
-
Page 47: Fcc Compliance
Consult the dealer or an experienced radio/TV technician for help. Warning: Changes or modifications made to this equipment not expressly approved by Philips may void the FCC authorization to operate this equipment. FCC 15.19 rule: This device complies with Part 15 of the FCC Rules and with RSS-210 of Industry Canada. - Page 48 3. Philips is committed to develop, produce and market products that cause no adverse health effects. 4. Philips confirms that if its products are handled properly for their intended use, they are safe to use according to scientific evidence available today.
-
Page 49: Safety Precautions
Safety Precautions USA/Canada:This player is for use only with IBM compatible UL listed Personal Computers or Macintosh UL listed workstations, weighing less than 18 kg. This unit employs a laser. Do not remove the cover or attempt to service this device when connected due to the possibility of eye damage. - Page 51 Specifications subject to change without notice. All dimensions shown are approximate. © 2008 Koninklijke Philips Electronics N.V. All rights reserved. Reproduction, copying, usage, modifying, hiring, renting, public performance, transmission and/or broadcasting in whole or part is prohibited without the written consent of Philips Electronics N.V.