Table of Contents
Advertisement
Available languages
Available languages
1. BEFORE YOU BEGIN
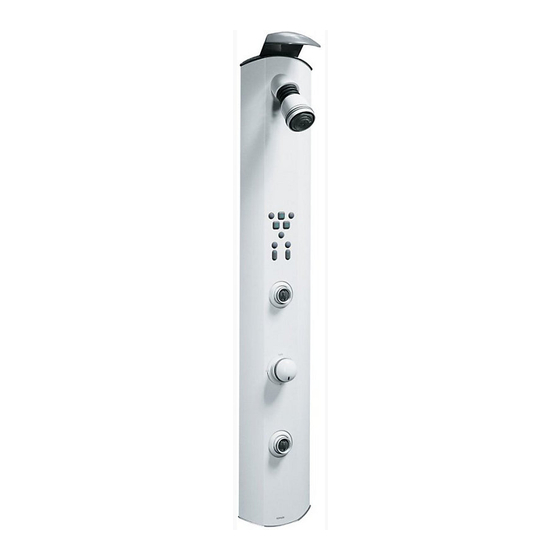
A. SPECIFICATIONS
MasterShower tower
. . . . . . . . . . . . . . . . . . . . . . . . . . . . . . . . .
International version (no transformer)
Electrical rating
. . . . . . . . . . . . . . . . . . . .
Electrical service requirements
Transformer Output Voltage
. . . . . . . . . . . .
Recommended cut-out size in finished wall for MasterShower
tower is 6-1/8" (15.6cm) x 45-11/16" (116cm).
Recommended rough-in height will provide showerhead outlet at
6' (1.8m) height. [A 6' (1.8m) to 6-1/2' (2m) height is typical].
Distance from transformer to tower assembly is a maximum of 12'
(3.7m).
Minimum static water pressure requirement is 40 p.s.i. (2.7 bar).
B. NOTES
IMPORTANT: Mounting box must mount with back of
mounting box flange flush to outside surface of finished wall.
Do not mount the box until completion of finished wall.
Kohler recommends the use of a water softener if this product is
being installed in a location with hard water.
This product is not designed for steam applications,
and may not perform satisfactorily as a steam unit.
Make sure all water lines are purged prior to final connection
to the MasterShower tower water inlets.
When installing the unit in areas with sand or other sediments in
water lines, Kohler recommends the following Ametek, or
equivalent, filters: Cold Water = HF150S1, 3/4" I.P.S. inlet filter; Hot
Water = WH34 RB25, 3/4" I.P.S. inlet filter.
Installation with fiberglass or acrylic shower enclosures may not
provide adequate clearance for MasterShower tower mounting.
The MasterShower tower requires a flat mounting surface for its
entire height.
Installation requires horizontal cross members. Installation does
not require vertical studs, but they may be necessary to support
thin-walled surfaces around the mounting box opening.
Risers must extend 7" (17.8cm) above bottom cross member for
mounting box.
A
1017598-2-
R
K-74
. . . . . . . . . . . . . . . .
K-74-JA
120 VAC, 60 HZ, 60 watts
. . . . . . . . .
120 VAC, 60 Hz, 15 A
12 VAC +/– 5% @5 A
Español, Página 13
Français, Page 25
MasterShowertTower
Supply strain relief bushing where 120 VAC line with
ground enters transformer enclosure.
A licensed electrician should make all electrical connections.
OBSERVE ALL LOCAL PLUMBING CODES.
All information in these instructions is based on the latest
product information available at the time of publication. Kohler
Co. reserves the right to make changes in product
characteristics, packaging, or availability at any time without
notice.
C. TOOLS AND MATERIALS REQUIRED
TOOLS REQUIRED
S
Hacksaw or tubing cutter
S
Propane torch
S
Caulking gun
S
Electric drill
S
9/64" drill bit (for pilot hole, see materials note below)
S
15/16" open end wrench (for supply couplings)
S
Screwdrivers
S
Nut driver assortment
S
Pliers
S
Strap wrench
S
Strain relief bushing tool
S
Hex key assortment
S
Adjustable or open end wrenches
MATERIALS REQUIRED
S
2x4 or 2x6 framing lumber
S
1/2" copper tubing
S
1/2" threaded adapter CXM (2)
S
One-hole electrician's strap for 1/2" tubing risers
S
Solder/flux
S
Adhesive Sealant
S
(Optional) Wall anchors (6) & drill bit for supplied #8-16 x 2"
Phillips head screws for mounting to hard/thick finish wall
materials.
S
Thread sealant
S
Strain relief bushing
S
Transformer enclosure mounting screws
K-74
Advertisement
Table of Contents

Related Manuals for Kohler MasterShower K-74


Summary of Contents for Kohler MasterShower K-74
- Page 1 Do not mount the box until completion of finished wall. Nut driver assortment Pliers Kohler recommends the use of a water softener if this product is being installed in a location with hard water. Strap wrench Strain relief bushing tool...
- Page 2 7-5/8” (16.5cm) (16.8cm) (19.4cm) 31-7/16” (79.9cm) 3-1/8” TO FINISHED (7.9cm) FLOOR 2-1/4” 3-3/4” RECOMMENDED (5.7cm) (9.5cm) 5-3/4” WALL MOUNT BOX (14.6cm) 10-1/4” (26cm) 6-1/2” (16.5cm) 50” (12.7cm) 40” (101.6cm) 15-1/2” (39.4cm) MAIN UNIT 8-1/8” (20.6cm) Fig. #1 Kohler Co. 1017598-2-...
- Page 3 Mounting box must mount with back of mounting box flange finished wall. flush to outside surface of finished wall. Do not mount the box until completion of finished wall. Flush the water supply lines to remove debris. Kohler Co. 1017598-2-...
-
Page 4: Installation
Re-install cover plate. Do not make electrical connection to transformer yet, unless power to transformer can be left off until after MasterShower tower installation is complete. Transformer Enclosure Screw Cover Fig. #6 1017598-2- Kohler Co. - Page 5 Perform Steps 7. and 8. immediately since sealant sets up in Wall minutes. Tilt bottom of mounting box into hole in finished wall so supply risers pass through holes in mounting box, and force down and into position. (See Step 4.) Mounting Fig. #8 Kohler Co. 1017598-2-...
- Page 6 Remove the protective caps from the short connection hose and the supply hose. Connect the hoses, and use two wrenches to tighten 1/2 to 3/4-turn past hand tight. Connector Cone Bushing Fig. #11 1017598-2- Kohler Co.
-
Page 7: Tower Assembly
To avoid scratching, carefully protect flats and wrench-tighten hinge and one screw in the lower hinge. See Fig. #14 . or use a clean strap wrench. Mounting Screws Wall Mount Box Mounting Flange Bellows Tower Door Three-Way Showerhead Fig. #13 Mounting Screws Fig. #14 Kohler Co. 1017598-2-... - Page 8 See Fig. #18 . Center seal over valve stem. Center flange over valve stem. Align sleeve with grip ring over valve stem. Secure with supplied #8-32 x 7/8” screw. Fig. #16 Water test tower assembly and connections for leaks before closing tower assembly to mounting box. 1017598-2- Kohler Co.
-
Page 9: Make Electrical Connection
Supply 120 VAC power line with strain relief bushing. (See Specifications on first page.) Feed incoming power line through one of the lower knockouts on the transformer enclosure. Allow ample line for connection and tighten strain relief bushing. Attach leads as illustrated. Fig. #19 Kohler Co. 1017598-2-... - Page 10 Turn on valve. Make desired adjustments. downward. See the Owner’s Manual, if necessary, for additional operating instructions. Sheetflow Dual Function Body Spray Buttons Button Showerhead Body Spray Body Sprays Sweep Body Spray Pulse Body Sprays Fig. #21 Fig. #22 1017598-2- Kohler Co.
- Page 11 To turn all flows off quickly, close the Rite-Temp mixer handle. See Fig. #25 . With the water turned off, open the tower door by following the steps in the owners manual. Inspect the tower for leakage, and re-close the tower door. Fig. #25 Kohler Co. 1017598-2-...
-
Page 12: Troubleshooting
Questions? Problems? First review the installation instructions to ensure correct installation. For additional assistance, call our Customer Service Department for direct help. You may also contact us at our web site listed below. In the U.S.A., call 1-800-4-KOHLER In Mexico, call 001-877-680-1310 In Canada, call 1-800-964-5590 www.kohler.com... -
Page 13: Instrucciones De Instalación
Llave de boca de 15/16” (para el acoplamiento de suministros) No monte la caja hasta haber completado la pared acabada. Destornilladores Kohler sugiere el uso de un ablandador de agua si el producto es Variedad de llaves para tuercas instalado en un área de agua dura. - Page 14 (16,8cm) (19,4cm) 31-7/16” (79,9cm) 3-1/8” PISO (7,9cm) ACABADO 2-1/4” 3-3/4” SUGERIDO (5,7cm) (9,5cm) 5-3/4” (14,6cm) CAJA DE MONTAJE A LA PARED 10-1/4” (26cm) 6-1/2” (16,5cm) 50” (12,7cm) 40” (101,6cm) 15-1/2” (39,4cm) UNIDAD PRINCIPAL 8-1/8” Fig. #1 (20,6cm) Kohler Co. 1017598-2-...
- Page 15 No monte la caja hasta haber completado la pared acabada. la pared acabada. PRECAUCIÓN: Es posible que la estructura no Descargue las líneas de suministro, para remover cualquier encaje en la abertura, lo cual requerirá ajustar la sedimento. Kohler Co. 1017598-2-...
-
Page 16: Instalación
Verifique que los tubos verticales tengan la altura requerida. NOTA: No realice la conexión eléctrica al transformador todavía, a menos que la corriente al transformador pueda permanecer desconectada hasta completar la instalación de la torre. Transformador Cajetín Tornillo Cubierta Fig. #6 1017598-2- Kohler Co. - Page 17 Encaje en su lugar. (Vea el Paso 4.) Caja de montaje Fig. #8 Kohler Co. 1017598-2-...
- Page 18 Remueva los tapones protectores de la manguera de conexión corta y de la manguera de suministro. Conecte las manguera y con dos llaves, asegure de 1/2 a 3/4 de vuelta más. Caja Conector Buje cóncavo Fig. #11 1017598-2- Kohler Co.
- Page 19 Tornillos de fijación Caja de Brida de montaje montaje a la pared Fuelle Puerta de la torre Cabezal de tres vías de regadera Fig. #13 Tornillos de fijación Fig. #14 Kohler Co. 1017598-2-...
- Page 20 NOTA: Pruebe la tubería y conexiones de la torre, antes válvula. Asegure con el tornillo incluido #8-32 x 7/8”. de encerrar el conjunto en la caja de montaje. 1017598-2- Kohler Co.
-
Page 21: Realice Las Conexiones Eléctricas
Dirija la línea de suministro eléctrico a través de uno de los orificios ciegos en la caja del transformador. Deje suficiente cable libre para la conexión y asegure el buje. Conecte los conectores, como se ilustra. Fig. #19 Kohler Co. 1017598-2-... - Page 22 Consulte el Manual del Usuario para información adicional. Caída de agua Botones de función doble Cabezal de regadera Rociadores Rociador corporal rotativo corporales Pulsador de rociador corporal Botón de rociador corporal Fig. #21 Rociadores corporales Fig. #22 1017598-2- Kohler Co.
- Page 23 Consulte la Fig. #25 . Con el agua cerrada, abra la puerta de la torre, siguiendo los pasos contenidos en el manual del usuario. Verifique que no haya fugas y cierre nuevamente la puerta de la torre. Fig. #25 Kohler Co. 1017598-2-...
- Page 24 ¿Preguntas? ¿Problemas? Primero, revise las instrucciones para asegurarse de haber realizado la instalación correcta. Para mayor asistencia, llame a nuestro Departamento de Atención al Cliente. También puede localizarnos en la dirección de Internet escrita abajo. En los Estados Unidos, llame al 1-800-4-KOHLER En México, llame al 001-877-680-1310 En Canadá, llame al 1-800-964-5590 www.kohler.com...
-
Page 25: Notice D'installation
Tous les renseignements contenus dans ces instructions proviennent des plus récentes données disponibles sur les Tension de sortie de transformateur ..12 VCA +/– 5% @5 A produits au moment d’aller sous presse. La société Kohler se réserve droit d’apporter modifications La découpe recommandée dans le mur fini pour la tour... - Page 26 (7,9cm) FINI 2-1/4 po 3-3/4 po RECOMMANDÉE (5,7cm) (9,5cm) 5-3/4 po BOÎTIER SUR MUR (14,6cm) 10-1/4 po (26cm) 6-1/2 po (16,5cm) 50 po (12,7cm) 40 po (101,6cm) 15-1/2 po (39,4cm) UNITÉ PRINCIPALE 8-1/8 po (20,6cm) Fig. #1 Kohler Co. 1017598-2-...
- Page 27 Ne pas installer ce boîtier tant que la finition du mur n’est pas terminée. Effectuer un essai sous pression des tuyauteries d’arrivée d’eau, avant de terminer le mur fini. ATTENTION : Risque montage incorrect nécessitant une modification de la structure. Vidanger les conduites pour éliminer tout débris. Le dessus Kohler Co. 1017598-2-...
- Page 28 REMARQUE : effectuer raccordement électrique au transformateur à ce stade, à moins que l’alimentation du transformateur puisse rester coupée tant que l’installation de la tour MasterShower n’est pas terminée. Transformateur Enceinte Couvercle Fig. #6 1017598-2- Kohler Co.
- Page 29 Incliner le bas du boîtier dans le trou du mur fini, de sorte que les colonnes montantes d’arrivée d’eau passent par les trous de ce boîtier, puis exercer un effort vers le bas pour la mise en place. (Se reporter à l’étape 4.) Boîtier Fig. #8 Kohler Co. 1017598-2-...
- Page 30 à ruissellement en nappe. Retirer les bouchons de protection du flexible de raccordement court et du flexible d’alimentation. Serrer les flexibles avec deux clés, de 1/2 à 3/4 tour après le serrage à la Fig. #11 main. 1017598-2- Kohler Co.
- Page 31 à la clé, ou se servir d’une Vis de clé à sangle propre. fixation Boîtier sur Porte de tour Bride de fixation Soufflets Pomme de douche à trois voies Vis de fixation Fig. #13 Fig. #14 Kohler Co. 1017598-2-...
- Page 32 Aligner le manchon avec raccordements, pour voir s’il n’y a pas de fuites, avant de l’anneau de serrage sur la tige de robinet. Assujettir à l’aide de refermer la tour sur le boîtier. la vis fournie #8-32 x 7/8 po. 1017598-2- Kohler Co.
- Page 33 (Se reporter aux spécifications à la première page.) Faire passer le câble d’alimentation électrique par l’une des débouchures inférieures de l’enveloppe du transformateur. Prévoir une bonne longueur de cordon, pour la connexion, puis serrer le serre-câble. Fig. #19 Fixer les câbles selon l’illustration. Kohler Co. 1017598-2-...
- Page 34 Boutons de Fonction double Pomme de douche Buses du Buse latérale à balayage corps Buse latérale à débit pulsatoire Bouton de buse du Fig. #21 corps Buses du corps Fig. #22 1017598-2- Kohler Co.
- Page 35 Voir la Fig. #25 . L’écoulement d’eau étant arrêté, ouvrir la porte de tour en suivant les étapes indiquées dans le manuel d’utilisation. Inspecter la tour, à la recherche de fuites, puis refermer la porte. Fig. #25 Kohler Co. 1017598-2-...
-
Page 36: Dépannage
Pour toute assistance additionnelle, contactez notre département de service à la clientèle pour une aide directe. Vous pouvez aussi nous joindre sur notre site Web à l'adresse donnée ci dessous. Aux É.-U., composez le 1-800-4-KOHLER Au Mexique, composez le 001-877-680-1310 Au Canada, composez le 1-800-964-5590 www.kohler.com...