Table of Contents
Advertisement
Quick Links
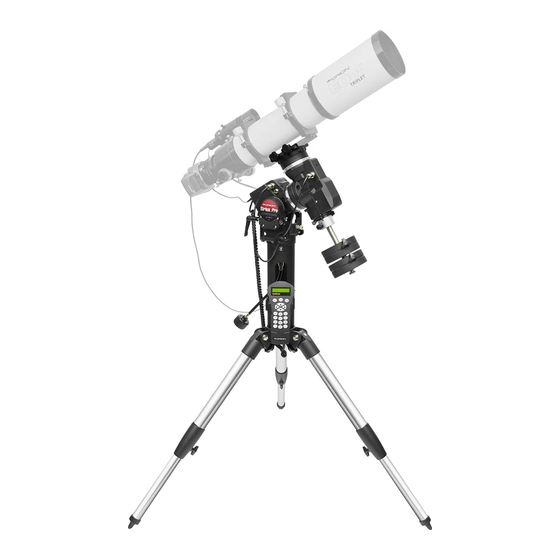
instruction Manual
orion
sirius
Pro aZ/EQ-G
©
™
Goto telescope Mount
#10088
Customer Support:
www.OrionTelescopes.com/contactus
Corporate Offices:
89 Hangar Way, Watsonville CA 95076 – USA
Providing Exceptional Consumer Optical Products Since 1975
Copyright © 2015 Orion Telescopes & Binoculars
All Rights Reserved. No part of this product instruction or any of its contents may be reproduced, copied, modified or adapted,
without the prior written consent of Orion Telescopes & Binoculars.
IN 550 Rev. A 09/15
Advertisement
Table of Contents

Summary of Contents for Orion Sirius Pro AZ/EQ-G
- Page 1 Copyright © 2015 Orion Telescopes & Binoculars All Rights Reserved. No part of this product instruction or any of its contents may be reproduced, copied, modified or adapted, without the prior written consent of Orion Telescopes & Binoculars. IN 550 Rev. A 09/15...
-
Page 2: Table Of Contents
2.1 Setting Up the Pier Tripod (“Pier-Pod”) ... . 4 PART 6: OTHER SIRIUS PRO AZ/EQ-G FEATURES 12 2.2 Attaching the Counterweights ....4 6.1 Auxiliary Encoder Function . -
Page 3: Part 1: Unpacking
We recommend keeping the boxes and telescope.com for assistance. original packaging. In the event that the mount needs to be shipped to another location, or returned to Orion for warranty 1.2 Parts list repair, having the proper packaging will ensure that your mount Qty. -
Page 4: Part 2: Assembly
Azimuth adjustment bolts Figure 3. Fold the tripod legs down and lock each one with the captive rosette knob. Part 2: assEMBlY Post 2.1 setting up the Pier tripod (“Pier-Pod”) Fold the tripod legs down until they stop, then screw the leg lock knob until tight (Figure 3). -
Page 5: Attach The Hand Controller Bracket
Mount coupling knob ON/OFF switch Power indicator (LED) Bubble level Figure 5. Turn the large knob on the flex cable clockwise to attach the mount head to the pier-pod. (Figure 10); first loosen the counterweight’s lock knob to clear the center hole. Retighten the lock knob to secure the counterweight(s) on the shaft. -
Page 6: Balancing The Telescope
Dec. clutch wheel Counterweight shaft lock knobs Satety stop Figure 10. Install counterweight(s) before attaching your telescope to the mount! Figure 7. Loosen the two counterweight shaft lock knobs to extend or retract the counterweight shaft. Bracket R.A. clutch wheel Figure 8. -
Page 7: Part 3: Using The Sirius Pro Az/Eq-G Mount
able to rotate freely about the R.A. axis. Rotate it until the counterweight shaft is parallel to the ground (i.e., Saddle horizontal). Now loosen the counterweight lock knob and slide the weight(s) along the shaft until it exactly counterbalances the telescope. That’s the point at which the shaft remains horizontal even when you let go with both hands. -
Page 8: Adjusting The R.a. Axis Elevation (Latitude)
desired location. Both the R.A. and Dec. clutches should be tightened when driving the mount with the internal motors. 3.2 using the setting circles As indicated in Figure 13, the Sirius Pro features right ascen- sion and declination setting circles. Most users of a GoTo tele- Polar scope mounting scope will not have a need to use setting circles, but if you... -
Page 9: Mounting A Second Telescope (Altazimuth Mode Only)
Note: • In any case, DO NOT TURN THE HANDLE FORCEFULLY. • In Altazimuth mode with one telescope mounted, the telescope should be positioned on the right-hand side of the mount when viewed from behind the mount. The counterweight shaft should be extended to the left. •... -
Page 10: Part 4: Polar Alignment
Loosen the counterweight shaft’s lock knobs and rotate the second telescope until it points in the same direction as the main telescope. Retighten the lock knobs. Aim the main telescope at a distant object, and then Flat strip adjust the two vertical-adjustment knobs on the secondary saddle (Figure 19) to point the secondary telescope to the same vertical level. - Page 11 Dec. motor sockets Adjustment knobs Power input jack Figure 21. The power input jack and declination motor Figure 19. Use the vertical-adjustment knobs on the cable sockets are located on the right side of the mount secondary saddle to point the secondary telescope to the same vertical level as the main telescope.
-
Page 12: Pinout Of The Interfaces
5.4 Power supply requirements as a power-on indicator and provides other status information: The Sirius Pro AZ/EQ-G should be powered by a 12V DC or AC-to-DC power supply with a 3-amp or higher output current Steady on: Power voltage is normal. -
Page 13: Batch Exposure Function
Instructions and hard- ware included. Polar Scope: For optimal tracking and GoTo performance the Sirius Pro AZ/EQ-G can be polar-aligned with a soft- ware-assisted polar alignment routine that doesn't require a polar alignment scope. But for those who prefer using a polar scope, the optional Orion Illuminated Polar Scope for Sirius Pro Mount is available. -
Page 14: Specifications
Product name Sirius Pro AZ/EQ-G Mount Mount type German equatorial / altazimuth dual mode Payload (Counterwts. excl.) 33 lbs. (15kg) (66 lbs. in two-telescope altaz mode) Saddle type Vixen style, dual bolt clamps Latitude adjustment range 0 - 90°... - Page 16 This warranty is for the benefit of the original retail purchaser only. During this warranty period Orion Telescopes & Binoculars will repair or replace, at Orion’s option, any warranted instrument that proves to be defective, provided it is returned postage paid to: Orion Warranty Repair, 89 Hangar Way, Watsonville, CA 95076.


