Table of Contents
Advertisement
Quick Links
Welcome
You have selected one of the finest marine power packages available. It incorporates numerous design features to
ensure operating ease and durability.
With proper care and maintenance, you will enjoy using this product for many boating seasons. To ensure maximum
performance and carefree use, we ask that you thoroughly read this manual.
The Operation and Maintenance Manual contains specific instructions for using and maintaining your product. We
suggest that this manual remain with the product for ready reference whenever you are on the water.
Thank you for purchasing one of our products. We sincerely hope your boating will be pleasant!
Mercury Marine, Fond du Lac, Wisconsin, U.S.A.
Name / function:
John Pfeifer, President,
Mercury Marine
Read This Manual Thoroughly
IMPORTANT: If you do not understand any portion of this manual, contact your dealer. Your dealer can also provide a
demonstration of actual starting and operating procedures.
Notice
Throughout this publication, and on your power package, warnings, cautions, and notices, accompanied by the
International Hazard Symbol
particular service or operation that may be hazardous if performed incorrectly or carelessly. Observe them carefully.
These safety alerts alone cannot eliminate the hazards that they signal. Strict compliance with these special instructions
while performing the service, plus common sense operation, are major accident prevention measures.
Indicates a hazardous situation which, if not avoided, could result in death or serious injury.
Indicates a hazardous situation which, if not avoided, could result in minor or moderate injury.
Indicates a situation which, if not avoided, could result in engine or major component failure.
IMPORTANT: Identifies information essential to the successful completion of the task.
NOTE: Indicates information that helps in the understanding of a particular step or action.
IMPORTANT: The operator (driver) is responsible for the correct and safe operation of the boat, the equipment aboard,
and the safety of all occupants aboard. We strongly recommend that the operator read this Operation and Maintenance
Manual and thoroughly understand the operational instructions for the power package and all related accessories before
the boat is used.
The engine exhaust from this product contains chemicals known to the state of California to cause cancer, birth
defects or other reproductive harm.
The serial numbers are the manufacturer's keys to numerous engineering details that apply to your Mercury Marine
power package. When contacting Mercury Marine about service, always specify model and serial numbers.
Descriptions and specifications contained herein were in effect at the time this was approved for printing. Mercury
Marine, whose policies are based on continuous improvement, reserves the right to discontinue models at any time or to
change specifications or designs without notice and without incurring obligation.
!
, may be used to alert the installer and user to special instructions concerning a
WARNING
!
CAUTION
!
NOTICE
WARNING
!
Advertisement
Table of Contents
Troubleshooting

Related Manuals for Mercury TDI 3.0L


Summary of Contents for Mercury TDI 3.0L
-
Page 1: Read This Manual Thoroughly
The engine exhaust from this product contains chemicals known to the state of California to cause cancer, birth defects or other reproductive harm. The serial numbers are the manufacturer’s keys to numerous engineering details that apply to your Mercury Marine power package. When contacting Mercury Marine about service, always specify model and serial numbers. - Page 2 At Mercury Marine every engine is operated and tested before it is boxed for shipment to make sure that the product is ready for use. In addition, certain Mercury Marine products are tested in a controlled and monitored environment, for up to 10 hours of engine run time, in order to verify and make a record of compliance with applicable standards and regulations.
-
Page 3: Table Of Contents
TABLE OF CONTENTS Section 1 - Getting to Know Your Power Package Engine Component List.............. 2 Controls..................7 3.0 Liter TDI Front View Components........ 2 Switches................7 3.0 Liter TDI Starboard View Components......2 Emergency Stop Switch............8 3.0 Liter TDI Port View Components........3 Remote Control.............. - Page 4 Section 4 - Maintenance Owner and Operator Responsibilities........32 Filling the Closed‑Cooling System........42 Dealer Responsibilities............32 Air Filter Cleaning..............44 Cleaning Care Recommendation........... 32 Removal................44 Cleaning Gauges............. 32 Installation................. 44 Cleaning Remote Controls..........32 Water‑Separating Fuel Filter..........45 Maintenance................
- Page 5 Low Engine Oil Pressure..........64 Steering Wheel Turns Hard or Jerky........ 64 Section 7 - Customer Assistance Information Owner Service Assistance............66 Contact Information for Mercury Marine Customer Service Local Repair Service............66 ................... 67 Service Away From Home..........66 Customer Service Literature............
- Page 6 Page iv 90-8M0133568 JUNE 2017...
- Page 7 Section 1 - Getting to Know Your Power Package Section 1 - Getting to Know Your Power Package Table of Contents Engine Component List............2 Controls.................. 7 3.0 Liter TDI Front View Components......2 Switches................7 3.0 Liter TDI Starboard View Components...... 2 Emergency Stop Switch...........
-
Page 8: Engine Component List
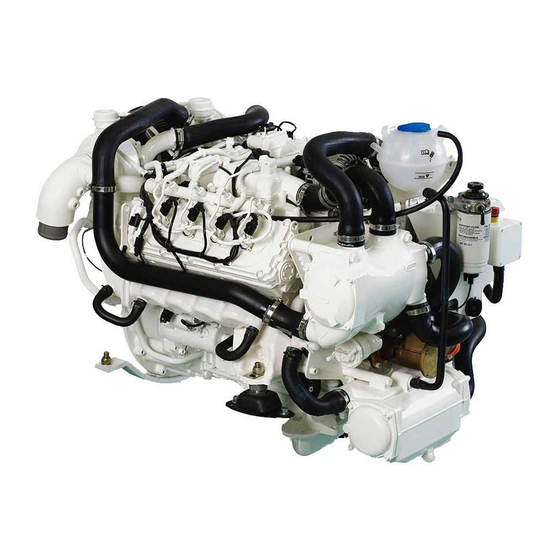
Section 1 - Getting to Know Your Power Package Engine Component List 3.0 Liter TDI Front View Components Gear lubrication monitor (sterndrive only) Engine control module cover Engine oil dipstick Engine coolant expansion tank Power steering oil reservoir Charge air cooler (intercooler) Sacrificial anode Seawater inlet connection... -
Page 9: 3.0 Liter Tdi Port View Components
Engine coolant expansion tank Engine control module cover 52239 Features and Controls TDI 3.0 Liter Engine Features The Mercury Diesel 3.0 Liter 6‑cylinder engine has the following features: • Four‑stroke diesel engine • Common‑rail direct injection • 6 cylinders (90° V angle) •... -
Page 10: Keep The Lanyard Stop Switch And Lanyard Cord In Good Operating Condition
Section 1 - Getting to Know Your Power Package The lanyard cord is usually 122–152 cm (4–5 feet) in length when stretched out, with an element on one end made to be inserted into the switch and a clip on the other end for attaching to the operator's PFD or wrist. The lanyard is coiled to make its at‑rest condition as short as possible to minimize the likelihood of lanyard entanglement with nearby objects. -
Page 11: Instrumentation
Section 1 - Getting to Know Your Power Package Instrumentation VesselView There are several VesselView products available. VesselView will display all engine information, fault codes, vessel information, basic navigation data, and system information. When an operating system error or failure occurs, VesselView displays an alarm message. -
Page 12: Smartcraft System-Power Shut Down
Section 1 - Getting to Know Your Power Package The following digital instruments may be included with your power package. 37925 System Link digital gauges Item Gauge Indicates Oil pressure gauge Engine oil pressure Voltmeter Battery voltage Water temperature gauge Engine operating temperature Fuel gauge Quantity of fuel in tank... -
Page 13: Engine Guardian System
Section 1 - Getting to Know Your Power Package Engine Guardian System The Engine Guardian system monitors the critical sensors on the engine for any early indications of problems. Engine Guardian is functional whenever your engine is operating, so you never have to be concerned about whether or not you are protected. The system will respond to a problem by sounding the warning horn for six seconds and/or reducing engine power in order to provide engine protection. -
Page 14: Emergency Stop Switch
30 seconds will restart the engine but cause fault codes to be set. Unless you are in a potentially hazardous situation, turn the key switch off and wait at least 30 seconds before restarting the engine or engines. If after restarting, some fault codes are still being displayed, contact your authorized Mercury Diesel repair facility. Remote Control Remote Control Function Operation of the throttle and shift are controlled by the movement of the control handle. -
Page 15: Digital Throttle And Shift
Forward gear Reverse gear 51014 Digital Throttle and Shift Digital Throttle and Shift (DTS) operating instructions are provided in a separate manual. Refer to Mercury Diesel's SmartCraft and DTS Operator's Manual. Electrical System Overload Protection CAUTION Failure to protect wiring with an appropriate fuse can damage the wiring and start a fire. When installing any accessories, we recommend using a Mercury accessory kit. -
Page 16: Vessel Adapter Assembly (Vaa) Fuse Replacement
Section 1 - Getting to Know Your Power Package Vessel Adapter Assembly (VAA) Fuse Replacement NOTE: Refer to your boat owner's manual for the location of the vessel adapter assembly (VAA). The key for the VAA was provided along with the ignition keys. Verify the ignition key is off and the lanyard switch is off. -
Page 17: Identification
Section 1 - Getting to Know Your Power Package Identification Engine Data Label Location The engine data label is located on top of the electrical box. Engine data label (not seen—on top of the electrical box) 52079 ZF Marine Transmissions On the ZF Marine 63A 8°... -
Page 18: Emissions Information
Boatbuilders and dealers may not remove the label or the part it is affixed to before sale. If modifications are necessary, contact Mercury Diesel about the availability of replacement decals before proceeding. - Page 19 Section 2 - On The Water Section 2 - On The Water Table of Contents Safe Boating Recommendations.......... 14 While You Are Cruising ......... 21 Carbon Monoxide Exposure..........15 While Boat Is Stationary ........21 Be Alert To Carbon Monoxide Poisoning ..... 15 High Speed and High Performance.......
-
Page 20: Safe Boating Recommendations
Most boats are rated and certified for maximum load (weight) capacities (refer to your boat's capacity plate). Know your boat's operating and loading limitations. Know if your boat will float if it is full of water. When in doubt, contact your authorized Mercury Marine dealer or the boat manufacturer. Ensure that everyone in the boat is properly seated. -
Page 21: Carbon Monoxide Exposure
Section 2 - On The Water Be alert. • The operator of the boat is responsible by law to maintain a proper lookout by sight and hearing. The operator must have an unobstructed view particularly to the front. No passengers, load, or fishing seats should block the operator's view when the boat is above idle or planing transition speed. -
Page 22: Poor Ventilation
(WOT) at the rated engine RPM. The power package must also be applied in accordance with recommendations indicated in the appropriate applications manual. Use of Mercury Diesel engines in other than the applications indicated by the following information and in the appropriate applications manual requires written approval from an authorized Mercury Diesel application engineer. - Page 23 Section 2 - On The Water EPA Mode Number MODES Cycle 5 DUTY CYCLE Engine speed (percent of WOT) Idle Engine power (percent of total) Time at given mode (percent of total operating time) Chart showing full power operation is limited to a maximum of 1 of 12 hours Mode 1: 1.0 hour (8%) Mode 2: 1.5 hours (13%) Mode 3: 2.0 hours (17%)
-
Page 24: Tdi Operation Chart
Section 2 - On The Water TDI Operation Chart Starting Procedure After Starting While Underway Stopping and Shutdown Observe all gauges and Frequently observe all gauges Open the engine hatch. Air indicator lamps to check the Shift the remote control lever and indicator lamps to monitor out the bilge completely. -
Page 25: Before Starting The Engine
• Check all items listed in the Maintenance Schedule and Operation Chart. • Perform any other necessary checks as indicated by your Mercury Diesel authorized repair facility or specified in your boat owner’s manual. Starting a Cold Engine (Inboard) IMPORTANT: Check the fluid levels before starting the engine. Refer to Maintenance. -
Page 26: Starting A Warm Engine
Check for coolant leaks. Check the coolant hoses and connection pipes of the heat exchanger, fluid coolers, aftercooler, water pump, and drain fittings for leaks. Correct any problems found, or see your Mercury Diesel‑authorized repair facility if you are unable to determine the problem. -
Page 27: Protecting People In The Water
• If operating in arctic temperatures of –29° C (–20° F) or lower, consult your Mercury Diesel authorized repair facility for information about special cold weather equipment and precautions. Refer to Storage for cold weather or extended storage related information. -
Page 28: Boats With Front-Mounted, Raised Pedestal Fishing Seats
Section 2 - On The Water Persons on the front deck could easily be thrown overboard or persons dangling their feet over the front edge could get their legs caught by a wave and pulled into the water. mc79555-1 WARNING Sitting or standing in an area of the boat not designed for passengers at speeds above idle can cause serious injury or death. -
Page 29: Impact With Underwater Hazards
Operating a boat or engine with impact damage can result in product damage, serious injury, or death. If the vessel experiences any form of impact, have an authorized Mercury Marine dealer inspect and repair the vessel or power package. Conditions Affecting Operation... -
Page 30: Elevation And Climate
It is important to follow this procedure to properly break in the engine. IMPORTANT: Mercury Marine recommends that the boat not be accelerated hard until this procedure has been completed. IMPORTANT: Never operate the starter motor longer than 15 seconds at a time to avoid overheating the starter motor. If the engine does not start, wait one minute to allow the starter motor to cool;... -
Page 31: After The 20-Hour Break-In Period
Check the engine oil level frequently. Add oil as needed. High oil consumption is normal during the break‑in period. After the 20-Hour Break-In Period To help extend the life of your power package, Mercury Marine recommends the following: • Change the engine oil and filter and the transmission fluid at the interval indicated in the Maintenance Schedule. Refer to Specifications and Maintenance. - Page 32 Section 2 - On The Water Notes: Page 26 90-8M0133568 JUNE 2017...
-
Page 33: Section 3 - Specifications
Section 3 - Specifications Section 3 - Specifications Table of Contents Fuel Requirements............... 28 Engine Specifications............29 Nonferrous Metals and the Fuel System ...... 28 Fluid Specifications............... 30 Diesel Fuel in Cold Weather..........28 Engine Fluid Capacity............ 30 Antifreeze/Coolant..............28 Transmission.............. -
Page 34: Fuel Requirements
Mercury diesels are required to use Grade No. 2‑D ULSD (ultra‑low sulphur diesel) fuel meeting ASTM Standards D975 (or fuel rated Diesel DIN EN 590), and having a minimum cetane rating of 40. -
Page 35: Engine Oil
Section 3 - Specifications Only premixed coolant should be added to the closed‑cooling system. Additives and inhibitors introduced into acceptable coolant solutions will form a protective film on the internal passages and provide protection against internal cooling system erosion. Do not drain the closed‑cooling section for storage. The closed‑cooling section should be kept filled year‑round with an acceptable antifreeze/coolant solution to avoid rust forming on the internal surfaces. -
Page 36: Fluid Specifications
*Battery manufacturers may rate and test their batteries to different standards. MCA, CCA, Ah, and reserve capacity (RC) are the ratings recognized by Mercury Marine. Manufacturers that use standards different than these, such as equivalent MCA, do not meet Mercury Marine battery requirements. - Page 37 Section 4 - Maintenance Section 4 - Maintenance Table of Contents Owner and Operator Responsibilities........32 Filling the Closed‑Cooling System......... 42 Dealer Responsibilities............32 Air Filter Cleaning..............44 Cleaning Care Recommendation......... 32 Removal ............... 44 Cleaning Gauges............32 Installation ..............44 Cleaning Remote Controls..........
-
Page 38: Owner And Operator Responsibilities
It is the operator's responsibility to perform all safety checks, to ensure that all lubrication and maintenance instructions are complied with for safe operation, and to return the unit to a Mercury Diesel authorized repair facility for a periodic checkup. -
Page 39: Replacement Parts Warning
IMPORTANT: Refer to Maintenance Schedule for a complete listing of all scheduled maintenance to be performed. Some tasks can be done by the owner or operator, while others should be performed by an authorized Mercury Diesel repair facility. Before attempting maintenance or repair procedures not covered in this manual, we recommended that you purchase the appropriate Mercury Diesel service manual and read it thoroughly. -
Page 40: Maintenance Schedule (Inboard Models)
Check electrical connections and leads for damage. Remove and inspect the propeller. If badly nicked, bent, or cracked, contact your Mercury Diesel authorized repair facility. Repair nicks and corrosion damage on power package exterior finish. Contact your Mercury Diesel authorized repair facility. -
Page 41: Every 500 Hours Or 5 Years (Whichever Occurs First)
Section 4 - Maintenance • Check the closed cooling fluid condition and level. • Inspect the air filter element and clean it if necessary. • Check the condition of the alternator and power steering pump ribbed V‑belt. • Check the condition of the fuel injection pump belt. See your authorized dealer. •... -
Page 42: Adding Engine Oil
Section 4 - Maintenance Adding Engine Oil IMPORTANT: When filling or adding oil to the engine, always use the dipstick to determine how much oil is required. Do not overfill the engine with oil. Remove the oil fill cap. Oil fill cap 50583 Add the specified oil to bring the oil level up to, but not over, the maximum mark on the dipstick. - Page 43 Section 4 - Maintenance Remove the cover of the oil filter so that the return valve opens, allowing the oil to return to the oil sump. Oil filter cover 50598 Separate the oil filter element from the oil filter cover. Clean the cover with a clean cloth.
-
Page 44: Zf Marine Transmission Fluid
If the fluid level is low, add transmission fluid to bring the level up to the maximum mark on the dipstick. Refer to Add Fluid. NOTE: If the transmission fluid level was extremely low, see your local Mercury Diesel authorized repair facility. Install the dipstick. -
Page 45: Change Fluid
Section 4 - Maintenance Model Capacity Fluid type Part Number ZF Marine 63A 4.0 L (4.2 US qt) Dexron III® Automatic Transmission Fluid or Equivalent Obtain locally ZF Marine 63IV 4.4 L (4.6 US qt) Install the dipstick. Check the fluid level. Refer to Check Fluid Level. Change Fluid Clean the exterior of the transmission around the fluid filter assembly. -
Page 46: Engine Coolant
Section 4 - Maintenance Using a 6 mm Allen wrench, turn the filter assembly nut clockwise to tighten. Tighten the nut to the specified torque. Assembly nut Fluid filter assembly 13173 Description lb‑in. lb‑ft Filter assembly nut – 10. Fill the transmission to the proper level with the specified fluid. See Add Fluid. Engine Coolant CAUTION A sudden loss of pressure can cause hot coolant to boil and discharge violently, resulting in serious injury from burns. -
Page 47: Filling
50656 The pressure cap maintains pressure on the cooling system and may not be holding pressure properly. To have the cap tested, contact your Mercury Diesel authorized repair facility. Refer to Filling and add the specified coolant as necessary. IMPORTANT: When installing the pressure cap, be sure to tighten it securely until it clicks to prevent coolant loss. -
Page 48: Replacing The Engine Coolant In The Closed-Cooling System
Closed‑cooling system drain screw Seawater system drain screw 50672 If required, clean the closed‑cooling system. See your Mercury Diesel authorized repair facility. Fill the system with the specified coolant. Refer to Filling the Closed‑Cooling System. Filling the Closed‑Cooling System IMPORTANT: Use only the specified coolant. - Page 49 Section 4 - Maintenance Remove the pressure cap from the expansion tank coolant reservoir. Pressure cap Maximum mark Minimum mark 52258 Slowly add the coolant to the expansion tank. Allow the entrapped air to escape. When coolant cannot be added, supply the seawater pump with water. NOTICE Without sufficient cooling water, the engine, the water pump, and other components will overheat and suffer damage.
-
Page 50: Air Filter Cleaning
Section 4 - Maintenance Air Filter Cleaning Removal Loosen the screw securing the air filter to the intake manifold and remove the air filter. Air filter Screw Intake manifold 50680 CAUTION Using compressed air can cause serious injury. Always wear eye protection when working with compressed air to prevent injury from ruptured hoses or flying debris. -
Page 51: Water-Separating Fuel Filter
Section 4 - Maintenance Tighten the air filter attaching screw securely. Air filter Screw Intake manifold 50680 Water‑Separating Fuel Filter WARNING Fuel is flammable and explosive. Ensure that the key switch is off and the lanyard is positioned so that the engine cannot start. -
Page 52: Replacing
13. Connect the battery cables. 14. Start and operate the engine. Check the filter connection for fuel leaks. If leaks exist, recheck filter installation. If leaks continue, stop the engine immediately and contact your Mercury Diesel authorized repair facility. Filling A plunger‑type of primer pump is located on the fuel filter bracket and is used to:... -
Page 53: Purging The Fuel System
Section 4 - Maintenance Securely tighten the bleed screw. Primer pump Bleed screw Fine element fuel filter Water‑in‑fuel sensor 52259 Purging the Fuel System IMPORTANT: The fuel line must be purged before the engine is put into operation. Loosen the bleed screw on top of the fuel filter bracket. Use a suitable container to collect fuel while purging the system. -
Page 54: Seawater System
Seawater Pump Impeller Inspection The seawater pump impeller must be inspected (and replaced, if necessary) at the interval specified by the maintenance schedule. It is recommended this task be performed at a Mercury Diesel authorized repair facility. Close the seacock. -
Page 55: Checking The Seawater Pickups
Section 4 - Maintenance Switch off the engine. Replace the cover on the seawater filter. Attach a suitable hose to the seawater‑cooling system drain screw. Heat exchanger drain screws Closed‑cooling system drain screw Seawater‑cooling system drain screw 50672 Open the drain screw and allow the water to drain into a suitable container. When the draining is complete, remove the hose and close the drain screw. -
Page 56: Corrosion Protection
To help control the effects of galvanic corrosion, Mercury Diesel power packages come with several sacrificial anodes and other corrosion protection devices. For a more comprehensive explanation of corrosion and corrosion protection refer to the Marine Corrosion Protection Guide. -
Page 57: Cleaning And Inspection
Section 4 - Maintenance Remove the anode assembly. Intercooler Anode plug Anode length 20 mm (0.79 in.) 54639 Cleaning and Inspection Inspection and replacement interval will vary according to the condition of the seawater and the mode of engine operation. NOTE: Use sandpaper, fiber brush, or cleaning pad, remove the deposits from the surface of the anode before trying to determine the amount of erosion. -
Page 58: Lubrication
Section 4 - Maintenance Install the anode assembly with the washer into the intercooler end cover and tighten securely. Anode 50781 Unplug and connect the seawater inlet hose, or open the seacock if equipped. NOTICE Without sufficient cooling water, the engine, the water pump, and other components will overheat and suffer damage. Provide a sufficient supply of water to the water inlets during operation. -
Page 59: Driveshaft Extension Models
Section 4 - Maintenance Tube Ref No. Description Where Used Part No. SAE Engine Oil 30W Shift cable pivot points and guide contact surfaces Obtain Locally Driveshaft Extension Models Lubricate the transom end grease fitting and engine end grease fitting by applying approximately 10–12 pumps of grease from a typical hand‑operated grease gun. -
Page 60: Engine Mounts
Engine Mounts IMPORTANT: The engine mounts must never be tightened or adjusted by unauthorized personnel. Only a Mercury Diesel authorized repair facility has personnel who are factory trained to adjust the engine mounts. If the engine mount appears to be loose, contact an authorized repair facility to perform an alignment inspection of the engine to the drive component. -
Page 61: Battery
Section 4 - Maintenance Appearance Description Cause Solution The belt should be replaced immediately. Improper belt installation is a Ensure all ribs of the Improper installation common cause of premature The belt ribs begin separating replacement belt fit into failure. One of the outermost belt from the joined strands. -
Page 62: Battery Precautions For Multiple Engines
Section 4 - Maintenance WARNING An operating or charging battery produces gas that can ignite and explode, spraying out sulfuric acid, which can cause severe burns. Ventilate the area around the battery and wear protective equipment when handling or servicing batteries. Battery Precautions for Multiple Engines Alternators Alternators are designed to charge a single battery that supplies electrical power to the individual engine on which the... -
Page 63: Section 5 - Storage
Section 5 - Storage Section 5 - Storage Table of Contents Cold Weather (Freezing Temperature), Seasonal Storage, Seasonal Storage Instructions........58 and Extended Storage............58 Extended Storage Instructions........59 Preparing Your Power Package for Seasonal or Battery Storage.............. 60 Extended Storage............58 Recommissioning.............. -
Page 64: Cold Weather (Freezing Temperature), Seasonal Storage, And Extended Storage
Section 5 - Storage Cold Weather (Freezing Temperature), Seasonal Storage, and Extended Storage IMPORTANT: Mercury Diesel strongly recommends that this service be performed by a Mercury Diesel authorized repair facility. Damage caused by freezing is not covered by the Mercury Diesel Limited Warranty. -
Page 65: Extended Storage Instructions
Read all precautions and perform all procedures found in Flushing and Draining the Seawater System. Read all precautions and perform all procedures found in Seasonal Storage Instructions. Remove the seawater pump impeller and store away from direct sunlight. See a Mercury Diesel authorized repair facility for additional information and service. -
Page 66: Battery Storage
On engines that were prepared for extended storage, refer to a Mercury Diesel authorized repair facility and have the seawater pump impeller installed, if it was removed for storage. -
Page 67: Section 6 - Troubleshooting
Section 6 - Troubleshooting Section 6 - Troubleshooting Table of Contents Diagnosing Electronically Controlled Fuel System Problems Engine Will Not Start, Starter Does Not Turn....63 ....................62 Excessive Engine Temperature........63 Troubleshooting Charts............62 Insufficient Engine Temperature........64 Starter Motor Will Not Crank Engine, or Cranks Slow... 62 Low Engine Oil Pressure.......... -
Page 68: Diagnosing Electronically Controlled Fuel System Problems
Diagnosing Electronically Controlled Fuel System Problems Your Mercury Diesel authorized repair facility has the proper service tools for diagnosing problems on electronically controlled fuel systems. The engine control module on these engines has the ability to detect some problems with the system when they occur, and store a trouble code in the control module's memory. -
Page 69: Poor Performance
Boat overloaded or improperly distributed. Reduce load or redistribute more evenly. Boat bottom fouled or damaged. Clean or repair as necessary. Have electronic fuel system checked by a Mercury Diesel–authorized Electronic fuel system fault. repair facility. Faulty turbocharger outlet air temperature sensor. Replace. -
Page 70: Insufficient Engine Temperature
Drive belt loose or in poor condition. Replace and/or adjust. Insufficient lubrication on the steering components. Lubricate. Check all parts and fasteners; if any are loose or missing, see a Mercury Loose or missing steering fasteners or parts. Diesel–authorized repair facility immediately. -
Page 71: Section 7 - Customer Assistance Information
Section 7 - Customer Assistance Information Section 7 - Customer Assistance Information Table of Contents Owner Service Assistance............ 66 Contact Information for Mercury Marine Customer Local Repair Service ............ 66 Service ................. 67 Service Away From Home ..........66 Customer Service Literature..........67 Stolen Power Package .......... -
Page 72: Owner Service Assistance
If your power package is stolen, immediately inform the local authorities and Mercury Marine of the model and serial numbers and to whom the recovery is to be reported. This information is maintained in a database at Mercury Marine to aid authorities and dealers in recovery of stolen power packages. -
Page 73: Contact Information For Mercury Marine Customer Service
Attn: Publications Department W6250 Pioneer Road P.O. Box 1939 Fond du Lac, WI 54936-1939 Outside the United States and Canada, contact the nearest Mercury Marine or Marine Power International Service Center for further information. When ordering be sure to: •... -
Page 74: Other Languages
Section 7 - Customer Assistance Information Other Languages To obtain an Operation, Maintenance and Warranty Manual in another language, contact the nearest Mercury Marine or Marine Power International Service Center for information. A list of part numbers for other languages is provided with your power package. -
Page 75: Section 8 - Maintenance Log
Section 8 - Maintenance Log Section 8 - Maintenance Log Table of Contents Scheduled Maintenance Log..........70 Vessel Maintenance Notes........... 71 90-8M0133568 JUNE 2017 Page 69... -
Page 76: Scheduled Maintenance Log
Section 8 - Maintenance Log Scheduled Maintenance Log 100 Hours Actual Hours Service Notes Dealer Name Signature Date 200 Hours Actual Hours Service Notes Dealer Name Signature Date 300 Hours Actual Hours Service Notes Dealer Name Signature Date 400 Hours Actual Hours Service Notes Dealer Name... -
Page 77: Vessel Maintenance Notes
Section 8 - Maintenance Log Vessel Maintenance Notes Record all general maintenance performed on your power package here. Save all work orders and receipts. Engine Date Maintenance Completed Servicing Dealer Hours 90-8M0133568 JUNE 2017 Page 71...