Table of Contents
Advertisement
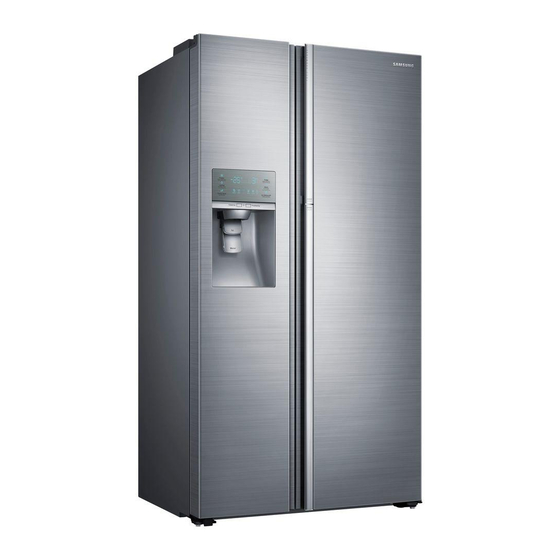
REFRIGERATOR
RH22H**/RH29H**
REFRIGERATOR
SIDE BY SIDE TYPE
MODEL NAME : RH22H9010SR
MODEL CODE : RH22H9010SR/AA
CONTENTS
1. PRECAUTIONS(SAFETY WARNINGS) · 5
2. PRODUCT SPECIFICATIONS ··············· 8
3. DISASSEMBLY AND REASSEMBLY······ 19
4. TROUBLESHOOTING ·························· 47
5. PCB DIAGRAM ····································· 75
6. WIRING DIAGRAM ······························· 80
7. BLOCK DIAGRAM ································ 81
8. MODEL CODE TABLE ························· 83
RH29H9000SR
RH29H9000SR/AA
Advertisement
Table of Contents

Related Manuals for Samsung RH29H9000SR


Summary of Contents for Samsung RH29H9000SR
- Page 1 REFRIGERATOR SIDE BY SIDE TYPE MODEL NAME : RH22H9010SR RH29H9000SR MODEL CODE : RH22H9010SR/AA RH29H9000SR/AA CONTENTS REFRIGERATOR 1. PRECAUTIONS(SAFETY WARNINGS) · 5 2. PRODUCT SPECIFICATIONS ··············· 8 3. DISASSEMBLY AND REASSEMBLY······ 19 4. TROUBLESHOOTING ·························· 47 5. PCB DIAGRAM ····································· 75 6.
- Page 2 Any attempt to repair a major appliance may result in personal injury and property damage. The manufacturer or dealer cannot be responsible for the interpretation of this information. SAMSUNG ELECTRONICS AMERICA, INC. Technical Service Guide Copyright ©2011 All rights reserved.
-
Page 3: Table Of Contents
Contents 1. PRECAUTIONS (SAFETY WARNINGS)................5 2. PRODUCT SPECIFICATIONS ..................8 2-1. Introduction of Main Function ....................9 2-2. Model Specification ......................10 2-3. Basic Specification ......................11 2-3-1. Electric Parts Specification ....................12 2-3-2. Electric Component ......................13 2-4. Model Inform For E-Cost (Model Code, introduction application date, Weight Inform) ..15 2-5. - Page 4 Contents 5-3. Connector Layout with part position (Main Board) ............... 78 5-4. Connector Layout with part position (Inverter Board) ............79 6. Wiring Diagram ......................80 6-1. Model : RH22*/RH29*......................80 7. Block Diagram ......................81 7-1. Whole block diagram ......................81 7-2.
-
Page 5: Precautions (Safety Warnings)
1. PRECAUTIONS (SAFETY WARNINGS) Unplug the appliance before the changing or repairing the electric parts. Use rated electronic Control equipment. Make sure to check out ModeL name, Rated voltage, Rated current, Operation Temp, etc. Upon repair, make sure that harnesses are not to be water-penetrated and are bundled tight. - Page 6 PRECAUTIONS(SAFETY WARNINGS) Read all instructions before repairing the product and follow the instructions in order to prevent danger or property damage. CAUTION/WARNING SYMBOLS DISPLAYED SYMBOLS means “Prohibited”. Indicates that a danger of death Warning means “Do not disassemble”. or serious injury exists.
- Page 7 PRECAUTIONS(SAFETY WARNINGS) Please let users know following warnings & cautions in detail. Warning & Caution Do not allow users to store narrow Do not allow users to store Do not allow users to put bottles or pharmaceutical products, scientific and lengthy bottles or foods in a kinds of glass in the freezer.
-
Page 8: Product Specifications
PRODUCT SPECIFICATIONS 2. PRODUCT SPECIFICATIONS 2-1. Introduction of Main Function ....................9 2-2. Model Specification ......................10 2-3. Basic Specification ......................11 2-3-1. Electric Parts Specification ....................12 2-3-2. Electric Component ......................13 2-4. Model Inform For E-Cost (Model Code, introduction application date, Weight Inform) ..15 2-5. -
Page 9: Introduction Of Main Function
2-1. Introduction of Main Function Larger Capacity • The Samsung Side by side Refrigerator has plenty of space for all your groceries, beverages, frozen foods and leftovers. It’s the perfect size for any occasion - holiday celebration, family reunion or Super Bowl party. -
Page 10: Model Specification
The characteristics of your appliance may differ slightly from those described in this manual. NOTE - Key features of your new refrigerator Your Samsung Side-By-Side Refrigerator comes equipped with many space-saving, innovative storage and energy-efficient features. • Multi Airflow Provides even cooling throughout the refrigerator to maintain optimal temperatures to keep food fresh. -
Page 11: Basic Specification
PRODUCT SPECIFICATIONS 2-3. Basic Specification ITEM Specification Model RH22H90** RH29H90** image Gross capacity (LT) 21.5 cu.ft 28.5 cu.ft Freezing compartment Valid net capacity 7.2 cu.ft 10.1 cu.ft (LT) Cold compartment (LT) 14.3 cu.ft 18.4 cu.ft 912 x 721 x 1774 912 x 896 x 1774 Dimensions (width x depth x height) (35 7/8"x 28 1/4"x 69 6/8") -
Page 12: Electric Parts Specification
PRODUCT SPECIFICATIONS 2-3-1. Electric Parts Specification Items Specification Model RH22H90** RH29H90** Type NC1MV90ALP NC1MV90ALP Compressor Drive mode INVERTER Charged oil FREOL α-15(ESTER) FREOL α-15(ESTER) Freezer compartment SPLIT FIN TYPE Freezer Cold compartment Condenser Forced and spontaneous convection type Desiccant Molecular sieve XH-9 Freezing compartment ID0.85 x L3300 (4.4) (kg/cm²) -
Page 13: Electric Component
PRODUCT SPECIFICATIONS 2-3-2. Electric Component Items Specification Model RH22H90** RH29H90** Power supplying Defrosting during freezing heater in freezing AC 120V, 300W AC 120V, 300W compartment compartment defrosting Power supplying Defrosting heater in during cold cold compartment compartment defrosting Home bar heater Ambient humidity (cold compartment) sensor interlocking... - Page 14 PRODUCT SPECIFICATIONS Items Specification RH22H90** RH29H90** Model RH22H90** RH29H90** (E-cost) (E-cost) Power supplying Defrosting during freezing AC 120V, AC 120V, AC 120V, AC 120V, heater in freezing compartment 300W 300W 300W 300W compartment defrosting Power supplying Defrosting heater in during cold cold compartment compartment defrosting...
-
Page 15: Model Inform For E-Cost (Model Code, Introduction Application Date, Weight Inform)
PRODUCT SPECIFICATIONS 2-4. Model Inform For E-Cost (Model Code, introduction application date, Weight Inform) Weight Model Code introduction application date GROSS 08/06/2015 RH29H9000SR/AA 08/06/2015 RH22H9010SR/AA 11/12/2017 RH29H9000SR/AA 11/12/2017 RH22H9010SR/AA... -
Page 16: Dimensions (Mm/Inch)
PRODUCT SPECIFICATIONS 2-5. Dimensions (mm/inch) • MODEL : RH22H90**... - Page 17 PRODUCT SPECIFICATIONS • MODEL : RH29H90** 0˚~160˚ 0˚~160˚...
-
Page 18: Optional Material Specification
PRODUCT SPECIFICATIONS 2-6. Optional Material Specification Photograph Part Name Part Code Quantity Remark FILTER-WATER DA29-00019A ALL MODEL ASSY DA90-08491A PACKING... -
Page 19: Disassembly & Reassembly
3. DISASSEMBLY & REASSEMBLY 3-1. PRECAUTION ........................20 3-2. Interior-Fridge ........................21 3-3. Multi Duct-Fridge ........................ 22 3-4. Water Filter (Assembly & Disassembly) ................23 3-5. Case Water Filter ........................ 24 3-6. Cover-Display & Water-Dispenser ..................25 3-7. Water-Dispenser ......................... 26 3-8. -
Page 20: Precaution
DISASSEMBLY AND REASSEMBLY 3-1. PRECAUTION • Unplug the appliance before servicing or replacing electrical parts. • Remove any foreign matter or dust from the power plug pins. - Otherwise there is a risk of fire. • Do not use a cord that shows cracks or abrasion damage along its length or at either end. •... -
Page 21: Interior-Fridge
DISASSEMBLY AND REASSEMBLY 3-2. Interior-Fridge Part Name Description Figure Shelf Pull the Shelf out to the front. Remove all Drawers before disassembling the cover. Drawer cover Pull the cover out to the front. Pull the flip cover out to the front. -
Page 22: Multi Duct-Fridge
DISASSEMBLY AND REASSEMBLY 3-3. Multi Duct-Fridge Part Name Description Figure After disengage the Evaporator Cover, pull the Multi duct-Fridge in the direction of the front. Disengage the housing connector. Multi Duct (Fridge) Assembly will progress in reverse of disengage, and assemble the GROMMENT and MULTI (2ea.) to the tap. -
Page 23: Water Filter (Assembly & Disassembly)
DISASSEMBLY AND REASSEMBLY 3-4. Water Filter (Assembly & Disassembly) Part Name Description Figure Turn the water filter count-clockwise. (Refer to the picture) Remove the water filter by pulling it. (Refer to the picture) Water Filter Push the water filter directly. Turn the water filter clockwise until it locked. -
Page 24: Case Water Filter
DISASSEMBLY AND REASSEMBLY 3-5. Case Water Filter Part Name Description Figure Before disassembling the Case Water Filter take out water filter and drawers and shelves located on the Case Water Filter. Remove screws. While pushing the Tube Fitting, remove the 2 Water Tube. -
Page 25: Cover-Display & Water-Dispenser
DISASSEMBLY AND REASSEMBLY 3-6. Cover-Display & Water-Dispenser Part Name Description Figure Remove a screw under the display cover. Remove the display cover by Cover-Display pulilng it up. Disengage the housing connect of display cover. -
Page 26: Water-Dispenser
DISASSEMBLY AND REASSEMBLY 3-7. Water-Dispenser Part Name Description Figure Disengage the Housing Connectors by pushing a flatblade screwdriver. Remove 2 screws of the Case Ice Route Assy. Pull the Case Ice Route Assy. Water-Dispenser Assembly shall be in order from the disassembly. -
Page 27: Interior-Freezer
DISASSEMBLY AND REASSEMBLY 3-8. Interior-Freezer Part Name Description Figure Shelf Pull the Shelf out to the front. Remove all Drawers before disassembling the cover. Drawer Cover Pull the cover out to the front. -
Page 28: Evaporator Cover-Freezer
DISASSEMBLY AND REASSEMBLY 3-9. Evaporator Cover-Freezer Part Name Description Figure Remove the Cap Screw. Remove the 4 screws by turning counterclockwise. Evap. Cover (Freezer) Pull the Evap. Cover in the direction of the front. -
Page 29: Multi Duct (Freezer)
DISASSEMBLY AND REASSEMBLY 3-10. Multi Duct (Freezer) Part Name Description Figure 1. Disassemble the INSULATION DUCT after remove the tape. 2. Disassemble the Electrically- driven DAMPER after disassemble the INSULATION DUCT REF UP. 3. Remove the two COVER SCREW which is on the center of freezer by driver(-). -
Page 30: Deodorizer
DISASSEMBLY AND REASSEMBLY 3-11. Deodorizer Part Name Description Figure 1. Remove the Cover Deodorizer using flat head driver. Cover Deodorizer 2. Replace Catalyst. 3. Reassemble in the reverse order. -
Page 31: Assembly Hinge-Up Disassembling (Freezing Compartment)
DISASSEMBLY AND REASSEMBLY 3-12. Assembly Hinge-Up Disassembling (Freezing Compartment) Part Name Work sequence Remarks 1. Disconnect the power cord, and Remove 3 cover screws using a Phillips screwdriver. Then open the refrigerator door and pull the hooks on the sides to loosen the cover. -
Page 32: Assembly Hinge-Up Disassembling (Show Case Of Cold Compartment)
DISASSEMBLY AND REASSEMBLY 3-13. Assembly Hinge-Up Disassembling (Show Case of Cold Compartment) Part Name Work sequence Remarks 1. Disconnect the power cord, and Remove 3 cover screws using a Phillips screwdriver. Then open the refrigerator door and pull the hooks on the sides to loosen the cover. -
Page 33: Assembly Hinge-Up Disassembling (Cold Compartment)
DISASSEMBLY AND REASSEMBLY 3-14. Assembly Hinge-Up Disassembling (Cold Compartment) Part Name Work sequence Remarks 1. Disconnect the power cord, and Remove 3 cover screws using a Phillips screwdriver. Then open the refrigerator door and pull the hooks on the sides to loosen the cover. -
Page 34: Assembly Locker Disassembling (Cold Compartment)
DISASSEMBLY AND REASSEMBLY 3-15. Assembly Locker Disassembling (Cold Compartment) Part Name Work sequence Remarks 1. Disassemble the entire door as described in Section 3-5, and lay the door on the floor, and disassemble the two fastening screws on the cover lock of the internal door. - Page 35 DISASSEMBLY AND REASSEMBLY Part Name Description Figure With the Door closed, remove the door from Remove the Upper Hinge with handling Wires. Remove the door from the lower hinge by lifting up the door straight. Door Be careful not to pinch the water tubing and the wire harness on the CAUTION door.
-
Page 36: Evaporator
DISASSEMBLY AND REASSEMBLY 3-16. Evaporator Figure Part Description Name Freezer Fridge Remove the Evaporator cover. Disengage the housing connector. (left) Evaporator Disengage the housing connector. (right) Remove the evaporator by pulling the lower part of the evaporator while lifting it up. -
Page 37: Main Pcb And Inverter Pcb Disassembling (Whole)
DISASSEMBLY AND REASSEMBLY 3-17. Main PCB and Inverter PCB Disassembling (whole) Work sequence Remarks 1. Pull the refrigerator forward to make space for servicing. 2. Disassemble the four screws. 3. Disassemble the thirteen connectors of the housing(Number of the housing connectors may vary dependent upon models and functions). -
Page 38: Disassemble The Wifi Module
DISASSEMBLY AND REASSEMBLY 3-18. Disassemble the WIFI module. Part Name Description Figure 1. Disassemble the top table after loosen 3 screw which is supported the top table. 2. Disassemble two connectors of the housing. 1. Press the hook of case PBA to disassemble. -
Page 39: Comp Cooling Fan Replacing
DISASSEMBLY AND REASSEMBLY 3-19. COMP Cooling Fan Replacing Work sequence Remarks 1. Remove five screws from the Comp Cover. 2. Remove the drain hose. Disassemble one screw. 3. Disassemble the connector. 4. Pull the connector forward, and incline it toward the drain hose. -
Page 40: Comp Cooling Fan Replacing- For E-Cost Model
DISASSEMBLY AND REASSEMBLY 3-20. COMP Cooling Fan Replacing– For E-cost model Work sequence Remarks 1. Remove five screws from the Comp Cover. 2. Remove the drain hose. Disassemble one screw. 3. Disassemble the connector. 4. Pull the connector forward, and incline it toward the drain hose. -
Page 41: Comp Cooling Fan Motor Replacing
DISASSEMBLY AND REASSEMBLY 3-21. COMP Cooling Fan Motor Replacing Work sequence Remarks 1. Remove the spring with a flat screwdriver. 2. Hold the motor, and pull the fan out to remove the fan. 3. Remove two screws from the motor. 4. -
Page 42: Relay Protector O/L Disassembling (Whole)
DISASSEMBLY AND REASSEMBLY 3-22. Relay Protector O/L disassembling (Whole) Work sequence Remarks 1. Remove five screws from the Comp Cover. 2. Remove the cover relay with a flat screwdriver. Caution: Pipe bending or exercise of excessive force may pinching on the CAUTION hands when removing the cover. -
Page 43: Step Valve Disassembling (Whole)
DISASSEMBLY AND REASSEMBLY 3-23. Step Valve Disassembling (whole) Work sequence Remarks 1. Remove five screws from the Comp Cover. 2. Disassemble the housing connector from the step valve. 3. Disassemble one screw, and pull the step valve up to remove the valve as shown on the figure. 4. -
Page 44: Ice Maker Compartment
DISASSEMBLY AND REASSEMBLY 3-24. Ice Maker Compartment Part Name Description Figure Disassemble the Ice-Bucket Assy by holding Ice Bucket the handles and pulling up the bottom part Assy slightly. Cover I/M Lift up the Icemaker Cover and gently pull out. Unscrew the 4 screws and disassemble the Auger Motor Assy as shown. -
Page 45: Auger-Motor
DISASSEMBLY AND REASSEMBLY 3-25. Auger-Motor Part Name Description Figure ① 1. Pull the shelf out to the front side. ② 2. Unscrew 4 screws by turning counter- Auger- clockwise. Motor 3. Disconnect the housing connector by pulling as shown. ③... -
Page 46: Disassembling The Internal Handle
DISASSEMBLY AND REASSEMBLY 3-26. Disassembling the internal handle Part Name Work sequence Remarks 1. Rotate one set screw counterclockwise with a hexagonal wrench to remove it from the bottom of the handle. Handle 2. Pull the bottom of the handle to remove it. 3. -
Page 47: Troubleshooting
4. TROUBLESHOOTING 4-1. Function for failure diagnosis ....................48 4-2. Diagnostic method according to the trouble symptom(Flow Chart) ........62... -
Page 48: Function For Failure Diagnosis
TROUBLESHOOTING 4-1. Function for failure diagnosis 4-1-1. Test mode (manual operation / manual defrost function) • If Freezer Key + Alarm Key on the front of panel are pressed simultaneously for 8 seconds , it will be changed to the test mode and all displays on the front of panel will be off. •... - Page 49 TROUBLESHOOTING 2) Forced Defrost 2-1) When you press any key one more time at the manual operation status, Fd lights up on the Display Panel. At this time, the Forced Operation stops immediately and F-Defrost will be performed at the same time.
- Page 50 TROUBLESHOOTING 4-1-3. Self-diagnostic function 1) Self-diagnostic function in the Initial power ON 1-1) Micom operates self-diagnostic function to check the temperature sensor condition within 1 second when the refrigerator turned On initially. 1-2) If bad sensor is detected by the self-diagnostic function, the applicable display LED will blink for 0.5 sec.
- Page 51 TROUBLESHOOTING ※ Self-diagnostics check list Item Trouble contents Diagnostic method When measuring the voltage between the Main F-Sensor Error PCB CN30 3PIN - 7PIN, it should read between 4.5V~1.0V. Display error : separation of sensor When measuring the voltage between the Main housing part, contact error, disconnection, R-Sensor Error PCB CN30 5PIN - 7PIN, it should read between...
- Page 52 TROUBLESHOOTING ※ Self-diagnostics check list Item Trouble contents Diagnostic method Display 46Er in the panel : I/O Expander I/O Expander ↔ Main MICOM It is desirable to replace Main PCB. Communication Error communication error. The temperature has been abnormally When the freezer temperature is The F compartment increased.
- Page 53 TROUBLESHOOTING 4-1-4. Display function of Load condition ① ① ② ① If Freezer Key + Fridge Key are pressed simultaneously for 6 seconds, ALL ON/OFF will blink with 0.5interval for 4 seconds. ② If take the finger off from above keys and press Alarm, load condition mode will be started. 1) If Freezer Key + Fridge Key are pressed simultaneously for 6 seconds during normal operation, the temperature setting display of fresh food and freezer compartments will blink ALL ON/OFF with 0.5 for 4 seconds.
- Page 54 TROUBLESHOOTING ※ Load mode Check list Display Display contents Operation contents R-1-ⓔ When ambient temperature is more than 93°F(34°C), LED blinks Overload condition R-1-ⓕ Low temperature condition When ambient temperature is less than 72°F(22°C), LED blinks R-1-ⓔ,ⓕ (All LED not When ambient temperature is between 73°F(23°C) and 91°F(33°C) Normal Condition blink)
- Page 55 TROUBLESHOOTING 4-1-5. Cooling OFF mode setting function North American(US, Canada) Models Only ① ① ① ① If Freezer Key + Lighting Key + Fridge Key are pressed for 5 seconds, Cooling Off mode will be started. 1) If Freezer Key + Lighting Key + Fridge Key are pressed simultaneously for 5 seconds during normal operation, Cooling Off mode will be started with buzzer sound(ding-dong).
- Page 56 TROUBLESHOOTING 4-1-7. Option setting function • If Lighting Key + Fridge Key are pressed simultaneously for 12 seconds during normal operation, fresh food and freezer compartments temperature display will be changed to option setting mode. KEY operation method for changing to option mode ①...
- Page 57 TROUBLESHOOTING Code Reference Value 1) For example, if you want to change freezer compartment standard temperature to -4℉(-2°C) by operating option, do as below. This function is for changing the standard temperature. In -2℉(-19°C) of current temperature of freezer compartment, if you make the temperature lower to -4℉(-2°C) by the option, the standard temperature would be controlled -6℉(-21°C) Therefore, if you change the setting of temperature option to -2℉(-19°C) on the panel, the appliance will be operated with -6℉(-21°C).
- Page 58 TROUBLESHOOTING 4-1-8. Option TABLE 1) Temperature changing table of freezer compartment Set item Freezer Temp Shift Reference Fridge Room 7-SEG Value Setting value Temp. compartment compensation Code 0°F(0.0°C) -1°F(-0.5°C) -2°F(-1.0°C) -3°F(-1.5°C) -4°F(-2.0°C) -5°F(-2.5°C) -6°F(-3.0°C) -7°F(-3.5°C) Code Reference Value +1°F(+0.5°C) +2°F(+1.0°C) +3°F(+1.5°C) +4°F(+2.0°C) +5°F(+2.5°C)
- Page 59 TROUBLESHOOTING 3) Ice Tray water supply of freezer compartment Ice Maker Set item FZ-Room ICE TRAY Reference Fridge Room 7-SEG Value Setting value Water compartment Settings. Code 94cc 104cc 4) Eject waiting time changing table of freezer compartment Ice Maker Set item FZ-Room Ice Maker Eject waiting time Shift Reference...
- Page 60 TROUBLESHOOTING 6-1) Minimum Comp RPM shifting -This option is rising minimum Comp RPM. As this option is applied, Comp operation. Set item Minimum Comp RPM setting Reference Fridge Room 7-SEG Value Setting value compartment Comp RPM Code No RPM Change Minimum 2450RPM Minimum 2450RPM Minimum 2450RPM...
- Page 61 TROUBLESHOOTING 8) Operation rate changing table of dispenser heater Set item Dispenser Heater Rate Reference Fridge Room 7-SEG Value Setting value compartment Rate change Code +0.0% + 20% operation ( up to 100% ) Code Reference Value ex) If you want to change the dispenser heater operation rate to +20%...
-
Page 62: Diagnostic Method According To The Trouble Symptom(Flow Chart)
TROUBLESHOOTING 4-2. Diagnostic method according to the trouble symptom(Flow Chart) DATA1.Temperature table Resistance value and MICOM port voltage of sensor according to the temperature SENSOR CHIP : based on PX41C, PX41C, 502AT/ 103**(ICE MAKER SENSOR(MOLD)/FULL UP, 20Kohm ( Actual measurement = value of the table below X 2 ) ℃... - Page 63 TROUBLESHOOTING DATA2. Humidity Sensor table - Voltage output table @23°…, 5Vdc --- HTG3515CH/HTG3535CH RH(Temperature compensate ) = RH (Relative Humidity ) + ( Temp(°C) °© 23°C) x 0.05 ℃ ℉ ℃ ℉ ℃ ℉ Voltage Resi s tance Voltage Resi s tance Voltage Resi s tance 2246...
- Page 64 TROUBLESHOOTING 4-2-1. Power Not Supplied (SMPS PCB) Output terminal Input terminal Start CAUTI O N AC input power and high voltage of DC 310V or higher are generated at SMPS PCB and INVERTER PCB power terminal. Be cautious during Is power plug connected? repair and measurement.
- Page 65 TROUBLESHOOTING 4-2-2. Unable to Defrost CN70 Start F-DEF Sensor is normal (with Self Diagnosis) CN30 Replace the sensor F-DEF Heater is normal F-DEF-HEATER : Read resistance between MAIN PBA Check Thermistor, Heater and their CN70 #9 and SMPS PBA CN01 #3 connectors Defrost Sensor Temp is Defrost Sensor Voltage is lower than 3.1V...
- Page 66 TROUBLESHOOTING 4-2-3. Self-Diagnosis Error (Defective Sensor) When there is sensor error, display panel show that. When it occurs during the initial power on time, display panel keeps blinking relevant 7-SEG and the refrigerator go into the emergency operation mode. Under the emergency operation mode, the refrigerator can not do its normal operation. So check out with the Self Diagnosis in this manual.
- Page 67 TROUBLESHOOTING 4-2-4. When Alarm Sound continues (Buzzer Sound) 1) When "DingDong" sound continues Start Door is ajar Door is closed completely? Romove causes after comprehending the Closed well condition of interference by door gasket or food etc Is water penetrated into the door switch? F-Door sensing : CN50 #6-#9 Replace Door switch...
- Page 68 TROUBLESHOOTING 3) If a buzzer does not sound This model has a buzzer on the Panel PBA. If the buzzer does not sounds when button is pressed, Forced Operation, door open and disconnection with Main PBA, check out defective soldering on PBA or buzzer damage. (It is recommended replacing Panel PBA if components are damaged) ※...
- Page 69 TROUBLESHOOTING 4-2-5. When PANEL PBA operates abnormally 1) When PANEL PBA does not light up or partially does Start Refer to Circuit Diagram in The connector at the this manual and check the Freezer upper hinge cover circuit diagram attached on is inserted properly.
- Page 70 TROUBLESHOOTING 4-2-6. When Fan does not operate - This model has BLDC FAN motor. BLDC motor is driven by DC7~12V - F-Fan motor usually runs together with the Compressor. Once the door is open and closed at high ambient temperature, F-Fan motor put off its operation for one minute. Therefore, you are advised not to take it as an error.
- Page 71 TROUBLESHOOTING 4-2-7. When the internal lamp of the freezer/fridge does not light up Model with light bulb applied Caution 1. Turn off the power for repair because there is risk of electric shock when replacing the internal lamp. 2. Please keep in mind you could get burnt by the excessive heating of an incandescent light bulb. Reference Internal lamp RELAY switches ON/OFF as the DOOR is OPEN/CLOSE.
- Page 72 TROUBLESHOOTING 4-2-8. When the WiFi does not work properly Start Do you have the Check the main power ☞ wireless router? conversion board CN02 No.5(VCC), No. 4 (GND) pins. Buy the wireless router (Normal range is: 11.4V ~12.6V) (Wireless router is not included) Is the power of wireless router turned on?
- Page 73 TROUBLESHOOTING 4-2-9. Check the WiFi module system EXPECTATION PROBLEM STATE 1 STATE 2 SOLUTION CAUSE Progress the WiFi WiFi setting is failed. setting again. Select the wireless Select the wrong router which is E-Smart LED OFF wireless router. connected with Smart mobile.
- Page 74 TROUBLESHOOTING 4-2-10. LED blinking frequency depending on protecting functions If Failure Condition is detected during compressor is operating, immediately stop Compressor operating and stand by 5 minutes. During this 5 minutes, RPM command signal is not available. It means, even if available RPM command signal is applied to the compressor, it does not work and keep standing by.
-
Page 75: Pcb Diagram
5. PCB DIAGRAM 5-1. PBA Layout with part position ..................... 76 5-2. PBA Layout with part position (Inverter Board) ..............77 5-3. Connector Layout with part position (Main Board) ............... 78 5-4. Connector Layout with part position (Inverter Board) ............79... -
Page 76: Pba Layout With Part Position
This document can not be used without Samsung's authorization PCB DIAGRAM 5-1. PBA Layout with part position Ⓗ Ⓘ Ⓖ Ⓐ Ⓕ Ⓔ Ⓒ Ⓚ Ⓙ Ⓑ Ⓓ A. Diode option setting B. Step valve & LED Room lamp controlling circuit C. -
Page 77: Pba Layout With Part Position (Inverter Board)
This document can not be used without Samsung's authorization PCB DIAGRAM 5-2. PBA Layout with part position (Inverter Board) 1. PCB Power Supply : From the AC Input Voltage(115V), it supplies DC 15V and 5V to the Inverter circuit for the Compressor control. -
Page 78: Connector Layout With Part Position (Main Board)
This document can not be used without Samsung's authorization PCB DIAGRAM 5-3. Connector Layout with part position (Main Board) -
Page 79: Connector Layout With Part Position (Inverter Board)
This document can not be used without Samsung's authorization PCB DIAGRAM 5-4. Connector Layout with part position (Inverter Board) AC 115V COMP 1 : DC 5V 2 : GND 3 : COMP. RPM 4 : COMP. Feedback... -
Page 80: Wiring Diagram
This document can not be used without Samsung's authorization 6. Wiring Diagram 6-1. Model : RH22*/RH29*... -
Page 81: Block Diagram
This document can not be used without Samsung's authorization 7. Block Diagram 7-1. Whole block diagram... -
Page 82: Inverter Block Diagram
This document can not be used without Samsung's authorization BLOCK DIAGRAM 7-2. Inverter Block Diagram... -
Page 83: Model Code Table
This document can not be used without Samsung's authorization 8. Model code table 8-1. MODEL : RH22*... -
Page 84: Model : Rh29
MODEL CODE TABLE 8-2. MODEL : RH29*... -
Page 85: Model ( E-Cost)
MODEL CODE TABLE 8-2. MODEL ( E-COST) - Page 86 Asia: gspn2.samsungcsportal.com North & Latin America: gspn3.samsungcsportal.com China: china.samsungportal.com - This Service Manual is a property of Samsung Electronics Co., Ltd. Any unauthorized use of Manual can be punished under applicable International or domestic law. © Samsung Electronics Co., Ltd.