
Related Manuals for Philips SPH8428/93


Summary of Contents for Philips SPH8428/93
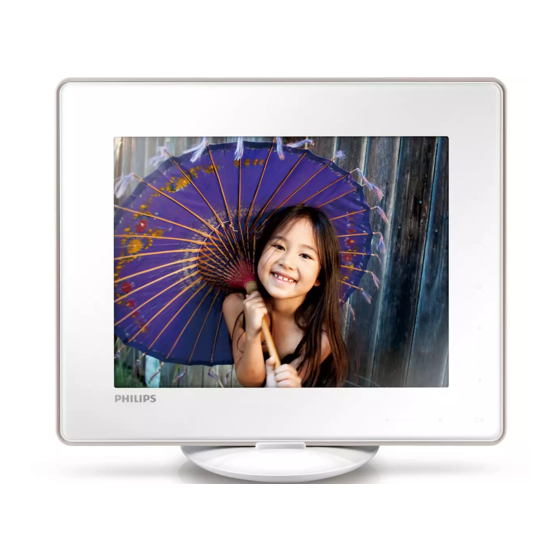
- Page 1 Register your product and get support at www.philips.com/welcome EN User manual PhotoAlbum SPH8408 SPH8428...
-
Page 2: Table Of Contents
9 Upgrade the PhotoAlbum 10 Product information 11 Frequently asked questions 12 Glossary Need help? Please visit www.philips.com/welcome where you can access a full set of supporting materials such as user manual, the latest software updates and answers to frequently asked questions. -
Page 3: Important
1 Important Safety Safety precautions and maintenance • Never touch, push, rub or strike the screen with hard objects as this may damage the screen permanently. • When the product is not used for long periods, unplug it. • Before you clean the screen, turn off and unplug the power cord. -
Page 4: Class Ii Statement
Please inform yourself about the local rules on separate collection of batteries. The correct disposal of batteries helps prevent potentially negative consequences on the environment and human health. Caution • RISK OF EXPLOSION IF BATTERY IS REPLACED BY AN INCORRECT TYPE. •... -
Page 5: Your Photoalbum
2 Your PhotoAlbum Congratulations on your purchase, and welcome to Philips! To fully benefit from the support that Philips offers, register your product at www.philips.com/welcome. Introduction This is a Philips Digital PhotoAlbum with built-in rechargeable battery. With Philips Digital PhotoAlbum, you can use the PhotoAlbum to: •... -
Page 6: Overview Of Your Photoalbum
Overview of your PhotoAlbum • Hold to go to the home screen • Tap to return to the upper-level menu b MENU • Tap to access/exit the option menu c Zoom buttons • Tap to zoom in Tap to switch modes (wave mode -> album mode ->... -
Page 7: Get Started
Always follow the instructions in this chapter in sequence. If you contact Philips, you will be asked for the model and serial number of this apparatus. The model number and serial number are on the back of the apparatus. Write the numbers here: Model No. -
Page 8: Turn On The Photoalbum
» If the PhotoAlbum is powered off, the LED indicators under the left-right slider and the OK button blink during the charging process. When the built- in battery is fully charged, the LED indicators stop blinking. • The lifespan of the battery varies with use. •... -
Page 9: Transfer Your Media
• / / / to set time and date, and then tap OK to confirm. » The home screen is displayed. Turn off the PhotoAlbum Note • You can only turn off the PhotoAlbum after all copy and save actions are complete. •... -
Page 10: Transfer Your Media With Pc
[Play Photos]: Select it to play media on the device [Browse]: Select it to browse media on the device [Copy to PhotoAlbum]: Select it to start transfer operation Select [Copy to PhotoAlbum], and then tap OK. » A confirmation message is displayed. To copy photos to the PhotoFrame: Select [Yes], and then tap OK. -
Page 11: Quick Menu
Quick menu In the home screen, tap MENU. » The quick menu is displayed. Select an option, and then tap OK. Follow the on screen instructions to adjust the brightness or view the status of the PhotoAlbum. • To exit the quick menu, tap MENU again. Know these keypad icons Input in English Input in supported... -
Page 12: Play
4 Play Display photos Note • You can display JPEG photos in slideshow mode on the PhotoAlbum. In the home screen, select [Play] and then tap OK. » Photos are displayed in slideshow mode. In slideshow mode: • To select the previous/next photo, tap •... -
Page 13: Zoom And Crop A Photo
• [Brightness]: Tap / to adjust the brightness of display Zoom and crop a photo When the view mode is selected as single, you can zoom in a photo, crop it, and save it as a new photo as follows: In slideshow mode, tap photo. -
Page 14: Browse
5 Browse Browse and manage albums and media You can browse and manage albums and media in wave mode or album mode. • Wave mode: • Album mode: Browse albums: In the home screen, select [Browse] and then tap OK. »... -
Page 15: Copy Media
Thumbnail menu: • [Add to Favorites]: Add media in the album to the [Favorites] album • [Copy]: Copy media in the album to another album • [Move]: Move media in the album to another album • [Delete]: Delete media in the album •... -
Page 16: Rotate Photos
Select multiple media to manage Select [Multiple-select], and then tap Select media. • To select all media in the album, tap • To select some of the media: Tap / / / and OK to select a medium. Then repeat this step to select others. -
Page 17: Clock
6 Clock Display the clock In the home screen, select [Clock] and then tap OK. » A clock/calendar is displayed. Clock menu When a clock/calendar is displayed, tap MENU to enter the clock menu. • [Select Clock]: Select another clock or calendar template to be displayed. -
Page 18: Event Reminder
7 Event reminder Create an event reminder In the home screen, select [Event Reminder] and then tap OK. Select [Create Event Reminder], and then tap OK. Tap / to select a template of event reminder, and then tap OK. » An option list is displayed. -
Page 19: Edit An Event Reminder
• [Event Name]: Enter the name. For details, see “Enter the name of an event reminder”. • [Repeat]: Select a repeat frequency • [Set Date]: Set the date or day • [Set Time]: Set the time After you complete the event reminder, select [Done] and tap OK. - Page 20 Tap / to select a template of event reminder, and then tap OK. Select one of the following options to edit an event reminder. • [Change Image]: Change the image of the event reminder • [Edit Text]: Edit the text of event reminder To change the image of event reminder: Select [Change Image], and then tap OK.
-
Page 21: View An Event Reminder
twice to access the keypad. To enter the text, select an alphabet/ number and then tap OK. • Select an input method, see “Know these keypad icons”. • To switch between uppercase and lowercase, select aA on the displayed keypad and then tap OK. After you enter the text, select then tap OK. - Page 22 Select an event reminder, and then tap » An event reminder is displayed. • MENU, and then select one of the following options to continue. • [Re-schedule]: Reschedule the event reminder • [Delete]: Delete the event reminder • To return and view other event reminders, select [Done] and then tap...
-
Page 23: Settings
8 Settings Select an on-screen language In the home screen, select [Settings] and then tap OK. Select [Language], and then tap OK. Select a language, and then tap OK. Adjust brightness You can adjust the brightness of the PhotoAlbum to achieve the best view. In the home screen, select [Settings] and then tap OK. -
Page 24: Set Time/Date
Set time/date In the home screen, select [Settings] and then tap OK. Select [Time and Date], and then tap Select [Set Time] / [Set Date], and then tap OK. Tap / / / to adjust minute/hour/day/ month/year, and then tap OK. Set time/date format In the home screen, select [Settings] and then tap OK. -
Page 25: Hibernate The Photoalbum
In the home screen, select [Settings] and then tap OK. Select [SmartPower], and then tap OK. Select [Set On-Time] / [Set Off-Time], and then tap OK. • To switch off the SmartPower function, select [Off] and then tap Tap / / / to set time, and then tap •... -
Page 26: Set Auto Orientation
Set auto orientation With the auto orientation function, you can play photos in the correct orientation depending on the horizontal/vertical orientation of the PhotoAlbum. In the home screen, select [Settings] and then tap OK. Select [Auto-orientate], and then tap Select [On], and then tap OK. •... -
Page 27: Slideshow Setting
Slideshow setting Select slideshow interval In the home screen, select [Settings] and then tap OK. Select [Slideshow], and then tap OK. Select [Interval], and then tap OK. Select a slideshow interval, and then tap Select slideshow sequence In the home screen, select [Settings] and then tap OK. -
Page 28: Select Background Color
Select a transition effect, and then tap Select background color You can select a background border color for photos that are smaller than the PhotoAlbum display. In the home screen, select [Settings] and then tap OK. Select [Slideshow], and then tap OK. Select [Background Color], and then tap Select [RadiantColor] / a background color/ [Auto-fit], and then tap OK. -
Page 29: Unlock The Touch Panel
» If you select [Auto-fit], the PhotoAlbum extends a photo to fill the screen with picture distortion. Unlock the touch panel In the home screen, select [Settings] and then tap OK. Select [Touch Panel Lock], and then tap Select [Auto-Lock On] to enable the lock, and then tap OK. -
Page 30: View Information Of The Photoalbum
To activate the locked touch panel: Tap any button. » The LED lights turns on. Fast swipe the left-right slider from left to right, to unlock the touch panel. View information of the PhotoAlbum You can find the model name, the firmware version of the PhotoAlbum, and the memory status of the PhotoAlbum and other storage device available on the PhotoAlbum. -
Page 31: Upgrade The Photoalbum
• Do not power off the PhotoAlbum during software upgrade. If there is a software update, you can download the latest software from www.philips.com/ support to upgrade your PhotoAlbum. The earlier software is unavailable on line. Visit www.philips.com/support. Search for your PhotoAlbum and go to the software section. -
Page 32: Product Information
Capacity: 600 mAh • Lifetime: 1 hour • Charging time: 2.5 hours • Power adaptor: • Manufacturer: Philips Consumer Lifestyle International B.V. • Model number: DSA-9PFB-09 Fxx (xx=EU, UK, AU, CN) • Input: 100 - 240 V ~ 50/60 Hz •... - Page 33 • Placement supported: Photo auto orientation • Buttons and controls: Touch panel, power button • Playback mode: Slideshow, wave view, album view • Album management: Create, copy, move, delete, add to the favorites album • Photo management: Copy, move, delete, rotate, add to the favorites album, color tone •...
-
Page 34: Frequently Asked Questions
11 Frequently asked questions Is the LCD screen touch-enabled? The LCD screen is not touch-enabled. After you turn on the PhotoAlbum, you can use the touch panel to control the PhotoAlbum. Can I use the PhotoAlbum to delete photos on a memory card? Yes, it supports operations to delete photos on an external device, such as a memory card. -
Page 35: Glossary
12 Glossary Aspect ratio Aspect ratio refers to the length to height ratio of TV screens. The ratio of a standard TV is 4:3, while the ratio of a high-definition or wide TV is 16:9. The letter box allows you to enjoy a picture with a wider perspective on a standard 4:3 screen. - Page 36 Thumbnail A thumbnail is reduced-size versions of a picture that is used to make it easier to recognize an them. Thumbnails serve the same role for images as a normal text index does for words. xD Card EXtreme Digital Picture Card. A flash memory card used in digital cameras.
- Page 37 © 2011 Koninklijke Philips Electronics N.V. All rights reserved. UM_V3.0...