Table of Contents
Advertisement
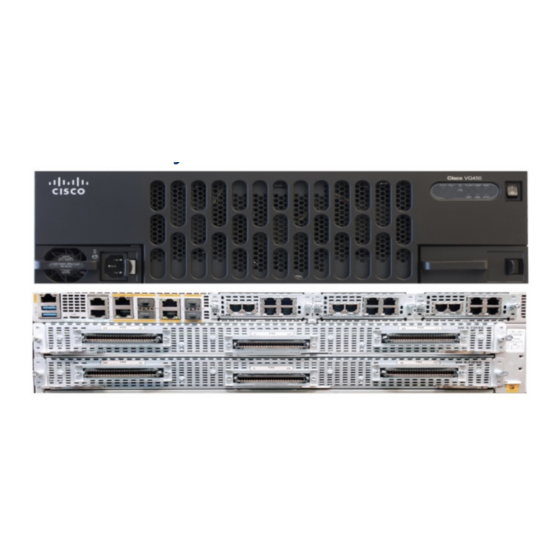
Installing the Cisco VG450 Voice Gateway
Tip
While you do this installation, record your progress and site information. See the suggested format in the
Installation Checklist.
Danger
Only trained and qualified personnel should be allowed to install, replace, or service this equipment. Statement
1030
Danger
Read the installation instructions before connecting the system to the power source. Statement 1004
This chapter contains the procedures for installing your Cisco VG450 Voice Gateway and consists of the
following sections:
•
•
•
•
•
Safety Recommendations
The following information is included to alert you to safety recommendations and best practices when working
with this equipment.
Maintaining Safety with Electricity
Follow these guidelines when working on equipment powered by electricity.
Danger
High leakage current—earth connection essential before connecting to system power supply. Statement 342
Safety Recommendations, on page 1
Unpacking and Inspection, on page 5
Install the Cisco VG450 Voice Gateway, on page 5
Chassis Grounding, on page 10
Power-On Procedure, on page 11
Installing the Cisco VG450 Voice Gateway
1
Advertisement
Table of Contents

Related Manuals for Cisco VG450


Summary of Contents for Cisco VG450
-
Page 1: Safety Recommendations
1030 Danger Read the installation instructions before connecting the system to the power source. Statement 1004 This chapter contains the procedures for installing your Cisco VG450 Voice Gateway and consists of the following sections: • Safety Recommendations, on page 1 •... - Page 2 Installing the Cisco VG450 Voice Gateway Maintaining Safety with Electricity Danger When installing the product, please use the provided or designated connection cables/power cables/AC adaptors/batteries. Using any other cables/adaptors could cause a malfunction or a fire. Electrical Appliance and Material Safety Law prohibits the use of UL-certified cables (that have the "UL" or "CSA" shown on the cord), not regulated with the subject law by showing "PSE"...
- Page 3 Installing the Cisco VG450 Voice Gateway Maintaining Safety with Electricity Danger Blank faceplates and cover panels serve three important functions: they prevent exposure to hazardous voltages and currents inside the chassis; they contain electromagnetic interference (EMI) that might disrupt other equipment;...
-
Page 4: General Safety Practices
Installing the Cisco VG450 Voice Gateway General Safety Practices Danger For diverging beams, viewing the laser output with certain optical instruments within a distance of 100 mm may harm your eyes. For collimated beams, viewing the laser output with certain optical instruments designed for use at a distance may harm your eyes. -
Page 5: Preventing Electrostatic Discharge Damage
(Mohm). Unpacking and Inspection Do not unpack the Cisco VG450 until you are ready to install it. If the installation site is not ready, keep the chassis in its shipping container to prevent accidental damage. The Cisco VG450, cables, printed publications, and any optional equipment you ordered might be shipped in more than one container. -
Page 6: Setting The Chassis On A Desktop
After you install the voice gateway, you must connect the chassis to a reliable earth ground. For the chassis ground connection procedures, see the Chassis Grounding section. Attach Cisco VG450 Voice Gateway Chassis to Wall Step 1 Attach the wall-mounting brackets to the voice gateway chassis as shown in the following figure, using the four PHMS screws and the plastic spacers provided for each bracket. -
Page 7: Mount Cisco Vg450 Voice Gateway Chassis In Rack
• If the rack is provided with stabilizing devices, install the stabilizers before mounting or servicing the unit in the rack. Statement 1006. You can install the Cisco VG450 Voice Gateway in 19-inch (48.26-cm) EIA and 23-inch (58.42-cm) Southwestern Bell Corporation (SBC) racks. You can also mount the voice gateway in a 600-mm ETSI rack. - Page 8 Installing the Cisco VG450 Voice Gateway Mount Cisco VG450 Voice Gateway Chassis in Rack Figure 1: Bracket Installation for Front Mounting Figure 2: Bracket Installation for Back Mounting Screws 23-inch SBC brackets Installing the Cisco VG450 Voice Gateway...
- Page 9 Installing the Cisco VG450 Voice Gateway Mount Cisco VG450 Voice Gateway Chassis in Rack 19-inch EIA brackets 19-inch EIA brackets 3. Use the screws provided with the rack to install the chassis in the rack. For both the 19-inch EIA brackets and the 23-inch SBC brackets, start the lower pair of screws first, and rest the brackets on the lower screws while you insert the upper pair of screws.
-
Page 10: Chassis Grounding
Installing the Cisco VG450 Voice Gateway Chassis Grounding After you install the voice gateway, you must connect the chassis to a reliable earth ground. For the chassis ground connection procedures, see the Chassis Grounding section. Chassis Grounding Warning To reduce the risk of electric shock, the chassis of this equipment needs to be connected to permanent earth ground during normal use. -
Page 11: Power-On Procedure
Connect the other end of the ground wire to a known reliable earth ground point at your site. Power-On Procedure Perform this procedure to power on your Cisco VG450 Voice Gateway, and verify that it goes through its initialization and self-test. When this is finished, the Cisco VG450 Voice Gateway is ready to configure. - Page 12 If the rommon 1> prompt appears, your system has booted in ROM monitor mode. For information on the ROM monitor, refer to the router rebooting and ROM monitor information in the Cisco IOS Configuration Fundamentals Configuration Guide for your Cisco IOS software release.