Table of Contents
Advertisement
SAFETY INSTRUCTIONS
Read this entire installation manual before beginning installation of the Aprilaire 6000 Series Zone Control System. For questions call Aprilaire
customer support at (800) 334-6011 or visit AprilairePartners.com.
1. 120 volts may cause serious injury from electrical shock. Leave power disconnected until installation is complete.
2. The system is designed for indoor use only. Do not expose any of the components to moisture.
1. Turn off the system power before removing or installing any wires into the terminals of any component of the system. Wiring with a live
circuit can lead to electrical shorts that can damage components.
2. Installation must be done in accordance with all applicable codes.
3. Installer should touch a grounded metal object before handling the components of the system. This will prevent any static discharge that
may cause damage.
4. A 6000 Series Zone Control System may not control temperature properly unless the heating and cooling system is properly sized and
balanced.
5. Insufficient air flow or excessive temperatures through the heating and cooling system could result in equipment damage. Refer to the
manufacturer's recommendations for minimum safe airflow and temperature requirements.
6. Do not mount the 6000 Series Control or Sensors on any exterior wall or equipment supply ductwork.
7. Do not install the system components where temperatures exceed 158°F (70°C) or are below 32°F (0°C), non-condensing.
8. Improper system installation could cause water damage from frozen pipes. Check system operation after installation.
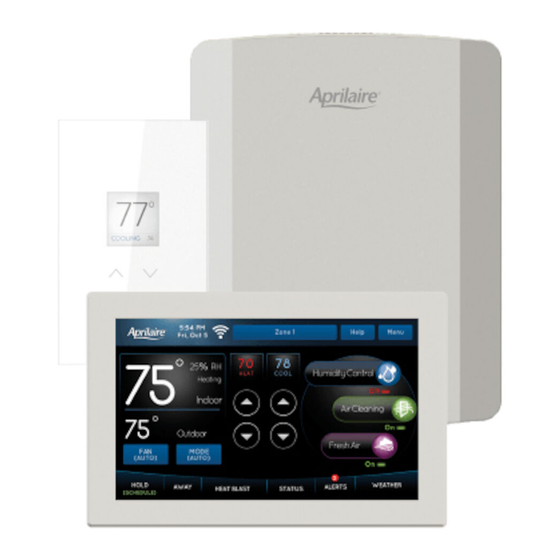
6000 Series Zone Control System
For models 6010, 6015, 6020, 6025, 6030, 6035,
6040, 6045, 6045M
Safety & Installation Instructions
WARNING
WARNING
READ AND SAVE THESE INSTRUCTIONS
1
Advertisement
Table of Contents

Related Manuals for Aprilaire 6000 Series

Summary of Contents for Aprilaire 6000 Series
-
Page 1: Safety Instructions
3. Installer should touch a grounded metal object before handling the components of the system. This will prevent any static discharge that may cause damage. 4. A 6000 Series Zone Control System may not control temperature properly unless the heating and cooling system is properly sized and balanced. -
Page 2: Table Of Contents
6000 SERIES CONTROL AND SENSORS INSTALLATION ........ -
Page 3: Specifications
Damper output per zone (fused): 18VA at 158°F, 30VA at 90°F Note: Use 18 or 20 AWG solid (non-stranded) wire ENVIRONMENT 6000 Series Hub Temperature (operating): 32°F – 158°F 6000 Series Control and Sensors (operating): 32°F – 120°F Temperature (shipping): -30°F – 150°F Humidity: 5% – 90%, non-condensing DIMENSIONS FIGURE 1 –... -
Page 4: Applications
APPLICATIONS The Aprilaire 6000 Series Zone Control System is available in these configurations: Model 6010 2 Zone Hub Black Control 1 Black Sensor Model 6030 2 Zone Hub Black Control Model 6015 2 Zone Hub White Control 1 White Sensor... -
Page 5: Layout
3. ZONE 1 CONTROL – 6000 Series Control connection. 4. ZONE 2 CONTROL – 6000 Series Sensor 2 connection. 5. ZONE 3 CONTROL – 6000 Series Sensor 3 connection (3 Zone models only). 6. DAMPER 1 – Zone 1 damper connection. -
Page 6: 6000 Series Control Home Screen
6000 SERIES CONTROL HOME SCREEN CURRENT DATE AND TIME WI-FI INDICATOR HEAT SETTING COOL SETTING ZONE SELECTION CURRENT SCREEN (AUTOMATICALLY UPDATED (STROBES IN SETUP MODE) RELATED HELP IF CONNECTED TO INTERNET) ROOM TEMPERATURE MAIN MENU & HUMIDITY HEATING AND COOLING... -
Page 7: 6000 Series Hub Installation
90-2407 MOUNTING 1. Separate the 6000 Series Hub cover from the base. See FIGURE 3. 2. Use the base as a template to drill mounting holes. See FIGURE 4 for mounting hole locations. 3. Attach the base to an interior wall, stud or return duct. -
Page 8: 6000 Series Hub Wiring
Multiply this number by 10 to determine the damper VA requirement. Add an additional 10VA for the 6000 Series System. Example: If you have a 3-zone system, and there are two dampers per zone, then the total number of dampers that could be energized at one time is, 6 dampers –... -
Page 9: Damper
• Multiple dampers for the same zone can be wired in parallel as shown in FIGURES 7 & 8. • Wire the dampers to the 6000 Series Hub: NC – This terminal is used to power open a normally closed damper. For power open and power close dampers this terminal is used to power open the damper. -
Page 10: Outdoor Temperature Sensor (Included)
FIGURE 11 – DISCHARGE AIR TEMPERATURE SENSOR shown. See FIGURE 11. • Maximum distance of the DAT sensor from the 6000 Series Hub is 300 feet. • Do not wire along 120VAC lines. • Refer to FIGURE 2 on page 7 for the proper... -
Page 11: Hvac Equipment Wiring Diagrams
HVAC EQUIPMENT WIRING DIAGRAMS FIGURE 13 – TWO-STAGE FURNACE AND A/C FIGURE 14 – TWO-STAGE HEAT PUMP JUMPER JUMPER INSTALLED INSTALLED TWO STAGE HEAT PUMP FURNACE AND A/C 90-2417 90-2418 FIGURE 15 – BOILER AND A/C FIGURE 16 – RADIANT FLOOR FIRST-STAGE HEAT, FURNACE SECOND-STAGE HEAT AND A/C NOTE: REMOVE RH/RC JUMPER JUMPER... -
Page 12: Indoor Air Quality Wiring Diagrams
INDOOR AIR QUALITY WIRING DIAGRAMS FIGURE 17 – INDOOR AIR QUALITY WIRING FIGURE 18 – INDOOR AIR QUALITY WIRING WITH SEPARATE TRANSFORMERS WITH A SINGLE TRANSFORMER HUMIDIFIER HUMIDIFIER TRANSFORMER TRANSFORMER DEHUMIDIFIER DEHUMIDIFIER NORMALLY NORMALLY CLOSED DAMPER CLOSED DAMPER TRANSFORMER Note: Outputs are 24VAC dry contact. Refer to individual product Note: Outputs are 24VAC dry contact. -
Page 13: 6000 Series Control And Sensors Installation
6000 SERIES CONTROL AND SENSORS INSTALLATION LOCATION RECOMMENDATIONS 6000 Series Control and Sensors should be mounted: • On an interior wall, in a frequently occupied space. • Approximately 5 feet above floor. • At least 18" from outside wall. • Displays can be mounted to a vertical junction box. -
Page 14: Wiring
18-24 gauge thermostat wire INSTALLATION NOTES: Control to Hub • Ensure power at the 6000 Series Hub is off. • Insert stripped wire (Hub). • Loosen screw terminals (Control), insert stripped wire and re-tighten. • Push the excess wire at Control, back into the opening and plug the wall opening to prevent drafts. -
Page 15: Installer Setup
6000 SERIES CONTROL The 6000 Series Hub is powered by 24VAC. The 6000 Series Control is powered by the 6000 Series Hub. In the case of power loss, the system will maintain the clock for 24 hours. The system has a memory backup that saves the system settings in case of power interruption. The factory reset is located in the Installer Tools option of the Installer Menu. -
Page 16: Table 4: Thermostat System Settings
TABLE 4: THERMOSTAT SYSTEM SETTINGS Factory Default Settings (bold) System Setting Description and Settings Range Heat/Cool Note: Equipment Type related settings will return to defaults if this is changed. Equipment Type Heat Pump Heat & Cool Control Setup Used to lockout heating or cooling outputs. (Heat/Cool mode only.) Heat Only Cool Only Gas/Oil Heat... - Page 17 TABLE 4: THERMOSTAT SYSTEM SETTINGS Factory Default Settings (bold) System Setting Description and Settings Range RH Sensor Offset Zone 1 Field adjustment of internal RH sensor. -5 to 5 0°F (0°C) Temp Sensor Offset Zone 2 Field adjustment of controlling temperature sensors. -4 to 4°F (-2 to +2°C) RH Sensor Offset Zone 2 Field adjustment of internal RH sensor.
-
Page 18: Table 5: Zone System Settings
TABLE 5: ZONE SYSTEM SETTINGS Factory Default Settings (bold) System Setting Description and Settings Range Number of Zones Number of zones detected. Zone Staging Based On Staging based on Zones. Number of Zones Selects how many Zones are required to stage up. Note: Only option if ZONES is Zones to Stage enabled. -
Page 19: Indoor Air Quality (Iaq)
INDOOR AIR QUALITY (IAQ) The following tables contain the Indoor Air Quality system settings and their details. Default settings are shown in bold. Some settings are only present dependent upon the value of other settings. The use of an outdoor temperature sensor (recommended) enables additional Indoor Air Quality functionality. -
Page 20: Table 7: Dehumidifier System Settings
TABLE 7: DEHUMIDIFIER SYSTEM SETTINGS Factory Default Settings (bold) System Setting Description and Settings Range None Selects whether a dehumidifier is installed. (If set to None, no other dehumidifier Dehumidifier Type Installed? Whole Home settings will be available.) Air Conditioner Overcooling Display Button? Note: Only available if Dehumidifier Installed is set to None Disable Dehumidification During Cooling? -
Page 21: Table 9: Fresh Air System Settings
TABLE 9: FRESH AIR SYSTEM SETTINGS Factory Default Settings (bold) System Setting Description and Settings Range Select whether ventilation is installed. (If set to No, no other ventilation settings Fresh Air Vent Installed? will be available.) (6045M default is Yes) Display Button? Note: only available if Fresh Air Installed is set to No. -
Page 22: Wi-Fi Setup
WI-FI SETUP The 6000 Series Zone Control System can be connected to a Wi-Fi network with the Aprilaire App, on the 6000 Series Control, or with another Wi-Fi device with a web browser. STEP 1: Verify the 6000 Series Control is in Wi-Fi Connection Mode. -
Page 23: 6000 Series Sensor
Display 5 seconds after selecting a zone number. INSTALLER TEST There are two options for performing installer checkout test, from the 6000 Series Control or from the 6000 Series Hub. 6000 SERIES CONTROL The Installer Test can be accessed from the Installer Menu. All equipment outputs that are configured in the installer settings will be turned on and off for testing equipment. - Page 24 TABLE 9: HEAT COOL INSTALLER SETTING HVAC Equipment Outputs Test Step Test Description Stage 1 Heat, Heat Cool Stage 2 Heat, Heat Cool Stage 1 Cool Stage 2 Cool IAQ Equipment Outputs Test Step Test Description HUM/AUX VENT Humidifier Dehumidifier Ventilation Damper Equipment Outputs Test Step...
-
Page 25: Sequence Of Operation
HEATING OPERATION When a zone makes a call for heating, the 6000 Series Zone Control System will initiate a heating call to the equipment and close the dampers for all zones that are not calling for heat. Following a 2-minute (heat/cool or auxiliary) or 4-minute (heat pump) minimum on time, the heating call will end when (1) all zones stop calling for heating, (2) the call has exceeded the 20 minute heating/cooling changeover time limit while a cooling call exists or (3) the call is interrupted because the discharge air temperature sensor reaches the DAT HIGH LIMIT setting. - Page 26 When a cooling call occurs from Zone 2, the 6000 Series Zone Control System will initiate a first stage cooling call to the heat pump, because the total number of zones calling is 1 which does not meet the Zones to Stage setting of 2. If Zone 3 then initiates a call for cooling the 6000 Series Zone Control System would stage up to a second stage cooling call to the heat pump, because the number of zones calling is now 2.
-
Page 27: Troubleshooting
• Check for 24VAC between the cooling terminal (Y) and the transformer common. If 24VAC is present, the 6000 Series Hub is functional. Check the cooling system to find the cause of the problem. -
Page 28: Limited Warranty
LIMITED WARRANTY Your Research Products Corporation Aprilaire® 6000 Series Zone Control System® is expressly warranted for five (5) years from date of installation to be free from defects in materials or workmanship. Any modifications to the product voids the warranty.