
Related Manuals for Toa EV-700


Summary of Contents for Toa EV-700
- Page 1 INSTRUCTION MANUAL DIGITAL ANNOUNCER EV-700 Thank you for purchasing TOA's Digital Announcer. Please carefully follow the instructions in this manual to ensure long, trouble-free use of your equipment.
-
Page 2: Table Of Contents
TABLE OF CONTENTS 1. IMPORTANT SAFETY INSTRUCTIONS ........... 5 2. SAFETY PRECAUTIONS ................6 3. GENERAL DESCRIPTION ................8 4. FEATURES ......................8 5. HANDLING PRECAUTIONS ..............8 BASIC USAGE 6. HANDLING OF MEMORY CARD ............9 6.1. Usable Memory Card .................... 9 6.2. - Page 3 14. EMERGENCY PLAYBACK (FRONT KEY OPERATION) ..52 14.1. Recording Audio Sources .................. 52 14.2. Making Emergency Playback ................55 14.3. Stopping Emergency Playback ................. 57 14.4. Confirming Audio Source Contents ..............58 14.5. Deleting the Recorded Audio Sources .............. 59 15.
- Page 4 29.3. Removable Terminal Plug Connection .............. 96 REFERENCE 30. IF YOU HAVE ANY PROBLEMS ............97 30.1. Troubleshooting ....................97 30.2. Error List ......................100 31. ABOUT THE EV-700'S STATE AND INPUT/OUTPUT ..103 32. PRERECORDED AUDIO FILE LIST ..........104 33. SPECIFICATIONS ..................105 Accessories ......................
-
Page 5: Important Safety Instructions
1. IMPORTANT SAFETY INSTRUCTIONS • Read these instructions. • Keep these instructions. • Heed all warnings. • Follow all instructions. • Do not use this apparatus near water. • Clean only with dry cloth. • Do not install near any heat sources such as radiators, heat registers, stoves, or other apparatus (including amplifiers) that produce heat. -
Page 6: Safety Precautions
Never plug in nor remove the AC adapter's power plug with wet hands, as doing so may cause electric • Should the following irregularity be found during shock. use, immediately stop the power supply to the unit and contact your nearest TOA dealer. Make no... - Page 7 · When connecting the unit's power cord to an AC outlet, use the AC outlet with current capacity allowable to the unit. · The supplied rack-mounting screws can be used for the TOA equipment rack only. Do not use them for other racks.
-
Page 8: General Description
(See p. 75.) or a PC. Prerecorded audio files cannot be restored once deleted. Redistribution is fee-based. • Before using the EV-700 unit, insert a usable memory card into it. (See p. 9.) Otherwise, the EV-700 unit cannot be used. -
Page 9: Handling Of Memory Card
• The memory card format is FAT16. 6.2. Memory Card Handling Precautions • Do not use the supplied memory card for equipment other than the EV-700, as this could lead to data damage or less. • Never touch the terminal pins on the memory card, as this could lead to data damage or less from static electricity. -
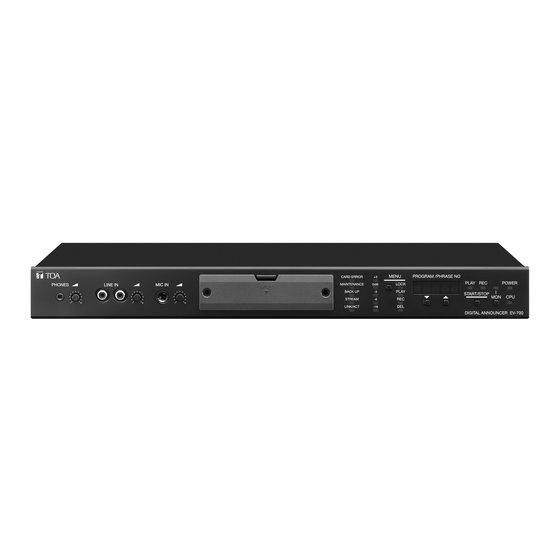
Page 10: Nomenclature And Functions
7. NOMENCLATURE AND FUNCTIONS [Front] [Inside the Front cover (9)] 3 4 5 22 23 24 26 27 28 1. Power indicator (Green) 7. Microphone input jack Lights when the power is supplied to the unit. −55 dB* , 600 Ω, unbalanced, 6.3 mm phone jack (2P) 2. - Page 11 Play mode, Recording mode, or Delete mode). the unit is placed in maintenance mode, possibly disabling broadcasts made by the contact control Green or using the EV-700 Setting software. Be sure to set all the switches to the OFF positions after completing maintenance. Orange 16.
-
Page 12: Rear
Connect this terminal to a 100BASE-TX-compatible Close the terminals to play a program, or to network. (Ethernet RJ-45 Jack) record or delete the phrase. (See the EV-700 Setting software instruction manual.) (See p. 28, "ACTIVATING OPERATION BY WAY OF EXTERNAL CONTROL.") 36. Cable clamp... -
Page 13: Workflow
8 prerecorded audio files (See p. 18.) which have already been programmed at the factory. To create a program, the EV-700 Setting software is required. The latest versions of the EV-700 Setting software and EV-700 Setting software instruction manual are made available on the TOA product data download site (http://www.toa-products.com/international/). -
Page 14: Try To Use First
Explained here is the procedure to play "2-tone chime" of the prerecorded audio files through the front key operation. Note To play other prerecorded audio files than the 8 files listed above, programs need be created on the EV-700 Setting software. (See the separate EV-700 Setting software instruction manual.) Phrases 00009 through 00016 are assigned to Program Nos. -
Page 15: Broadcasting (Playing)
9.2. Broadcasting (Playing) Play the program through the front panel operation. The following procedures show an example to play "2-tone chime" registered in Program No. 001 (P001). Step 1. Press the MENU key to select the play mode. The PLAY mode indicator lights. The "PLAY"... -
Page 16: Phrase And Program
Up to 32768 pieces of phrase data can be written on the memory card. "Phrase" used for the EV-700 refers to a WAV file and differs from the Phrase in the general sense. Despite the name "Phrase," audio data for music and sentences can be recorded as phrases. -
Page 17: Playing A Program
Interval (Phrase interval) p. 68 Busy output during interval p. 69 * Refers to pause between phrases, which can be adjusted in seconds. It can be created using the EV-700 Setting software. 10.3. Playing a Program Playback is executed for each program. -
Page 18: Factory-Preset Program
In this case, they can be played without the need to create program using the EV-700 Setting software as is the case described above. The prerecorded audio files deleted in this method can be registered again from the memory card using the EV-700 Setting software. -
Page 19: Operation
The same operation can be performed by way of contact control. (See p. 28, "ACTIVATING OPERATION BY WAY OF EXTERNAL CONTROL.") Note Program cannot be created through the front key operation. To create program, use the EV-700 Setting software. (See the EV-700 Setting Software instruction manual.) 11.1. Playing a Program To play a program, designate the program number. - Page 20 Step 2. Press either the Up or Down key to select Program number to be played. Tips • You can monitor the content to be played using headphones before play. (See p. 27, "Confirming the Recorded Contents on Memory Card.") •...
-
Page 21: Stopping Program Playback
Program playback can be stopped following the procedures below even if it is started in any of the methods using the EV-700 Setting software, control input, or through front panel operation. When the Quick stop function is set to "Enabled," you can stop playback by simply pressing the Start/Stop key even while in Lock mode. -
Page 22: Recording To Phrase
11.3. Recording to Phrase Designate the phrase number, then record the sound source to it. Recording is made at the sampling frequency set using the EV-700 Setting software. Sampling frequency is factory-preset to 44.1 kHz. 4,6,8 Step 1. Connect a microphone or sound source equipment such as player to the EV-700. - Page 23 Step 4. Adjust the sound volume of the sound source to record. Adjust the sound volume of the sound source with the Microphone input volume control or Line input volume control while watching the level meter. Take care so that "+3" LED of the level meter is not constantly lighting. Flashing Front panel Line input volume...
- Page 24 Step 7. Speak into the microphone or play the sound source by a player. Tips • Recording stops when the memory card becomes full. • The active input of either the microphone input or line input is recorded. • When both the microphone and line inputs are active, the input having higher broadcast priority is recorded.
-
Page 25: Deleting Phrase
11.4. Deleting Phrase Designate the phrase number, then delete the audio source. 3, 4 Step 1. Press the Menu key to select Delete mode. Press the Menu key some times until the Delete mode indicator lights. The "dEL" (DEL) indication appears for about 3 seconds on the Status display, then followed by the Phrase number indication like "00001."... - Page 26 Step 3. Press the Start/Stop key. The "rEAdy" (READY) indication appears on the Status display, then the unit will be placed in Delete standby mode. (READY) Flashing The dot at the lower right corner of the Status display flashes during Delete standby. If you do not make any front panel operation for 5 minutes, display's status will return to the one in Step Step 4.
-
Page 27: Confirming The Recorded Contents On Memory Card
11.5. Confirming the Recorded Contents on Memory Card Follow the procedures below to confirm the recorded contents on memory card before playing, recording, or deleting them. Audio signals are not output from the Line outputs 1 and 2 but you can check the contents using the headphones connected to the Headphone output jack. -
Page 28: Activating Operation By Way Of External Control
Lock mode. (See p. 88, "QUICK STOP FUNCTION.") 12.1. Setting the Control Method Use the EV-700 Setting software to perform settings related to external activation such as a control method and control signal type. [Setting example (default setting)] See the EV-700 Setting software instruction manual for details. -
Page 29: Inputting Control Signals
12.2. Inputting Control Signals 12.2.1. Input terminals used for external activation Apply a make signal to the Contact-activated input terminals and another make signal to the control input terminals for activating each operation. Use the Contact-activated input terminals to select a playback program number or the phrase number to be recorded/deleted. -
Page 30: Details Of The Setting Items
12.3. Details of the Setting Items 12.3.1. Direct control function and Binary control function Direct control function: Allows operation such as playback of the program number or recording/deletion of the phrase number corresponding to such terminal when a make signal is applied to any one of the Contact-activated input terminals 1 through 16. - Page 31 [Activation by the Binary control function] The Contact-activated input terminals 1 through 8 are regarded as 8 binary digits comprised of "0" and "1" when assuming the closed state as "1" and the open state as "0." To start playback, close the Playback control input terminal after designating the target program number, then the program of the designated number is played.
- Page 32 [States of Contact-activated input terminals 1 to 8 by the Binary control function] Recording/ Recording/ Recording/ Recording/ Contact-activated Contact-activated Contact-activated Contact-activated Delection Playback Delection Playback Delection Playback Delection Playback input terminal input terminal input terminal input terminal Phrase Program Phrase Program Phrase Program...
- Page 33 12.3.2. Pulse signal input activation and Level signal input activation Pulse signal input activation: Activates operation when a make signal (Closed time duration: over 50 ms) is applied to the terminals. Operation stops when it is finished or when a make signal is applied to the Stop control input.
- Page 34 [Operation by Level signal input activation] (When Direct control function is selected) • Operation of playback start by Level signal input activation Contact-activated input Program Unit's playback operation • Operation when playback is started by Level signal input activation and the closed state is kept even after program completion Contact-activated input Program...
- Page 35 12.3.3. Operation setting for playback start Three methods are available for the operation settings: Priority setting (FIFO), Priority setting (LIFO), and Sequential storage playback. [Playback depending on Priority setting (FIFO) and Priority setting (LIFO)] The unit operates as shown below depending on the program priority levels when playback is performed by these two settings.
- Page 36 [Sequential storage playback] The unit memorizes up to 16 contact-activated inputs, then each playback is started in the order of input. The program playback order has no relation to the program priority level. Programs are played in the order of the activation signal input.
- Page 37 [Operation of the Forced stop and Spontaneous stop of phrase playback during Level signal input activation] Level signal input activation, Forced stop Contact-activated input Stop activation Stop control input Program playback P001 P001 (Playback from the beginning) Level signal input activation, Spontaneous stop of phrase playback Contact-activated input Stop activation Stop control input...
-
Page 38: Details Of The Activation Signals And Operations
12.4. Details of the Activation Signals and Operations 12.4.1. Activation mode list Control function Activation target Activation type Operation Reference page Direct control Playback Pulse FIFO (priority setting) p. 39 (1) LIFO (priority setting) p. 39 (2) Sequential storage p. 40 (3) Level FIFO (priority setting) p. - Page 39 Direct control 12.4.2. Direct control function [(1) Operation of FIFO (priority setting) playback by a Pulse signal input activation] • Priority setting: When P001 is higher than P002 P001 start Contact-activated input 1 P002 start Contact-activated input 2 P002 playback P001 playback Program playback (Activation method)
- Page 40 Direct control • Priority setting: When P001 is lower than P002 P001 start Contact-activated input 1 P002 start Contact-activated input 2 Program playback P002 playback (Activation method) Close the Contact-activated input terminal corresponding to the program number to be played. (Operation description) Even if P001 playback is activated during Program P002 playback, the last-in P001 start is ignored and the first activated P002 playback continues.
- Page 41 Direct control • To clear all the stored contact-activated inputs Close the Delete/Clear control input terminal. Delete/Clear control input Program playback P001 playback P002 playback P003 playback P005 playback Playback stops. Playback stops when P002 playback is complete and no subsequent programs are played. [(4) Operation of FIFO playback (priority setting) by a Level signal input activation] •...
- Page 42 Direct control [(5) Operation of LIFO playback (priority setting) by a Level signal input activation] • Priority setting: When P001 is higher than or equal to P002 P001 start Contact-activated input 1 P002 start Contact-activated input 2 Program playback P002 playback P001 playback (Activation method) Close the Contact-activated input terminal corresponding to the program number to be played.
- Page 43 Direct control [(7) Recording operation by a Level signal input activation] Recording start Recording control input Phrase 00002 selection Contact-activated input 2 Phrase recording Phrase 00002 recording (Activation method) Close the Contact-activated input terminal corresponding to the phrase number to be recorded while the Recording control input terminal is being closed.
- Page 44 Direct control [(10) Spontaneous stop operation of phrase playback by a Pulse signal input activation] P001 start Contact-activated input 1 Stop activation Stop control input P001 Program playback Phrase 00001 playback Phrase 00002 playback (Activation method) When the Stop control input terminal is closed, program playback will stop after the phrase playback in the program currently being played reaches its end.
- Page 45 Binary control 12.4.3. Binary control function [(11) Operation of FIFO (priority setting) playback by a Pulse signal input activation] • Priority setting: When P002 is higher than P003 P002 selection Contact-activated input P002 P003 selection Contact-activated input P003 Playback start Playback start Playback control input Program playback...
- Page 46 Binary control [(12) Operation of LIFO playback (priority setting) by a Pulse signal input activation] • Priority setting: When P002 is higher than or equal to P003 P002 selection Contact-activated input P002 P003 selection Contact-activated input P003 Playback start Playback start Playback control input Program playback P003 playback...
- Page 47 Binary control [(13) Operation of Sequential storage playback by a Pulse signal input activation] P002 selection Contact-activated input P002 P003 selection Contact-activated input P003 Playback start Playback start Playback control input P002 playback P003 playback Program playback (Activation method) Close the Playback control input terminal while the Contact-activated input terminal corresponding to the program number to be played is being closed.
- Page 48 Binary control [(14) Playback operation by a Level signal input activation] P002 selection Contact-activated input P002 P003 selection Contact-activated input P003 P002 playback start Playback control input P002 playback Program playback (Activation method) Close the Playback control input terminal while the Contact-activated input terminal corresponding to the program number to be played is being closed.
- Page 49 Binary control [(16) Recording operation by a Level signal input activation] Phrase 00002 selection Contact-activated input 00002 Recording start Recording control input Phrase 00002 recording Phrase recording (Activation method) Close the Recording control input terminal while the Contact-activated input terminal corresponding to the phrase number to be recorded is being closed.
- Page 50 Binary control [(18) Forced stop operation by a Pulse signal input activation] P002 selection Contact-activated input P002 Playback start Playback control input Stop activation Stop control input Program playback P002 playback (Activation method) Program playback currently in operation stops instantly when the Stop control input terminal is closed. (Operation description) P002 playback starts when the Playback control input terminal is closed after while the Contact-activated input terminal is being closed.
-
Page 51: Types Of Emergency Broadcasts
Output destination, repeat count, and repeat time can be preset using the EV-700 Setting software. Audio source preparation and Emergency playback/stop can be made at the EV-700 unit or using the EV-700 Setting software. This manual describes the method of operations performed at the EV-700 unit. -
Page 52: Emergency Playback (Front Key Operation)
(Such as recording of audio source for Emergency playback and audio source confirmation) To make Emergency broadcast in the event of an emergency, use the Control input terminals or the EV-700 Setting software. (See p. 61, "EMERGENCY PLAYBACK (USING THE CONTROL INPUT TERMINALS)."... - Page 53 Tips • When input signals are fed to both the Microphone and Line inputs, you can set which input to take precedence using the EV-700 Setting software. The input with the higher broadcast priority (see p. 82) assigned takes precedence.
- Page 54 Step 6. Press the Start/Stop key again. Recording will start after 3 seconds. Flashing Time (seconds) till recording start is indicated by the countdown signs from "3" to "1" on the Status display. Displayed for 3 seconds. When recording starts, the Recording indicator lights and the "rEC"...
-
Page 55: Making Emergency Playback
14.2. Making Emergency Playback Step 1. Set only Switch 2 to the ON position. Confirm that the "EMEr" (EMER) indication appears on the Status display. Step 2. Press the Menu key to select Play mode. Press the Menu key several times until the Play mode indicator lights. - Page 56 Tips • If the playback time exceeds 5 minutes, the unit is automatically placed in Lock mode. • To cancel Lock mode, press the Menu key. Step 4. When Emergency playback is complete, return Switch 2 to the OFF position. When you finish all operations, it is recommended that you place the unit in Lock mode to prevent accidental operation.
-
Page 57: Stopping Emergency Playback
EV-700 Setting software, Control input, or front-key operation. Tips • When Emergency playback is under way using the EV-700 Setting software or control input, it is possible to stop Emergency playback even if the DIP switch for maintenance is not operated. -
Page 58: Confirming Audio Source Contents
14.4. Confirming Audio Source Contents When performing recording (See p. 52.), playback (See p. 55.), or deletion (See p. 59.) of the audio source for emergency playback, you can confirm the audio source contents. Step 1. Press the Monitor key while the playback mode, recording mode, or deletion mode for the emergency playback is being selected. -
Page 59: Deleting The Recorded Audio Sources
14.5. Deleting the Recorded Audio Sources Step 1. Set only Switch 2 to the ON position. Confirm that the "EMEr" (EMER) indication appears on the Status display. Step 2. Press the Menu key to select Delete mode. Press the Menu key some times until the Delete mode indicator lights. - Page 60 Step 4. Press the Start/Stop key again. The audio source for Emergency playback is deleted. The "dEL" (DEL) indication appears on the status display, followed by the flashing "EMEr" indication (DEL) during deletion. Flashing (EMER) Hyphens appear when the deletion is complete, then the display's indication changes to "EMEr."...
-
Page 61: Emergency Playback (Using The Control Input Terminals)
Emergency playback will start. Emergency playback will stop automatically after it is repeated by the number of times or for the period of time, both preset using the EV-700 Setting software. Tips • Emergency playback will automatically stop after it is repeated by the set number of times even if you continue to close the Emergency playback control input terminals after Emergency playback has started. -
Page 62: Stopping Emergency Playback
15.1.2. When Level signal input activation is selected for the Emergency playback start setting Step: Close the Emergency playback control input terminals (Terminal No. 3). Emergency playback will start. Emergency playback continues as long as the Emergency playback control input terminals are closed. 15.2. -
Page 63: Playback
Recording starts instantly by closing the rear-mounted Emergency recording control input terminals, and the recorded contents are repeatedly played when the terminals are opened. Output destination, repeat count, and repeat time can be preset using the EV-700 Setting software. 16.1. Repetitive Operation of R.E.M. Playback [Operation when the repeat count is set to "0"]... - Page 64 You can also make a setting so that playback is repeated until it is stopped manually or by Emergency stop control input. (See the separate EV-700 Setting software instruction manual.) Tips • Operation from recording to playback can be resumed if the recording switch is pressed once again while R.E.M.
-
Page 65: Operation And Setting At The Time Of Emergency Broadcast
• When the emergency broadcast is initiated, the program playback in operation is stopped, allowing the emergency broadcast to take precedence. • The EV-700 returns to the Lock mode after the emergency broadcast is stopped. • Emergency broadcast is disabled while the Maintenance indicator is lighting. (Except when making emergency... -
Page 66: Playback Systems
17. PLAYBACK SYSTEMS Playback system refers to the broadcasting way of phrases and programs. Settings for the repeat playback of program or the phrase playback at regular intervals can be performed by selecting playback system. Select the playback system from Program playback, Step playback, All phrases playback, or Chime playback for each program. - Page 67 • To stop playback partway, perform any of the following operations: Pressing the Start/Stop key (See p. 21.), Closing the Stop control input terminals (See p. 33.), and Using the EV-700 Setting software. (See the EV- 700 Setting software instruction manual.)
- Page 68 Pressing the Start/Stop key (See p. 21.), Closing the Stop control input terminals (See p. 33.), and Using the EV-700 Setting software. (See the EV-700 Setting software instruction manual.) • Playback will start from the first step in the following cases even if it is played partway through a program.
- Page 69 • Interval can be set in the range of 10 to 50 seconds (in 10-second units) and 1 to 99 minutes (in 1-minute units). Default setting is "OFF." • Busy output ON/OFF during interval can be set using the EV-700 Setting software. • Monitor playback of all Steps will start when the Monitor key is pressed.
- Page 70 To Phrase 00001 Chime playback This playback system is suited when the EV-700 is used as chime audio source of the remote microphone. • Delay time is fixed at "0" second regardless of the unit setting. • Busy output is not active regardless of the unit setting.
-
Page 71: Maintenance Function
When you finish work in Maintenance mode, return the DIP switch to the OFF position. If any one of the switches is set to the ON position, broadcast by way of contact control or using the EV-700 Setting software cannot be made. -
Page 72: Performing All-Program Playback (Use Switch 1.)
18.1. Performing All-program Playback (Use Switch 1.) 1, 4 2, 3 Monitor key Step 1. Set Switch 1 to the ON position. The "PG.VoL" indication appears on the Status indicator display. In this event, if the Monitor key is pressed, monitor playback of all programs will start and the playback is output only to the headphones. -
Page 73: Adjusting The Whole Sound Volume (Use Switch 1.)
18.2. Adjusting the Whole Sound Volume (Use Switch 1.) 1, 3 Step 1. Set Switch 1 to the ON position. The "PG.VoL" indication appears on the Status display. Step 2. Press the Up and Down keys to adjust the whole sound volume of program. The volume increases by 1 dB each time the Up key is pressed. -
Page 74: Uploading/Downloading Unit Setting File (Use Switch 3.)
Also, write the unit setting file to the memory card using the EV-700 Setting software in advance, then upload the setting file from the memory card to the EV-700 after inserting the card into the EV-700, and you can change the EV-700's settings. -
Page 75: Returning The Network Setting To The Default Value Temporarily (Use Switch 3.)
Even when the network setting is unknown, use this function to return the network setting to the default value, and you can confirm and edit the setting using the EV-700 Setting software by connecting the PC to the EV-700 via a network. -
Page 76: Updating The Firmware (Use Switches 5 And 8.)
18.7. Updating the Firmware (Use Switches 5 and 8.) You can update the firmware using the memory card on which the latest firmware is recorded. 2, 5 Status display 3, 4 Step 1. Insert the memory card on which the latest firmware is recorded into the Memory card slot B. Step 2. -
Page 77: Initializing The Unit Settings (Use Switches 6 And 8.)
18.8. Initializing the Unit Settings (Use Switches 6 and 8.) You can initialize the unit's settings, returning them to the factory default. 1, 5 Status display 3, 4 Step 1. Set Switches 6 and 8 to the ON position. The target to initialize appears on the Status display. Displayed indications represent the following contents. -
Page 78: Self-Check (Use Switches 7 And 8.)
18.9. Self-Check (Use Switches 7 and 8.) You can execute the unit's self-check, and can confirm the history storage memory error. 1, 3 Status display Step 1. Set Switches 7 and 8 to the ON position. Step 2. Press the Start/Stop key. The "tESt."... -
Page 79: Confirming The Firmware Version
19. CONFIRMING THE FIRMWARE VERSION Lock mode indicator Status display 2, 3 Step 1. Check that the Lock mode indicator is lighting. Step 2. Press the Up and Down keys simultaneously. Firmware version appears on the Status display as long as the keys are held down. Step 3. -
Page 80: Acquiring Operation History
Step 4. Remove the Memory card B from the EV-700. Step 5. Insert the Memory card B into a PC, then check the history using the EV-700 Setting software. Operation history is downloaded in 2 formats having the same data, xml and csv. -
Page 81: Priority Level Settings
Emergency playback and R.E.M. playback are fixed to Priority level 1 (the highest priority), which cannot be changed. Note See the EV-700 Setting software instruction manual for details. Though Broadcast priority level takes precedence over Program priority level, Emergency playback and R.E.M. playback, both having Priority level 1, are played with the highest priority. -
Page 82: External Input Broadcast
Broadcast priority level can be set among the normal broadcast, microphone broadcast, and line input broadcast. (For the setting procedures, read the EV-700 Setting software instruction manual.) Priority level can be selected from "1," "2," "3," or "OFF" with "1" being the highest priority while "3" the lowest priority. -
Page 83: Making External Input Broadcast
• Signals entered to the front-mounted and rear-mounted Line input terminals are internally mixed and output. 22.3.1. Making the microphone broadcast Separately prepare a dynamic microphone with ON/OFF switch meeting the following EV-700's input specifications. Microphone input specifications: −55 dB (0 dB = 1 V), 600 Ω, unbalanced, phone jack Step 1. - Page 84 Depending on the priority level setting, the line input broadcast may be interrupted if the higher-priority broadcast is initiated during broadcast. In this case, check the broadcast priority level setting. (See the EV-700 Setting software instruction manual.) Tips • Stereo input signals, if entered, are converted into monaural signals after the left and right channel signals are internally mixed.
-
Page 85: Broadcast Sound Volume
It can be set in 1-dB units in the range of −60 to 0 dB. Its initial setting is "−6 dB." Whole sound volume can also be set through operation at the EV-700. (See p. 73, "Adjusting the Whole Sound Volume (Use Switch 1).") -
Page 86: Sound Volume Of The Microphone Broadcast And The Line Input Broadcast
Using the EV-700 Setting software, it is possible to set what type of busy signal is output from which channel of the contact control output terminals 1 to 8 when the device performs the following operations. -
Page 87: Setting A Busy Signal
25.2. Setting a Busy Signal 25.2.1. Setting To set the busy signal, use the EV-700 Setting software. Busy signal name Content Default setting Program playback busy The busy signal is output during program playback. 1, 2: ON, 3−8: OFF You can set the channel of the contact control output terminal that outputs the busy signal for each program. -
Page 88: Error Output
A Quick stop function is a function that stops playback instantly when the Start/Stop key is pressed during program playback even in the Lock mode. Use the EV-700 Setting software to perform the Quick stop function setting. If you wish to stop playback instantly using the Start/Stop key, enable the Quick stop function. -
Page 89: Backup Function
Therefore, be sure to make a backup copy of the Memory card A to the Memory card B in advance when wishing to use this function. (See p. 75.) By comparing both data on the Memory cards A and B using the EV-700 Setting software, you can check whether they are identical or not. -
Page 90: Operation Of The Unit When The Backup Function Is Enabled
28.2. Operation of the Unit When the Backup Function Is Enabled [When the Backup function is enabled] • The Backup indicator lights. • When rewriting data by the operation like recording or deletion with the Backup function enabled, both data on the Memory cards A and B are rewritten at the same time. -
Page 91: Returning The Operation Using The Memory Card B To That Using The Memory Card A
Step 2. Press the Reset switch for 2 seconds or more, or disconnect the AC adapter plug on the rear panel, then connect it again. Operation can also be switched to that handled by the Memory card A using the EV-700 Setting software. -
Page 92: Installation
28. INSTALLATION 28.1. Mounting the Unit in an Equipment Rack When mounting the unit in an equipment rack, use the optional MB-15B Rack mounting bracket. EV-700 Machine screw M3 Remove the screws used for fixing Rack mounting screw 5 the unit’s case, and use them to fix (supplied with the MB-15B) the MB-15B to the unit. -
Page 93: Connections
29. CONNECTIONS Note When connecting the power source to the EV-700 or when connecting the EV-700 to the external audio player or amplifier, be sure to switch off the power of all devices. 29.1. Front Panel Connections [Connection example] Audio player... -
Page 94: Rear Panel Connections
29.2. Rear Panel Connections For the operations and functions of each terminal, see p. 12, "Rear" of "NOMENCLATURE AND FUNCTIONS." [Connection example] Control input device such as Output External control a revolving light device Audio signal output Audio signal input CD player Amplifier AD-246 AC adapter... - Page 95 When applying power to this terminal and the DC power input terminal (9) simultaneously, the higher side voltage is supplied to the EV-700. 9. DC power input terminal Cable clamp Connect 24 V DC power to this terminal.
-
Page 96: Removable Terminal Plug Connection
29.3. Removable Terminal Plug Connection Notes • Use the slotted screwdriver when connecting the removable terminal connector. • Avoid soldering stranded or shielded cable, as contact resistance may increase when the cable is tightened and the solder is crushed, possibly resulting in an excessive rise in joint temperatures. •... -
Page 97: If You Have Any Problems
Memory card Slot A. (The Card error indicator is lit.) unit placed Quit the setting on the EV-700 Setting Maintenance mode. software or return all the switches of the (The Maintenance indicator DIP switch used for Maintenance to the is lit.) OFF position. - Page 98 EV- Or, turn on the AGC using the EV-700 Setting 700 Setting software. software and the playback sound volume is automatically adjusted. (See the EV-700 Setting software instruction manual.)
- Page 99 (See p. 94.) communication • Check firewall setting. interrupted. • To connect the EV-700 online, FTP communication must be executed. Consult your network administrator of the facilities where the EV-700 is installed. Network...
-
Page 100: Error List
If the error still remains, it may be eliminated by reformatting the memory card. But note that all saved data is erased once the card is reformatted. * A collection of files necessary for the EV-700 to broadcast. For the details, read the EV-700 Setting software instruction manual. - Page 101 If the error still remains, it may be eliminated by reformatting the memory card. But note that all saved data is erased once the card is reformatted. * A collection of files necessary for the EV-700 to broadcast. For the details, read the EV-700 Setting software instruction manual.
- Page 102 Instruction value used inside the unit's firmware is The unit's firmware may be malfunctioning. Consult abnormal. the TOA dealer where the unit was purchased. * A collection of files necessary for the EV-700 to broadcast. For the details, read the EV-700 Setting software instruction manual.
-
Page 103: About The Ev-700'S State And Input/Output
31. ABOUT THE EV-700'S STATE AND INPUT/OUTPUT Following 3 points are set for the EV-700 as shown in the table below depending on the EV-700's state (Mode and operation type). (1) Audio source that can be output (2) Output destination... -
Page 104: Prerecorded Audio File List
Notes • Never use the prerecorded audio files with other products than the EV-700. They can only be used with the EV-700. • Duplication or diversion of the prerecorded audio files is prohibited without permission of the right holder, except for making backup copies. -
Page 105: Specifications
Wave Format 44.1 kHz/32 kHz sampling rate, 16 bit PCM method, WAV file (monaural) Sound Source Rewriting Method LAN data transfer/Analog recording/ Direct write to memory card using the EV-700 setting software Audio Input MIC: −55 dB* (microphone input volume control in maximum position), 600 Ω, unbalanced, φ6.3 phone jack (2P) -
Page 106: Accessories
Machine screw M3 x 12 (for fixing the front cover) ....2 • Optional products AC adapter: AD-246 Rack mounting bracket: MB-15B Traceability Information for Europe Manufacturer: Authorized representative: TOA Corporation TOA Electronics Europe GmbH 7-2-1, Minatojima-Nakamachi, Chuo-ku, Kobe, Hyogo, Suederstrasse 282, 20537 Hamburg, Japan Germany URL: https://www.toa.jp/ 133-02-00223-03...