Table of Contents
Advertisement
Advertisement
Table of Contents

Related Manuals for Toro TMC-212


Summary of Contents for Toro TMC-212
- Page 1 TMC-212 Residential and Commercial Irrigation System Controller User’s Guide...
-
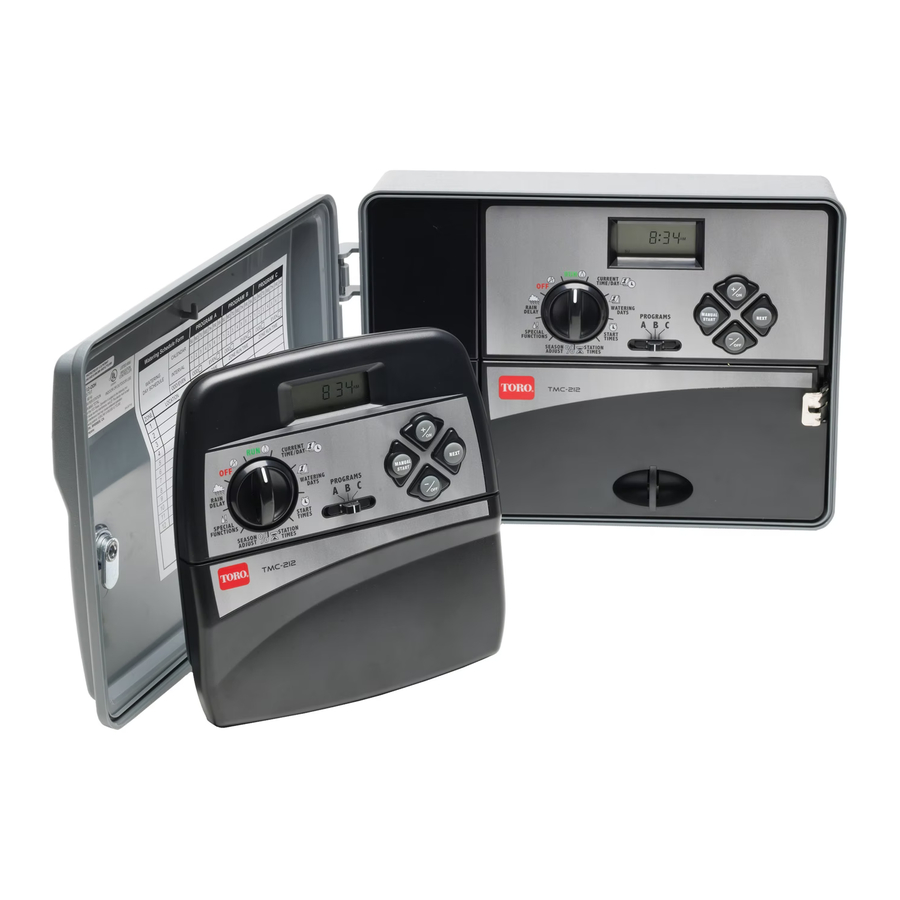
Page 2: Controller Components
Remote Control Ready Automatic Circuit Protection—Eliminates Fuse Non-volatile Program Memory—Eliminates Battery The TMC-212 controller features several unique and helpful operating characteristics. To take advantage of these features, spend just a few minutes to browse through this manual to familiarize yourself with your new controller. -
Page 3: Table Of Contents
Table of Contents Controller Components ...2 Controller Installation Indoor Model Installation ...6 Connecting the Valves ...7 Connecting a Pump Start Relay...8 Connecting the Transformer ...8 Outdoor Model Installation ...9 Preparing the Cabinet for Installation...9 Installing the Cabinet...10 Connecting the Valves ...11 Connecting a Pump Start Relay...12 Connecting the Power Source ...13 Connecting a Rain Sensor...13... -
Page 4: Controller Components
Controller Components Controller Components... - Page 5 Controller Components The following are brief descriptions of the controller components and display elements. Each of these items will be explained in further detail within the appropriate programming, operating and installation sections of this guide. 1 - LCD Display A - “Start Time” symbol is displayed when setting the program start times.
- Page 6 Up to six modules can be installed to expand the TMC-212 control from 2 to12 stations. Standard- surge expansion module TSM-02 provides 1.3 Kv surge protection per station and is identified by a single lightning bolt symbol and black color.
- Page 7 Controller Components...
-
Page 8: Controller Installation
Controller Installation IMPORTANT: TMC-212 indoor model is not weather resistant and must be installed indoors or in a protected location. Indoor Model Installation 1. Select a location for the controller within 4' (1.2 m) of an electrical outlet to enable the transformer wires to easily reach. -
Page 9: Connecting The Valves
Connecting the Valves Note: Using 14 to 18 AWG (2.5mm to 1mm cable is recommended. This cable is made specifically for automatic irrigation systems and is available in several lengths and conductor count. Always use a cable that has at least one wire for each valve and one wire for the valve common connection. -
Page 10: Connecting A Pump Start Relay
Connecting a Pump Start Relay CAUTION: Never connect an auxiliary pump starter directly to the controller. A 24 VAC relay, rated at 0.50A maximum current draw, must be used to connect the controller to the pump starter circuit. 1. Route a wire pair from the pump start relay into the controller housing. -
Page 11: Outdoor Model Installation
Four wiring access holes are provided in the cabinet base as follows: (D) - 1/2" (13mm) for power and equipment ground wires. (E) - 1/2" (13mm) (plugged) for optional Toro Rain Sensor wires. (F) - 3/4" (19mm) for sprinkler valve wires. -
Page 12: Installing The Cabinet
Installing the Cabinet 1. For safe, reliable operation, select an installation site which will provide the following conditions: • Protection from irrigation spray, exposure to direct sun during the hottest hours, wind and snow. • Access to a grounded power source which is not controlled by a light switch or utilized by a high current load appliance, such as a refrigerator or air conditioner. -
Page 13: Connecting The Valves
Connecting the Valves Note: Using 14 to 18 AWG (2.5mm to 1mm cable is recommended. This cable is made specifically for automatic irrigation systems and is available in several lengths and conductor count. Always use a cable that has at least one wire for each valve and one wire for the valve common connection. -
Page 14: Connecting A Pump Start Relay
Connecting a Pump Start Relay CAUTION: To prevent controller damage, never connect an auxiliary pump starter directly to the controller’s 24 VAC output. A 24 VAC 0.50A relay, must be used to connect the controller to the pump starter circuit. 1. -
Page 15: Connecting A Rain Sensor
Connecting the Power Source (cont.) Connecting a Rain Sensor (optional) A rain sensor is an optional control device that connects directly to the TMC-212 to automatically interrupt auto- matic controller operation during rain. A sensor bypass switch is provided to enable sensor operation to be disabled as needed. -
Page 16: Getting Started Irrigation System Basics
Automatic controller “Programs” are used to establish and organize different watering schedules. The TMC-212 provides three independent watering programs, designated A, B and C, and are established by specifying: what day(s) of the week to water –... -
Page 17: Watering Program Basics
Friday on program B and drip irrigation to soak the flower beds every three days on program C. Note: Although the TMC-212 offers the multiple program feature, you may want to use one program only if it meets your needs. The remaining programs can be turned off and on as you need to use them. -
Page 18: Selecting Watering Day Schedule
Selecting a Watering Day Schedule The TMC-212 provides three optional formats to schedule watering days: Calendar, Interval and Odd/Even. The Calendar Format The Calendar format is a recurring 7-day schedule that begins on Sunday and enables you to select specific days of the week to water. -
Page 19: Setting Program Start Times
Setting Program Start Times A program start time is the time of day an automatic program watering cycle will start. The TMC-212 enables each watering program (A, B and C) to have four indepen- dent start times. Please note the following start time conditions: •... -
Page 20: Planning Your Watering Schedule
Each program can have up to four assigned start times. Note: The TMC-212 runs one program watering cycle at a time. Within the cycle, only one station runs at a time. Therefore, when scheduling multiple programs... - Page 21 (Example)
-
Page 22: Watering Schedule Form
Watering Schedule Form CALENDAR INTERVAL WATERING DAY SCHEDULE ODD/EVEN EXCLUDE STATION LOCATION WELL RECOVERY DELAY TIME PROGRAM START TIMES PROGRAM A PROGRAM B SU MO TU WE TH FR SA SU MO TU WE TH FR SA SU MO TU WE TH FR SA EVEN TU WE TH FR SA SU MO TU WE TH FR SA SU MO TU WE TH FR SA STATION RUN TIME... -
Page 23: Programming The Controller
24 hours. The TMC-212 has a default watering program that will automatically control your sprinkler system when power is initially applied. -
Page 24: Setting The Watering Day Schedule
Setting the Watering Day Schedule Each program can have its own Calendar, Interval, Odd or Even schedule, but only one schedule can be active at a time for that program. The watering day schedule or OFF shown in the display when the control dial is in the position will be the active schedule W TERING D YS for that program. -
Page 25: Setting An Interval Schedule
Setting an Interval Schedule Turn the control dial to the W TERING D YS position. Check the switch setting. If necessary, PROGR MS reposition the switch to select the desired program. The current watering schedule will be displayed. If Int (Interval) is not displayed, press the +/ button as needed to select Int. -
Page 26: Setting An Odd Or Even Schedule
Setting an Odd or Even Schedule - Turn the control dial to the position. - Check the switch setting. If necessary, PROGR MS reposition the switch to select the desired program. - The current watering schedule will be displayed. If Odd or Even is not displayed, press the +/ button as needed to select Odd or Even. -
Page 27: Using The Day Exclusion Feature
Using the Day Exclusion Feature A Calendar schedule is generally used to exclude or select specific days of the week for watering. However, if an Interval or Odd/Even watering schedule is preferred (or required), the Day Exclusion feature enables you to select any day(s) of the week to be excluded and remain off regardless of the program schedule. -
Page 28: Turning Off A Program
Turning Off a Program Note: Turning off a program does not alter or erase a preset watering day schedule. Selecting Off simply places the program on hold until one of the watering day schedules is selected. - Turn the control dial to the position. -
Page 29: Setting Program Start Times
Setting Program Start Times A program start time is the time of day that an automatic watering cycle will start. The TMC-212 enables you to assign up to four automatic start times per program. Turn the control dial to the ST RT TIMES Start times are designated by numbers 1–4 shown at... -
Page 30: Setting Station Run Times
Setting Station Run Times Station run time determines how long the station will operate during a program watering cycle. Each station can have a different run time assignment in each program. Run time is adjustable from OFF to 4 hours, in 1-minute increments. - Page 31 Note: For information regarding the practical application of the PS/MV control features, refer to the examples provided on pages 38 and 39. Turn the control dial to the SPECI L FUNCTIONS position. See Example 1. Check the switch setting. If necessary, PROGR MS reposition the switch to select the desired program.
-
Page 32: Controller Operations
• Off mode – Shuts off and prevents all watering activity. Automatic Mode In the Automatic mode, the TMC-212 keeps track of the current time, day of the week and the automatic watering program schedule. Automatic operation will occur when- ever a programmed watering day and a start time match the current time and day. -
Page 33: Manual Mode
Note: The position of the PROGR MS determine which program will run during automatic controller operation. In other words, if a program has an assigned watering day schedule, start time and a station with run time, it will operate automatically regardless of the position of the switch. -
Page 34: Watering Control Features
Watering Control Features Once the sprinkler system is running, the following manual control features become available: Pause Watering To pause watering, press the +/ at the same time. • The station will temporarily turn off. • The Watering On symbol will begin flashing. •... -
Page 35: Rain Delay Feature
Off (and possibly forgetting to turn it back on), a rain delay of 3 days can be easily entered. At the end of 3 days, the TMC-212 will resume automatic operation as scheduled. Turn the control dial to the... -
Page 36: Season Adjust Feature
Season Adjust % Feature Note: The Season Adjust % and Rain Delay features modify controller operation only and do not change the controller’s programmable memory. The Season Adjust % feature enables the station time of all stations (assigned to a watering program) to be simul- taneously decreased or increased from 10–200% in 10% increments (100% equals no adjustment). -
Page 37: Turn Off Operation
Turn Off Controller Operation When the control dial is turned to the controller operation stops immediately. Leaving the control dial in the position enables the controller maintain current time and day, while disabling automatic and manual watering activity. Turn the control dial to the The word OFF will be displayed for approximately eight minutes. -
Page 38: Appendix
Clearing the Program Memory The user-defined watering program information stored in the TMC-212 memory will be retained for several years. If controller power is lost for more than 24 hours, only the time and date will need to be reset. -
Page 39: Setting Station Times
Note: Expansion modules are available in Standard- surge (TSM-02) and High-surge (TSM-02-H) versions. Although the TSM-02-H module can be used in any TMC-212 controller, it will only provide high (6.0 Kv) surge protection when installed in Outdoor controller models TMC-212-ODH and TMC-212-ODH-50H. -
Page 40: Using Pump/Master Valve Controls
Using Pump Start/Master Valve and Well Recovery Controls The following examples illustrate various practical application of automatic Pump Start/Master Valve (PS/MV) and Well Recovery timing controls and how they affect the program watering cycles Example 1: The irrigation supply is pumped directly from a well. Program Setup: •... - Page 41 Example 1 Example 2 3:00 Example 3 3:35 3:55 4:10 4:30...
-
Page 42: Troubleshooting
If you are having a problem with the controller, check the following symptoms, possible causes and remedies. If the problem can not be resolved or you would like assistance with any Toro irrigation product, call 1-800-664-4740 or 1-951-688-9221 (outside U.S.) Monday through Friday, 7:30 a.m – 4:00 p.m. (Pacific Standard Time). -
Page 43: Specifications
Specifications Cabinet Dimensions: Indoor Model 7.5" W x 8.5" H x 2" D (19cm W x 21.6cm H x 5cm D) Outdoor Model 13.25" W x 9" H x 3.5" D (33.7cm W x 22.9cm H x 9cm D) Temperature Range: Operating: +14°F to +140°F (-10°C to +60°C) Storage: -22°F to +149°F (-30°C to +65°C) Power Specifications:... -
Page 44: Warranty
Warranty The Toro Promise – Limited Three- or Five-year Warranty Neither Toro nor Toro Warranty Company is liable for indirect, incidental or consequential damages in connection with the use of equipment, including but not limited to: vegetation loss, the cost of substitute equipment or ser- vices required during periods of malfunction or resulting non-use, property damage or personal injury resulting from installer’s actions, whether negli-...