Table of Contents
Advertisement
Quick Links
CEILING SPEAKER SYSTEM
TABLE OF CONTENTS
1. SAFETY PRECAUTIONS .......................... 2
2. GENERAL DESCRIPTION ........................ 3
3. FEATURES ................................................ 3
5. INSTALLATION ......................................... 4
Please follow the instructions in this manual to obtain the optimum results from this unit.
We also recommend that you keep this manual handy for future reference.
INSTRUCTION MANUAL
FOR MAINTENANCE ................................. 9
7. REPAINTING THE SPEAKER .................. 10
8. SPECIFICATIONS .................................... 11
Accessories ............................................... 11
Optional Components ................................ 11
F-2352SC
Advertisement
Table of Contents

Related Manuals for Toa F-2352SC


Summary of Contents for Toa F-2352SC
-
Page 1: Table Of Contents
Please follow the instructions in this manual to obtain the optimum results from this unit. We also recommend that you keep this manual handy for future reference. INSTRUCTION MANUAL F-2352SC 6. REMOVING THE SPEAKER FOR MAINTENANCE ... 9 7. REPAINTING THE SPEAKER ... 10 8. -
Page 2: Safety Precautions
1. SAFETY PRECAUTIONS • Be sure to read the instructions in this section carefully before use. • Make sure to observe the instructions in this manual as the conventions of safety symbols and messages regarded as very important precautions are included. •... -
Page 3: General Description
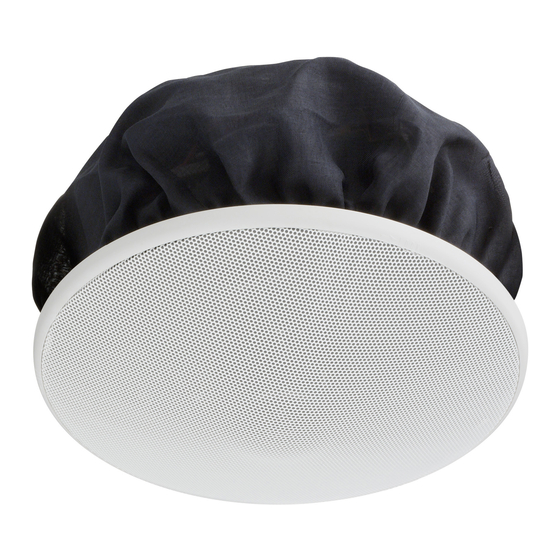
2. GENERAL DESCRIPTION The F-2352SC is a 2-way, flush-mounted ceiling speaker that offers a wide frequency range and high-quality sound output. Use of optional mounting hardware permits versatile mounting to match a wide range of applications and installation locations. 3. FEATURES •... -
Page 4: Installation
A dust cover is pre-mounted on the rear of the speaker at the factory. Pay attention not to accidentally take it off during speaker installation. The F-2352SC ceiling speaker can be mounted in 6 different configurations: • Direct mounting to a strong ceiling panel No additional hardware required. - Page 5 2-2. Mounting to a ceiling frame Use the optional HY-RR2 Reinforcement Ring in conjunction with the optional HY-TB1 Tile Bar Bridge. Note Refer to the instruction manual included with the HY-TB1 for the correct ceiling mounting procedure. [Installed HY-TB1 and HY-RR2] 2-3.
- Page 6 2-5. Hanging from a ceiling suspension pipe (exposed installation) Use the optional HY-BC1 Back Can. Note Refer to the instruction manual included with the HY-BC1 for Back Can installation. Step 3. Connect the speaker cable to the push-in terminal. Use the 600 V vinyl-insulated cable (IV or HIV wire). The following matching cable types are recommended: •...
- Page 7 4-1. Flush ceiling mounting (in the cases except for Step 2-5) Insert the speaker through the mounting hole till it contacts the ceiling panel. While doing so, avoid directly touching the speaker's diaphragm and diffuser section. WARNING Never grab the diffuser section as a hand hold. The speaker could fall due to damage, resulting in possible personal injury.
- Page 8 Step 5. Set the input power. Turn the input selector switch (on the unit's front) to set it to the desired input impedance. (Factory-preset to 1.7 kΩ.) Important Never set this switch to low-impedance (8 Ω or 16 Ω) settings when using a high-impedance 25, 70, or 100 V line.
-
Page 9: Removing The Speaker For Maintenance
6. REMOVING THE SPEAKER FOR MAINTENANCE 6.1. Detaching the Front Grille Turn the front grille counterclockwise to full stop, then lightly pull it downward. The front grille employs a double-locking system. If the grille cannot be detached when lightly pulled downward, it likely has not yet been fully rotated back to the detachment position. -
Page 10: Repainting The Speaker
7. REPAINTING THE SPEAKER Follow the procedure below when repainting the front grille: Step 1. Clean the front grille before painting. Wipe with a soft cloth dampened in a detergent. Caution Do not use thinner or other volatile liquids to clean the grille. Step 2. -
Page 11: Specifications
")x Depth 154 mm (6 1.5 kg (including front grille) This is a special fitting for use with the F-2352SC. Use this ring when mounting the speaker unit to a weak ceiling. This ring can also be used in conjunction with the HY-TB1, HY-TR1, or HY-AH1. - Page 12 Printed in Indonesia 533-06-094-8A...