Table of Contents
Advertisement
Available languages
Available languages
Quick Links
Advertisement
Table of Contents

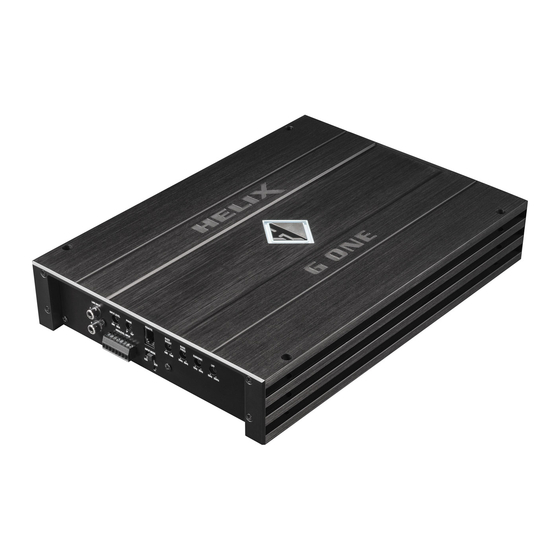
Summary of Contents for HELIX G ONE
- Page 1 G ONE 1-Kanal Class D Verstärker 1-channel Class D amplifier...
-
Page 2: Herzlichen Glückwunsch
Verarbeitung und eine tigen HELIX Verstärkers. überzeugende Anwendung ausgereifter Technolo- gien aus. Audiotec Fischer setzt mit der HELIX G ONE neue Viel Freude an diesem Produkt wünscht Ihnen das Maßstäbe in puncto Preis-Leistungsverhältnis. Dabei profitieren Sie als Kunde direkt von unserer Team von nahezu 30-jährigen Erfahrung in der Forschung und... -
Page 3: Anschluss- Und Bedienelemente
Anschluss- und Bedienelemente Line Input Input Mode Cinch-Eingänge Anschluss eines Schalter zur Verteilung der Eingangssignale Vorverstärkersignals. auf die jeweiligen Verstärkerkanäle. Input Level Bass Boost Regler zum Einstellen der Eingangsempfind- Regler zum Einstellen der Bassanhebung lichkeit des Line und Highlevel Inputs. von 0 bis 12 dB. - Page 4 Achtung: Verwenden Sie zum Anschluss aus- schließlich den mitgelieferten Stecker mit integrier- ten Schraubklemmen oder einen passenden Kabel- baum aus dem HELIX Zubehörprogramm. Achtung: Eine gleichzeitige Verwendung der Hochpegel- und Vorverstärkersignaleingänge ist nicht möglich und kann zu Schäden an Ihrem Au-...
- Page 5 8 Bass Frequenz Das Tiefpassfilter bildet in Verbindung mit dem Sub- Mit Hilfe dieses Reglers kann die Mittenfrequenz sonicfilter in jedem Fall einen Bandpass. des Bass Boost von 25 Hz bis 50 Hz eingestellt So kann mit Hilfe dieser beiden Regler ein Band- werden.
-
Page 6: Output Channel
Verbindungen oder Falscheinstellungen und Über- des Verstärkers. Diese Fehlfunktion kann unter- temperatur. Sollte sich der Verstärker nach Besei- schiedliche Ursachen haben, da die G ONE mit tigung der Fehlerquelle nicht wieder einschalten verschiedenen elektronischen Schutzschaltungen lassen, liegt ein Defekt vor. - Page 7 Abstand von max. 30 cm von der Batterie mit einer Hauptsicherung abgesichert werden. Der Wert der Sicherung errechnet sich aus der maximalen Stromaufnahme der gesamten Car- Hifi Anlage (G ONE = max. 120 A RMS bei 12 V Bordnetz). Konfigurationsbeispiele Mono...
- Page 8 Konfigurationsbeispiele Parallelbetrieb Zwei Subwoofer mit einer Schwingspule (Single Voice Coil) oder ein Subwoofer mit Doppelschwingspule (Dual Voice Coil) werden parallel geschaltet. Hinweis: Die Parallelschaltung von zwei Schwingspulen führt zur Halbierung der Impedanz! Maximale Ausgangsleistung dieser Konfiguration: Zwei Subwoofer 1 x 4 Ohm entspricht einer Zwei Subwoofer mit einer...
- Page 9 Anschluss mit Hilfe des „Easy Plug Cables“ Um die Installation der G ONE an ein Werks- oder Je nach Fahrzeugtyp benötigen Sie hierfür Nachrüstradio deutlich zu vereinfachen, kann der gegebenenfalls einen fahrzeugspezifischen Verstärker auch mit Hilfe des optional erhältlichen ISO-Adapter. Eine Liste aller Fahrzeuge und Easy Plug Kabels (EPC 5) angeschlossen werden.
-
Page 10: Technische Daten
Technische Daten Leistung RMS / Max. - @ 4 Ohm ..............1 x 390 / 780 Watt - @ 2 Ohm ..............1 x 675 / 1350 Watt - @ 1 Ohm ..............1 x 920 / 1840 Watt Verstärkertechnologie ..........Class D Eingänge .............. -
Page 11: General Instructions
HELIX dealer. cross-section for the connection of the HELIX Install your G ONE in a dry location with sufficient G ONE. The fuses may only be replaced by iden- air circulation for proper cooling of the equipment. - Page 12 Connectors and control units Line Input Input Mode RCA inputs for connecting pre-amplifier Switch to route input signals to respective signals. amplifier channels. Input Level Bass Boost Control for adjusting the input sensitivity of Control for adjusting the bass boost from 0 to the Line and Highlevel Inputs.
- Page 13 Attention: Solely use the pluggable screw-terminal for the highlevel connector which is included in de- livery or an optional available cable harness from the HELIX accessory assortment! 8 Bass Frequency Important: It is strictly forbidden to use the High level Input and pre-amplifier inputs (Line Input) at This control is used to adjust the center frequency the same time.
-
Page 14: Initial Start-Up And Functions
(max. distance from battery: 30 cm / 12”). The HELIX G ONE is equipped with 3 x 40 Ampere fuses. Power & Protect LED The power and protect LED indicates the operating mode of the amplifier. -
Page 15: Installation
/ Attention: It is mandatory to properly adapt the input sensitivity of the G ONE to the sig- lowlev el / cinch outputs of your car radio. It is nal source in order to avoid damage to the not mandatory to use both pre-amplifier inputs. - Page 16 The value of the fuse is calculated from the maximum total current draw of the whole car audio system (G ONE = max. 120 A RMS at 12 V power supply). If your power wires are short (less than 1 m / 40”) then a wire gauge of 16 mm²...
- Page 17 Parallel operation Two subwoofers with one voice coil (single voice coil) or one subwoofer with dual voice coil are connected in parallel. Note: The parallel connection of two voice coils will result in halving the impedance! Maximum output power of this configuration: Two subwoofers with 1 x 4 Ohms correspond to a total Two subwoofers with a single voice coil...
- Page 18 To simplify installation to an OEM or aftermarket a special ISO-adaptor depending on vehicle radio the HELIX G ONE can also be connected us- type. In order to verify please check the adaptor ing the optional Easy Plug Cable (EPC 5) which will...
-
Page 19: Technical Data
Technical Data Output power RMS / max. - @ 4 Ohms ................1 x 390 / 780 Watts - @ 2 Ohms ................1 x 675 / 1350 Watts - @ 1 Ohm ................. 1 x 920 / 1840 Watts Amplifier technology .............. - Page 20 Audiotec Fischer GmbH Hünegräben 26 · 57392 Schmallenberg · Germany Tel.: +49 2972 9788 0 · Fax: +49 2972 9788 88 E-mail: helix@audiotec-fischer.com · Internet: www.audiotec-fischer.com...


