Sony SU-PW2 Instructions Manual
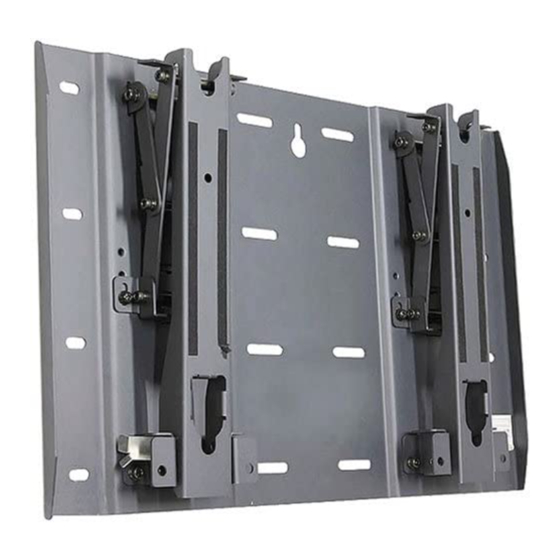
Wall-mount bracket
Hide thumbs
Also See for SU-PW2:
- Instructions manual (176 pages) ,
- Dimensional information (1 page) ,
- Installation manual (33 pages)
Advertisement
Available languages
Available languages
Quick Links
Advertisement

Related Manuals for Sony SU-PW2


Summary of Contents for Sony SU-PW2
- Page 1 4-099-792-42 (1) Wall-Mount Bracket Instructions SU-PW2 © 2004 Sony Corporation...
- Page 2 Sufficient expertise is required for installing this product. Be sure to subcontract the installation to Sony dealers or contractors and pay special attention to safety during the installation. Sony is not liable for any damages or injury caused by mishandling or improper installation.
- Page 3 For Customers WARNING If the following precautions are not observed, serious injury or death through fire, electric shock, the product toppling over, or the product dropping can result. Be sure to subcontract the installation to qualified contractors and keep small children away during the installation.
- Page 4 Do not cover the ventilation hole of the Display Unit. If you cover the ventilation hole (with a cloth, etc.), heat may build up inside and cause fire. Do not apply any load other than the Display Unit on the Wall-Mount Bracket.
- Page 5 CAUTION If the following precautions are not observed, injury or property damage may occur. Do not install the Wall-Mount Bracket on wall surfaces where the corners or the sides of the Display Unit protrude away from the wall surface. Do not install the Wall-Mount Bracket on wall surfaces such as a pillar, where the corners or the sides of the Display Unit protrude away from the wall surface.
-
Page 6: Install The Wall-Mount Bracket
WARNING To Sony Dealers The following instructions are for Sony Dealers only. Be sure to read safety precautions described above and pay special attention to safety during the installation, maintenance and checking of this product. Be sure to install the Wall-Mount Bracket securely to the wall following the instructions in this instruction manual. - Page 7 Be sure to tighten the screws securely in the designated position. If you fail to do so, the Display Unit may fall, and cause bodily injury to someone or damage to the Display Unit. Be careful not to subject the Display Unit to shock during installation. If the Display Unit is exposed to shock, it may fall or break apart.
- Page 8 Step 1: Check the parts required for the installation Prepare a Phillips screwdriver and the appropriate screws (four or more M8 (or equivalent) screws, not supplied), depending on the material of the wall, beforehand. Open the package and check the parts. Screw (+B6 ×...
- Page 9 Display installing dimensions table Unit: mm Display Dimensions Unit: mm Length for each mounting angle Unit: mm Weight Display Model Mounting Weight (× 4)* angle (αº) 0º KE-MX37A1 5º KE-MX37S1 1135 10º 33 kg 132 kg KE-MX37N1 15º KE-MX37K1 20º KE-MX42A1 0º...
- Page 10 Wall processing dimensions diagram Unit: mm 20 – 9 × 20 Slot hole ø60 ø50 Hole for cable routing (One of two): Hole for cable routing: KE-MX37A1 / KE-MX37S1 / KE-MX37N1 / KE-MX37K1 / PDM-4200 / PDM-5000 / PDM-6100 KE-MX42A1 / KE-MX42S1 / KE-MX42N1 / KE-MX42K1 / KE-MX42M1 Referring to the paper template and the diagram above, determine the positions of the screws and the cable hole (if you intend to route the cables in the wall), and work on the wall.
- Page 11 Step 3: Install the Plate Unit on the wall Fix the Plate Unit to the wall using four or more Align the unit so that it is exactly level. M8 (or equivalent) screws (not supplied). Select at least four screw holes with the same mark shown in the diagram on the right, and tighten the screws securely so that they will not come loose.
- Page 12 When installing the Display Unit of the TV KE-MX37A1, KE- MX37S1, KE-MX37N1, KE-MX37K1, KE-MX42A1, KE-MX42S1, KE- MX42N1, KE-MX42K1 or KE-MX42M1, do step 3 below. Change the positions of the Mounting Hook Unit support shafts. 1 Remove the screws from the left and right Mounting Hook Unit support shafts and fit the support shafts in the outer notches.
- Page 13 PDM-6100 1 Place the Display Unit, with its screen facing down, on a stable, cloth-covered Speaker (left) Speaker (right) work surface. Notes • If the weight of the Display Unit is placed on the speakers, deformation or a loose connection of the speakers may result.
-
Page 14: Step 4: Install The Display Unit
Step 4: Install the Display Unit WARNING Be sure to complete the installation before connecting the mains lead to the wall socket. If you allow the mains lead to be pinched under or between pieces of equipment, this may result in a short circuit or an electric shock. Be careful not to stumble over the mains lead or the Display Unit, as you may hurt yourself. - Page 15 Install the Display Unit on the Plate Unit. 1 Insert the screws (+B6 × L20, supplied) for securing the Mounting Hook Unit into the screw holes on the outer left and right sides of the Mounting Hook Unit support shafts, and then tighten them temporarily. 2 Hitch the upper hooks of the two Mounting Hook Units on to the support shafts of the arms.
-
Page 16: Remove The Display Unit
Remove the Display Unit For Sony Dealers Unplug the mains lead from the wall socket. Remove the two securing screws on the right and left Mounting Hook Unit support shafts. Be sure that two or more persons hold the Display Unit and slide it upward to remove the Display Unit. -
Page 17: Specifications
Specifications Unit: mm Weight: 9.0 kg Design and specifications are subject to change without notice. (GB) - Page 18 (GB)
- Page 19 等离子电视接收机用 墙装式托架 Instructions SU-PW2...
- Page 20 感谢您购买本产品。 致用户 安装本产品要求具有一定的技术。确保将安装工作委托给合格的安装人员,并在安装过程中特别注意安全。Sony 对操作不当或安装不正确而引起的任何损坏或伤害均不负责。 警告 如果不遵守安全注意事项或不正确使用本产品,则可能导致严重的受伤或火灾。 本使用说明书提供了正确使用本产品的信息,以及为防止事故发生需注意的重要事项。务必仔细阅读本说明书并正确 使用本产品。保存好本说明书以备将来参考。 致 Sony 经销商及安装人员 安装本产品要求具有一定的技术。为安全地进行安装工作,请务必仔细阅读本说明书。Sony 对操作不当或安装不正 确而引起的任何损坏或伤害均不负责。请在完成安装后将本说明书交给用户。 安全事项 Sony 的产品设计非常注重安全。 然而,如果不正确使用这些产品,则可能因火灾、电击、产品倾倒或产品跌落而导致严重的受伤。务必遵守安全注意 事项以防止此类事故发生。 当心 此挂壁式支架只能用于下列产品。用于其它电器产品会产生不稳定,从而引起受伤。 指定的产品(2004 年 6 月止) 等离子电视接收机用 KE-MX37A1 KE-MX37S1 KE-MX37N1 KE-MX37K1 (显示器型号) KE-MX42A1 KE-MX42S1 KE-MX42N1 KE-MX42K1 KE-MX42M1 KE-42MR1 KE-42MR1E KE-50MR1 KE-P50MR1E KE-61MR1 (PDM-4200) (PDM-4200) (PDM-5000) (PDM-5000) (PDM-6100) (CS)
- Page 21 用户须知 警告 如果不遵守下列注意事项,将因火灾、电击、产品倾倒或产品跌落而导致严重的受伤或死亡。 务必将安装工作委托给合格的安装人员,并确保在安装过程中无小孩接近。 如果挂壁式支架或显示装置安装不正确,则可能发生下列事故。确 保安装工作由合格的安装人员进行。 • 显示装置可能跌落并造成严重的受伤,如擦伤或骨折等。 • 如果安装挂壁式支架的墙体不平稳、不平整或与地面不垂直,则装置可能 会跌落,从而造成受伤或财产损失。墙体应能承受至少四倍于显示装置的 重量。(各显示装置的重量,请参阅第 9 页上的显示器安装尺寸表。) • 如果墙壁上安装的挂壁式支架不够牢固,则装置可能会跌落并造成受伤或 财产损失。 务必将显示装置的搬移或拆卸工作委托给合格的安装人员进行。 如果由合格安装人员之外的其它个人进行显示装置的搬运或拆卸,则装置可能跌落并造成受伤或财产损失。请确保由 两人或两人以上搬运或拆卸显示装置。 勿将各种液体泼洒在显示装置上。 如果弄湿显示装置,则会造成火灾或电击。 显示装置安装完之后,勿拆下螺丝等零件。 否则,显示装置可能会跌落并造成受伤或财产损失。 勿拆解或变更挂壁式支架的零部件。 否则,挂壁式支架可能会跌落并造成受伤或财产损失。 勿将指定产品之外的其它设备安装到支架上。 本挂壁式支架仅为安装指定的产品而设计。如果您安装非指定设备,则设备可能跌落或破裂,并可能造成受伤或财产 损失。 (CS)
- Page 22 勿盖住显示装置的通风孔。 如果您盖住通风孔(用布等),则热量会积聚其中并造成火灾。 除显示装置之外,勿在挂壁式支架上再安装其它重物。 否则,显示装置可能跌落并造成受伤或财产损失。 勿倚靠或攀爬显示装置。 勿倚靠或攀爬显示装置,因为装置可能跌落到您身上,并造成严重的受伤。 勿使显示装置暴露于雨水或潮湿中。 这样可能会引起火灾或电击。 切勿将显示装置放在炎热、潮湿或灰尘过多的地方,也勿放在装置会受到机械振动 的地方。 否则,可能会引起火灾或电击。 可燃物或明火(如蜡烛)应远离显示装置。 为防止火灾,请使可燃物或明火(如蜡烛)远离显示装置。 (CS)
- Page 23 当心 如果不遵守下列注意事项,则可能导致受伤或财产损失。 勿将挂壁式支架装在会使显示装置的边角或侧面突出于墙面的墙壁位置。 勿将挂壁式支架装在柱子等会使显示装置的边角或侧面突出于墙面的墙壁位 置。如果人或物正巧撞到显示装置的边角或侧面,则会引起受伤或财产损失。 在清洁或维护过程中,勿对产品施加过大的力量。 勿在显示装置的顶部施加过大的力量。否则,显示装置可能会跌落并造成受伤或财产损失。 勿将显示装置安装在空调的上面或下方。 如果显示装置长期接触漏水,或长期暴露于空调的气流中,则可能造成火灾、电击或显示装置的故障。 注意事项 • 如果长期使用安装于挂壁式支架的显示装置,则视墙面材料而定,显示装置后面或上面的墙面可能会褪色,或墙 纸会脱落。 • 如果在墙壁上安装挂壁式支架后再将其拆下,则墙壁上会留下螺丝孔。 • 如果您在墙壁后面布置了 300 欧姆的供电电缆,建议您将其换成 75 欧姆的同轴电缆。 如果需要继续使用 300 欧姆的供电电缆,请在安装前确保显示装置和墙内供电电缆之间有足够的空间。有关安装 前的正确安装位置(远离无线电干扰,等)的情况,请向安装人员咨询。 (CS)
- Page 24 安装挂壁式支架 安装人员须知 警告 致安装人员 下列说明仅适用于安装人员。务必阅读上述安全注意事项,并在安装、维护和本产品的检查时特别注意安全。 务必按照本说明书中的指示牢固地将挂壁式支架安装在墙上。 如果有螺丝松动或掉落,则挂壁式支架会跌落并造成受伤或财产损失。务必使 用针对墙壁材料的正确螺丝,并牢固安装本装置。请用四个或更多个 M8(或 相当规格)螺丝。 勿使电源线或连接电缆受挤压。 如果电源线或连接电缆被压在装置和墙壁之间,或被用力弯曲或扭曲,则其内 部导线可能会裸露并造成短路或断电。这会造成火灾或电击。 务必按照本使用说明书中的指示正确使用提供的螺丝和附件。如果使用其它替换零 件,则显示装置可能跌落,并造成身体受伤或显示装置损坏。 务必按照本使用说明书中介绍的步骤正确安装支架。 如果有螺丝松动或掉落,则显示装置会跌落并造成身体受伤或显示装置损坏。 (CS)
- Page 25 务必拧紧指定位置的螺丝。 否则,显示装置会跌落并造成身体受伤或显示装置损坏。 小心,勿使显示装置在安装过程中受到震动。 如果显示装置受到震动,它可能会跌落或裂开。这会引起受伤。 务必将显示装置安装在既垂直又平坦的墙壁上。 否则,显示装置会跌落并造成受伤。 正确安装显示装置后,请正确固定电缆。 如果人或物勾到电缆,则会导致受伤或显示装置的损坏。 小心,在安装过程中勿伤到您的手或手指。 在安装挂壁式支架或显示装置时,小心,勿伤到您的手或手指。 不提供用于将挂壁式支架固定于墙壁的螺丝。 在安装挂壁式支架时,请使用针对墙壁材料和结构的合适的螺丝。 (CS)
- Page 26 步骤 1:检查用于安装的零件 事先根据墙壁材料准备好十字槽螺丝刀和合适的螺丝(四个或更多个 M8(或相当规格)的螺丝,不 提供)。 打开包装并检查零件。 钩子(4) 螺丝(+B6 × L20)(2) 金属板单元(1) 安装悬挂单元(2) 纸模板 螺丝(+PSW5 × L16)(6) (1 套 3 张) 步骤 2:确定安装位置 将纸模板放在垂直、平坦的墙面上,并确定安装位 单位:mm 置。 用另购的胶带将提供的 3 张纸模板贴在一起。详细信 息,请参阅纸模板上印刷的指示。 按右图所示,在显示装置、天花板和墙壁的突出部位间留 出适当的空间。 注意 如果您想将电缆布置到墙壁内,则事先在墙壁上钻一个孔,以确保可将 电缆拉进墙壁。 电缆孔的位置依据显示装置的型号印在纸模板和第 10 页上。 100 100 (CS)
- Page 27 显示器安装尺寸表 单位:mm 显示器尺寸 单位:mm 各安装角的长度 单位:mm 重量 显示器型号 安装角 重量 (× 4)* (αº) 0° 165 149 75 KE-MX37A1 5° 209 138 84 KE-MX37S1 1135 617 110 246 75 10° 251 123 94 33 kg 132 kg KE-MX37N1 15° 292 104 103 KE-MX37K1 20° 330...
- Page 28 墙壁处理尺寸图 单位:mm 20 – 9 × 20 槽孔 ø60 ø50 电缆布置孔(两个之一): 电缆布置孔: KE-MX37A1 / KE-MX37S1 / KE-MX37N1 / KE-MX37K1 / PDM-4200 / PDM-5000 / PDM-6100 KE-MX42A1 / KE-MX42S1 / KE-MX42N1 / KE-MX42K1 / KE-MX42M1 参考纸模板和上图,确定螺丝和电缆孔(如果您想将电缆布置到墙壁内)的位置,然后在墙上作业。 警告 安装显示装置的墙壁应能承受至少四倍于显示装置的重量(第 9 页)。 请确保安装显示装置的墙壁的强度。若必要,请充分加固墙壁。 注意 电缆孔的位置视显示装置的型号而有所不同。请用纸模板或上图确定电缆孔的位置,并在合适的位置钻孔。 (CS)
- Page 29 步骤 3:在墙壁上安装金属板单元 用四个或更多个 M8(或相当规格)的螺丝(不提 放平单元,使其完全水平。 供)将金属板单元固定到墙壁上。 选择至少四个如右图所示带有相同标记的螺丝孔,并将螺 丝牢固地拧紧以防止松动。 警告 • 不提供用于将挂壁式支架安装到墙壁的螺丝。 • 务必按照墙壁材料和结构使用适当的螺丝。 • 如果不能足够牢固地安装金属板单元,请使用更多的螺丝。 • 确保金属板单元牢固地安装到墙壁上。 金属板单元 调节悬挂臂的角度。 当垂直(0 度)安装显示装置时,不必进行悬挂臂角度的 • 0 度:拧紧的白色螺丝保持不动。 调节(下文步骤 1 和步骤 2)。请确保各悬挂臂底座 • 0 度之外:拧下白色的螺丝。 已用螺丝牢固固定。 1 拧下两个悬挂臂底座顶部和底部的螺丝。然后选择对 应于所需角度(5、10、15 或 20 度)的槽口,并将 悬挂臂底座装入。 2 用步骤 1 中拧下的螺丝将各悬挂臂底座紧紧地固定。 注意 • 务必将左右悬挂臂的角度调节到相同。 • 小心,在调节悬挂臂角度时,勿夹到手指。 • 使用电钻时,请将扭矩设定到 2 N ・ m 左右。 •...
- Page 30 当安装 KE-MX37A1, KE-MX37S1, KE-MX37N1, KE-MX37K1, KE- MX42A1, KE-MX42S1, KE-MX42N1, KE-MX42K1 或 KE-MX42M1 型号 电视机的显示装置时,进行下列第 3 步操作。 变更安装悬挂单元支撑轴的位置。 1 拧下左右安装悬挂单元支撑轴的螺丝,并将支撑轴装 到外侧的位置。 2 用第 1 步中拧下的螺丝将各安装悬挂单元支撑轴紧 紧地固定。 注意 • 如果您安装 KE-MX37A1 ,KE-MX37S1 ,KE-MX37N1 ,KE-MX37K1 , KE-MX42A1 ,KE-MX42S1 ,KE-MX42N1 ,KE-MX42K1 或 KE-MX42M1 之 外的其它显示装置,请勿变更安装悬挂单元支撑轴的位置。 • 当使用电钻时,请将扭矩设定至 2 N ・ m 左右。 安装悬挂单元支撑轴 准备安装显示装置 准备工作视将要安装的显示装置而不同。请参阅针对各型号的操作步骤,以准备安装。 注意 使用电钻时,请将扭矩设定至 2 N ・ m 左右。 PDM-4200 无需准备工作。请进入下一步。 PDM-5000 (CS)
- Page 31 PDM-6100 1 将显示装置放在平稳的、盖有布料的工作 平面上,屏幕朝下。 扬声器(左) 扬声器(右) 注意 • 如果显示装置的重量压在扬声器上,则扬声器可能变 形或连接松动。为避免此结果,请注意下列各项。 – 勿抓着扬声器搬运显示装置。 – 将包装材料等放在地板上,将显示装置面朝下放在 上面,注意,显示装置两侧的扬声器应不接触包装 包装材料等 材料等。 软布 • 务必平稳地放置显示装置。 • 请使用软布保护显示装置的屏幕,避免损坏或变脏。 2 拆下显示装置背面下部的两个螺丝和两个 挂钩。 3 用两个螺丝(+PSW5 × L16)(均随挂壁 式支架提供)安装两个挂钩。 如果您想使用不带扬声器的显示装置,请在此时拆 下扬声器。关于拆卸扬声器的详细信息,请参阅电 视机的使用说明书。 KE-MX37A1 1 拧下显示装置背面的六个螺丝。 KE-MX37S1 2 用四个提供的螺丝(+PSW5 × L16)安装四 个提供的挂钩。 KE-MX37N1 KE-MX37K1...
- Page 32 步骤 4:安装显示装置 警告 务必先完成安装,然后再将电源线连接到墙壁插座。如果电源线压在设备的零件下或零件之间,则可能造成短路 或电击。 小心,勿被电源线或显示装置绊倒,否则会受伤。 将安装悬挂单元套进显示装置背面的挂钩上。然后, 软布 滑动安装悬挂单元并用提供的螺丝(+PSW5 × L16) 将其固定。 显示装置背面 (图中显示装置的型号为 PDM-4200。) 将随机提供的电源线和连接电缆连接到显示装置。 将电源线和连接电缆连接到显示装置背面的接口。关于连 接电源线和连接电缆的详细信息,请参阅显示装置的使用 说明书。 当您将电缆和导线布置在墙内时,请将它们穿进钻好的孔 内(第 10 页)。 钻孔的位置根据显示装置的型号会有所不同。 注意 • 一旦您将显示装置装到金属板单元上,您就不能连接导线和电缆。 • 务必将在墙壁内布置电缆的工作和电器工作委托给合格的安装人员。 PDM-4200 KE-MX37A1 PDM-5000 KE-MX37S1 PDM-6100 KE-MX37N1 KE-MX37K1 KE-MX42A1 KE-MX42S1 KE-MX42N1 KE-MX42K1 KE-MX42M1 (CS)
- Page 33 将显示装置安装在金属板单元上。 1 将固定安装悬挂单元的螺丝(+B6 × L20,提供)装入 安装悬挂单元支撑轴左右外侧的螺丝孔内,然后,临 时固定一下。 2 将两个安装悬挂单元的上部钩子套到悬挂臂的上支撑 轴上。 3 将两个安装悬挂单元的下部钩子靠到安装悬挂单元支 撑轴的前面。 4 轻轻向金属板单元和向上推动显示装置,使两个安装 悬挂单元的下部钩子套到安装悬挂单元支撑轴上。 5 确认八个钩子都已牢固地钩到金属板单元的四个轴上。 6 拧紧步骤 1 中临时旋进的固定螺丝。 注意 如果临时性装入的用于固定安装悬挂单元的螺丝从安装悬挂单元支撑轴 的内侧突出,则安装悬挂单元的下部钩子将不能装入。 将螺丝拧到一半,以避免螺丝从反面穿出。 安装悬挂单元 安装完成后的确认 请检查下列事项。 • 安装悬挂单元的八个钩子已牢固地钩到金属板单元的四个轴上。 • 导线和电缆未被扭曲和挤压。 • 安装悬挂单元支撑轴上的两个固定螺丝已拧紧。 警告 安装工作不彻底会引起产品跌落和导致受伤或财产损失。另外,电源线的不正确放置会因短路引起火灾或电击。 务必确认安装工作已完成,以保证安全。 (CS)
- Page 34 拆卸显示装置 安装人员须知 从墙壁插座拔下电源线插头。 拧下左右安装悬挂单元支撑轴上的两个固定螺丝。 切记需有两人或多人抬着显示装置,向上滑动显示装置以将其取下。 警告 • 搬动显示装置时,切记需有两人或多人抬着显示装置。 • 小心,取下显示装置时,勿让导线和电缆挂于墙上。 • 小心,取下显示装置时,勿伤到您的手或手指。 (CS)
- Page 35 规格 单位:mm 重量:9.0 kg 设计和规格若有变更,恕不另行通知。 51 670 (CS)
- Page 36 感謝您購買本產品。 致用戶 安裝本產品需要足夠的專業技術。必須請 Sony 經銷商或承包人進行安裝,安裝期間應特別注意安全。Sony 對 誤操作或不正確安裝造成的任何損壞或引致受傷不承擔責任。 警告 如果不遵守安全事項或未能正確使用本產品,則可能導致嚴重引致受傷或者火災。 本說明書介紹了正確使用本產品和防止事故發生而必需的重要事項。必須通讀本手冊並正確使用本產品。請妥善保管 本手冊,以備將來參考。 致 Sony 經銷商 安裝本產品需要足夠的專業技術。必須通讀本說明書以安全安裝。Sony 對誤操作或不正確安裝造成的任何損壞或引 致受傷不承擔責任。請在安裝後後將本手冊交給用戶。 安全事項 Sony 的產品設計非常注重安全。 但是,如果使用不正確,則可能因火災、電擊、產品傾倒或產品墮下而導致嚴重引致受傷。必須遵守安全事項以防止 此類事故發生。 小心 此掛壁式支架/掛牆架只能用於下列產品。用於其它電器產品會產生不穩定,從而引起引致受傷。 指定的產品(截至 2004 年 6 月) 等離子電視 電漿電視 KE-MX37A1 KE-MX37S1 KE-MX37N1 KE-MX37K1 (顯示器型號) KE-MX42A1 KE-MX42S1 KE-MX42N1 KE-MX42K1...
- Page 37 致用戶 警告 如果不遵守下列注意事項,則可能因火災、電擊、產品傾倒或產品墮下而導致嚴重引致受傷或死亡。 必須將安裝工作委託給合格的承包商,並確保在安裝過程中無小孩接近。 如果掛壁式支架/掛牆架或顯示裝置安裝不正確,則可能發生下列事故。確保 安裝工 作由合格的承包商進行。 • 顯示裝置可能墮下並造成嚴重的引致受傷,如引致擦傷或破碎等。 • 如果安裝掛壁式支架/掛牆架的牆壁不平穩、凹凸的或與地面不垂直,則 裝置可能會墮下,從而造成引致受傷或財產損失。牆壁應能承受至少四倍 於顯示裝置的重量。(各顯示裝置的重量,請參閱第 9 頁上的顯示器安裝 尺寸表。) • 如果牆壁上安裝的掛壁式支架/掛牆架不夠牢固,則裝置可能會墮下並造 成引致受傷或財產損失。 必須顯示裝置安裝完之後,請勿拆除螺絲等零件。 如果由合格承包商之外的其它個人進行顯示裝置的搬運或拆除,則裝置可能墮下並造成引致受傷或財產損失。請確保 由兩人或兩人以上搬運或拆除顯示裝置。 請勿將各種液體潑洒在顯示裝置上。 如果弄濕顯示裝置,則會造成火災或電擊。 顯示裝置安裝完之後,請勿拆下螺絲等零件。 否則,顯示裝置可能會墮下並造成引致受傷或財產損失。 請勿拆解或變更掛壁式支架/掛牆架的零件。 否則,掛壁式支架/掛牆架可能會墮下並造成引致受傷或財產損失。 請勿將指定產品之外的其它設備安裝到支架上。 本掛壁式支架/掛牆架僅為安裝指定的產品而設計。如果您安裝非指定設備,則設備可能墮下或破裂,並可能造成引 致受傷或財產損失。 (CT)
- Page 38 請勿蓋住顯示裝置的通風孔。 如果您蓋住通風孔(用布等),則熱量會積聚其中並造成火災。 除顯示裝置之外,請勿在掛壁式支架/掛牆架上再安裝其它重物。 否則,顯示裝置可能墮下並造成引致受傷或財產損失。 請勿倚靠或攀爬顯示裝置。 請勿倚靠或攀爬顯示裝置,因為裝置可能墮下到您身上,並造成嚴重的引致受 傷。 請勿使顯示裝置暴露於雨水或潮濕中。 這樣可能會引起火災或電擊。 請勿將顯示裝置放在炎熱、潮濕或灰塵過多的地方,也請勿放在裝置會受到機械振 動的地方。 否則,可能會引起火災或電擊。 易燃物件或明火(如蠟燭)應遠離顯示裝置。 為防止火災,請使易燃物件或明火(如蠟燭)遠離顯示裝置。 (CT)
- Page 39 小心 如果不遵守下列注意事項,則可能引致受傷或財產損失。 請勿將掛壁式支架/掛牆架裝在會使顯示裝置的邊角或側面突出於牆面的牆壁位 置。 請勿將掛壁式支架/掛牆架裝在柱子等會使顯示裝置的邊角或側面突出於牆面 的牆壁位置。如果人或物正巧撞到顯示裝置的邊角或側面,則會引起引致受傷 或財產損失。 在清潔或維修過程中,請勿對產品施加過大的力量。 請勿在顯示裝置的頂部施加過大的力量。否則,顯示裝置可能會墮下並造成引致受傷或財產損失。 請勿將顯示裝置安裝在冷氣機的上面或下方。 如果顯示裝置長期接觸漏水,或長期暴露於冷氣機的氣流中,則可能造成火災、電擊或顯示裝置的故障。 注意事項 • 如果長期使用安裝於掛壁式支架/掛牆架的顯示裝置,則視乎牆面材料而定,顯示裝置後面或上面的牆面可能會 褪色,或牆紙會脫落。 • 如果在牆壁上安裝掛壁式支架/掛牆架後再將其拆下,則牆壁上會留下螺絲孔。 • 如果您在牆壁後面布置了 300 歐姆的供電電纜,建議您將其換成 75 歐姆的同軸電纜。 如果需要繼續使用 300 歐姆的供電電纜,請在安裝前確保顯示裝置和牆內供電電纜之間有足夠的空間。有關安裝 前的正確安裝位置(遠離無線電干擾,等)的情況,請向承包商諮詢。 (CT)
- Page 40 安裝掛壁式支架/掛牆架 致 Sony 經銷商 警告 致 Sony 經銷商 下列說明僅適用於 Sony 經銷商。必須閱讀上述安全注意事項,並在安裝、維修和本產品的檢查時特別注意安全。 必須按照本說明書中的指示牢固地將掛壁式支架/掛牆架安裝在牆上。 如果有螺絲鬆動或掉落,則掛壁式支架/掛牆架會墮下並造成引致受傷或財產 損失。必須使用針對牆壁材料的正確螺絲,並牢固安裝本裝置。請用四個或更 多個 M8(或相當規格)螺絲。 請勿使電源線或連接電纜受擠壓。 如果電源線或連接電纜被壓在裝置和牆壁之間,或被用力彎曲或扭曲,則其內 部導線可能會裸露並造成短路或斷電。這會造成火災或電擊。 必須按照本使用說明書中的指示正確使用提供的螺絲和附件。如果使用其它替換零 件,則顯示裝置可能墮下,並造成身體引致受傷或顯示裝置損壞。 必須按照本使用說明書中介紹的步驟正確安裝支架。 如果有螺絲鬆動或掉落,則顯示裝置會墮下並造成身體引致受傷或顯示裝置損壞。 (CT)
- Page 41 必須擰緊指定位置的螺絲。 否則,顯示裝置會墮下並造成身體引致受傷或顯示裝置損壞。 小心,請勿使顯示裝置在安裝過程中受到震動。 如果顯示裝置受到震動,它可能會墮下或裂開。這會引起引致受傷。 必須將顯示裝置安裝在既垂直又平坦的牆壁上。 否則,顯示裝置會墮下並造成引致受傷。 正確安裝顯示裝置後,請正確固定電纜。 如果人或物勾到電纜,則會引致受傷或顯示裝置的損壞。 小心,在安裝過程中請勿傷到您的手或手指。 在安裝掛壁式支架/掛牆架或顯示裝置時,小心,請勿傷到您的手或手指。 不提供用於將掛壁式支架/掛牆架固定於牆壁的螺絲。 在安裝掛壁式支架/掛牆架時,請使用針對牆壁材料和結構的合適的螺絲。 (CT)
- Page 42 步驟 1:檢查用於安裝的零件 事先根據牆壁材料準備好十字槽螺絲批和合適的螺絲(四個或更多個 M8(或相當規格)的螺絲,不 提供)。 打開包裝並檢查零件。 螺絲(+B6 × L20)(2) 鉤子(4) 螺絲(+PSW5 × L16)(6) 金屬板單元(1) 安裝懸掛單元(2) 紙模板(1 套 3 張) 步驟 2:確定安裝位置 將紙模板放在垂直、平坦的牆面上,並確定安裝位 單位:mm 置。 用另購的膠帶將提供的 3 張紙模板貼在一起。詳細資訊, 請參閱紙模板上印刷的指示。 按右圖所示,在顯示裝置、天花板和牆壁的突出部位間留 出適當的空間。 注意 如果您想將電纜布置到牆壁內,則事先在牆壁上鑽一個孔,以確保可將 電纜拉進牆壁。電纜孔的位置依據顯示裝置的型號印在紙模板和第 10 頁上。 (CT)
- Page 43 顯示器安裝尺寸表 單位:mm 顯示器尺寸 單位:mm 各安裝角度的長度 單位:mm 重量 顯示器型號 安裝角度 重量 (× 4)* (αº) 0° KE-MX37A1 5° KE-MX37S1 1135 10° 33 kg 132 kg KE-MX37N1 15° KE-MX37K1 20° KE-MX42A1 0° KE-MX42S1 5° KE-MX42N1 1229 10° 38 kg 154 kg KE-MX42K1 15° KE-MX42M1 20°...
- Page 44 牆壁處理尺寸圖 單位:mm 20 – 9 × 20 槽孔 ø60 ø50 電纜布置孔(兩個之一): 電纜布置孔: KE-MX37A1 / KE-MX37S1 / KE-MX37N1 / KE-MX37K1 / PDM-4200 / PDM-5000 / PDM-6100 KE-MX42A1 / KE-MX42S1 / KE-MX42N1 / KE-MX42K1 / KE-MX42M1 參考紙模板和上圖,確定螺絲和電纜孔(如果您想將電纜布置到牆壁內)的位置,然後在牆上工作。 警告 安裝顯示裝置的牆壁應能承受至少四倍於顯示裝置的重量(第 9 頁)。 請確保安裝顯示裝置的牆壁的強度。若必要,請充分加固牆壁。 注意...
- Page 45 步驟 3:在牆壁上安裝金屬板單元 用四個或更多個 M8(或相當規格)的螺絲(不提 放平單元,使其完全水平。 供)將金屬板單元固定到牆壁上。 選擇至少四個如右圖所示帶有相同標記的螺絲孔,並將螺 絲牢固地擰緊以防止鬆動。 警告 • 不提供用於將掛壁式支架/掛牆架安裝到牆壁的螺絲。 • 必須按照牆壁材料和結構使用適當的螺絲。 • 如果不能足夠牢固地安裝金屬板單元,請使用更多的螺絲。 • 確保金屬板單元牢固地安裝到牆壁上。 金屬板單元 調節懸掛臂的角度。 當垂直(0 度)安裝顯示裝置時,不必進行懸掛臂角度的 • 0 度:擰緊的白色螺絲保持不動。 調節(下文步驟 1 和步驟 2)。請確保各懸掛臂底座 • 0 度以外﹔擰下白色的螺絲。 已用螺絲牢固固定。 1 擰下兩個懸掛臂底座頂部和底部的螺絲。 2 用步驟 1 中擰下的螺絲將各懸掛臂底座緊緊地固定。 注意 • 必須將左右懸掛臂的角度調節到相同。 •...
- Page 46 當安裝 KE-MX37A1, KE-MX37S1, KE-MX37N1, KE-MX37K1, KE- MX42A1, KE-MX42S1, KE-MX42N1, KE-MX42K1 或 KE-MX42M1 型號 電視機的顯示裝置時,進行下列第 3 步操作。 變更安裝懸掛單元支撐軸的位置。 1 擰下左右安裝懸掛單元支撐軸的螺絲,並將支撐軸裝 到外側凹槽。 2 用第 1 中擰下的螺絲將各安裝懸掛單元支撐軸緊緊 地固定。 注意 • 如果您安裝 KE-MX37A1, KE-MX37S1, KE-MX37N1, KE-MX37K1, KE-MX42A1, KE-MX42S1, KE-MX42N1, KE-MX42K1 或 KE-MX42M1 之 外的其它顯示裝置,請勿變更安裝懸掛單元支撐軸的位置。 •...
- Page 47 PDM-6100 1 將顯示裝置放在平穩的、蓋有布料的工作 平面上,螢幕朝下。 揚聲器(左) 揚聲器(右) 注意 • 如果顯示裝置的重量壓在揚聲器上,則揚聲器可能 變形或連接鬆動。為避免此結果,請注意下列各 項。 – 請勿抓著揚聲器搬運顯示裝置。 – 將包裝材料等放在地板上,將顯示裝置面朝下放 在上面,注意,顯示裝置兩側的揚聲器應不接觸 包裝材料等 軟布 包裝材料等。 • 必須平穩地放置顯示裝置。 • 請使用軟布保護顯示裝置的螢幕,避免損壞或變 髒。 2 拆除顯示裝置背面下部的兩個螺絲和兩個 掛鉤。 3 用兩個螺絲(+PSW5 × L16)(均隨掛壁式 支架/掛牆架提供)安裝兩個掛勾。 如果您想使用不帶揚聲器的顯示裝置,請在此時拆 下揚聲器。關於拆除揚聲器的詳細資訊,請參閱電 視機的使用說明書。 KE-MX37A1 1 拆除顯示裝置背面的六個螺絲。 2 用四個提供的螺絲(+PSW5 × L16)安裝四 KE-MX37S1 個提供的掛勾。...
- Page 48 步驟 4:安裝顯示裝置 警告 必須先完成安裝,然後再將電源線連接到牆壁插座。如果電源線壓在設備的零件下或零件之間,則可能造成短路 或電擊。 小心,請勿被電源線或顯示裝置絆倒,否則會引致受傷。 將安裝懸掛單元套進顯示裝置背面的掛勾上。然後, 滑動安裝懸掛單元並用提供的螺絲(+PSW5 × L16) 軟布 將其固定。 顯示裝置背面 (圖中顯示裝置的型號為 PDM-4200。) 將隨機提供的電源線和連接電纜連接到顯示裝置。 將電源線和連接電纜連接到顯示裝置背面的接口。關於連 接電源線和連接電纜的詳細資訊,請參閱顯示裝置的使用 說明書。 當您將電纜和導線布置在牆內時,請將它們穿進鑽好的孔 內(第 10 頁)。 鑽孔的位置根據顯示裝置的型號會有所不同。 注意 • 一旦您將顯示裝置裝到金屬板單元上,您就不能連接導線和電纜。 • 必須將在牆壁內布置電纜的工作和電器工作委託給合格的承包商。 PDM-4200 KE-MX37A1 PDM-5000 KE-MX37S1 PDM-6100 KE-MX37N1 KE-MX37K1 KE-MX42A1 KE-MX42S1 KE-MX42N1 KE-MX42K1 KE-MX42M1 (CT)
- Page 49 將顯示裝置安裝在金屬板單元上。 1 將固定安裝懸掛單元的螺絲(+B6 × L20,提供)裝入 安裝懸掛單元支撐軸左右外側的螺絲孔內,然後,臨 時固定一下。 2 將兩個安裝懸掛單元的上部鉤子套到懸掛臂的上支撐 軸上。 3 將兩個安裝懸掛單元的下部鉤子靠到安裝懸掛單元支 撐軸的前面。 4 輕輕向金屬板單元和向上推動顯示裝置,使兩個安裝 懸掛單元的下部鉤子套到安裝懸掛單元支撐軸上。 5 確認八個鉤子都已牢固地鉤到金屬板單元的四個軸 上。 6 擰緊步驟 1 中臨時旋進的固定螺絲。 注意 如果臨時性裝入的用於固定安裝懸掛單元的螺絲從安裝懸掛單元支撐軸 的內側突出,則安裝懸掛單元的下部鉤子將不能裝入。 將螺絲擰到一半,以避免螺絲從反面穿出。 安裝懸掛單元 安裝完成後的確認 請檢查下列事項。 • 安裝懸掛單元的八個鉤子已牢固地鉤到金屬板單元的四個軸上。 • 導線和電纜未被扭曲和擠壓。 • 安裝懸掛單元支撐軸上的兩個固定螺絲已擰緊。 警告 安裝工作不徹底會引起產品墮下和引致受傷或財產損失。另外,電源線的不正確放置會因短路引起火災或電擊。 必須確認安裝工作已完成,以保証安全。 (CT)
- Page 50 拆除顯示裝置 致 Sony 經銷商 從牆壁插座拔下電源線插頭。 擰下左右安裝懸掛單元支撐軸上的兩個固定螺絲。 切記需有兩人或多人抬著顯示裝置,向上滑動顯示裝置以將其取下。 警告 • 搬動顯示裝置時,切記需有兩人或多人抬著顯示裝置。 • 小心,取下顯示裝置時,請勿讓導線和電纜掛於牆上。 • 小心,取下顯示裝置時,請勿傷到您的手或手指。 (CT)
- Page 51 規格 單位:mm 重量:9.0 kg 設計和規格若有變更,恕不另行通知。 (CT)
- Page 52 본 제품을 구입하여 주셔서 감사합니다. 고객용 본 제품을 설치하려면 충분한 전문 기술이 필요합니다. 설치는 반드시 Sony 대리점 또는 설치업자에게 맡기시 고 설치 중에는 안전에 각별한 주의를 기울이십시오. Sony는 잘못된 취급 또는 부적절한 설치로 인해 발생하 는 어떠한 손실이나 부상에 대해서도 책임을 지지 않습니다. 경고...
- Page 53 고객용 경고 만일 다음의 안전조치를 지키지 않을 경우 화재, 감전 사고 또는 제품이 넘어짐으로 인해 사망 또는 심각한 부 상에 이르는 사고가 발생할 수 있습니다. 설치는 반드시 자격을 갖춘 설치업자에게 맡기시고 설치 중에는 어린이의 접근을 막아 주십시오. 벽걸이형 브라켓 또는 디스플레이 장치가 올바르게 설치되지 않으면 다음의 사고가...
- Page 54 디스플레이 장치의 환기구를 막지 마십시오. 헝겊 등으로 환기구를 막으면 내부에 열이 축적되어 화재가 일어날 수 있습 니다. 벽걸이형 브라켓 위에 디스플레이 장치 이외의 어떠한 물건도 올려놓지 마십시오. 그렇게 할 경우 디스플레이 장치가 떨어져서 부상 또는 자산 손실을 입을 수 있습니다. 디스플레이...
- Page 55 주의 만일 다음의 안전조치를 지키지 않을 경우 부상 또는 자산 손실을 입을 수 있습니다. 디스플레이 장치의 모서리나 측면이 벽면 밖으로 튀어나오는 벽에는 벽걸이형 브라켓을 설치하지 마십시오. 디스플레이 장치의 모서리나 측면이 벽면 밖으로 튀어나오는, 기둥과 같은 벽에는 벽걸이형 브라켓을 설치하지 마십시오. 사람이나 물건이 디스플레이 장치의...
- Page 56 Sony 대리점용 경고 Sony 대리점용 다음 지침은 Sony 대리점용입니다. 위에 설명한 안전조치를 숙독해 주시고 본 제품의 설치, 유지 및 점검을 할 때에는 안전에 각별한 주의를 기울여 주십시오. 본 사용설명서의 지침에 따라 벽걸이형 브라켓을 벽에 안전하게 설치해 주십시오. 나사가 하나라도 느슨해지거나 풀려 떨어지면 벽걸이형 브라켓이 떨어져서...
- Page 57 지정된 위치에서 나사를 단단히 조여 주십시오. 그렇지 않으면 디스플레이 장치가 떨어져서 신체에 부상을 입거나 디스플레이 장치에 손상을 줄 수 있습니다. 설치 중 디스플레이 장치에 충격을 주지 않도록 주의하십시오. 디스플레이 장치가 충격을 받으면 떨어지거나 파손될 수 있습니다. 이로 인해 부상을 입을 수 있습니다. 마루와...
- Page 58 순서 1: 설치에 필요한 부품 확인하기 십자 드라이버 및 벽 재질에 따라 적절한 나사(4개 이상의 M8(또는 동등 제품) 나사, 별매품)를 미 리 준비해 주십시오. 포장을 열고 부품을 확인합니다. 나사(+B6 × L20)(2) 고리(4) 나사(+PSW5 × L16)(6) 플레이트 장치(1) 장착 고리 장치(2) 종이...
- Page 59 디스플레이 설치 치수 표 단위: mm 단위: mm 단위: mm 디스플레이 치수 장착 각도별 길이 중량 디스플레이 모델 장착 중량 (× 4) 각도(αº) 0º KE-MX37A1 5º KE-MX37S1 1135 10º 33 kg 132 kg KE-MX37N1 15º KE-MX37K1 20º 0º KE-MX42A1 KE-MX42S1 5º...
- Page 60 벽 처리 치수 그림 단위: mm 20 – 9 × 20 슬롯 구멍 ø60 ø50 케이블이 지나는 구멍(둘 중 하나): 케이블이 지나는 구멍: KE-MX37A1 / KE-MX37S1 / KE-MX37N1 / KE-MX37K1 / PDM-4200 / PDM-5000 / PDM-6100 KE-MX42A1 / KE-MX42S1 / KE-MX42N1 / KE-MX42K1 / KE-MX42M1 종이...
- Page 61 순서 3: 벽에 플레이트 장치 설치하기 4개 이상의 M8(또는 동등 제품) 나사(별매품)를 사 장치가 정확히 수평이 되도록 맞춥니다. 용하여 플레이트 장치를 벽에 고정시킵니다. 오른쪽 그림에 동일한 마크로 표시된 적어도 4개의 나사 구멍을 선택하고 나사가 느슨해지지 않도록 단단히 조입 니다. 경고 •...
- Page 62 TV KE-MX37A1, KE-MX37S1, KE-MX37N1, KE-MX37K1, KE- MX42A1, KE-MX42S1, KE-MX42N1, KE-MX42K1 또는 KE-MX42M1 디스플레이 장치를 설치할 때에는 다음의 순서 3을 따르십시오. 장착 고리 장치 지지축의 위치를 변경합 니다. 1 좌우 장착 고리 장치 지지축에서 나사를 제거한 후 지 지축을 바깥쪽 노치에 맞춥니다. 2 절차...
- Page 63 PDM-6100 1 천을 덮은 안정적인 작업대 위에 디스플 레이 장치의 화면을 아래로 하여 올려놓 스피커(왼쪽) 스피커(오른쪽) 습니다. 주의점 • 디스플레이 장치의 하중이 스피커에 가해질 경우 스피커가 변형되거나 스피커 연결이 느슨해질 수 있습니다. 이를 방지하려면 다음 안전조치를 따라 주십시오. 포장재 등 –...
- Page 64 순서 4: 디스플레이 장치 설치하기 경고 설치를 완료한 이후에 전원선을 콘센트에 연결하여 주십시오. 기기 사이나 아래에 전원선이 눌리는 경우 단락 이나 감전 사고의 원인이 될 수 있습니다. 전원선이나 디스플레이 장치에 발부리가 걸리지 않도록 주의하십시오. 신체에 상처를 입을 수 있습니다. 디스플레이 장치 뒷면의 고리에 장착 고리 장치를 부드러운...
- Page 65 플레이트 장치에 디스플레이 장치를 설치합니다. 1 장착 고리 장치 지지축 외부의 왼쪽과 오른쪽에 있는 나사 구멍에 장착 고리 장치를 고정시키기 위해 나사 (+B6 × L20, 부속품)를 끼워 넣은 다음 임시로 조입 니다. 2 2개의 장착 고리 장치의 위쪽 고리를 암 지지축에 겁 니다.
- Page 66 디스플레이 장치 제거하기 Sony 대리점용 콘센트에서 전원선의 플러그를 뽑습니다. 오른쪽과 왼쪽의 장착 고리 장치 지지축에 있는 2개의 안전 나사를 제거합니다. 2명 이상이 디스플레이 장치를 붙잡고 디스플레이 장치를 위쪽으로 밀어 제거합니다. 경고 • 디스플레이 장치를 운반할 때에는 반드시 2명 이상이 장치를 붙잡도록 하십시오.
- Page 67 제품 사양 단위: mm 중량: 9.0 kg 디자인 및 제품 사양은 예고 없이 변경될 수 있습니다. (KR)
- Page 68 (AR)
- Page 69 • • • (AR)
- Page 70 +B6 × L20 • • • (AR)
- Page 71 (+PSW5 × L16) PDM-4200 • PDM-4200 KE-MX37A1 • PDM-5000 KE-MX37S1 PDM-6100 KE-MX37N1 KE-MX37K1 KE-MX42A1 KE-MX42S1 KE-MX42N1 KE-MX42K1 KE-MX42M1 (AR)
- Page 72 PDM-6100 • – – • • (+PSW5 × L16) KE-MX37A1 KE-MX37S1 (+PSW5 × L16) KE-MX37N1 KE-MX37K1 KE-MX42A1 KE-MX42S1 KE-MX42N1 KE-MX42K1 KE-MX42M1 (AR)
- Page 73 KE-MX37N1 KE-MX37S1 KE-MX37A1 KE-MX42N1 KE-MX42S1 KE-MX42A1 KE-MX37K1 KE-MX42M1 KE-MX42K1 KE-MX37N1 KE-MX37S1 KE-MX37A1 • KE-MX42K1 KE-MX42N1 KE-MX42S1 KE-MX42A1 KE-MX37K1 KE-MX42M1 • PDM-4200 PDM-5000 (AR)
- Page 74 • • • • • • • • • • (AR)
- Page 75 KE-MX37A1 / KE-MX37S1 / KE-MX37N1 / KE-MX37K1 / PDM-4200 / PDM-5000 / PDM-6100 KE-MX42A1 / KE-MX42S1 / KE-MX42N1 / KE-MX42K1 / KE-MX42M1 (AR)
- Page 76 × (αº) º KE-MX37A1 º KE-MX37S1 º KE-MX37N1 º KE-MX37K1 º º KE-MX42A1 º KE-MX42S1 º KE-MX42N1 º KE-MX42K1 º KE-MX42M1 º º º PDM-4200 º º º º º PDM-5000 º º º º º PDM-6100 º º (AR)
- Page 77 (+B6 × L20) (+PSW5 × L16) (AR)
- Page 78 (AR)
- Page 79 (AR)
- Page 80 • • • (AR)
- Page 81 (AR)
- Page 82 • • • (AR)
- Page 83 KE-MX37K1 KE-MX37N1 KE-MX37S1 KE-MX37A1 KE-MX42M1 KE-MX42K1 KE-MX42N1 KE-MX42S1 KE-MX42A1 KE-61MR1 KE-P50MR1E KE-50MR1 KE-42MR1E KE-42MR1 (PDM-6100) (PDM-5000) (PDM-5000) (PDM-4200) (PDM-4200) (AR)
- Page 84 Printed on 100% recycled paper using VOC (Volatile Organic Compound)-free vegetable oil based ink. Printed in Japan...